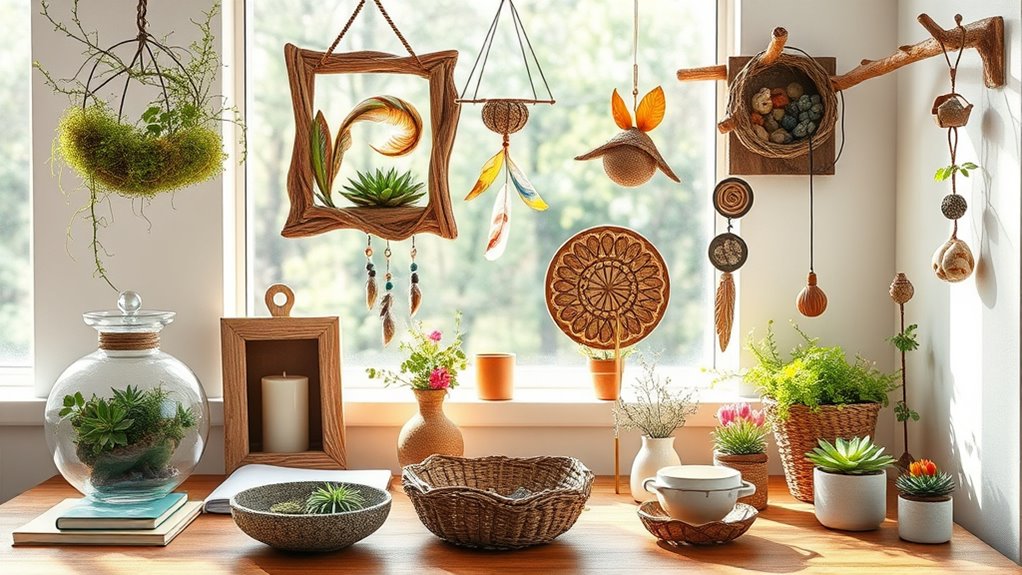

Explore fun DIY projects inspired by nature, like creating leaf-printed wall art, driftwood candle holders, pebble pathways, pinecone picture frames, seashell wind chimes, bark-textured planters, mossy centerpieces, acorn jewelry, or natural fiber macramé wall hangings. Using simple natural elements such as leaves, shells, wood, stones, and moss, you can craft beautiful, eco-friendly decor. If you want to discover more ideas and detailed instructions, keep going to uncover inspiring ways to bring nature into your space.
Key Takeaways
- Create leaf-printed wall art using pressed leaves and colorful paints for natural decor.
- Craft driftwood candle holders and seashell wind chimes for rustic, outdoor-inspired accents.
- Design moss-filled centerpieces with stones, twigs, and dried flowers for natural table decor.
- Make natural jewelry from acorns, nuts, and shells, sealing and assembling with wire or resin.
- Build pebble pathways and bark-textured planters to incorporate natural elements into garden spaces.

Strathmore 300 Series Printmaking Paper Pad, Glue Bound, 8×10 inches, 40 Sheets (120g) – Artist Paper for Adults and Students – Block Printing, Linocut, Screen Printing
Natural colored and lightweight printing paper
As an affiliate, we earn on qualifying purchases.
As an affiliate, we earn on qualifying purchases.
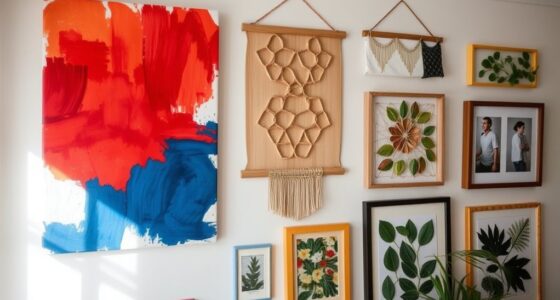
Leaf-Printed Wall Art

Creating leaf-printed wall art is an easy and budget-friendly way to bring a touch of nature into your home. First, gather leaves with interesting shapes and textures, making sure they’re clean and dry. Next, choose a canvas or piece of paper as your base. Apply paint or ink to the leaf’s underside using a sponge or brush, then press it onto your surface. Press firmly and lift carefully to reveal the leaf’s intricate pattern. Repeat with different leaves and colors to create a vibrant, natural display. This project allows you to customize your artwork easily, adding a fresh, earthy vibe to any room without spending much money. Incorporating natural materials like leaves into your decor can also promote mindfulness and a sense of tranquility in your space. Understanding biodiversity principles can inspire you to protect your digital environment as well as your physical surroundings. Being mindful of sustainable practices in crafting your art can further enhance the eco-friendly aspect of your project. Additionally, exploring environmentally friendly paints and inks can make your project even more sustainable.

Plow & Hearth Faux Driftwood Fireplace Candle Holder, Resin Log Insert for Fireplace Decor, Holds 8 Fireplace Candles for Inside Fireplace, Coastal Beach Cozy Living Room Fireplace Decorations
COZY FIREPLACE CANDLESCAPE UPGRADE: Refresh your fireplace decor by turning an empty hearth into a glowing focal point…
As an affiliate, we earn on qualifying purchases.
As an affiliate, we earn on qualifying purchases.
Driftwood Candle Holders
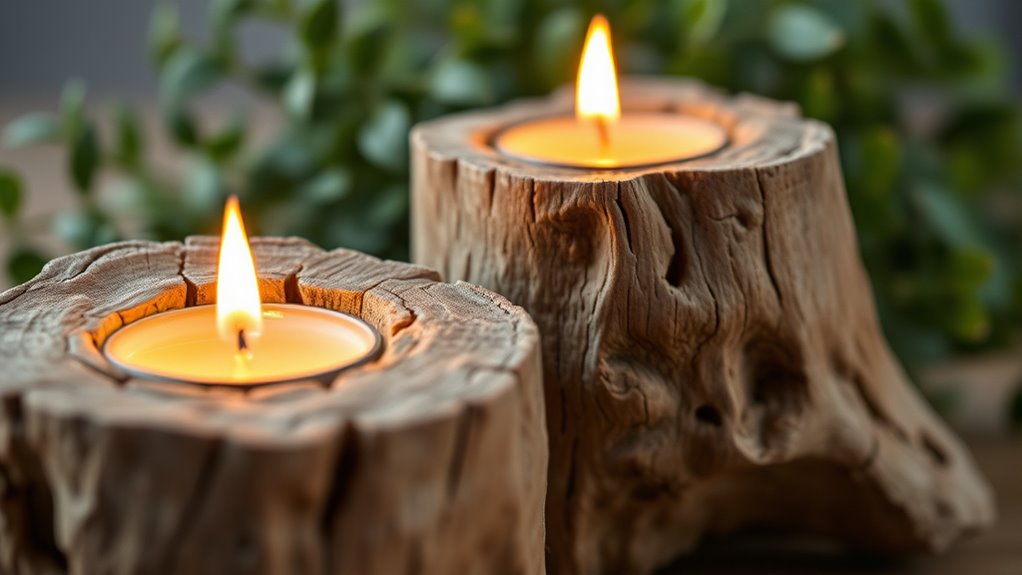
Choosing the right driftwood is key to creating unique candle holders that reflect nature’s beauty. With simple assembly techniques, you can easily piece together your materials into a charming centerpiece. These holders effortlessly enhance candlelight, adding warmth and ambiance to any space. Incorporating elements from best beaches can inspire your design and bring a coastal feel to your decor. Selecting driftwood with natural moisture levels ensures your candle holders are both durable and visually appealing. Understanding the family dynamics of your chosen driftwood can help you select pieces that are more stable and aesthetically pleasing. Additionally, considering the local environment where the driftwood was found can provide insights into its weathering process, enhancing the rustic charm of your creation. Being aware of weathering patterns can also help you choose driftwood with interesting textures that add character to your project.
Natural Material Selection
Natural materials like driftwood add a rustic charm to your candle holders, making them a standout feature in any space. When selecting driftwood, look for pieces with interesting textures, natural curves, and minimal damage.
Confirm the wood is dry and free of mold or pests before using it in your project. Consider the size and shape that best fits your candle type—thicker pieces work well for pillar candles, while thinner ones suit tea lights.
You can find driftwood on beaches, riverbanks, or in craft stores that sell natural materials. Always choose pieces that feel sturdy and stable to prevent accidents.
Simple Assembly Techniques
Once you have the perfect driftwood piece, assembling your candle holder is straightforward. First, decide on the best surface to place your driftwood and gather a hot glue gun, candles, and any decorative elements. Position the driftwood pieces to create a stable base and where the candle will sit. Apply hot glue to secure each piece, holding them in place for a few seconds until set. For added stability, use small stones or sand around the base. Proper assembly techniques can significantly enhance the durability and appearance of your finished project. Additionally, selecting appropriate adhesives ensures a secure and lasting hold for your candle holder. It’s also helpful to consider your local entertainment and parks hours if you plan to showcase or sell your craft at community events or markets. Being aware of retail hours can help you coordinate the timing of your craft displays or sales. Here’s a quick overview:
| Step | Action |
|---|---|
| 1 | Arrange driftwood pieces |
| 2 | Glue pieces together |
| 3 | Let glue dry |
| 4 | Add decorative accents |
Additionally, consider the residency requirements in your area to ensure your project complies with local regulations if you plan to display or sell your handmade candle holders. This simple process results in a rustic, handcrafted candle holder ready to brighten any space.
Enhancing Candle Ambiance
To truly enhance the ambiance of your driftwood candle holder, consider incorporating soft, ambient lighting and decorative elements that complement its rustic charm. Use dimmable candles or LED tea lights to create a warm, inviting glow. Incorporating layer textures and colors from the interior decor principles can also inspire creative ways to present your candle holder as a unique decor piece. Additionally, experimenting with different lighting techniques can further elevate the cozy atmosphere.

Natural Pebble Stepping Stones for Garden & Outdoor Walkways – 9 Inch Round Therapeutic Massage Stones, 6pcs Non-Slip Acupressure Floor Mats, Polished River Rock Decorative Stone Path
MASSAGE YOUR FEET: Put the stepping stones outdoor together with pieces on a flat proper place and walk…
As an affiliate, we earn on qualifying purchases.
As an affiliate, we earn on qualifying purchases.
Pebble Pathway Garden Decor
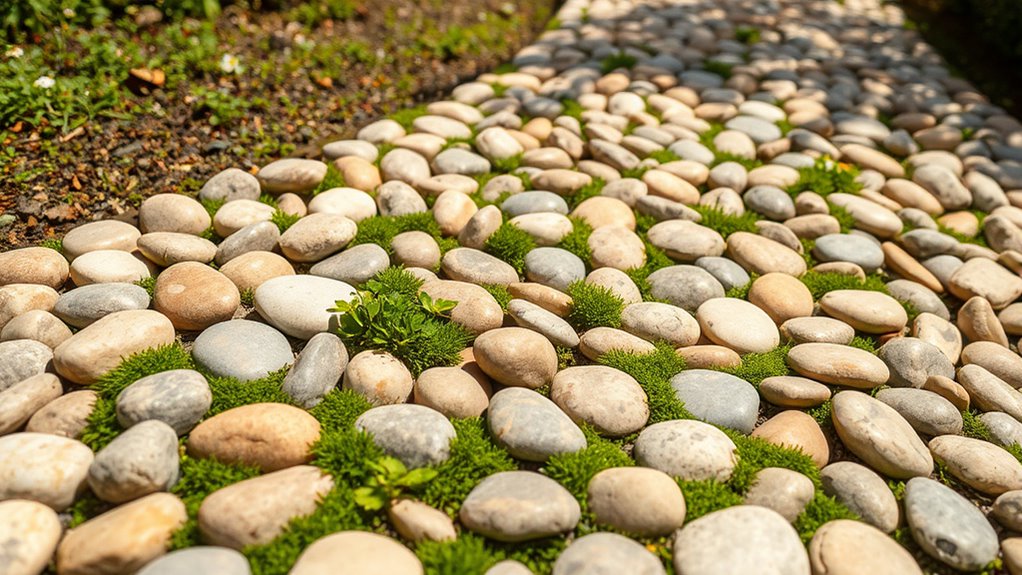
Ever considered how pebbles can transform your garden into a charming, organic space? Creating a pebble pathway is a simple yet effective way to add natural beauty and function. Start by outlining the path you want, then clear the area of grass and weeds. Lay down a weed barrier fabric to prevent future growth. Next, place a layer of gravel or sand to create a stable base. Then, carefully arrange your pebbles along the path, choosing a mix of sizes and colors for visual interest. Fill gaps with smaller stones or sand to secure the path. This DIY project adds texture, guides visitors, and blends seamlessly with surrounding plants, turning your garden into a tranquil outdoor retreat inspired by nature’s own design. To ensure longevity, use proper drainage techniques to prevent water accumulation and potential erosion. Additionally, selecting the right type of native stones can help ensure durability and harmony with your local environment. Incorporating regular maintenance such as removing debris and repositioning stones when needed can further extend the life of your pebble pathway.

SUNNYCLUE Wind Chime Kit Ocean Wind Chimes Driftwood Decorative Branches Summer Hawaii Shell Seashell Charms Glass Acrylic Gemstone Beads Windchime for Outside Indoor DIY Wall Hanging Ornament Decor
Ocean Themed: Turtle and starfish beads, shell charms, shell beads and other classic ocean elements, paired with blue…
As an affiliate, we earn on qualifying purchases.
As an affiliate, we earn on qualifying purchases.
Pinecone Photo Frame
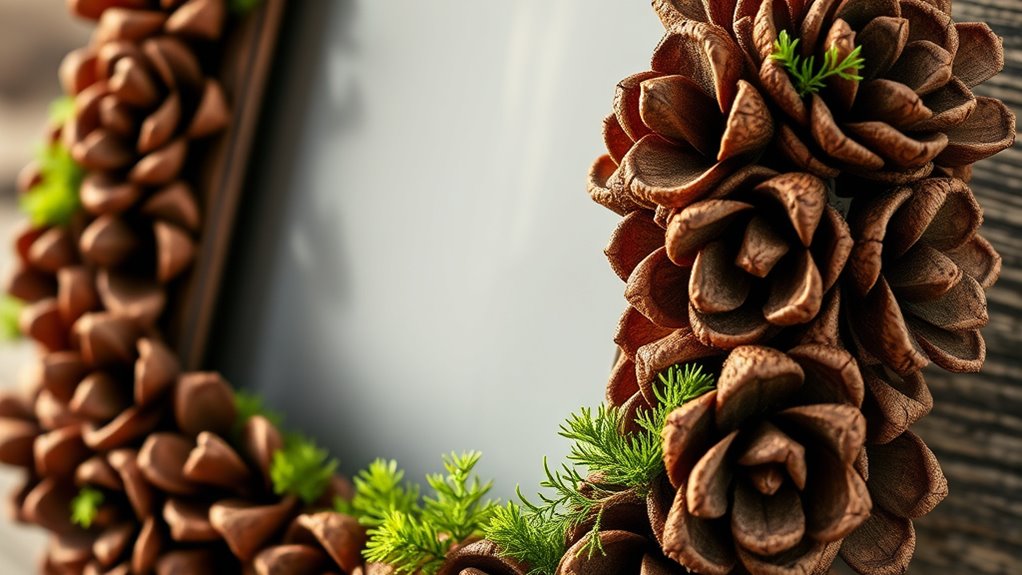
A pinecone photo frame offers a rustic, natural touch to display your favorite memories. To make one, gather pinecones of similar size and clean them thoroughly. You’ll also need a sturdy backing—wood or cardboard works well—and some hot glue.
Start by arranging the pinecones around the edges of the backing, securing each with glue. Overlap them slightly for a fuller look. Once all pinecones are attached, allow the glue to dry completely.
Insert your chosen photo into the frame, securing it with additional glue or a simple backing. This project not only highlights nature’s beauty but also creates a personalized keepsake.
It’s perfect for adding a cozy, woodland-inspired vibe to any room, whether for a gift or your own display.
Seashell Wind Chimes
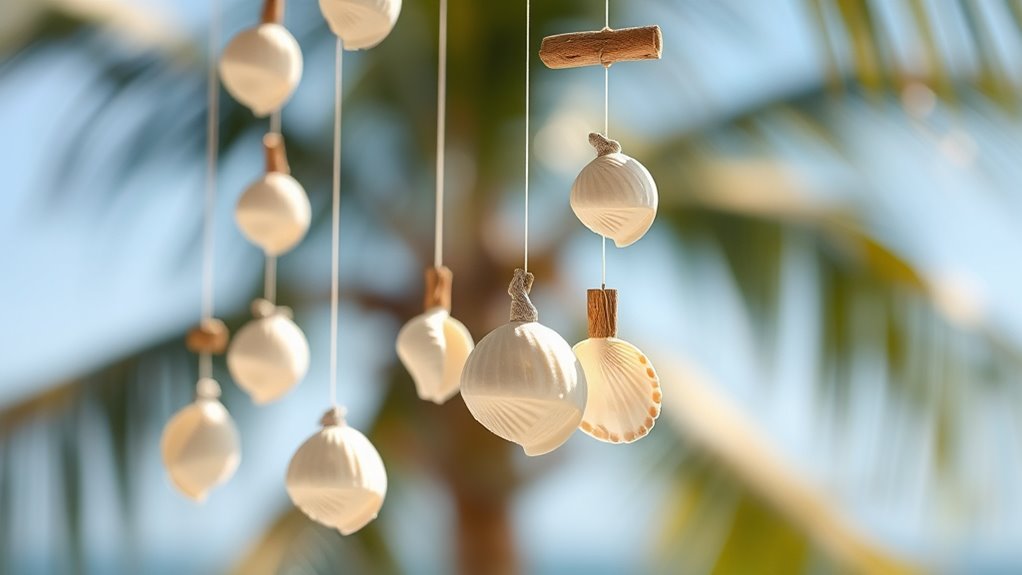
Start by collecting seashells naturally from your favorite beach or shoreline, choosing unique shapes and colors. Then, assemble your chimes by threading the shells onto sturdy string, spacing them to create a pleasant sound.
Finally, personalize your wind chimes with additional decor like beads or charms to match your style.
Collecting Seashells Naturally
Have you ever wondered how to gather seashells in a way that’s both natural and eco-friendly? To do so, focus on sustainable collection methods that respect the environment.
First, only collect shells that are already washed ashore, avoiding disturbing live creatures or digging in the sand.
Second, choose shells that are broken or abandoned, preventing harm to marine life.
Third, limit your collection to a small, manageable number, so the beach remains undisturbed.
Fourth, consider recycling shells from local sources or asking for permission if collecting from private beaches.
Assembling With String
To create beautiful seashell wind chimes, you’ll need to carefully assemble your shells using string. Start by threading a strong piece of twine or fishing line through each shell’s hole. Use different lengths to add visual interest and guarantee the shells hang freely. To organize your work, follow this simple plan:
| Shell Type | String Length | Position |
|---|---|---|
| Small | 6 inches | Top layer |
| Medium | 8 inches | Middle layer |
| Large | 10 inches | Bottom layer |
Be gentle when threading to avoid cracking shells. Tie secure knots and double-check stability. Once all shells are attached, hang your chime in a breezy spot, and enjoy the soothing sound it creates.
Customizing With Decor
Adding decorative elements to your seashell wind chimes is a great way to personalize their appearance and enhance their natural beauty. You can incorporate various items to give your chimes a unique touch.
For example, paint the shells with vibrant colors or patterns to make them stand out. Add small charms or beads between the shells for extra detail. You might also attach tiny driftwood pieces or colorful feathers for a more organic look.
Finally, using glow-in-the-dark paint can make your chimes visible at night, creating a magical effect. Here are some ideas to inspire you:
- Brightly painted shells with intricate designs
- Beads and charms strung between shells
- Driftwood accents for a rustic feel
- Glow-in-the-dark or metallic paint for added shimmer
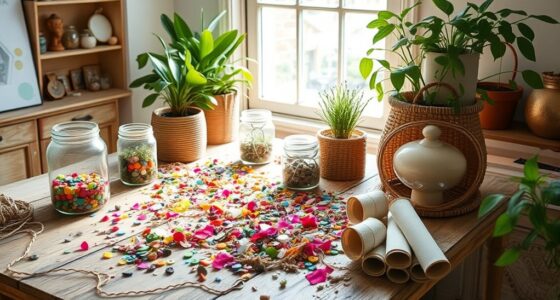
Botanical Pressed Flower Bookmarks
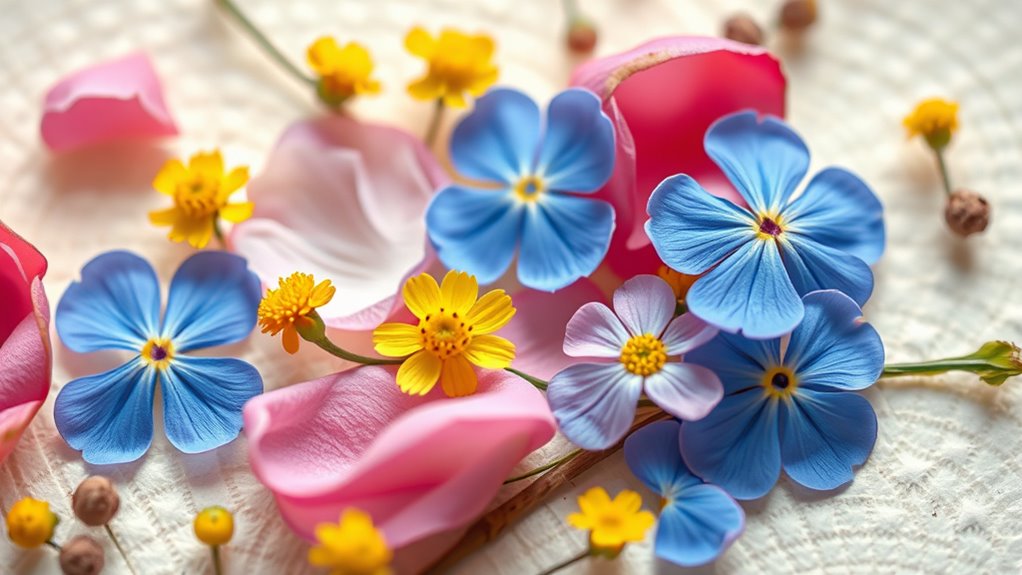
Pressed flower bookmarks offer a charming way to combine nature’s beauty with a practical craft. You start by selecting vibrant, flat flowers or leaves and gently pressing them between heavy books or a flower press for a few days.
Once dried, carefully arrange your pressed botanicals on sturdy cardstock or bookmark paper. Use a clear adhesive to secure the flowers, ensuring they stay flat.
Trim the edges neatly and, if desired, laminate your design for added durability. Add a ribbon or tassel at the top for a finishing touch.
These bookmarks make thoughtful gifts or personal keepsakes, reminding you of nature’s delicate charm every time you turn a page. Creating pressed flower bookmarks is simple and allows you to preserve and enjoy natural beauty in a functional form.
Bark-Textured Planters
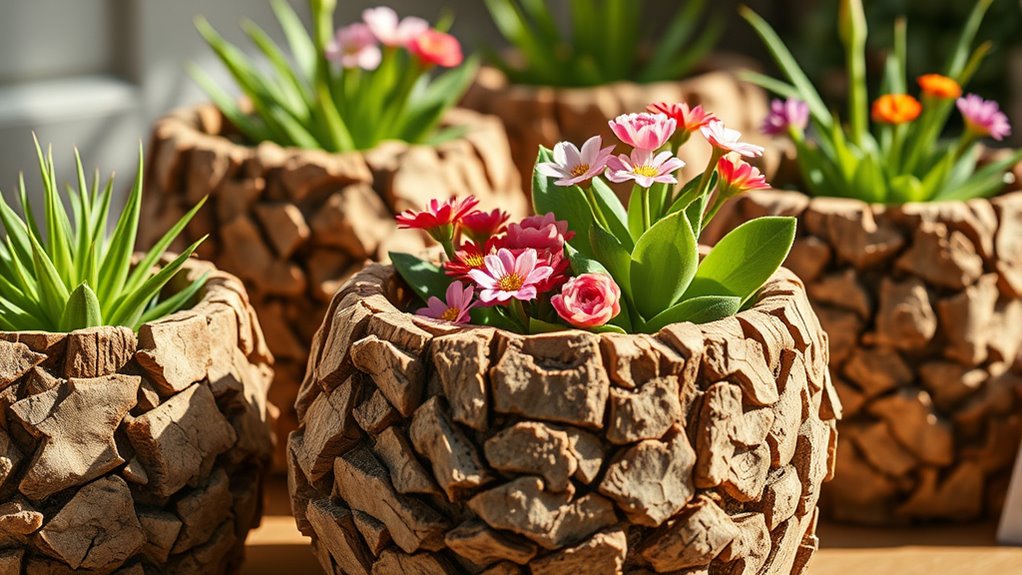
Bark-textured planters bring a rustic, natural look to your garden or indoor space by mimicking the rough, intricate patterns of tree bark. You can create these planters by applying textured materials like concrete, clay, or plaster over a basic container.
Add rustic charm to your space with bark-textured planters mimicking natural tree bark patterns.
Once dried, you can carve or press bark patterns into the surface for a realistic effect. To enhance authenticity, add subtle color washes that highlight the ridges and grooves. These planters work well with succulents, ferns, or small flowering plants, blending seamlessly with nature-inspired decor.
Here are some ideas to get started:
- Use real bark pieces pressed into wet plaster.
- Carve bark patterns into concrete molds.
- Apply textured paint over clay pots.
- Incorporate natural dyes for a weathered look.
Mossy Table Centerpiece
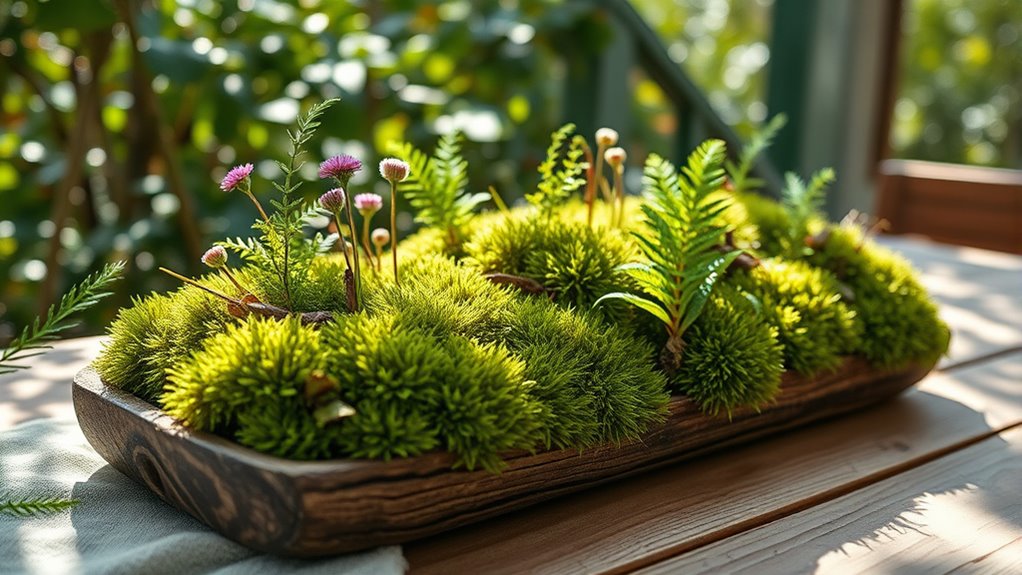
To create a stunning mossy table centerpiece, you need to choose the right type of moss that stays vibrant and healthy.
Next, gather natural elements like stones, twigs, or small plants to enhance your design.
Finally, learn simple tips to keep your centerpiece fresh and thriving over time.
Choosing the Perfect Moss
Choosing the right moss is essential for creating a stunning mossy table centerpiece. You want moss that’s vibrant, healthy, and fits your aesthetic.
First, consider type: sheet moss offers a lush, uniform look, while cushion moss adds texture.
Next, check color: opt for bright green for freshness or darker shades for a woodland feel.
Third, examine texture: soft moss feels gentle, while coarser types add visual interest.
Finally, select freshness: choose moss that’s moist and pliable, avoiding dried or brittle patches.
Here’s a quick guide:
- Type (sheet or cushion)
- Color (bright green or dark)
- Texture (soft or coarse)
- Freshness (moist and pliable)
Assembling Natural Elements
Once you’ve selected the perfect moss, it’s time to assemble your natural elements into a cohesive centerpiece. Start by choosing a sturdy, shallow container that complements your decor.
Arrange small stones or pebbles at the base to create a natural foundation. Spread the moss evenly over the surface, ensuring full coverage.
Add other natural elements like tiny branches, dried flowers, or pinecones for visual interest. Be mindful of balance and proportion, placing larger items toward the center or at the back, and smaller accents around the edges.
Use your hands or tools to gently press the elements into the moss, securing them in place. Keep the arrangement natural and organic, allowing the textures and colors to blend harmoniously.
Maintaining Your Centerpiece
Ever wonder how to keep your mossy centerpiece looking fresh and vibrant over time? Proper maintenance guarantees it stays lush and eye-catching.
First, mist the moss regularly with water to maintain humidity and prevent it from drying out.
Second, keep the centerpiece away from direct sunlight, which can scorch the moss.
Third, monitor for mold or pests, and remove any affected areas promptly.
Fourth, occasionally trim any overgrown or brown patches to encourage healthy growth.
By following these simple steps, your mossy table centerpiece will remain an attractive focal point.
Consistent care preserves its natural beauty and longevity, making your DIY project a lasting tribute to nature’s charm.
Acorn and Nut Jewelry

Acorn and nut jewelry offers a charming way to celebrate nature’s beauty while creating unique accessories. You can gather acorns, nuts, and seed pods from your outdoor adventures and transform them into necklaces, earrings, or brooches.
Start by cleaning and drying your natural materials thoroughly. Use small drill bits or pins to create holes for stringing or attaching charms.
To add durability, consider sealing the pieces with clear acrylic or resin. You might wrap the acorns or nuts with wire for extra detail and strength.
Be creative with your designs—combine different shapes and sizes, add beads or other natural elements. This project not only results in beautiful jewelry but also keeps a piece of nature close to you.
It’s a simple, eco-friendly way to craft meaningful, personalized accessories.
Natural Fiber Macramé Wall Hanging
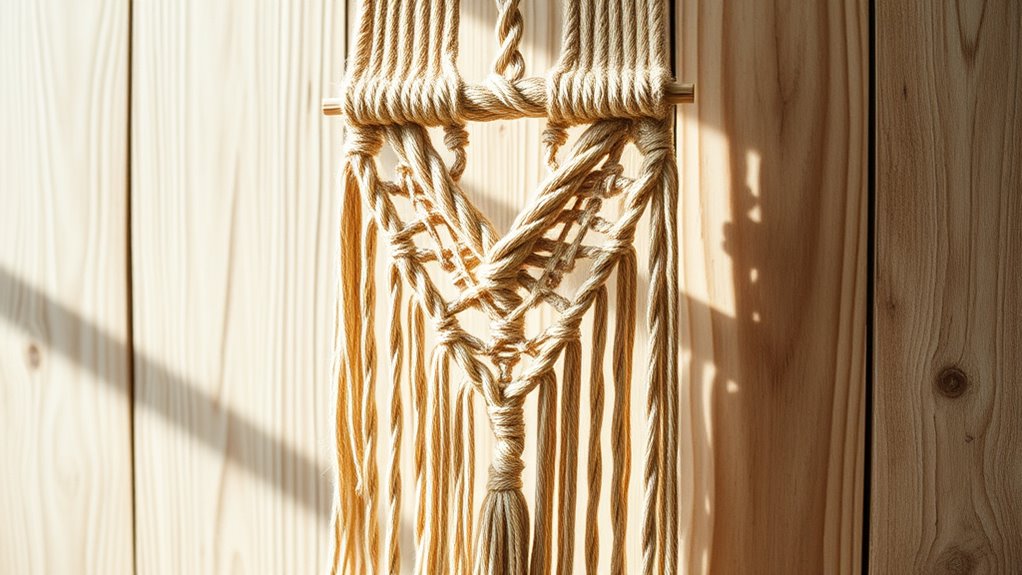
Natural fiber macramé wall hangings offer a versatile and stylish way to bring texture and warmth into any space. Using natural fibers like jute, hemp, or cotton, you can create unique pieces that reflect nature’s simplicity.
To start, choose your fiber and a simple knot pattern. Incorporate natural elements, like feathers or wooden beads, for added texture. Experiment with different lengths and fringe styles for a personalized look.
Here are some ideas to inspire your project:
- Use earthy tones like beige and brown for a neutral aesthetic
- Add driftwood or small branches for a rustic touch
- Incorporate beads or shells for subtle accents
- Vary knot styles to create visual interest and depth
This project lets you craft a beautiful, eco-friendly decor piece that celebrates nature’s beauty.
Frequently Asked Questions
What Safety Precautions Should I Take When Collecting Natural Materials?
When collecting natural materials, you should prioritize safety. Wear gloves to protect your hands from sharp objects or irritants, and use sturdy tools to avoid injuries.
Be mindful of your surroundings, watch out for thorns, insects, or unstable terrain.
Always respect local regulations and avoid damaging ecosystems.
Let someone know where you’re going, and carry a first aid kit just in case.
Safety first guarantees your project remains enjoyable and injury-free.
How Do I Preserve Natural Elements for Long-Lasting DIY Projects?
To keep your natural elements looking their best, you should gently dry or press them first, which helps maintain their color and shape.
You can also apply a light coating of clear sealant or varnish to protect against moisture and decay.
Store your items in a cool, dry place away from direct sunlight.
These simple steps ensure your beautiful finds stay vibrant and ready for your creative projects.
Can These Projects Be Adapted for Indoor Use?
Yes, you can adapt these projects for indoor use. You might need to modify materials or techniques to suit indoor conditions.
For example, you can use preserved flowers or artificial elements instead of fresh ones, and sealant sprays can help protect natural items from humidity.
Just guarantee proper ventilation and placement to prevent damage.
With some adjustments, your nature-inspired projects can beautifully enhance your indoor space.
What Eco-Friendly Adhesives or Finishes Are Recommended?
When choosing eco-friendly adhesives or finishes, you should look for options that minimize environmental impact.
You might opt for plant-based glues like those made from cashew or soy, or natural finishes such as beeswax, tung oil, or shellac. These products are non-toxic, biodegradable, and sustainable, making them perfect for eco-conscious projects.
Always check labels to guarantee they’re free from harmful chemicals, so your project remains both beautiful and eco-friendly.
Are There Age Restrictions or Safety Concerns for Children Participating?
Imagine you’re in a bygone era, yet safety still matters. When kids take part in crafting projects, you should consider age restrictions and safety concerns.
Keep young children away from sharp tools, hot glue, or toxic finishes.
Always supervise closely, use non-toxic, eco-friendly adhesives, and choose finishes that are safe for kids.
Your goal is to create a fun, educational experience without risking their health or safety.
Conclusion
By exploring these nature-inspired DIY projects, you gently invite a touch of the outdoors into your space, creating a harmonious balance between simplicity and beauty. Each craft allows you to embrace the subtle elegance of the natural world, subtly enriching your environment. As you nurture these creations, you may find that they not only adorn your home but also serve as quiet reminders of life’s delicate, ever-present beauty, softly encouraging a deeper connection to the world around you.