To build a layered paper shadow scene, start by selecting paper colors and thicknesses that match your desired mood and visual impact. Carefully cut and layer each piece, using foam adhesive for dimension. Position your light source to create sharp or soft shadows, experimenting with angles, distances, and layering to add depth. Focus on how shadows evolve as you adjust lighting, and explore different color choices. Keep experimenting to perfect your scene, and you’ll uncover more tips along the way.
Key Takeaways
- Select paper colors and thicknesses to create desired mood and stability for layered elements.
- Position the light source strategically to produce sharp or soft shadows, adjusting distance for effect.
- Cut elements precisely and use foam adhesive to elevate layers, adding depth to the scene.
- Arrange foreground and background pieces thoughtfully to enhance storytelling and visual interaction.
- Experiment with lighting angles and color choices to refine shadow effects and overall atmosphere.
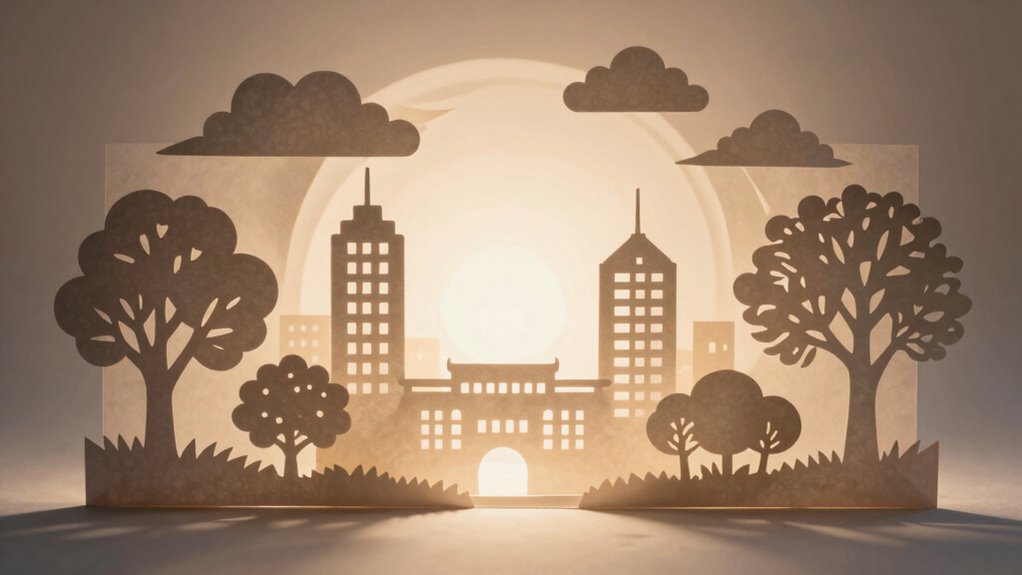
Creating a layered paper shadow scene is a fun and rewarding craft project that transforms simple paper cutouts into an enthralling display of depth and dimension. The first step is selecting the right paper colors, which is essential for achieving the desired visual impact. Bright, contrasting colors can make your scene pop, while softer, muted tones lend a more subtle, atmospheric feel. Think about the mood you want to create and choose your papers accordingly. You might opt for a combination of dark and light shades to emphasize different layers or keep a monochromatic palette for a more cohesive look. When selecting your paper, consider its thickness as well; slightly thicker cardstock can add stability, especially for the more prominent foreground pieces.
Choosing the right colors and paper thickness is key to creating captivating layered shadow scenes.
Once you’ve gathered your materials, focus on shadow effect techniques to bring your scene to life. The key is understanding how light interacts with your layered paper. Position your light source carefully—direct overhead lighting creates sharp, defined shadows, while side lighting adds softness and depth. Experiment with different angles and distances to see how the shadows change, and don’t be afraid to move your light around until you get the effect you want. You can also play with the distance between your paper layers and the light source to control shadow size and intensity. Closer proximity results in larger, more pronounced shadows, while placing layers farther away creates subtler effects.
As you assemble your scene, keep in mind that layering is about more than just stacking paper. Cut each element with precision, considering how each piece overlaps and interacts with the others. Use foam adhesive dots or small blocks of foam to elevate certain layers, adding more dimension and creating natural variation in shadow depth. When positioning your layers, think about the story or scene you want to tell—foreground elements should be closer to the viewer, with background pieces receding naturally. To further enhance your scene, understanding shadow effect techniques can help you manipulate light and shadows more effectively. Additionally, paying attention to color choices can significantly influence the overall mood and realism of your shadow scene. Exploring different lighting setups can also help you discover new ways to enhance the depth and dimension of your scene. Remember that adjusting the lighting angle can dramatically change the overall atmosphere and perception of your scene.
Finally, as you refine your shadow scene, observe how the shadows evolve as you adjust the light. This experimentation allows you to fine-tune the effect, emphasizing certain details or creating a more dramatic contrast. With patience and creativity, you’ll craft a layered paper shadow scene that captivates viewers and showcases your artistic skill. Remember, the magic lies in the interplay of color, shadow, and composition—so have fun exploring different combinations until you find the perfect look.
As an affiliate, we earn on qualifying purchases.
Frequently Asked Questions
What Materials Are Best for Creating Durable Paper Layers?
For durable paper layers, you should choose paper with a thicker paper thickness, like cardstock or heavyweight paper, which resists tearing and warping. When sticking layers together, opt for strong adhesive options such as double-sided tape or glue dots, which provide a firm bond without causing damage. These materials guarantee your layered paper shadow scene stays intact and looks professional over time.
How Can I Add Color to My Paper Shadow Scene?
You can add color to your paper shadow scene through color blending and layering. Start by choosing colored paper or markers, then layer different shades to create depth. Use gentle blending tools like sponges or brushes to smoothly shift between colors. As you layer, coincidence brings an unexpected harmony, revealing more than just color—it’s a reflection of your creative journey. Embrace the process, and your scene will come alive with vibrant, meaningful hues.
What Lighting Setup Works Best for Shadows?
You should use a single, focused light source positioned at a low angle to create strong, defined shadows. Experiment with light positioning to find the best shadow effects, adjusting the distance and angle for softer or sharper shadows. Employ shadow techniques like diffusing or blocking light to control shadow intensity. Consistent, directional lighting guarantees your layered paper scene maintains clear, dramatic shadows that enhance depth and detail.
How Do I Secure the Paper Layers Without Damaging Them?
Think of securing your paper layers like carefully stacking a delicate stack of cards. You should use a light adhesive, like double-sided tape or glue dots, that won’t damage the paper or cause warping. Opt for a paper thickness that’s sturdy yet flexible, so layers stay in place without tearing. Apply adhesive sparingly along the edges or hidden spots to keep your scene intact and pristine.
Can I Animate a Layered Paper Shadow Scene?
Yes, you can animate a layered paper shadow scene to create shadow movement and enhance scene depth. Use small, precise pivot points or joints where layers connect, allowing you to gently move or rotate them. Incorporate a movable light source to simulate changing shadows. This approach adds dynamic shadow movement, making your scene look more lively and three-dimensional, effectively emphasizing scene depth and progression shifts.
Conclusion
Now that you’ve mastered creating a layered paper shadow scene, you’re all set to wow your friends or even impress Marie Antoinette at your next soirée. Remember, patience and creativity are your best tools—think of it as your own secret recipe, like the one for the perfect quiche Lorraine. So, keep experimenting, and soon you’ll have a stunning display that transports viewers to a different world, all without needing a time machine!