
To master knitting basics, start by learning how to cast on to create your initial row of stitches—use methods like the long-tail or cable cast-on for a neat edge. Next, work on binding off to finish your project securely. Always check your gauge by knitting a small swatch to ensure your project turns out the right size and fit. With some practice, these foundational skills become easier, and you’ll discover how much more you can create.
Key Takeaways
- Casting on creates the foundation row of stitches, with methods like long-tail or cable cast-on offering different edge finishes.
- Proper tension during casting on ensures even stitches and sets the tone for the entire project.
- Binding off secures your finished edge, preventing unraveling and giving a clean, professional look.
- Gauge measures stitches and rows per four inches, crucial for matching project size and fit.
- Knitting a swatch helps check gauge and adjust needle size for accurate, well-fitting finished items.
Have you ever wondered how to start knitting? It’s a simple question, but the answer depends on understanding a few key basics. The first step is choosing the right yarn and knitting tools. Yarn selection is vital because it impacts how your project turns out, how easy it is to work with, and how comfortable you’ll feel knitting. You’ll want to pick a yarn that matches your project’s purpose—whether it’s soft wool for warmth, smooth cotton for breathability, or a colorful acrylic for easy care. When selecting yarn, consider its weight or thickness; thinner yarns are suitable for delicate projects, while thicker yarns work well for quick, chunky scarves. Your knitting tools, primarily needles, also matter. Different projects require different needle sizes, so start with a versatile set that includes various sizes. Choose needles that feel comfortable in your hand, whether they’re wooden, bamboo, or metal, as this can make your knitting experience more enjoyable.
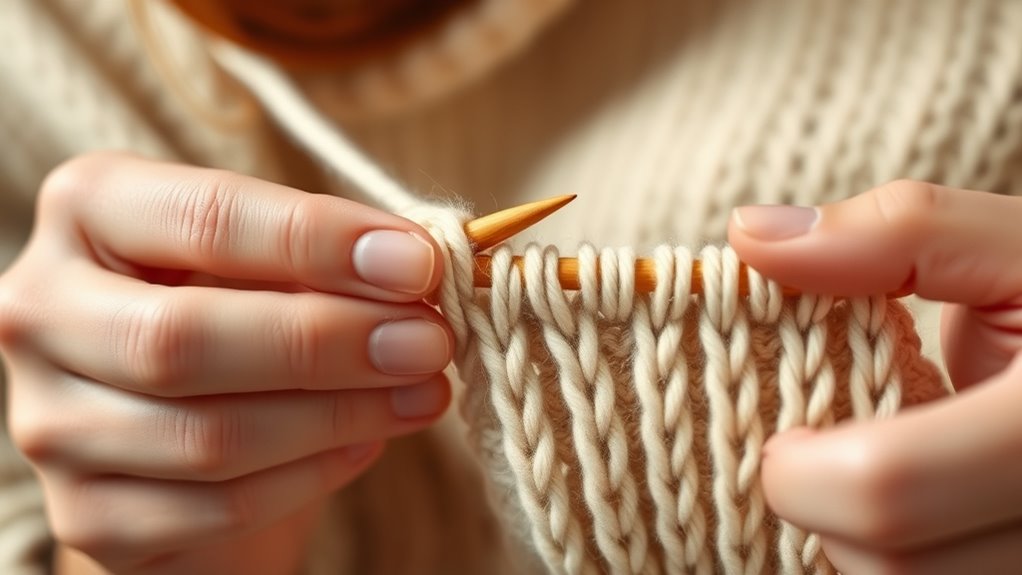
Once you have your yarn and knitting tools ready, casting on becomes your first practical step. Casting on creates the foundation row of stitches on your needle, setting the stage for the rest of your project. To do this, you’ll make a slip knot to attach the yarn to the needle, then use a simple method like the long-tail cast-on or the cable cast-on. These methods are beginner-friendly and produce a neat edge. The key is to keep the tension even so your stitches aren’t too tight or too loose, which affects the overall look and ease of knitting. As you practice casting on, pay attention to how the yarn flows from your ball and how your fingers guide the stitches onto the needle.
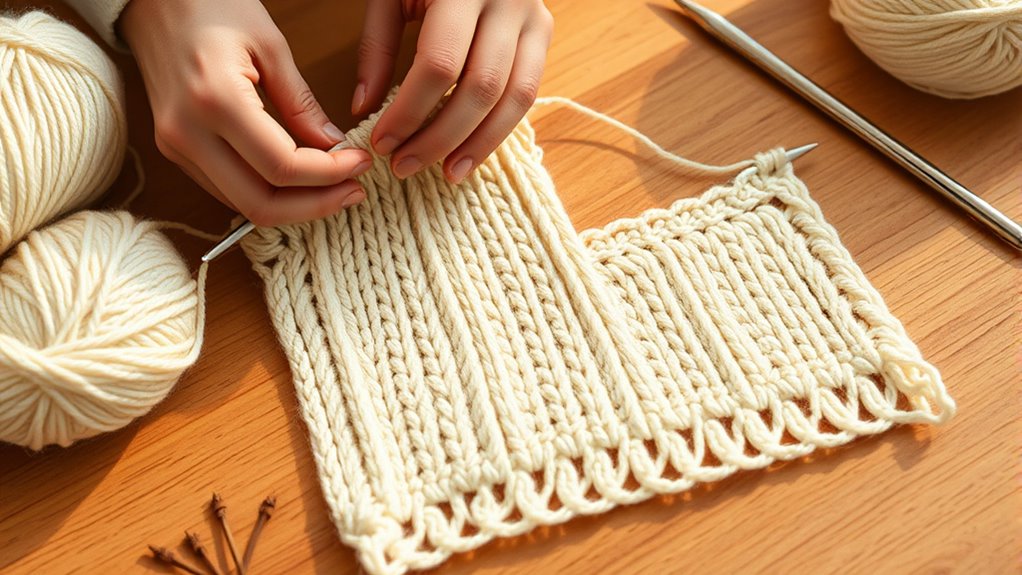
After casting on, you’ll need to knit your rows following your pattern. Throughout this process, gauge plays an important role. Gauge measures how many stitches and rows fit within a specific area, usually four inches. Achieving the correct gauge ensures your finished item matches the size you want and looks professional. To check your gauge, knit a small swatch using your chosen yarn and needles, then compare the number of stitches and rows to your pattern’s specifications. If your gauge is off, switch to a different needle size. This step might seem minor, but it’s essential to make sure your project turns out just right.

Aeelike Knitting Kit for Beginners, Complete Beginner Knitting Kit Easy Knitting Set Including Knitting Needles Set Cotton Yarn, Learn to Knit Dishcloth with Step-by-Step Instructions, Colorful
[ Knitting Needles Set for Beginners ]: Aeelike knitting kit include almost everything you may need, such as…
As an affiliate, we earn on qualifying purchases.
As an affiliate, we earn on qualifying purchases.
Frequently Asked Questions
How Do I Fix a Dropped Stitch?
To fix a dropped stitch, carefully locate the tangled yarn and unravel it slightly above the dropped stitch. Using a crochet hook, catch the loop and pull it through the next stitch, working your way up to reknit the dropped stitch. This method is called tangled yarn, or dropped stitch repair. Be gentle to avoid creating more loose stitches, and secure your work by knitting or purling the stitch back into place.
What Yarn Is Best for Beginners?
Think of your first project as planting a garden—you want easy-to-care-for seeds. Soft, smooth yarns like acrylic or wool blends are perfect for beginners, offering gentle textures that glide easily through your fingers. Bright colors can boost your confidence and keep you motivated, while neutral shades help you focus on mastering stitches. Choose yarns that feel comfortable in your hands, turning your knitting journey into a joyful, colorful adventure.
How Do I Measure Knitting Gauge Accurately?
To measure your knitting gauge accurately, you need to focus on tension consistency and the importance of a swatch. Knit a sample swatch in the stitch pattern you’ll use, then measure the number of stitches and rows per inch. Keep your tension even throughout, and use a ruler to verify your gauge matches the pattern’s specifications. This helps ensure your finished project turns out just right.
Can I Knit With Circular Needles for Flat Projects?
Yes, you can knit flat projects with circular needles. They work well because circular vs straight needles are versatile; you just need to switch to knitting in the round for seamless projects. For flat work, you’ll turn your work at the end of each row, just like with straight needles. Circular needles are especially handy for large projects, reducing strain and offering flexibility, even when knitting flat.
How Do I Choose the Right Needle Size?
Choosing the right needle size is like picking the perfect key for a lock. To do this, match your needle size to your yarn weight, ensuring they work well together. Check your pattern’s recommended needle size or the yarn label, which usually suggests a compatible range. Experiment with different sizes if needed—smaller needles create tighter stitches, while larger ones give a looser, more open fabric.

JubileeYarn Jumbo Bamboo Knitting Needles – US 13 (9mm) – 16" Long – 1 Pair
CONTENTS 1 pair of jumbo knitting needles per each set
As an affiliate, we earn on qualifying purchases.
As an affiliate, we earn on qualifying purchases.
Conclusion
So, congratulations—you now know how to cast on, bind off, and check your gauge. Who knew that a few simple stitches could turn you into a knitting superstar? Just remember, if your scarf ends up looking like a crooked caterpillar, it’s all part of the charm. Embrace the quirks, because eventually, your projects will be perfectly imperfect—just like you. Happy knitting, and don’t forget to blame the yarn when things go awry!

Clover Swatch Ruler & Needle Gauge, White
Measure your gauge swatch with the 4 inch (10cm) ruler
As an affiliate, we earn on qualifying purchases.
As an affiliate, we earn on qualifying purchases.
Clover Swatch Ruler & Needle Gauge, White
Measure your gauge swatch with the 4 inch (10cm) ruler
As an affiliate, we earn on qualifying purchases.
As an affiliate, we earn on qualifying purchases.