Discover 12 creative DIY decorative pillow ideas to elevate your home decor. Mix fabric paints for color blocking, stencil designs onto rustic burlap, and add playful pom-pom trims for charm. You can create patchwork, embroider initials, or overlay vintage lace for a personal touch. Transform old fabrics with graphic transfers or upcycle sweaters into cozy pillows. Each idea offers a unique, stylish touch; explore more ways to craft beautiful pillows that suit your style.
Key Takeaways
- Use stenciling and fabric paint on burlap or fabric for crisp, personalized designs.
- Incorporate embellishments like pom-poms, buttons, or embroidery for added texture and charm.
- Create patchwork pillows using leftover fabrics in various colors and patterns for a vibrant look.
- Add vintage lace overlays or graphic transfers for elegant or modern statement pillows.
- Upcycle old sweaters or textiles into cozy, unique pillow covers with simple sewing techniques.
Color Block Pillow Covers With Fabric Paint
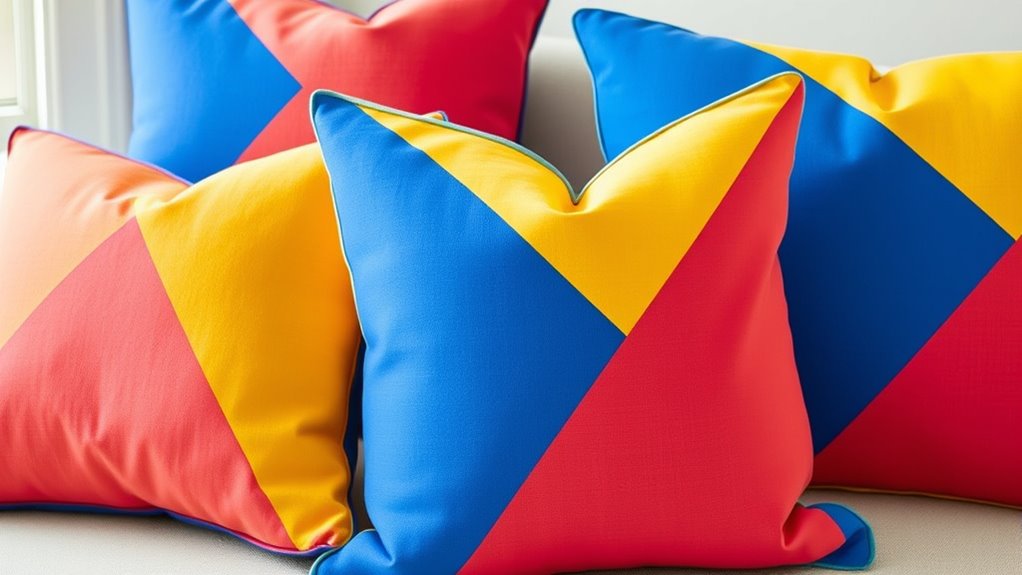
Creating color block pillow covers with fabric paint is an easy and customizable way to add a modern touch to your decor. Start by choosing your pillow covers and selecting coordinating or contrasting fabric paints. Use painter’s tape to create clean, straight lines for your blocks, ensuring sharp edges. Apply the paint in even layers, and let each section dry completely before removing the tape. You can experiment with different color combinations and block sizes to match your style. This DIY project allows you to personalize your space effortlessly. Once finished, your pillow covers will have a sleek, contemporary look that elevates any sofa or bed. It’s a simple craft that produces striking, professional-looking results with minimal effort. Incorporating mindful decluttering practices can also help you create a more organized and peaceful environment that complements your new decor. Additionally, choosing crochet or knitting techniques can add textured accents to your space for a layered aesthetic. Paying attention to fabric quality can further enhance the durability and appearance of your pillow covers. Using high-quality fabric paints designed for longevity and washability can ensure your designs stay vibrant over time, similar to maintaining the durability of electric bikes with reliable components.
Rustic Burlap Pillows With Stenciled Designs
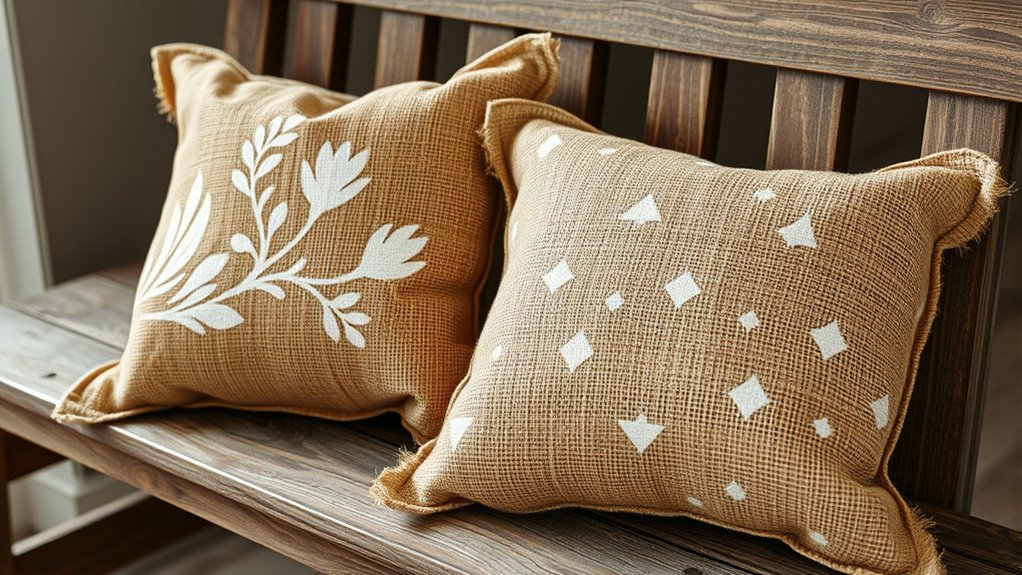
To create rustic burlap pillows with stenciled designs, start by selecting quality burlap fabric that adds a natural, textured look. Next, craft your stenciled patterns carefully, using stencils and fabric paint for clean, crisp designs. To enhance the durability and aesthetic appeal, sealing the paint and adding decorative accents can make your pillows stand out. Being aware of DIY home decor trends can also inspire unique and personalized touches to your pillow designs. Incorporating vibrational energy into your project can help attract positive vibes and creativity, making your decor even more inviting. Paying attention to textured fabrics can further elevate the tactile and visual appeal of your pillows, complementing your rustic theme. Utilizing emotional support techniques when working on your project can foster a relaxed and enjoyable crafting experience, especially if you’re creating these pillows for a loved one. For durability and enhanced aesthetic appeal, consider incorporating decorative accents that complement your rustic theme.
Choosing Burlap Fabric
Choosing the right burlap fabric is essential for achieving a rustic look with your stenciled pillows. Look for burlap that’s tightly woven and free of large holes or frays, which makes it easier to stencil and guarantees durability. Natural, undyed burlap offers a classic, earthy appearance, but you can also choose lightly dyed options for subtle color variations. When selecting fabric, consider its weight; heavier burlap provides a sturdier base, ideal for pillows that hold their shape. Here’s a quick guide:
| Burlap Type | Weave Tightness | Color Options |
|---|---|---|
| Natural | Tight | Undyed, Light |
| Dyed (pastels) | Moderate | Soft hues |
| Heavyweight | Very tight | Natural or dyed |
Choosing quality burlap guarantees your pillow’s rustic charm and longevity. Additionally, considering the fabric’s durability can help ensure your decorative pillows withstand regular use over time, especially if you plan to incorporate environmental considerations into your crafting process. Proper finishing techniques are also important to prevent fraying and extend its lifespan, and selecting the right finishing method can make a significant difference in the pillow’s durability.
Crafting Stenciled Patterns
Once you’ve selected the perfect burlap fabric, it’s time to add personalized charm through stenciled patterns. Start by choosing a design that matches your style—whether it’s floral, geometric, or lettering. Secure your stencil firmly to prevent slipping, and use a sponge or brush to apply fabric paint evenly. Dab off excess paint to avoid bleeding, and work slowly for crisp edges. For a rustic look, consider using a dry brush technique or distressing the edges of your design after drying. Feel free to layer different patterns or colors for a unique effect. Keep a steady hand and patience, as careful application makes all the difference. With a little practice, you’ll create eye-catching, customized pillows that showcase your personality. Remember that selecting the right fabric paint and technique is essential for achieving a durable and professional-looking design using fabric paint, and ensuring your stenciled patterns last over time. Additionally, understanding WWE Raw’s financial impact can inspire creative projects that reflect boldness and impact, just like a well-executed design. Incorporating proper surface preparation can further enhance the adhesion and longevity of your painted patterns, especially considering the nutritional advantages of green juice which highlight the importance of quality materials for health benefits.
Finishing Touch Techniques
After completing your stenciled design on the burlap pillow, the final step is adding finishing touches that enhance its rustic charm. To achieve this, lightly distress the edges with sandpaper or a razor blade for a worn look. You can also fray the raw burlap edges by pulling out loose threads, giving it a more authentic, vintage feel. Consider adding a decorative element like a burlap bow or a simple twine bow at a corner for extra character. If you want a softer finish, lightly spray the pillow with fabric sealant to protect the design without losing its rustic appeal. These small details will tie your project together, making your rustic burlap pillow a charming, handcrafted accent for your space. Additionally, exploring celebrity transformations can inspire unique styling ideas for your home decor. Incorporating preppy dog names or other themed accents can also add a personalized touch to your decor scheme. For a more polished look, you might also consider adding decorative stitching around the edges to reinforce durability and enhance the handcrafted appearance.
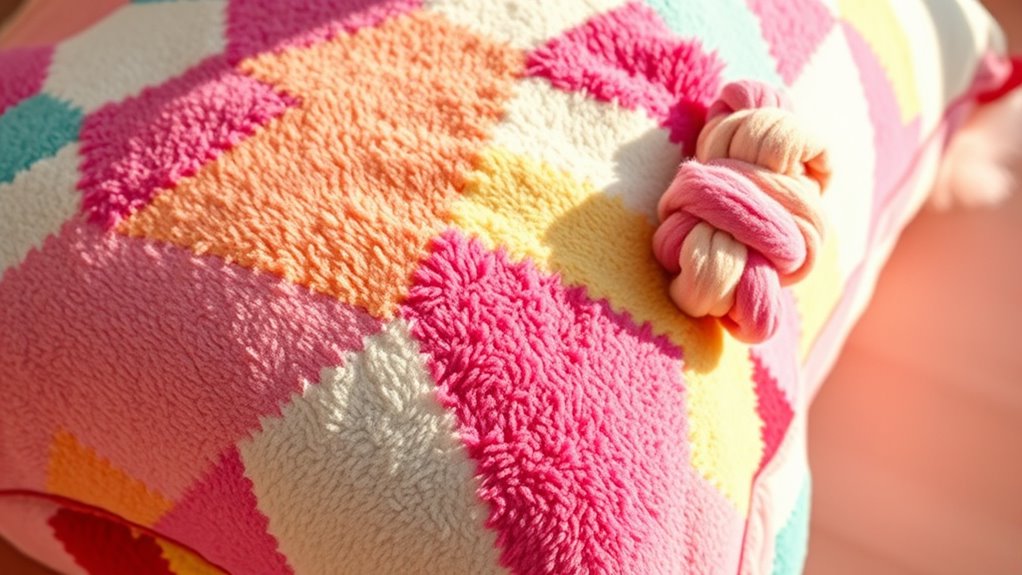
Pom-Pom Trim Accent Pillows
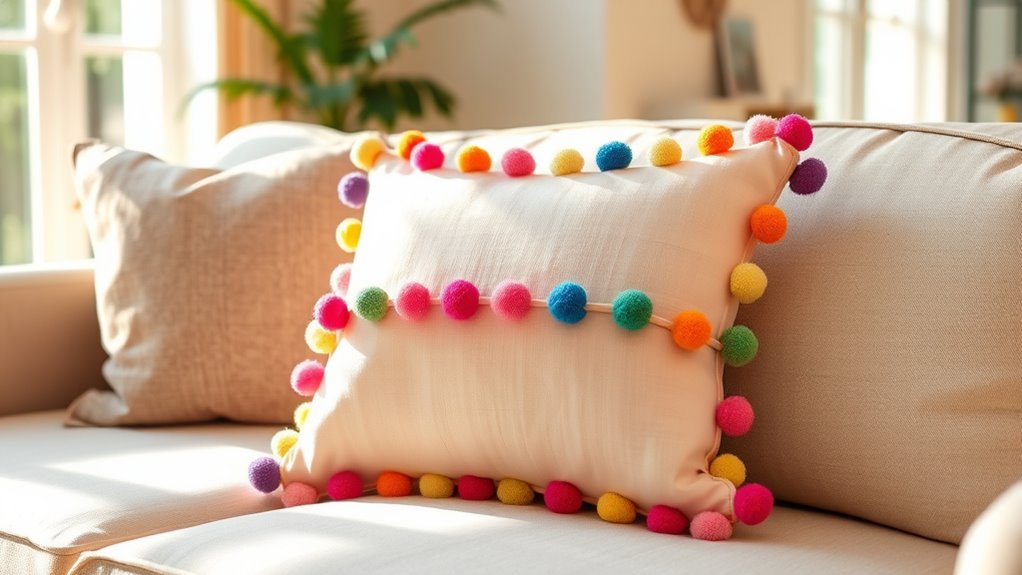
Adding bright pom-poms instantly boosts your pillow’s charm, so pick bold colors that pop. Learn easy sewing techniques to attach the trim securely and neatly. Mixing different colors and textures creates a fun, personalized look that really stands out.
Choosing Bright Pom-Poms
Have you considered how bright pom-poms can instantly elevate the look of your decorative pillows? Choosing bold, vibrant colors for your pom-pom trim creates a lively, eye-catching focal point. Think about colors that complement your existing decor—bright pinks, oranges, or vivid blues can add a playful touch, while contrasting hues make your pillow pop. When selecting pom-poms, consider the size; larger ones make a statement, while smaller ones add subtle charm. Remember, the brightness of the pom-poms should reflect your style—whether you want a cheerful vibe or a bold accent. Don’t be afraid to mix and match colors or textures for a personalized, fun look. Bright pom-poms are a simple way to make your pillows stand out effortlessly.
Sewing Techniques for Trim
Wondering how to attach pom-pom trim neatly and securely? First, align the trim along the pillow edge, pinning it in place. Use a straight or zigzag stitch close to the trim’s edge to secure it firmly. For even attachment, sew slowly and keep the trim taut. To prevent puckering, adjust your tension and stitch length as needed. Below is a quick guide:
| Step | Tip |
|---|---|
| Pin the trim | Use pins to keep it aligned |
| Stitch placement | Sew close to the trim’s edge |
| Stitch type | Use a zigzag or straight stitch |
| Tension adjustment | Maintain even tension |
| Final check | Ensure trim is securely attached |
With precise sewing, your accent pillow will have a polished, professional look.
Mixing Colors and Textures
Mixing colors and textures can instantly elevate your pillow designs, making them more dynamic and visually appealing. When creating pom-pom trim accent pillows, choose contrasting or complementary colors to add vibrancy. Pair soft, plush fabrics with sleek, smooth materials to create tactile interest. Incorporate bold hues with neutral tones to balance energy and calmness. Experiment with different textures, like fuzzy pom-poms against crisp cotton or velvet, to add depth. Don’t shy away from mixing patterns or combining matte and shiny finishes for an eclectic look. The key is to keep it balanced—use one dominant color or texture and accent with smaller details. This approach will make your pillows stand out, giving your space a personalized and stylish touch.
Fabric Scrap Patchwork Pillows

Looking for a simple way to add color and texture to your decor? Fabric scrap patchwork pillows are perfect for that. Gather leftover fabrics in different colors, patterns, and textures—these become your palette. Cut them into uniform squares or rectangles and sew them together, creating a vibrant patchwork design. You can arrange the pieces randomly for a boho look or in a neat grid for a more structured appearance. Once assembled, attach the patchwork to a pillow insert and sew the edges securely. These pillows are a fantastic way to repurpose fabric scraps while showcasing your creativity. Plus, they add a cozy, eclectic touch to any sofa or bed, making your space feel personalized and inviting.
Embroidered Monogrammed Throw Pillows
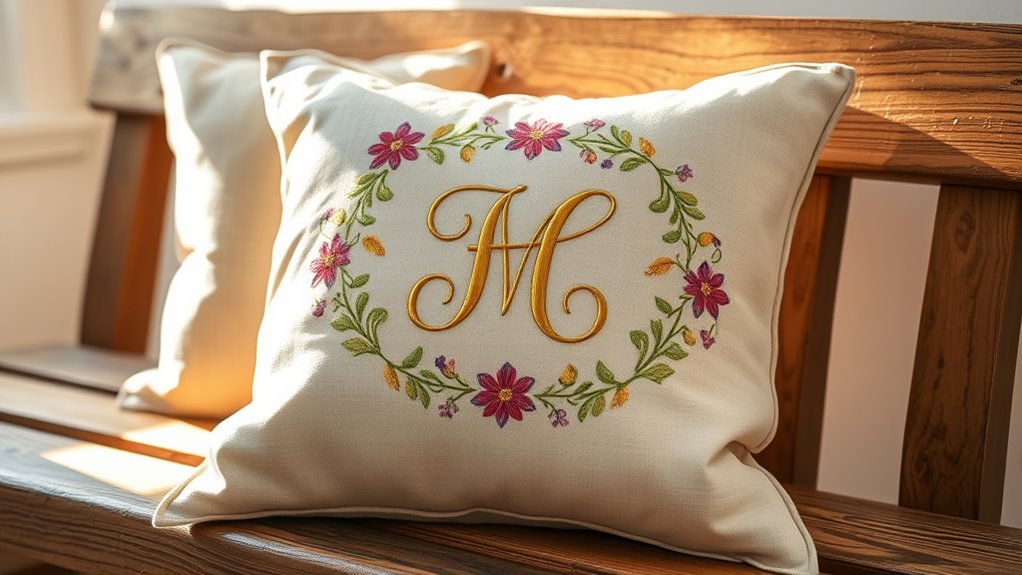
Ever thought about adding a personal touch to your home decor? Embroidered monogrammed throw pillows are a simple way to do that. Choose a pillow cover in your favorite fabric and pick a monogram style that matches your decor. You can hand-embroider your initials or use a fabric stencil and embroidery hoop for a cleaner look. Select contrasting thread colors to make your monogram stand out or match the fabric for a subtle effect. Keep your stitches even and consistent for a professional appearance. These pillows are perfect for beds, sofas, or armchairs. Not only do they add a personalized flair, but they also make thoughtful, handmade gifts for friends and family. With a little practice, you’ll create charming, unique accents in no time.
Tie-Dye Patterned Cushions
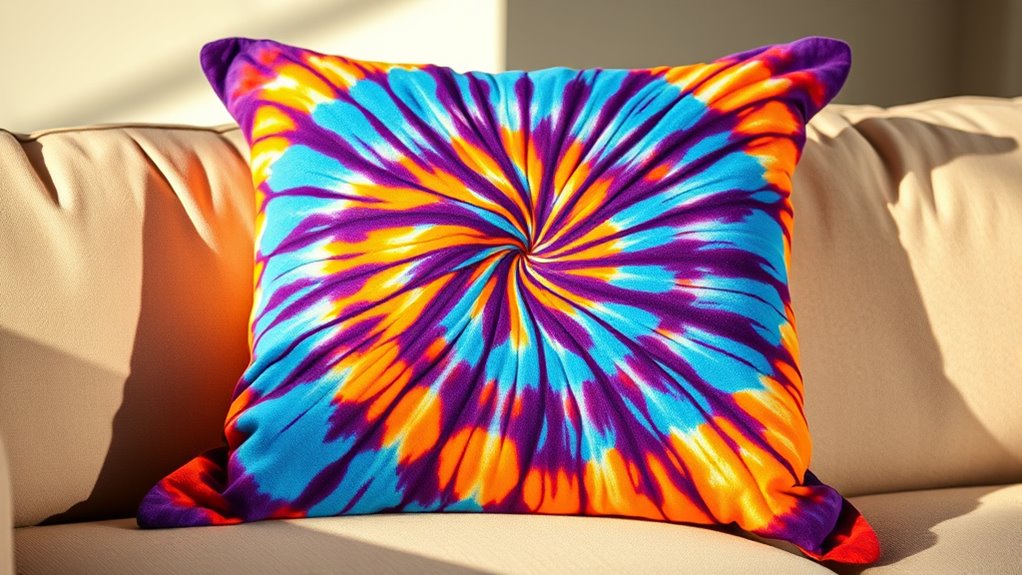
Adding a splash of color to your home decor becomes effortless with tie-dye patterned cushions. To create your own, start by choosing fabric in your favorite shades and folding or twisting it to achieve your desired pattern. Secure the fabric with rubber bands to create sections for different colors. Then, apply fabric dyes, squeezing or dripping the dye onto the fabric to produce vibrant, swirling designs. Let the dye set according to the instructions before rinsing and drying. Once dry, sew the fabric into cushions or slip it over existing pillow inserts for an easy upgrade. Tie-dye cushions add a fun, bohemian vibe to any space, making your decor feel lively and personalized without much effort.
No-Sew Fleece Pillow Covers
Choosing the right cozy fleece fabric makes your pillow covers soft and inviting. When cutting and measuring, accuracy guarantees a perfect fit without sewing. Adding simple decorative touches can personalize your pillows and enhance your home style effortlessly.
Selecting Cozy Fleece Fabrics
Selecting the right fleece fabric is key to creating cozy, no-sew pillow covers that look and feel inviting. Look for fleece with a soft, plush texture that adds warmth and comfort. Thicker fleece provides durability and a luxurious feel, while lightweight options work well for smaller pillows or layered decor. Consider color and pattern to match your style, whether solid neutrals or vibrant prints. Ascertain the fleece is free of pilling and fraying for a clean finish. Here’s a quick guide:
| Fleece Type | Best For |
|---|---|
| Microfleece | Lightweight, delicate projects |
| Sherpa | Extra warmth, plush feel |
| Polyester fleece | Durability, vibrant colors |
| Cotton fleece | Breathability, softness |
| Printed fleece | Stylish, decorative accents |
Cutting and Measuring Tips
Once you’ve picked the perfect fleece fabric, accurate cutting and measuring become the foundation for a neat, no-sew pillow cover. Start by using a clear ruler or measuring tape to determine the dimensions of your pillow, adding about 1/2 inch to each side for seam allowances. Use sharp scissors or a rotary cutter for clean, straight lines. To guarantee precision, mark your measurements with tailor’s chalk or a washable fabric marker before cutting. Keep the fabric flat on a smooth surface, avoiding wrinkles or folds that could distort your cuts. When trimming, go slowly and double-check measurements to prevent uneven edges. Proper measuring and careful cutting help your pillow cover look professional, with clean lines and a polished finish every time.
Simple Decorative Enhancements
Adding simple decorative touches can instantly elevate your no-sew fleece pillow cover without the need for sewing. One easy idea is to add a border using fabric glue or double-sided tape, giving your pillow a finished look. You can also create fun patterns with fabric paint or sharpie markers, adding personality and color. Another option is to tie a decorative ribbon or twine around the pillow’s edges or corners for a charming accent. If you prefer a textured look, cut out shapes like hearts, stars, or leaves from contrasting fleece and glue them onto the cover. These quick enhancements require minimal effort but make a noticeable difference, helping you craft a personalized, stylish pillow in just minutes.
Metallic Fabric Accents With Iron-On Transfers
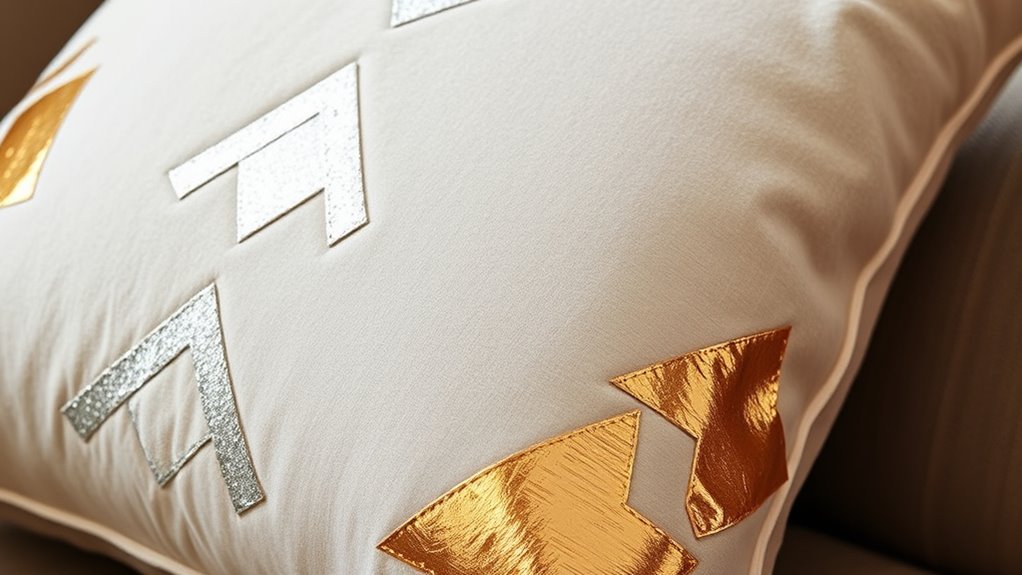
Metallic fabric accents with iron-on transfers offer an easy way to give your pillows a chic, eye-catching touch. You can enhance plain fabric by applying metallic transfers that shimmer and catch the light. Choose designs like geometric patterns, bold words, or abstract shapes to match your decor. To start, simply cut your transfer, place it on the fabric, and follow the instructions to iron it on securely. This method allows for customization without sewing or complex tools. The metallic finish adds a modern, luxurious vibe, elevating simple pillows instantly. Use different colors and patterns to create a coordinated look or mix and match for a playful style. Below is a helpful guide to some popular metallic transfer options:
| Transfer Type | Best Use Cases |
|---|---|
| Silver | Modern, sleek designs |
| Gold | Elegant, sophisticated accents |
| Copper | Warm, earthy tones |
| Rose Gold | Feminine, trendy details |
| Glitter | Fun, festive accents |
Vintage Lace Overlay Pillows
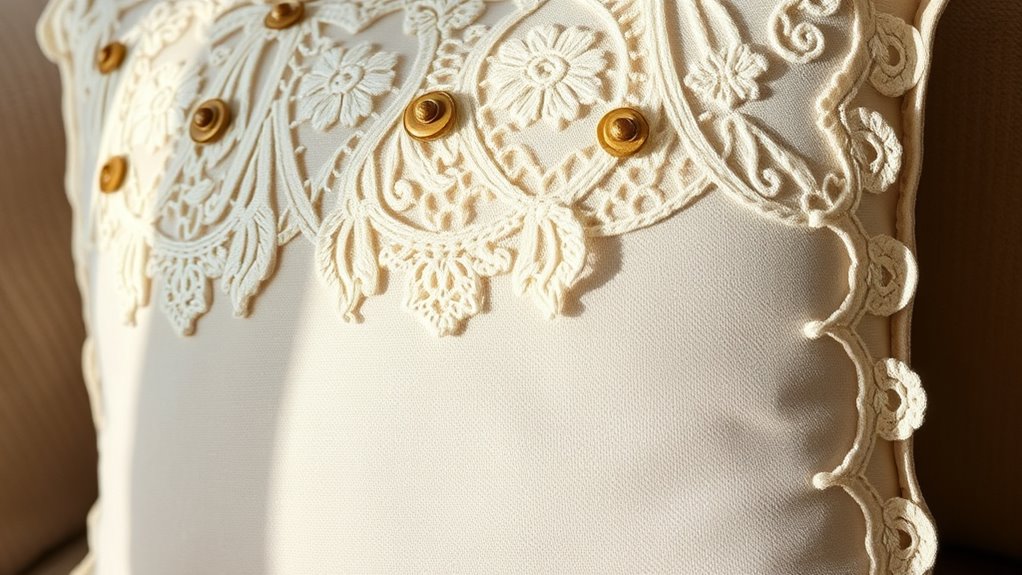
Vintage lace overlay pillows instantly evoke a sense of timeless elegance and delicate charm. To create your own, start by selecting a simple fabric for the pillow cover and a beautiful vintage lace. Cut the lace slightly smaller than the pillow front, then sew or glue it in place, allowing the edges to gently drape. You can reinforce the lace with a contrasting trim or ribbon for added detail. For a more polished look, consider adding a subtle embellishment like a fabric flower or pearl accent. Keep the color palette soft and neutral to enhance the vintage vibe. These pillows work beautifully on sofas or beds, adding a romantic touch to your decor. With a little creativity, you can craft a piece that feels both elegant and personal.
Bold Graphic Prints With Iron-On Transfers
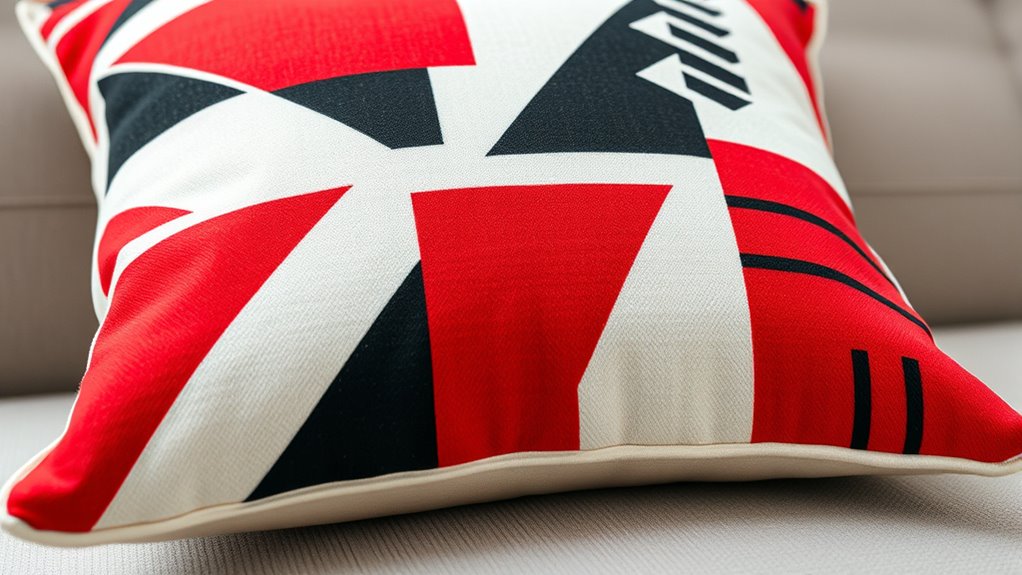
For a bold, modern touch to your decor, graphic prints created with iron-on transfers offer a quick and customizable solution. You can easily transform plain pillows into statement pieces by choosing striking designs or creating your own. First, select high-quality transfer paper and print your favorite graphic or quote. Then, position it on your pillow cover and follow the instructions to iron it on securely. This method allows for endless creativity and personalization. Here’s a quick overview:
| Step | Details |
|---|---|
| Design Selection | Pick a graphic, quote, or pattern you’d love |
| Printing | Use compatible ink and transfer paper |
| Preparation | Ensure pillow cover is clean and flat |
| Ironing | Follow transfer paper instructions for best results |
| Final Touch | Let it cool, then peel off backing carefully |
This technique makes bold, eye-catching pillows easy and fun!
Quilted Plush Throw Pillows
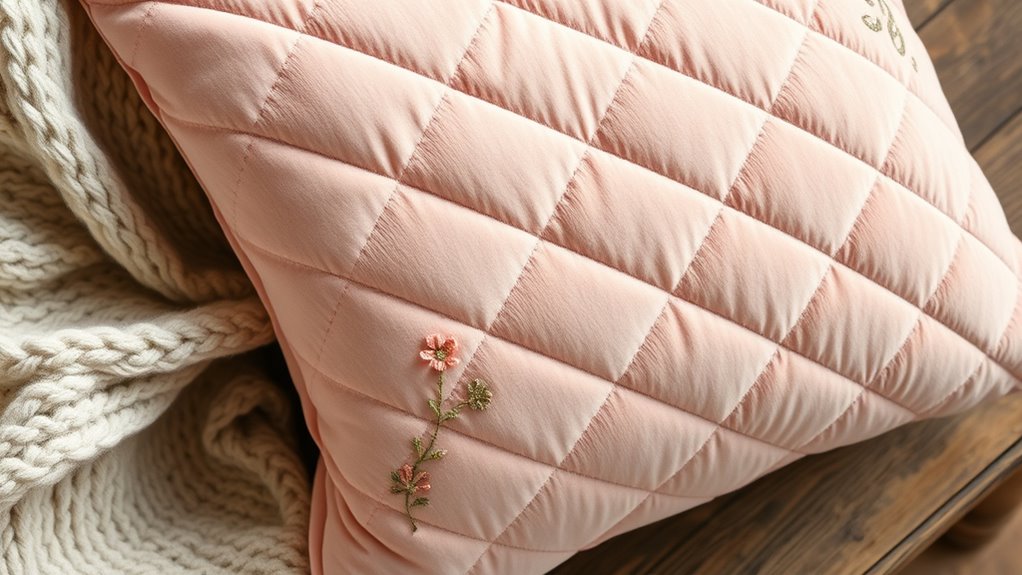
Quilted plush throw pillows add cozy texture and sophisticated style to any sofa or bed. To create your own, start with a soft plush fabric in your favorite color, then cut it into your desired pillow size. Use a simple quilting technique by sewing diagonal lines across the pillow’s surface, creating a diamond or grid pattern. This adds visual interest and a plush, cushioned feel. For extra detail, you can add a contrasting fabric border or piping around the edges. Stuff the pillow with a high-quality filling to achieve a plush, inviting look. Once sewn and stuffed, give your pillow a gentle press to smooth out the quilting. These pillows not only elevate your decor but also bring warmth and comfort to your space.
Upcycled Sweater Pillows
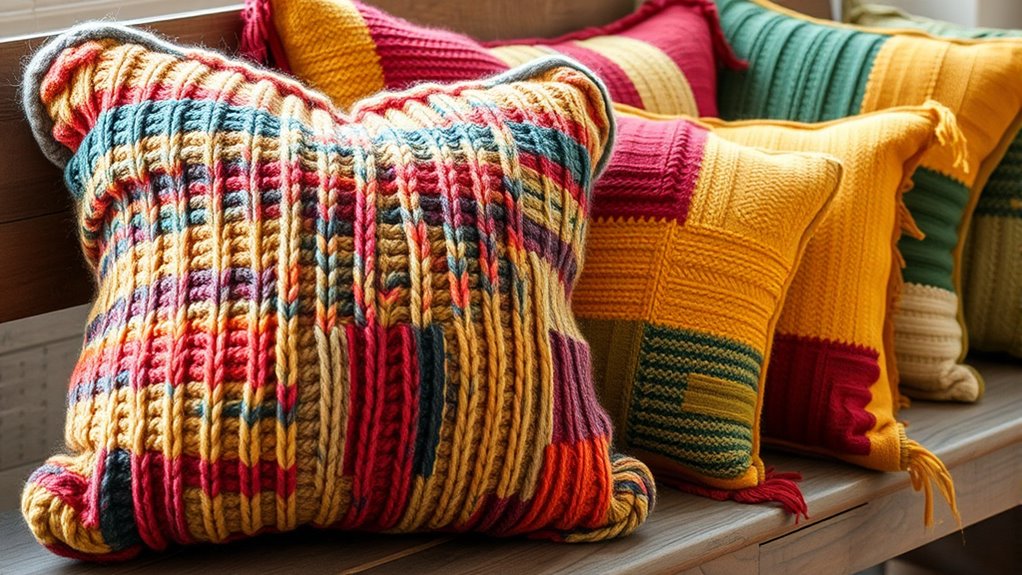
Upcycled sweater pillows are a creative way to breathe new life into old garments while adding cozy charm to your space. Choose a favorite sweater with a good texture or pattern, and cut out two identical pieces for the pillow cover. Sew the pieces together, leaving an opening to insert a pillow form. You can add decorative touches like buttons, embroidery, or contrasting stitching to personalize your pillow. Turn the sweater right-side out once sewn, and stuff it with a pillow insert. These pillows are perfect for adding warmth and character to couches, chairs, or beds. Plus, repurposing sweaters helps reduce waste and gives a unique, handmade touch to your home decor. It’s a simple project that combines sustainability with style.
Frequently Asked Questions
What Materials Are Safest for DIY Pillow Dyeing Projects?
When dyeing pillows yourself, you want to prioritize safety. You should choose materials like fiber-reactive dyes or natural options such as beet juice, turmeric, or coffee, which are less toxic. Always work in a well-ventilated area and wear gloves and an apron to protect your skin and clothes. Avoid harsh chemicals like bleach or synthetic dyes that can cause irritation. Using these safe materials helps you enjoy your project without worries.
How Can I Ensure My Painted Designs Won’T Peel or Fade Over Time?
You’re on the right track by asking how to keep your painted designs from peeling or fading. To make your artwork last, you need to seal it properly with a high-quality fabric sealant or clear acrylic spray. Always let your paint cure fully before use, and wash your pillow gently in cold water. Think of it as giving your design a shield—protecting it from wear and tear over time.
What Techniques Help Prevent Fabric Fraying During Pillowmaking?
To prevent fabric fraying during pillowmaking, you should start by finishing raw edges with techniques like zigzag stitching or serging. Alternatively, applying a fabric sealant or using pinking shears cuts down on fraying. Remember to handle fabric gently and avoid over-stretching during sewing. These methods keep your edges neat, durable, and professional-looking, ensuring your pillow stays intact and beautiful over time.
How Do I Choose the Best Pillow Filling for Different Styles?
While exploring the art of selecting pillow fillings, you’ll find that the ideal choice subtly enhances your style. For a plush, luxurious feel, opt for down or feather fills. If you prefer a firmer, supportive touch, consider foam or polyester. For a blend of softness and resilience, shredded memory foam works beautifully. Matching the filling to your aesthetic and comfort needs guarantees your pillow complements your decor effortlessly.
Are There Eco-Friendly Options for Creating Decorative Pillow Covers?
You’re wondering if eco-friendly options exist for creating decorative pillow covers. The good news is, many sustainable materials are available, like organic cotton, hemp, or linen, which are biodegradable and eco-friendly. You can also choose natural dyes that avoid harmful chemicals. By selecting these materials, you not only make stylish pillow covers but also reduce your environmental impact, making your decor both beautiful and sustainable.
Conclusion
Creating your own decorative pillows is a fun way to personalize your space. Did you know that DIY home décor projects can reduce costs by up to 30% compared to store-bought items? With these 12 ideas, you’re all set to craft stylish, unique pillows that reflect your personality. So grab your supplies and start designing—your perfect pillow is just a project away!