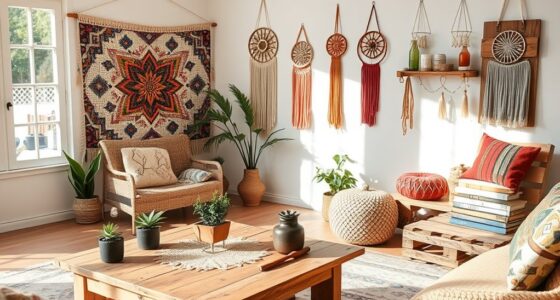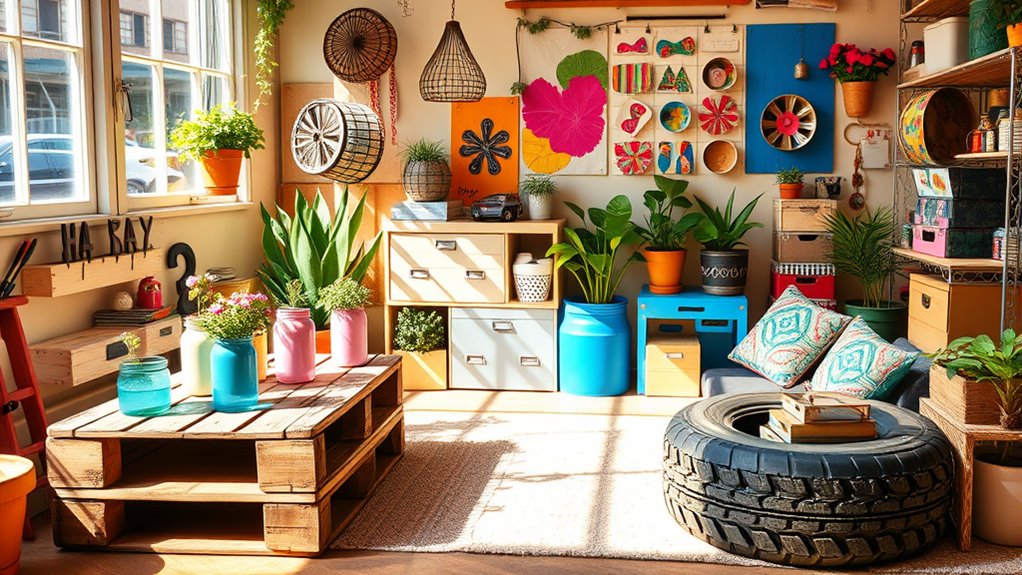

If you’re looking to boost your sustainable living with creative projects, there are plenty of DIY upcycling ideas to try. You can transform tin cans into stylish planters, reuse old T-shirts as shopping bags, and turn pallets into rustic wall shelves. Turning glass jars into candle holders, bicycle parts into jewelry racks, and cardboard boxes into storage solutions are also great options. Keep exploring these ideas, and you’ll discover even more ways to make eco-friendly decor and accessories.
Key Takeaways
- Highlight creative ways to repurpose common household items like cans, pallets, and cardboard for eco-friendly home decor.
- Emphasize upcycling textiles such as old T-shirts into reusable bags and accessories for sustainable fashion.
- Showcase glass jar and bottle transformations into candles, light fixtures, and decorative elements for eco-conscious living.
- Provide practical DIY steps for transforming waste materials into functional storage solutions and wall decor.
- Promote the environmental benefits of upcycling through personalized, budget-friendly projects that reduce waste and promote sustainability.
Transforming Tin Cans Into Stylish Planters
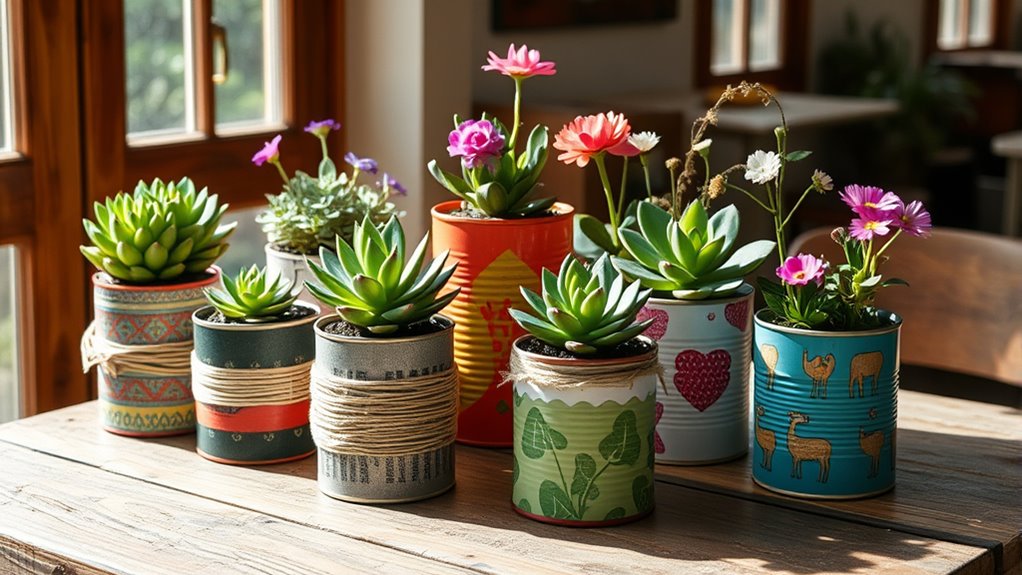
If you’re looking for an easy way to add greenery to your space, transforming tin cans into stylish planters is a fantastic option. Start by cleaning and removing the labels from your cans. Use a hammer and nail to punch drainage holes in the bottom to prevent waterlogging. Incorporate sustainable materials into your planting mix by adding organic compost to support healthy plant growth. Consider choosing eco-friendly paints and tapes for decoration to further enhance the sustainability of your project. Decorate the cans with paint, washi tape, or fabric to match your style. You can also add patterns or personal touches for a unique look. Fill the cans with potting soil and your favorite plants, like herbs or small flowers. Place them on your windowsill, balcony, or porch. This upcycling project not only gives new life to old cans but also creates charming, eco-friendly planters that brighten up any space. Additionally, using payment processing methods can streamline online sales if you decide to sell your crafted planters. Incorporating recycling techniques ensures your project remains environmentally conscious from start to finish.
Repurposing Old T-Shirts as Reusable Shopping Bags
Choosing the right T-shirt is key—you’ll want one that’s sturdy and free of holes. Once you have it, you’ll cut and shape it carefully to form your bag’s body and handles. A strong brand identity can help ensure the quality and durability of your upcycled bag. Additionally, selecting eco-friendly or sustainable fabrics can further enhance your commitment to sustainable living. Using a fabric with good color retention will keep your bag looking vibrant even after multiple washes. Incorporating upcycling techniques can also improve the overall craftsmanship of your reusable shopping bag. Finally, reinforcing the seams and finishing touches will make your reusable shopping bag durable and ready to use.
Choosing the Right T-Shirt
Selecting the right T-shirt is essential for creating a sturdy and functional reusable shopping bag. First, choose a shirt made of thick, durable fabric to withstand weight and frequent use. Second, avoid shirts with holes, tears, or excessive wear, as these can weaken the bag. Third, pick a T-shirt with a simple design, avoiding embellishments that might tear or catch on items. Fourth, opt for a shirt with a straight or slightly tapered fit, as this makes cutting and shaping easier and yields a better bag shape. Additionally, selecting a T-shirt in a classic style can help ensure the bag maintains its shape over time.
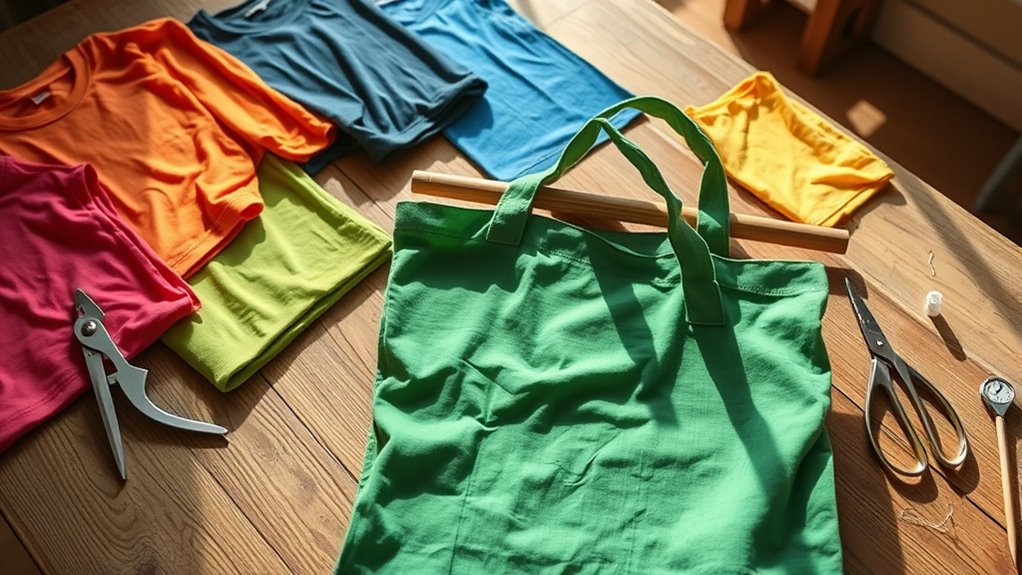
Cutting and Shaping Technique
Once you’ve picked the right T-shirt, the next step is to transform it into a functional shopping bag by cutting and shaping the fabric. Lay the T-shirt flat and smooth out any wrinkles. Cut across the bottom hem to open up the shirt into a large rectangle. Next, decide how deep you want the bag to be, and cut the sleeves off along the shoulder seams. Then, cut straight across the top to create an open edge. To form handles, cut two strips from the remaining fabric, about 1-2 inches wide and as long as you want your handles to be. Be careful to keep the side seams intact, as they’ll help reinforce the bag’s structure. This shaping process is simple but essential for creating a sturdy, reusable shopping bag. Incorporating sustainable materials and upcycling techniques ensures your project promotes eco-friendly living. Using recycled textiles not only reduces waste but also adds unique character to your upcycled items. Additionally, considering mindfulness in your crafting process can enhance your connection to eco-conscious practices and foster a sense of calm and purpose. Engaging in thoughtful crafting can also increase your awareness of the importance of environmental conservation, making your upcycling endeavors even more meaningful. Practicing intentionality in your design choices can further support sustainable living goals.
Reinforcing and Finishing
To guarantee your upcycled T-shirt bag is durable and ready for regular use, reinforce the seams and edges. Strong stitching prevents fraying and tears, ensuring longevity. Proper cookie management helps maintain a smooth browsing experience while customizing your site preferences. You can also add finishing touches for a polished look. Consider these steps:
- Sew double seams along the bag’s sides and bottom for extra strength. Recognizing patterns of emotional coldness in relationships can help identify areas needing reinforcement, much like strengthening a craft project for durability. Incorporating lightweight materials can further enhance ease of carrying and handling. Additionally, understanding legal requirements for upcycling projects can ensure your creations meet safety standards. Being aware of safety standards is crucial to prevent accidents or damage during use.
- Fold and hem the top edge to prevent fraying and improve appearance.
- Attach handles securely with reinforced stitching to support weight.
- Optionally, add a decorative stitch or patch for durability and style.
Turning Pallet Wood Into Rustic Wall Shelves
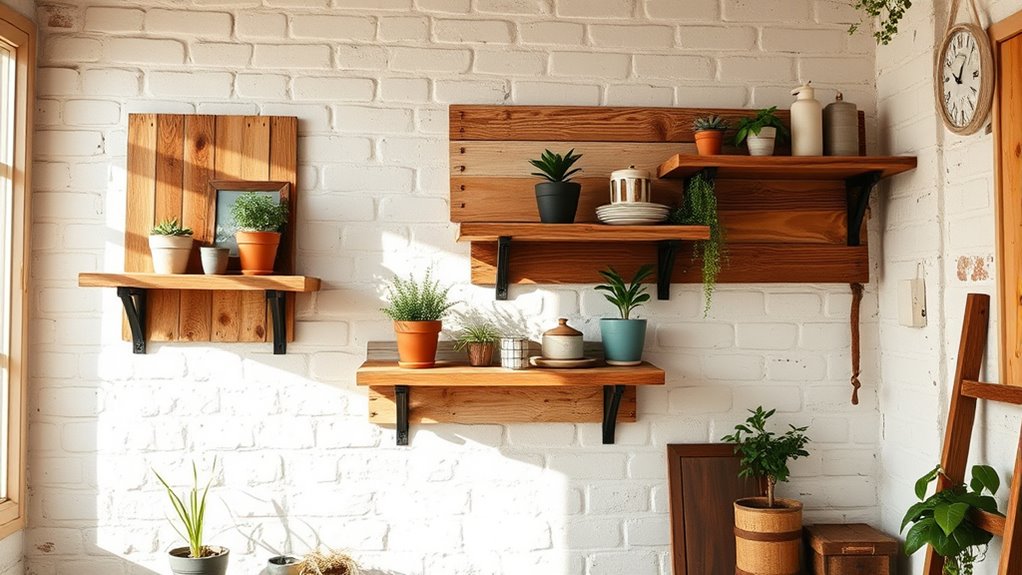
Turning pallet wood into rustic wall shelves is a simple and eco-friendly way to add character to your space. Start by selecting sturdy pallets and removing any nails or staples. Sand the wood to smooth out rough edges and surfaces. This step not only improves safety but also prepares the wood for finishing. Cut the shelves to your desired length, then attach brackets or make floating shelves by securing cleats behind the wood. For a rustic look, leave some wood imperfections and a natural finish. Choose weathered pallets to enhance the rustic aesthetic of your shelves, as weathered wood naturally exhibits unique textures and tones. Hang your shelves using appropriate anchors for your wall type. This project not only recycles wood but also creates functional decor. Additionally, embracing sustainable practices during your DIY project supports a sustainable lifestyle and reduces environmental impact. Below is a quick reference guide:
| Step | Tip |
|---|---|
| 1 | Choose weathered pallets for character |
| 2 | Use natural or light stain for finish |
| 3 | Secure properly for safety |
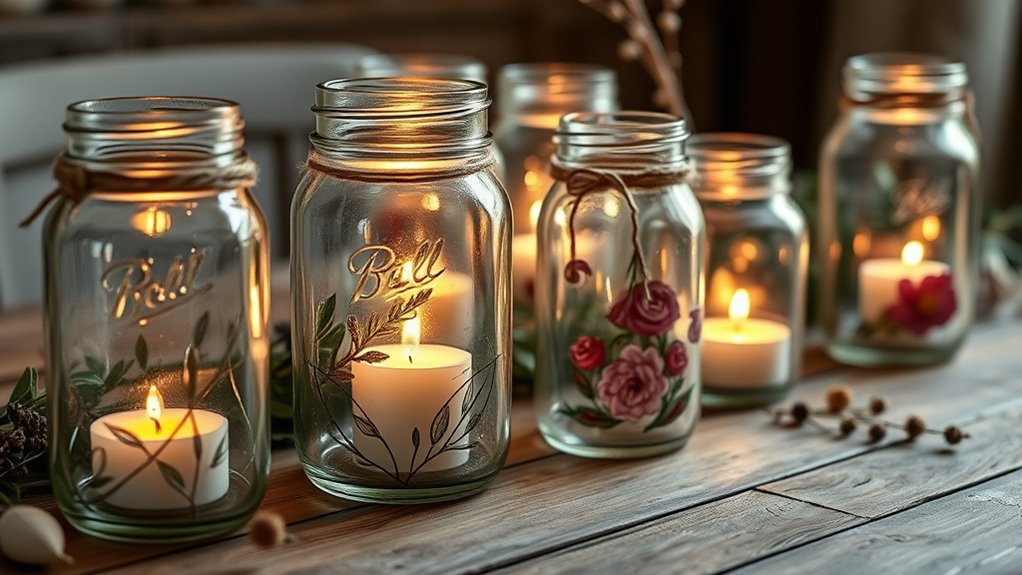
Upcycling Glass Jars Into Elegant Candle Holders
You can transform ordinary glass jars into stunning candle holders by choosing the right jars that fit your style.
Decorating them with paints or other embellishments instantly elevates their look.
Once finished, add candle inserts to create a cozy, elegant ambiance in your space.
Selecting Suitable Jars
Ever wonder what makes a glass jar the perfect candidate for an elegant candle holder? The key is selecting jars that enhance your aesthetic and safety.
First, choose jars with smooth, crack-free surfaces to prevent accidents.
Second, opt for jars with a wide mouth, making it easier to place and remove candles.
Third, consider the height—taller jars create a more sophisticated look, while shorter ones are cozy.
Fourth, pick jars with neutral or clear glass to maximize light and match any decor style.
Avoid jars with labels, cracks, or decorative patterns that could distract from the candle’s glow.
Decorating With Paints
Have you considered how a splash of paint can transform simple glass jars into stunning candle holders? With just a few brushstrokes, you can add color, patterns, or textures that match your decor style.
Use spray paint for a smooth, even finish or try hand-painting for detailed designs. Chalk paint creates a matte, vintage look, while metallics add a touch of elegance.
Before painting, clean the jars thoroughly and apply painter’s tape to achieve crisp lines or patterns. Let each coat dry completely before adding another.
Experiment with color combinations or create ombre effects by blending shades. Decorating with paint allows you to customize your candle holders and give your space a fresh, artistic vibe—all while upcycling materials you already have.
Adding Candle Inserts
Wondering how to turn your painted glass jars into truly functional candle holders? Adding candle inserts makes this simple.
First, pick inserts that fit snugly inside your jars—this guarantees stability and safety. Next, clean the jars thoroughly to remove paint residue or dust.
Then, follow these steps:
- Insert the candle holder or tealight cup securely into the jar.
- Fill the jar with decorative elements like sand, shells, or stones for added style.
- Place a candle inside the insert, ensuring it sits level.
- Light the candle for a cozy, eco-friendly glow.
This method transforms your jars into elegant, reusable candle holders that brighten your space while reducing waste. It’s a smart way to upcycle and add ambiance to any room.
Creating Jewelry Holders From Discarded Bicycle Parts
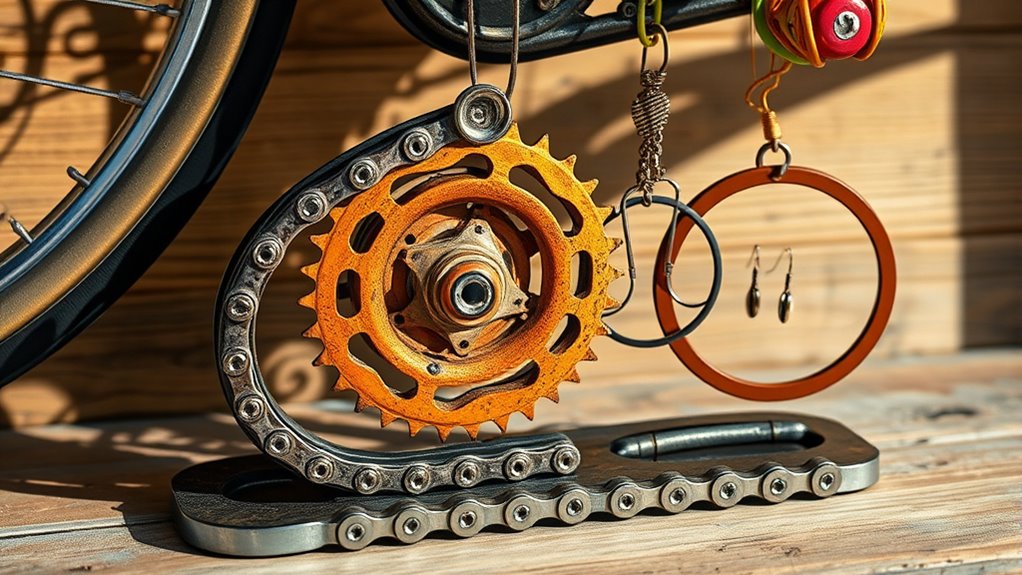
Transforming discarded bicycle parts into jewelry holders is a creative way to repurpose old equipment while adding a unique touch to your space. You can use a bike chain to create a rustic necklace rack by shaping it into a circular or linear design and attaching hooks for earrings and necklaces.
The wheel rims make excellent bases: mount one on the wall and add small hooks or pins to hold rings, bracelets, or earrings. Pedals or gears can serve as decorative accents or stand-alone holders for smaller jewelry pieces.
Spray paint your parts to match your decor, and secure everything with strong adhesives or screws. Not only do you give new life to discarded bicycle components, but you also craft functional art that showcases your eco-friendly spirit.
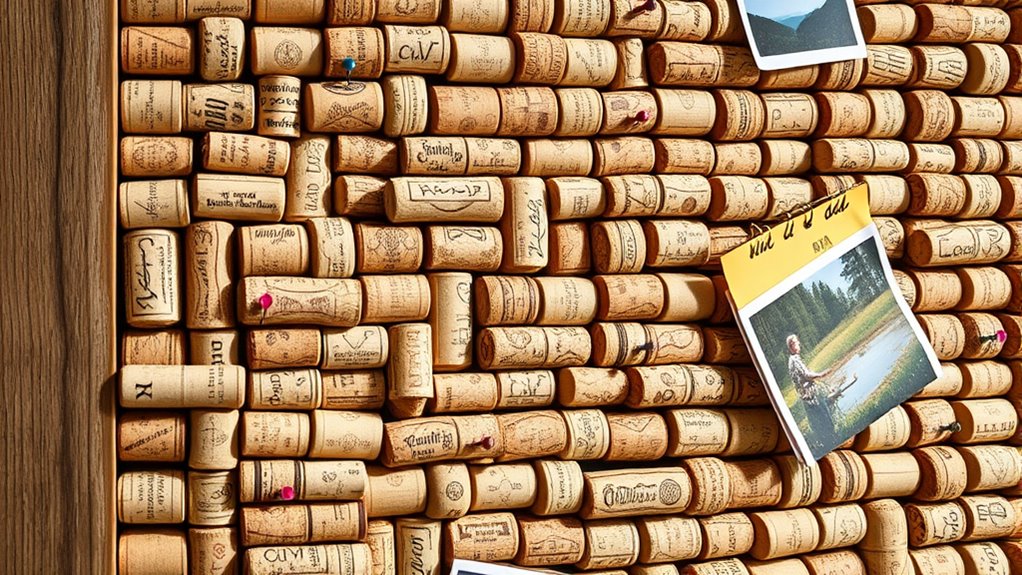
Converting Wine Corks Into Unique Bulletin Boards
Choosing the right corks is key to creating a sturdy bulletin board that suits your style. Once you pick your corks, assembling them into an appealing design is simple with some basic tools.
You can also explore fun ways to incorporate your cork board into your decor to make it both functional and eye-catching.
Cork Selection Tips
Have you ever considered how wine corks can become charming and functional bulletin boards? Choosing the right corks makes all the difference.
First, select corks from wines you’ve enjoyed; this adds sentimental value. Second, look for corks that are firm and free of cracks or damage—these will hold pins better. Third, opt for natural corks over synthetic ones, as they’re sturdier and easier to work with. Fourth, consider corks with printed logos or distinctive markings for a personalized touch.
Keep in mind that uniformity in size helps create a neat, cohesive board. Sorting your corks beforehand saves you time during assembly and guarantees a consistent appearance. With these tips, your upcycled cork bulletin board will be both charming and durable.
Assembly and Design
Wondering how to turn your sorted corks into a functional bulletin board? Start by choosing a sturdy backing, like a piece of reclaimed wood or a thick cardboard panel.
Arrange your corks in the pattern you prefer—horizontal, vertical, or mixed—to create an eye-catching design.
Use a strong adhesive or hot glue to secure each cork firmly in place, pressing down for a few seconds to guarantee good contact.
For added durability, consider framing the corks with a border made from reclaimed materials, such as scrap wood or metal.
Once glued, let the entire piece sit overnight to set completely.
Finally, hang your crafted bulletin board on a wall using appropriate fixtures.
This simple process transforms your corks into a unique, eco-friendly piece of functional decor.
Functional Decor Ideas
Transforming wine corks into a one-of-a-kind bulletin board is a simple way to add functional decor to your space. First, gather a collection of corks and arrange them in your desired pattern on a sturdy backing.
Next, secure the corks with hot glue, ensuring they stay in place. Once dried, you can customize your board further:
- Add a frame for a polished look
- Use pushpins to display notes or photos
- Incorporate decorative elements like ribbons or paint
- Mount your corkboard on a wall for easy access
This DIY project not only recycles corks but also creates a charming, personalized space for reminders or inspiration. It’s an eco-friendly upgrade that combines utility with a touch of creativity.
Making Decorative Vases From Plastic Bottles
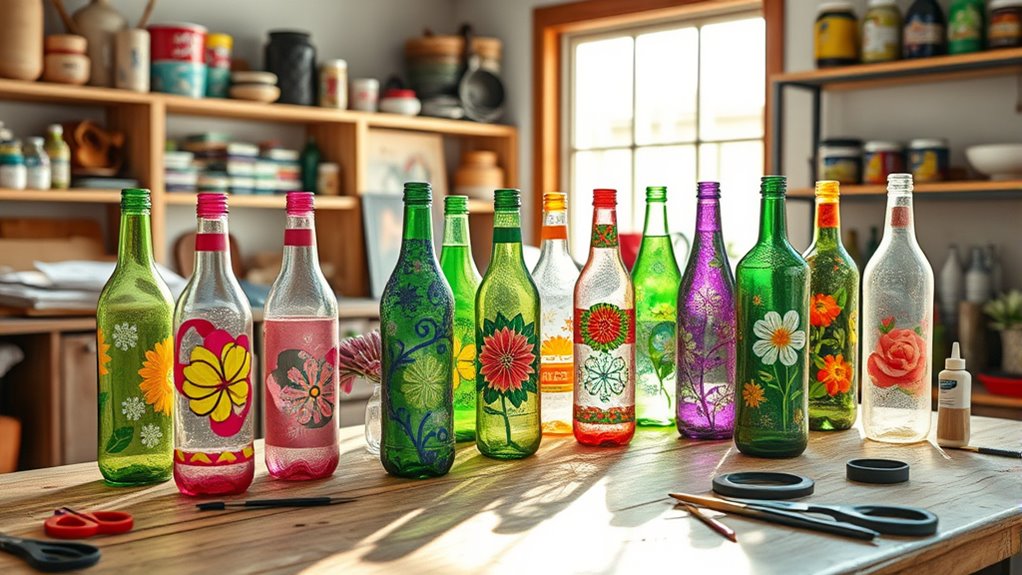
Creating decorative vases from plastic bottles is a simple and eco-friendly way to refresh your home decor. Start by cutting the bottle to your desired height, then clean it thoroughly. You can paint, decorate, or wrap the bottle to match your style. Fill it with fresh flowers or greenery for a lively touch. This project turns waste into art and adds a personal element to your space. Here’s a quick overview:
| Step | Material Needed | Tips |
|---|---|---|
| Cut the bottle | Plastic bottle | Use a sharp knife for clean edges |
| Decorate | Paint, fabric, or washi tape | Get creative with colors and patterns |
| Fill with flowers | Fresh or artificial flowers | Choose arrangements that fit your style |
This upcycled vase is both functional and aesthetically pleasing!
Crafting Chalkboard Signs From Reclaimed Wood

Using reclaimed wood to craft chalkboard signs is an eco-friendly way to add a personalized touch to your home or event decor. First, select a sturdy piece of reclaimed wood, ensuring it’s smooth and free of splinters.
Next, follow these steps:
- Cut the wood to your desired size, using a saw.
- Sand the surface to create a smooth writing area.
- Prime the surface with chalkboard paint for easy writing.
- Attach a hanging mechanism, like twine or hooks, if needed.
This project not only repurposes materials but also allows you to customize signs for weddings, parties, or daily reminders.
The simplicity of the process makes it accessible, while the end result offers a rustic, charming addition to any space.
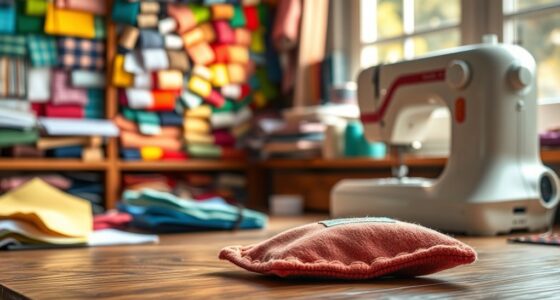
Designing Tote Bags From Scrap Fabric Scraps
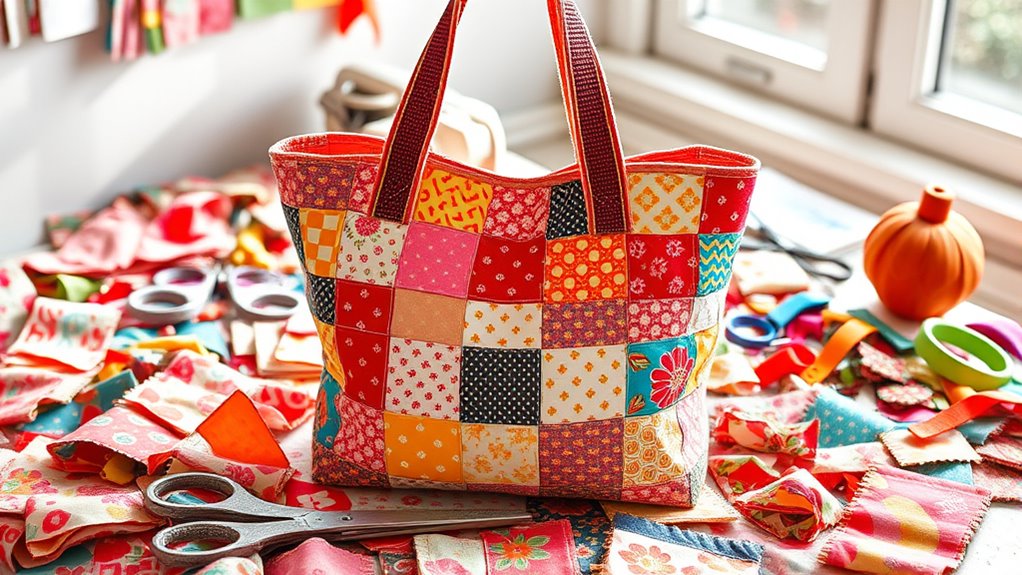
If you have leftover fabric scraps, designing tote bags is a simple and sustainable way to repurpose them. Begin by selecting your scraps, choosing pieces that complement each other or add a fun patchwork effect.
Cut the fabric into two large rectangles for the main body and two strips for handles. Sew the sides and bottom of the main pieces, then fold and sew the top edges to create a clean finish.
Attach the handles securely to the top edges, making sure they’re even. Reinforce the seams for durability.
You can personalize your tote with embroidery, fabric paint, or decorative stitching. This project helps reduce waste and creates a functional bag you can use daily, all while giving new life to your fabric scraps.
Recycling Newspaper Into Decorative Wall Art

Recycling newspaper into decorative wall art is a fantastic way to transform everyday materials into eye-catching decor. You can create unique pieces that brighten your space while reducing waste.
Transform everyday newspapers into vibrant, eco-friendly wall art that brightens your space and reduces waste.
To start, choose colorful or patterned pages for a vibrant look. You might consider these ideas:
- Cut newspapers into geometric shapes and glue them onto a canvas for a modern collage.
- Roll newspaper strips into flowers or rosettes for a textured, 3D effect.
- Arrange and overlap pages in a mosaic pattern for a striking visual.
- Frame large, bold headlines or images for a minimalist, statement piece.
With a little creativity, you turn recycled paper into stunning artwork that’s eco-friendly and personalized. Plus, it’s a budget-friendly way to decorate your home sustainably.
Building Storage Solutions Using Empty Cardboard Boxes

Have you ever considered turning empty cardboard boxes into practical storage solutions? They’re versatile, affordable, and easy to customize. Start by selecting sturdy boxes and reinforce them with packing tape to ensure durability.
You can paint or cover them with fabric or decorative paper to match your decor. Label each box for easy organization, especially if you’re storing different items like books, toys, or seasonal decorations.
Stack and arrange the boxes on shelves or in closets to maximize space. For added stability, secure boxes together with glue or tape.
Not only do you create functional storage, but you also give new life to materials that might otherwise be discarded. With a little creativity, your cardboard boxes can transform into stylish, eco-friendly storage solutions.
Crafting Light Fixtures From Reused Mason Jars
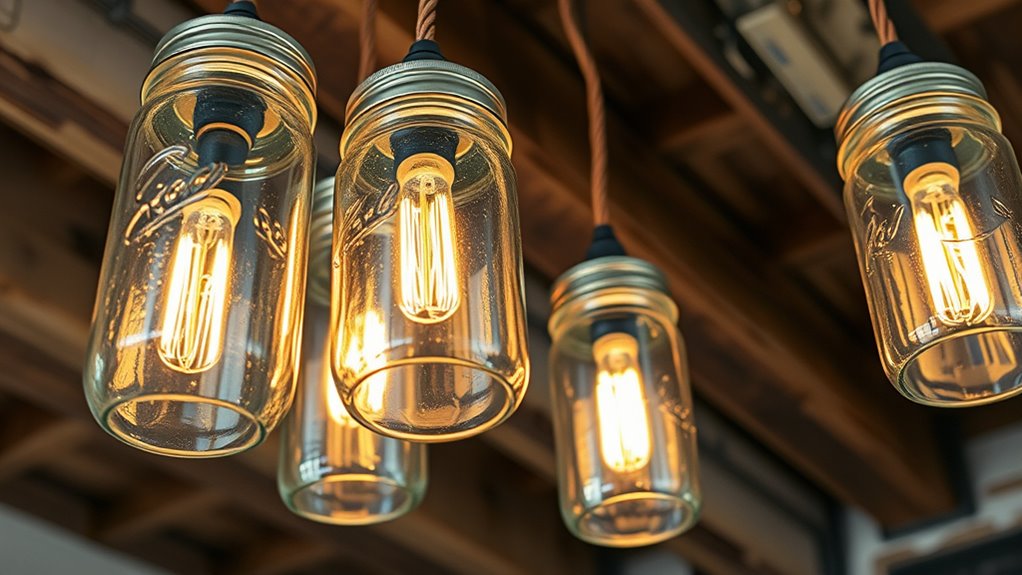
Ever thought about transforming old mason jars into charming light fixtures? It’s a simple way to add rustic charm to your space while repurposing.
First, clean the jars thoroughly and remove any labels.
Start by thoroughly cleaning the jars and peeling off any labels for a fresh look.
Second, drill holes in the lids for wiring and airflow.
Third, choose your light source—string lights or small bulbs work well.
Fourth, connect the wiring, secure the jar to the fixture base, and hang it up.
Mason jars diffuse light beautifully, creating a cozy ambiance.
You can also paint or decorate the jars for a personalized touch.
This project not only reduces waste but also adds a unique, handmade element to your home decor.
With a few tools and some creativity, you’ll craft eye-catching fixtures that are both functional and eco-friendly.
Frequently Asked Questions
What Safety Precautions Should I Take During DIY Upcycling Projects?
When you’re doing DIY upcycling projects, safety should be a top priority. Always wear protective gear like gloves, goggles, and masks to prevent injuries and inhaling fumes.
Work in a well-ventilated area, keep tools organized, and follow instructions carefully.
Avoid rushing, and never use damaged tools. Keeping a first aid kit nearby is smart.
How Can I Ensure My Upcycled Items Are Durable and Long-Lasting?
Like building a ship that can weather storms, you need to focus on quality and proper techniques. Use strong adhesives, sealants, and durable materials suited for your project.
Guarantee joints are secure and finishes are applied smoothly. Follow manufacturer instructions, and don’t rush the process.
Regularly inspect your creations, making repairs as needed, so your upcycled items stand the test of time, just like a well-crafted vessel.
Are There Eco-Friendly Adhesives or Paints Recommended for Upcycling Crafts?
You can choose eco-friendly adhesives like soy-based glues, beeswax, or natural rubber, which are less harmful to the environment and provide strong bonds.
For paints, opt for water-based, low-VOC or zero-VOC options, such as plant-based or mineral-based paints.
Always check labels to verify they’re non-toxic and biodegradable.
Using these eco-friendly products helps protect the planet while making your crafts durable and long-lasting.
How Do I Choose the Right Upcycling Project for My Skill Level?
Imagine finding a cozy nook that perfectly matches your vibe—that’s how you should approach choosing your project.
Consider your experience and the tools you’re comfortable with. If you’re new, start small with simple ideas; if you’re more confident, take on more complex projects.
Trust your instincts and enjoy the process.
Can Upcycled Crafts Be Used for Outdoor or Weather-Resistant Purposes?
Yes, you can create upcycled crafts suitable for outdoor or weather-resistant use. Focus on durable materials like metal, treated wood, or weatherproof fabrics.
Seal or coat your projects with protective finishes to enhance their resistance to rain, sun, and humidity.
You’ll want to choose designs that can withstand outdoor conditions, ensuring your upcycled creations stay functional and attractive over time without quick deterioration.
Conclusion
By trying out these DIY upcycling ideas, you’re not just saving money—you’re giving new life to everyday items and making a positive impact on the planet. It’s a win-win situation; you get creative and eco-friendly solutions all at once. Remember, a little effort can go a long way, and these projects show that when you think outside the box, you can turn trash into treasure. So, roll up your sleeves and start upcycling today!