Explore creative ways to combine fabric, wood, and paper in your crafts, such as making textured wall art, decorative trays, or personalized photo frames. Use bold patterns, rustic finishes, and layered elements to add depth and interest. Incorporate decorative embellishments like stamps, paint, or charms to enhance your designs. With the right techniques, tools, and materials, you can create stunning, one-of-a-kind pieces. Keep exploring to discover more inspiring ideas and straightforward tips to perfect your projects.
Key Takeaways
- Combine fabric, wood, and paper to create textured wall art with layered elements and contrasting materials.
- Use mixed media to craft personalized photo frames featuring fabric accents, wooden borders, and decorative paper.
- Design functional items like jewelry organizers by integrating fabric-lined wooden trays and paper embellishments.
- Make decorative shadow boxes with fabric backgrounds, layered paper cutouts, and stained or sealed wooden accents.
- Create custom greeting cards or tags by combining fabric patches, wooden charms, and layered paper for visual interest.

16 Pieces Stencils for Painting, Abstract Texture Mixed Media Art Supplies Crafts Reusable Layering Stencil Brick Pattern Templates for Drawing Card Making Canvas Furniture Paper (Texture)
Package including: texture stencils for painting include16 pieces craft stencils, and each stencils is measure 5.5 x 8.26…
As an affiliate, we earn on qualifying purchases.
As an affiliate, we earn on qualifying purchases.
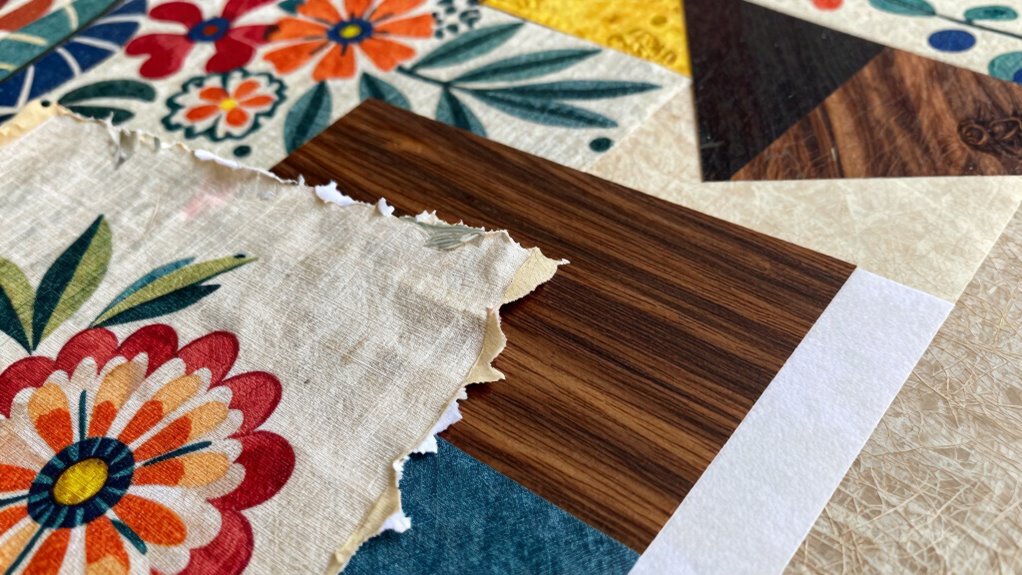
Why Mixing Fabric, Wood, and Paper Creates Unique Textures

Mixing fabric, wood, and paper creates a rich tapestry of textures that instantly catch the eye. This combination offers striking texture contrast, making each element stand out while contributing to a cohesive look. You’ll notice how the softness of fabric complements the roughness of wood and the crispness of paper, creating visual interest. When you blend these materials thoughtfully, you achieve material harmony, where each piece enhances the other’s qualities. The tactile variety invites viewers to explore your craft more closely, adding depth and dimension. This mix also allows for creative freedom, as you can emphasize certain textures or balance them for a unified design. Additionally, understanding the material properties of each element helps ensure durability and proper integration in your projects. Considering sustainable materials can further elevate your work by aligning it with eco-friendly practices. Ultimately, combining fabric, wood, and paper elevates your projects by engaging both the senses and the eye.

K KERNOWO Wood Burning Kit – 156Pcs All-in-One Wood Burning Tool Pen Adjustable Temperature Wood Burner Kit Crafts Gifts for Adults & Teens, Woodburning Kits for Beginner Pyrography
Multi-Craft Pyrography & Design: Go beyond wood! Our premium wood burning kit is the ultimate all-in-one solution for…
As an affiliate, we earn on qualifying purchases.
As an affiliate, we earn on qualifying purchases.
Choosing the Right Materials for Your Craft Projects

When selecting materials for your craft projects, consider how well fabric, wood, and paper work together to guarantee compatibility. Think about their durability and flexibility to match the project’s needs, so your creations last and move as intended. Finally, coordinate your choices visually by balancing textures and colors for an appealing finished piece.
Material Compatibility Tips
Choosing the right materials for your craft projects is essential to guarantee durability and a polished look. To assure compatibility, consider how fabric, wood, and paper interact. Focus on color blending to create harmonious designs, and source materials that match in texture and weight. For example, lightweight paper pairs well with softer fabrics, while sturdy wood supports heavier elements. Use this table to guide your choices:
| Material 1 | Compatible with | Tips for Compatibility |
|---|---|---|
| Fabric | Paper, Wood | Match textures for seamless blending |
| Wood | Fabric, Paper | Seal surfaces to prevent damage |
| Paper | Fabric, Wood | Choose acid-free options for longevity |
Additionally, understanding material compatibility can help prevent issues like warping or tearing over time. Being aware of adhesion techniques can also improve the strength of your mixed-media projects. Paying attention to material properties ensures your project remains stable and visually appealing over time.
Durability and Flexibility
Selecting the right materials is essential to guarantee your craft projects are both durable and flexible enough to withstand handling and movement. When considering fabric, focus on fabric durability—choose sturdy fabrics like canvas or denim for strength and longevity. For wood, prioritize wood flexibility; thinner, pliable woods like balsa or basswood bend easily without cracking, making them ideal for shaping. Combining these materials requires balancing their strengths: use durable fabrics that won’t tear easily, and flexible wood that can be manipulated without breaking. Properly selecting and pairing these materials ensures your project remains resilient over time while maintaining the flexibility needed for intricate designs or functional features. This approach helps your craft stand up to regular use while keeping it easy to work with.
Aesthetic Coordination Strategies
To create visually appealing craft projects, you need to carefully coordinate your materials to achieve a cohesive look. Focus on color contrast to make each element stand out, balancing bold hues with softer shades. This contrast adds visual interest and guides the viewer’s eye across your piece. Simultaneously, consider pattern harmony—mixing patterns that complement each other rather than clash. For example, pairing a subtle floral fabric with a simple geometric paper design creates a balanced, unified appearance. Keep your color palette consistent or intentionally varied to enhance harmony. By thoughtfully selecting materials based on color contrast and pattern harmony, you guarantee your project looks intentional and polished, making every element work together seamlessly.

NAHARO Modern Textured Artwork- Natural wood Handcrafted Rustic Charm for Your Home – Perfect for Living Room, Bedroom,Kitchen,or Office
🌟 Modern Textured Elegance:Crafted from high-quality plaster, this 3D wall art features a stunning abstract relief design that…
As an affiliate, we earn on qualifying purchases.
As an affiliate, we earn on qualifying purchases.
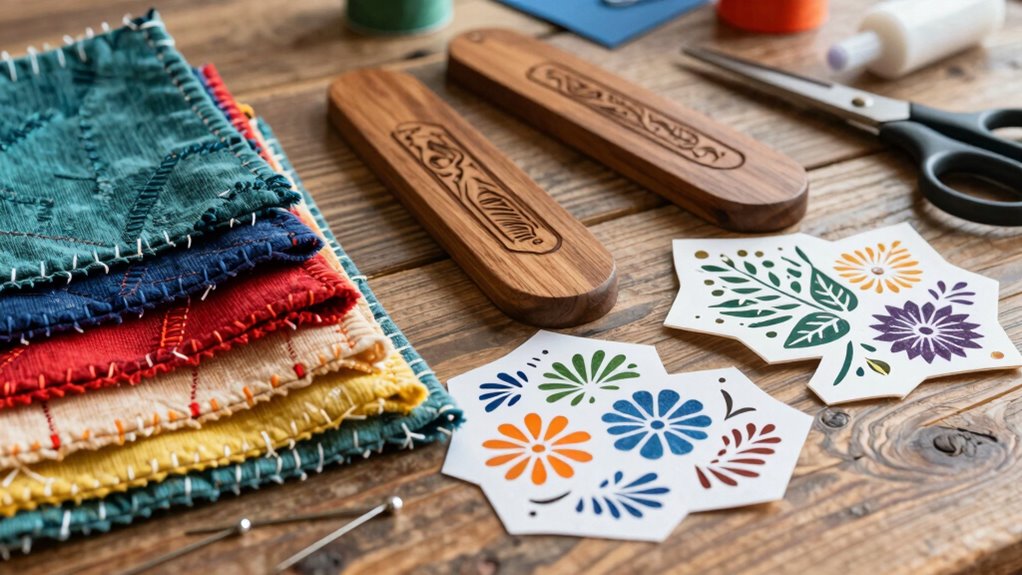
Essential Tools and Supplies for Mixing Fabric, Wood, and Paper

Mixing fabric, wood, and paper requires a well-stocked toolkit to guarantee your projects come together smoothly. You’ll need basic supplies like scissors, glue, and cutting mats, but also specialized tools. Textile innovations, such as fabric adhesives and seam rollers, help secure fabric without damaging it. For working with wood, a set of chisels and wooden carving tools are essential for shaping and detailing. Precision rulers and craft knives ensure clean cuts across all materials. Don’t forget to have clamps and tacks on hand to hold pieces together during assembly. A variety of brushes and paint supplies also come in handy for finishing touches, especially when adding decorative elements. Incorporating 3D scanning techniques can help you accurately replicate complex shapes and patterns, enhancing your mixed-media projects. Additionally, understanding material compatibility is crucial for ensuring that different mediums bond properly and last over time. With these tools, you’ll be ready to create seamless, innovative mixed-media crafts.
Swpeet 40Pcs Pendant Picture Frame Keyrings, Make Your Own Keyring Kit, Keychain Central Photo Frame Pendant for Kids to Assemble and Attach to Key Rings and Bags
1, 【 What You Get 】 —— In this kit, You will get 40Pcs Pendant Picture Frame Keyrings…
As an affiliate, we earn on qualifying purchases.
As an affiliate, we earn on qualifying purchases.
Preparing Materials for Seamless Integration
Before assembling your mixed-media project, preparing your materials guarantees everything comes together smoothly. Start by selecting fabrics, paper, and wood pieces that complement each other through thoughtful pattern matching. Look for patterns or textures that coordinate, making sure they don’t clash visually. For color blending, choose hues that harmonize or create intentional contrast to add interest. Trim your materials precisely to fit your design, and consider test-assembling parts before final attachment. Smooth out wrinkles in fabric and ensure paper pieces are flat. Sand or treat wood surfaces if needed for better adhesion. By carefully preparing your materials with attention to pattern matching and color blending, you set a solid foundation for a cohesive, professional-looking finished piece. Incorporating material compatibility can further enhance the durability and visual harmony of your project. Paying close attention to surface preparation ensures that all elements adhere properly and last longer over time.
How to Combine Fabric, Wood, and Paper in Mixed-Media Art
To create cohesive mixed-media art, start by choosing fabric, wood, and paper that complement each other in color and texture. Use layering techniques to build depth and interest, ensuring each element enhances the overall design. Don’t forget to seal and protect your work to keep everything intact and lasting. Incorporating embroidery techniques can add intricate details and elevate the overall craftsmanship of your project. Additionally, selecting appropriate adhesives can ensure your materials stay securely in place throughout the creative process.
Selecting Complementary Materials
Choosing complementary materials is essential for creating cohesive mixed-media art that seamlessly integrates fabric, wood, and paper. To do this, consider color theory to select hues that harmonize or contrast effectively, enhancing visual interest. Draw inspiration from history to incorporate textures, patterns, or themes that evoke a specific era or style. Use the table below to guide your choices:
| Fabric | Wood | Paper |
|---|---|---|
| Soft pastels | Rustic finishes | Vintage ephemera |
| Brights | Polished surfaces | Printed patterns |
| Neutral tones | Weathered look | Handmade paper |
| Textured fabrics | Dark stains | Metallic accents |
| Bold prints | Light woods | Minimalist designs |
This approach guarantees your materials work together, creating a unified and compelling piece.
Layering Techniques Effectively
Once you’ve selected materials that work well together, the next step is mastering how to layer them effectively. Start by arranging your fabric, wood, and paper to create visual balance, considering textile patterns that complement each other. Use varying thicknesses and textures to add depth, placing lighter paper or fabric on top of heavier wood pieces. When layering, think about material sourcing—choose elements that naturally fit together and avoid overcrowding. Secure each layer carefully, allowing enough space to showcase individual textures and patterns. Remember, strategic layering highlights contrast and harmony, making your mixed-media piece more dynamic. Experiment with overlapping elements to find a pleasing composition, and don’t be afraid to adjust layers as you go for the best visual effect. Additionally, understanding layering techniques can help you create more cohesive and visually appealing projects.
Sealing and Protecting Work
Sealing and protecting your mixed-media piece is essential to guarantee its longevity and preserve the textures and patterns you’ve combined. Applying a clear sealant ensures that fabric dyeing, wood staining, and paper elements stay intact over time. Use a spray or brush-on acrylic varnish for a durable finish. Before sealing, test on small sections to prevent damage. Consider the following factors:
| Material | Recommended Sealer | Notes |
|---|---|---|
| Fabric | Fabric medium sealant | Preserves dyeing and softness |
| Wood | Oil-based polyurethane | Protects stained wood |
| Paper | Matte acrylic spray | Prevents smudging and fading |
| Mixed elements | Clear epoxy resin | Creates a glossy, durable topcoat |
| Overall protection | UV-resistant sealer | Prevents fading from sunlight |
Choosing the right sealer depends on your materials and desired finish. Additionally, understanding the sealing process helps ensure your artwork remains vibrant and intact over time.
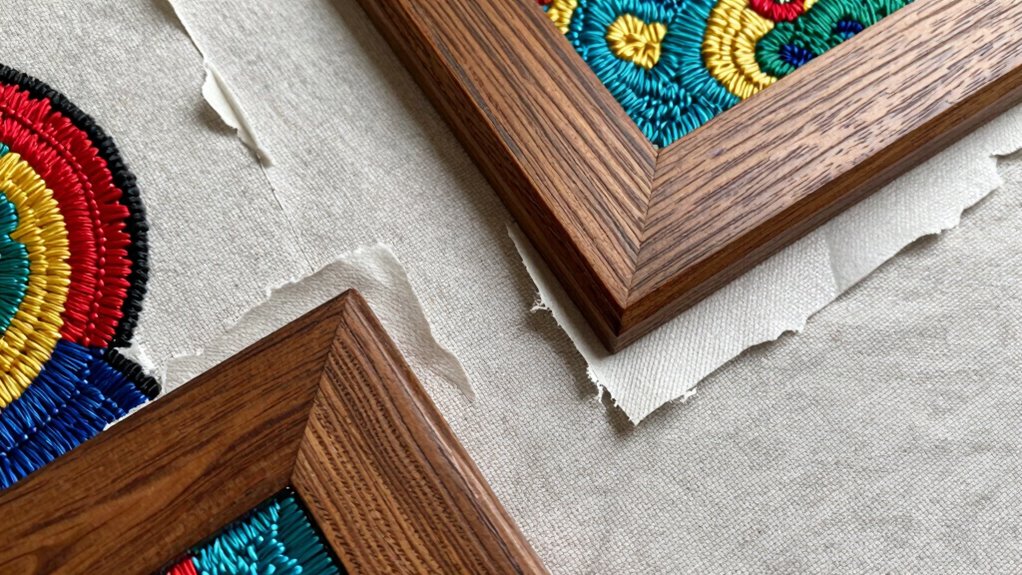
Creating a Mixed-Media Wall Art With Fabric, Wood, and Paper

Creating a mixed-media wall art piece that combines fabric, wood, and paper allows you to craft a visually striking and textured display. Start by selecting fabric with bold textile patterns to add vibrant color and visual interest. Incorporate wooden finishes, such as stained or natural wood pieces, to bring warmth and contrast to the artwork. Layer paper elements, like cutouts or painted designs, to introduce depth and detail. Mix and match textures—smooth fabric against rough wood—to create tactile appeal. Arrange your materials thoughtfully, ensuring each element complements the others. Use adhesives suitable for all surfaces to secure your pieces firmly. The result will be a dynamic, multi-dimensional piece that showcases your creativity through a harmonious blend of fabric, wood, and paper.
How to Make a Personalized Photo Frame With Fabric and Wooden Accents

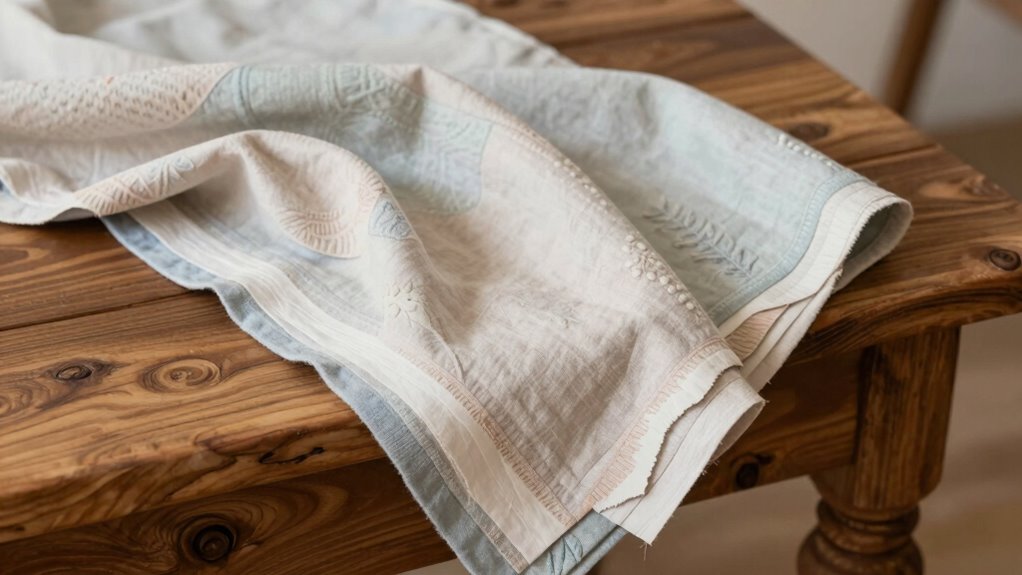
Making a personalized photo frame with fabric and wooden accents is a fun way to showcase your memories while adding a touch of craftiness to your decor. Start by choosing a sturdy wooden frame and sanding it smooth to highlight its natural textures. Wrap the frame with fabric featuring appealing textile patterns, ensuring the fabric is tight and secure. You can use hot glue or a strong adhesive to attach the fabric neatly around the edges. For added visual interest, select fabric with bold or subtle textile patterns that complement your photo. To enhance the wooden textures, consider staining or sealing the wood, or leave it natural for a rustic look. Finish by inserting your favorite photo, and you’ve got a unique, handcrafted frame that blends fabric, wood, and personal style seamlessly.
Crafting a Textured Notebook Cover With Layers of Paper, Fabric, and Wood
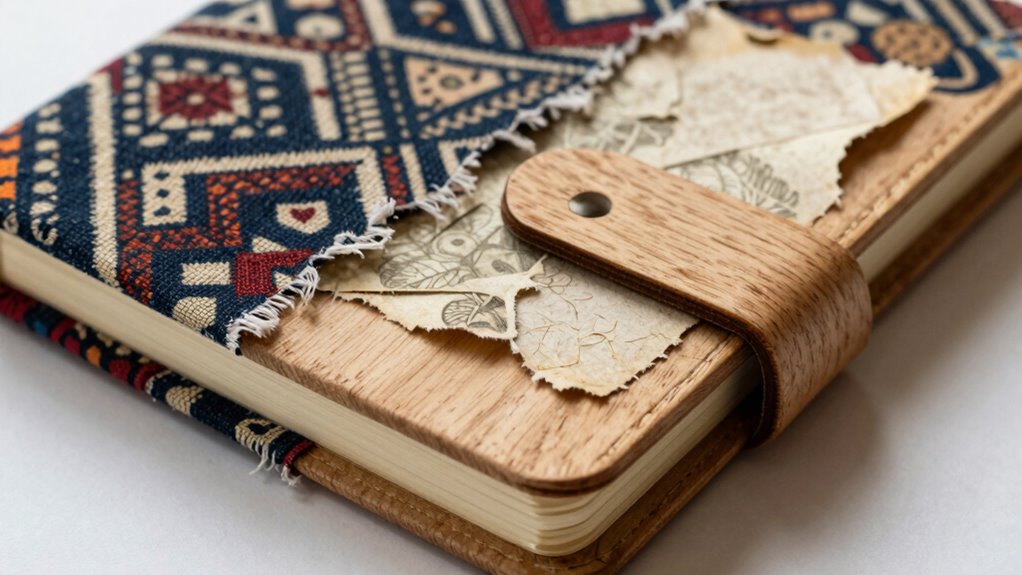
Start by choosing textured materials like patterned paper, fabric with a tactile feel, and small wooden accents to add depth. Next, layer these elements thoughtfully, ensuring each piece is secured firmly for a balanced, dimensional look. To enhance stability, consider adhesive techniques that provide both durability and a seamless finish. Using the right adhesives can also help in achieving a professional-looking result that holds up over time. Additionally, selecting the appropriate adhesive type can make a significant difference in how well your layers adhere and withstand handling. Incorporating historical craft methods can inspire more authentic textures and finishes in your project. Exploring metaphysical concepts related to materials can also add a unique spiritual dimension to your crafting process. Finally, finish with secure adhesives and subtle touches to keep everything in place and enhance the overall texture.
Selecting Textured Materials
Choosing the right textured materials is essential for adding depth and visual interest to your notebook cover. Look for textured patterns that create a tactile experience and catch the eye. Material contrast is key—pair smooth fabrics with rough wood or embossed paper to highlight different textures. Consider natural textures like burlap, linen, or cork for fabric, and rough-hewn wood or distressed paper for added dimension. Mixing glossy surfaces with matte finishes also enhances visual interest. When selecting materials, think about how each piece will interact and complement one another. The goal is to create a layered, dynamic look that invites touch and exploration. By carefully choosing textured patterns and contrasting materials, you’ll craft a cover that’s both visually appealing and richly textured. Paying attention to Material contrast can significantly elevate your project’s overall aesthetic and tactile appeal. Incorporating textured patterns thoughtfully will help create a visually engaging and tactilely satisfying finished piece. Additionally, considering how different textures respond to light and shadow can further enhance the visual depth of your design.
Layering Techniques Overview
Have you ever wondered how to give your notebook cover a rich, layered look? Start by arranging your paper, fabric, and wood pieces in a way that highlights their textures. Use layering techniques to add depth and interest, ensuring each layer supports the next. For textile durability, choose sturdy fabrics and secure them firmly to prevent fraying. Incorporate wooden pieces with flexibility in mind—thin, flexible wood allows for easier layering without cracking. Overlap materials slightly to create visual interest, and vary the orientation for a more dynamic feel. Be mindful of the balance between materials, so no single element overwhelms the others. This approach results in a textured, cohesive cover that combines the tactile qualities of wood’s flexibility with fabric’s durability. layering techniques can be further enhanced by understanding how different materials interact when layered, ensuring a harmonious and durable design. Additionally, paying attention to workshop equipment can help you achieve cleaner cuts and more precise placement of each layer.
Securing and Finishing Touches
Once you’ve arranged your layers, the next step is to secure everything firmly in place. Use a strong adhesive suited for fabric, paper, and wood to guarantee durability. As you work, consider color coordination to create a cohesive look—choose complementary or contrasting hues for visual interest. When sourcing materials, opt for high-quality adhesives and find your supplies from reliable stores or online shops to guarantee consistent results. For finishing touches, trim any excess material carefully and smooth out surfaces to avoid bumps. You might also add decorative elements like stamps or paint for extra texture. Properly securing each layer and paying attention to color harmony enhances the notebook’s aesthetic and longevity, giving your textured cover a professional, polished appearance.
Making Decorative Greeting Cards With Fabric Patches and Wooden Details

Creating decorative greeting cards becomes more personal and textured when you incorporate fabric patches and wooden details. You can add depth by choosing fabric textures that complement your theme, like soft felt or linen. Wooden accents, such as tiny tags or cutouts, bring a natural, rustic feel. To enhance your design, consider these ideas:
- Attach fabric patches using a strong adhesive or sewing for added dimension
- Incorporate wooden elements like small shapes or personalized tags
- Experiment with layering fabric and wood to create a tactile experience
- Incorporate muscle recovery techniques to keep your hands steady and precise while working on detailed elements
These elements not only make your cards visually appealing but also add a sensory touch that recipients will appreciate. Combining fabric textures with wooden accents creates a unique, handcrafted look perfect for any occasion.
Building a Rustic Jewelry Holder With Wooden Base and Fabric Linings

Building a rustic jewelry holder is a rewarding project that combines natural wood with soft fabric linings to keep your accessories organized and stylish. Use color theory principles to choose fabrics that complement the warm tones of the wood, creating a cozy vintage-inspired look. For example, muted pastels or earthy hues work well for a timeless feel, while bold patterns add a touch of personality. Attach fabric to the wooden base with glue or staples, lining sections for necklaces and bracelets. Incorporate vintage inspirations by selecting fabrics with floral or lace patterns, enhancing the nostalgic charm. This blend of materials not only organizes your jewelry but also adds a handcrafted, artistic touch to your space, making your jewelry holder both functional and beautiful.
Designing a Shadow Box Using Fabric Backdrops, Wooden Frames, and Paper Cutouts

Choosing the right fabric backdrop sets the tone for your shadow box, so consider colors and textures that complement your theme. Crafting paper cutouts allows you to add personal and detailed accents that bring your design to life. Once you have these elements, assembling your shadow box becomes an engaging process of layering and arrangement.
Selecting Fabric Backdrops
Selecting the right fabric backdrop is essential to setting the tone and mood of your shadow box. It influences how your other elements—wooden frames and paper cutouts—stand out. Focus on pattern mixing carefully; choose fabrics with complementary designs to add visual interest without overwhelming your display. Color coordination is equally important; pick hues that harmonize or create striking contrast, depending on your desired effect. For a cohesive look, stick to a color palette that matches or enhances your paper and wood accents. Consider textured fabrics to add depth, but avoid overly busy patterns that distract from your focal elements. Ultimately, your fabric backdrop should serve as a beautiful foundation that highlights your creative details.
Crafting Paper Cutouts
Have you ever considered how paper cutouts can bring your shadow box to life? Start by choosing paper with vibrant colors or intricate designs that complement your fabric patterns and wooden frame. Use scissors or craft knives to create detailed shapes or silhouettes that fit your theme. Layer your cutouts for depth, attaching them with glue or double-sided tape. Incorporate various wood finishes on your frame to enhance the overall look—smooth, matte, or glossy finishes add different textures. Be mindful of how the paper and fabric interact, ensuring they don’t overwhelm each other. Carefully plan your layout before gluing everything in place, so your paper cutouts add a striking visual element that ties all the materials together seamlessly.
Making a Whimsical Mobile With Wooden, Fabric, and Paper Elements

Ever wondered how to create a whimsical mobile that combines the charm of wood, fabric, and paper? Start by selecting lightweight wooden shapes and carving them with intricate designs for added texture. Use fabric dyeing techniques to color your fabric pieces, creating vibrant or subtle hues that complement your wooden elements. Incorporate paper cutouts or folded shapes for movement and visual interest. Hang your components with thin, durable strings, adjusting lengths for a balanced look. To enhance the design, carve details into the wood or dye fabric for unique patterns. This mix of natural textures and colors results in a lively, artistic mobile that captures whimsy and craftsmanship. Experiment with different fabric dyes and wooden carving styles to personalize your creation.
Incorporating Fabric and Paper Into Wooden Home Decor Pieces
Building on the playful mobile concept, incorporating fabric and paper into wooden home decor pieces adds layers of texture and visual interest to your space. You can enhance wooden finishes by attaching fabric panels with vibrant textile patterns, creating a tactile contrast that draws the eye. Use decorative paper, like patterned scrapbook sheets or embossed designs, to accent or fill in gaps on wooden frames or plaques. Glued or wrapped fabric can soften sharp edges, while paper embellishments bring a pop of color or intricate detail. Mix and match textile patterns with the natural grain of wood to develop a cohesive look. These elements elevate simple wooden decor, making each piece a unique blend of materials that reflects your personal style and adds warmth to your home.
How to Make a Fabric-Covered Wooden Box for Storage

To create a beautiful fabric-covered wooden box, you need to choose the right materials that suit your style and purpose. Once you have your fabric and wood, you’ll want to attach the fabric securely to guarantee a smooth, professional finish. We’ll walk through the best techniques for selecting materials and fastening the fabric tightly so your project lasts.
Selecting Suitable Materials
Choosing the right materials is essential to creating a durable and attractive fabric-covered wooden box. You need to focus on material sourcing to guarantee quality and consistency. Pick a sturdy, smooth wood for the base, like plywood or pine, that can handle the fabric’s tension. For the fabric, select a material with good durability and appealing color coordination to match your decor. Confirm the fabric is easy to work with, such as cotton or linen.
- Use contrasting or complementary fabric patterns to enhance visual appeal
- Select a wood finish that complements your fabric choice
- Choose adhesives suitable for both fabric and wood to ensure secure attachment
Attaching Fabric Securely
Once you’ve selected the right fabric and wood, attaching the fabric securely is the next step. Start by smoothing the fabric over the wooden surface, guaranteeing there are no wrinkles. Use sewing techniques like sewing a simple zigzag stitch along the edges if you prefer a decorative finish, or opt for fabric adhesives for a quicker, cleaner look. Fabric adhesives work well for attaching fabric to flat surfaces; apply a thin, even layer and press firmly. For corners or edges, fold the fabric neatly and secure with a combination of fabric glue and small stitches if needed. Always allow the adhesive to dry completely before handling the box. This approach guarantees your fabric stays smooth and securely attached, giving your storage box a polished, professional appearance.
Crafting a Mixed-Media Scrapbook With Fabric Pages, Wooden Embellishments, and Paper Tags
Creating a mixed-media scrapbook allows you to blend textures and materials for a truly personalized keepsake. To start, dye your fabric pages with vibrant fabric dyes to add color and interest. Use wooden stains to enhance wooden embellishments, giving them a rich, aged look that complements the fabric. Incorporate paper tags with handwritten notes or decorative stamps for a layered effect.
- Experiment with fabric dyes for unique, vibrant backgrounds
- Use wooden stains to create rustic wooden embellishments
- Attach paper tags with mixed media techniques for added depth
Mixing fabric, wood, and paper creates a dynamic visual texture and tactile experience. This approach guarantees your scrapbook is a one-of-a-kind piece, full of personality and charm.
Creating Textile-Inspired Wooden Coasters With Paper Accents

Start by choosing fabric patterns that complement your wooden coasters and match your style. Next, assemble your wooden bases, ensuring they’re smooth and ready for decoration. Adding paper accents will give your coasters a unique, textured finish that ties everything together.
Choosing Fabric Patterns
Choosing the right fabric patterns can considerably enhance the visual appeal of your wooden coasters, especially when paired with paper accents. When selecting textile patterns, focus on creating a striking material contrast that highlights both textures. Bold, geometric designs can add modern flair, while softer floral or paisley patterns bring a charming, vintage vibe. Keep in mind that smaller patterns work well for detailed accents, whereas larger motifs make a stronger statement. Balancing these patterns with the natural grain of wood adds depth and interest to your project. Remember, the goal is to create harmony between fabric and paper, ensuring that each element complements the other without competing for attention. Thoughtful pattern choices elevate the overall aesthetic and make your coasters truly unique.
Assembling Wooden Bases
Once you’ve selected the fabric patterns that will bring your coaster design to life, it’s time to assemble the wooden bases. Focus on seasonal themes and color coordination to unify your project. Sand the wooden surface smooth, then cut your fabric to fit, leaving a small margin. Use a strong adhesive to attach the fabric securely. For added visual interest, incorporate paper accents that complement the seasonal or color scheme.
| Step | Action |
|---|---|
| 1 | Sand the wooden base |
| 2 | Cut fabric to size |
| 3 | Glue fabric onto wood |
| 4 | Add paper accents for detail |
This approach guarantees a cohesive, eye-catching finish that highlights your textile and paper accents while celebrating seasonal themes.
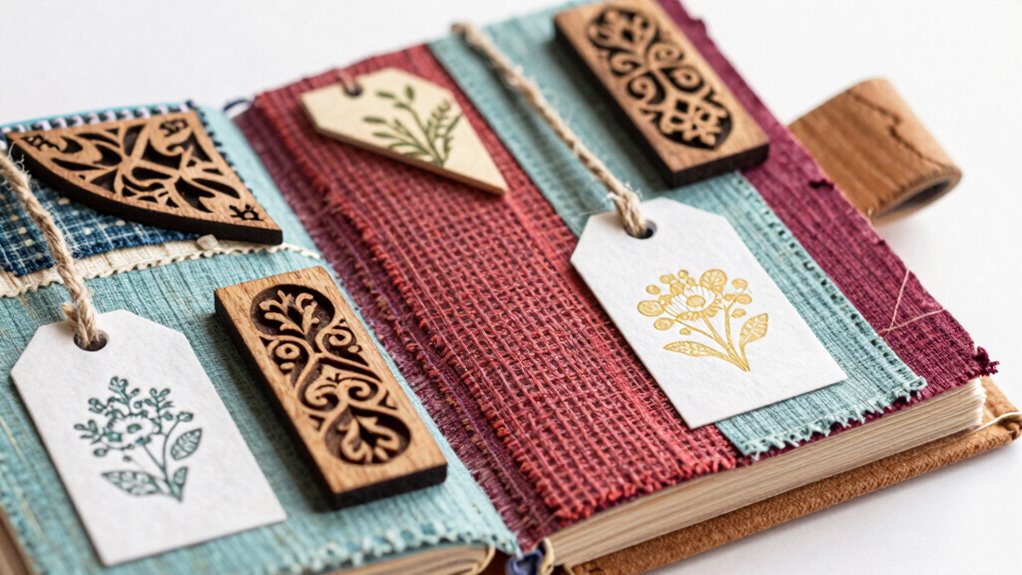
Designing Gift Tags With Fabric Ribbons, Wooden Charms, and Paper Labels

Creating personalized gift tags is a delightful way to add a special touch to your presents, and incorporating fabric ribbons, wooden charms, and paper labels makes each tag unique. Start by choosing fabric patterns that complement your gift’s theme, whether floral, geometric, or solid. Use wooden textures for the charms to add a natural, rustic feel. Attach fabric ribbons to the paper labels, tying them into bows or knots for a polished look. Incorporate wooden charms with engraved messages or decorative shapes for extra charm. To enhance the design, consider layering fabric, wood, and paper elements for visual interest. This combination allows you to craft tags that are both charming and personalized, perfect for any occasion.
- Select fabric patterns that match your gift’s theme
- Use wooden textures for charms to add warmth
- Layer materials for a unique, tactile experience
Building a Functional Plant Stand With Fabric and Paper Decor
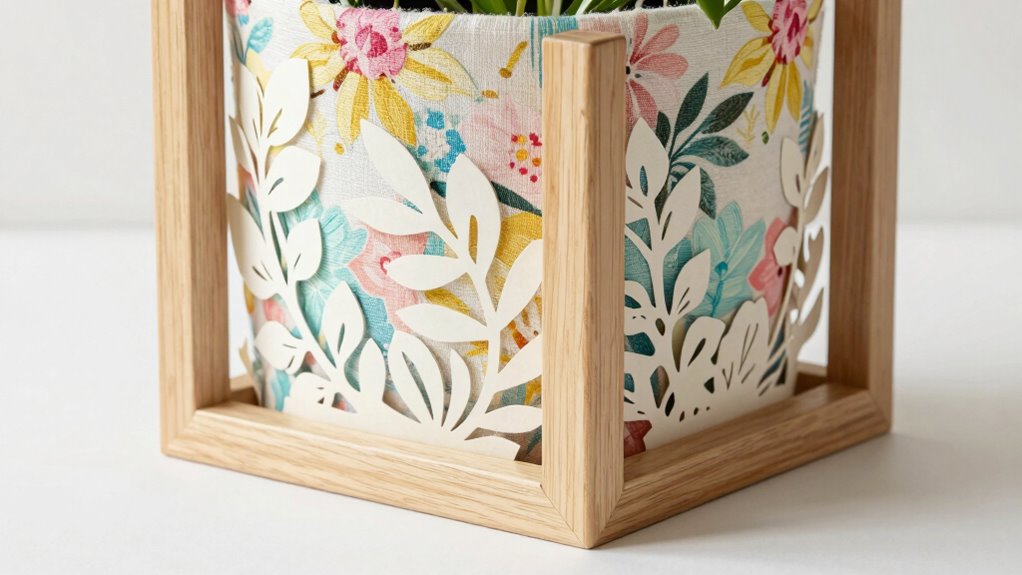
Building a functional plant stand that also serves as decorative art offers a great way to showcase your greenery while adding style to your space. Start with a sturdy wooden frame, choosing wood textures that complement your decor—smooth, distressed, or rustic. Wrap or adorn the stand with fabric patterns like floral, geometric, or solid colors to introduce softness and visual interest. Use fabric to create decorative panels or drapes that hang around the stand, adding a layered look. Incorporate paper accents, such as crafted paper flowers or decorative labels, to enhance the design. This combination of wood textures, vibrant fabric patterns, and paper details results in a unique, eye-catching piece that balances functionality with artistic flair.
Making a Custom Headboard With Fabric Upholstery and Wooden Frame

A custom headboard can instantly elevate your bedroom’s style, and crafting one with a wooden frame and fabric upholstery allows you to personalize your space. Choose fabric patterns that match your decor, whether bold prints or subtle textures, to create a focal point. When selecting the wood, consider different stains to enhance the natural grain or match existing furniture. Sand the wooden frame smoothly before applying stains for an even finish. Upholster the headboard with your chosen fabric, ensuring it’s tightly wrapped and secured for a sleek look. You can even add decorative staples or buttons for extra flair.
- Pick fabric patterns that complement your room’s theme
- Experiment with various wooden stains for warmth or contrast
- Use padding for extra comfort and a plush appearance
Creative Ideas for Table Centerpieces Using Fabric, Wood, and Paper

Transforming everyday materials into eye-catching table centerpieces can add a unique touch to any event or gathering. Start by combining fabric with bold textile patterns that complement your theme. Use wooden finishes to add warmth and elegance—perhaps a carved wooden base or a polished wooden tray. Wrap fabric around small wooden blocks or vases for a layered look, creating visual interest through contrasting textures. Incorporate paper elements such as origami flowers or decorative paper cutouts to bring delicate detail. Arrange these components thoughtfully for a balanced display, mixing fabric drapes with wooden accents and paper embellishments. The combination of textile patterns, wooden finishes, and paper detail results in a stunning, handcrafted centerpiece that’s both stylish and personalized.
Making a Cozy Fabric and Paper Wall Hanging With Wooden Supports

Ever wondered how to create a cozy, handcrafted wall hanging that combines fabric, paper, and wood? Start by selecting textile patterns that complement each other and match your decor. Use wooden supports with smooth finishes to add warmth and structure. To assemble, cut fabric and paper into shapes or strips, then attach them to the wooden supports with glue or small nails. Layer different textures for visual interest and mix patterns for a dynamic look. Consider staining or sealing the wooden supports to enhance their natural finishes and protect them over time. Keep the design balanced by spacing elements evenly. This project results in a charming piece that blends textiles, paper, and wood seamlessly, perfect for adding a cozy touch to any space.
Crafting a Decorative Tray With Wooden Base, Fabric Linings, and Paper Decor

Creating a decorative tray that combines a wooden base with fabric linings and paper accents is a straightforward way to add personalized charm to your space. Start by selecting a sturdy wooden tray or craft your own through wood carving, adding unique details. Next, dye your fabric lining with fabric dyeing techniques to match your decor; you can achieve subtle gradients or bold colors. Secure the fabric to the tray’s base, ensuring smooth coverage. For added flair, cut decorative paper into shapes or patterns and glue onto the fabric or wood surface. This mix of materials creates visual interest and texture. The combination of wood carving details, vibrant fabric, and intricate paper accents makes your tray a functional and artistic piece.
How to Finish and Seal Your Mixed-Media Fabric, Wood, and Paper Projects
Finishing and sealing your mixed-media fabric, wood, and paper projects is essential to guarantee durability and preserve their visual appeal. Proper sealing protects against moisture, dirt, and wear while enhancing color blending and texture contrast. To achieve the best results, consider these steps:
- Apply a clear, matte or gloss sealant to unify the different surfaces and create a smooth finish.
- Use a brush or spray for even coverage, paying attention to edges and corners.
- Consider layering a protective topcoat for added durability, especially if your project will be handled frequently.
This process not only safeguards your work but also intensifies the visual impact by highlighting color blending and emphasizing texture contrast. Sealing ensures your creation remains beautiful and intact over time.
Display and Preserve Your Unique Craft Creations

Have you considered the best ways to showcase and protect your mixed-media creations? Digital patterns can help create personalized displays, such as framed prints or custom backgrounds that highlight your work. For fabric dyeing projects, sealing with a clear, fabric-safe sealer preserves vibrant colors and prevents fading. To enhance presentation, use shadow boxes or glass frames to safeguard fabric and paper elements from dust and damage. Consider mounting your pieces on sturdy backing materials for added support. Label your creations with digital patterns or handwritten descriptions for a professional touch. Proper sealing and framing not only showcase your craft but also guarantee it lasts. By combining these techniques, you’ll keep your unique projects vibrant and well-preserved for years to come.
Frequently Asked Questions
How Do I Prevent Fabric From Tearing When Glued to Wood?
To prevent fabric tearing when gluing to wood, start with proper wood surface preparation by sanding and cleaning it to ensure a smooth, dust-free surface. Use a strong, flexible fabric glue or a fabric-specific adhesive to allow movement without tearing. Apply the glue evenly, pressing the fabric firmly, and avoid stretching it during attachment. This approach guarantees fabric tearing prevention and creates a durable bond between fabric and wood.
What Are the Best Adhesives for Bonding Fabric, Wood, and Paper?
Imagine your project as a story waiting to unfold—choose the right adhesives to make it stick! For bonding fabric, wood, and paper, use flexible adhesives like tacky glue or fabric glue for fabric, wood glue for wood, and spray adhesive or decoupage medium for paper. Bonding techniques like applying even pressure and allowing proper drying time guarantee a strong, durable connection across all materials.
How Can I Ensure Color Consistency Across Materials?
To guarantee color consistency across your mixed materials, start with color matching by comparing fabric, paper, and wood samples in natural light. Use dye blending techniques to create a uniform hue, adjusting shades as needed before applying. Test your color mixes on scrap pieces to prevent surprises. Consistent dye application and careful blending will help your project maintain cohesive, harmonious colors throughout all materials.
What Safety Precautions Should I Take During Crafting?
Did you know that over 60% of crafting accidents involve inhaling fumes? To stay safe, always wear safety gear like masks and goggles, especially when working with adhesives or paints. Make certain proper ventilation precautions by working outdoors or in well-ventilated areas to avoid inhaling harmful fumes. Keep your workspace tidy, and handle tools carefully. These steps help protect you while you enjoy your creative projects safely.
How Do I Store Mixed-Media Projects to Preserve Them?
To preserve your mixed-media projects, you should use framing techniques that protect and showcase your work. Choose UV-protective glass or acrylic to prevent fading, and consider framing with acid-free mats to avoid deterioration. Store your projects in a cool, dry place away from direct sunlight. Display tips include hanging them securely and avoiding areas with high humidity, ensuring your artwork stays vibrant and intact over time.
Conclusion
Just as Da Vinci mastered blending different mediums to create timeless art, you can merge fabric, wood, and paper to craft your own masterpiece. With patience and creativity, your projects will transcend simple decor, becoming expressions of your unique style. Remember, every stitch, cut, and glue bond echoes the harmony of the Renaissance masters—turning everyday materials into enduring works of art that tell your story. Embrace the journey, and let your craft be your legacy.