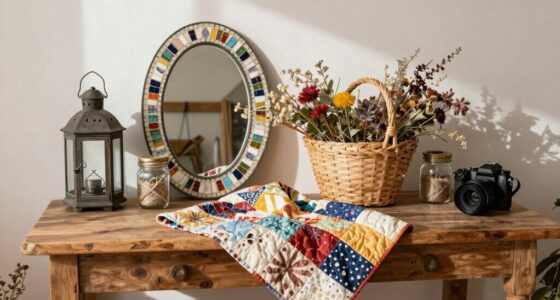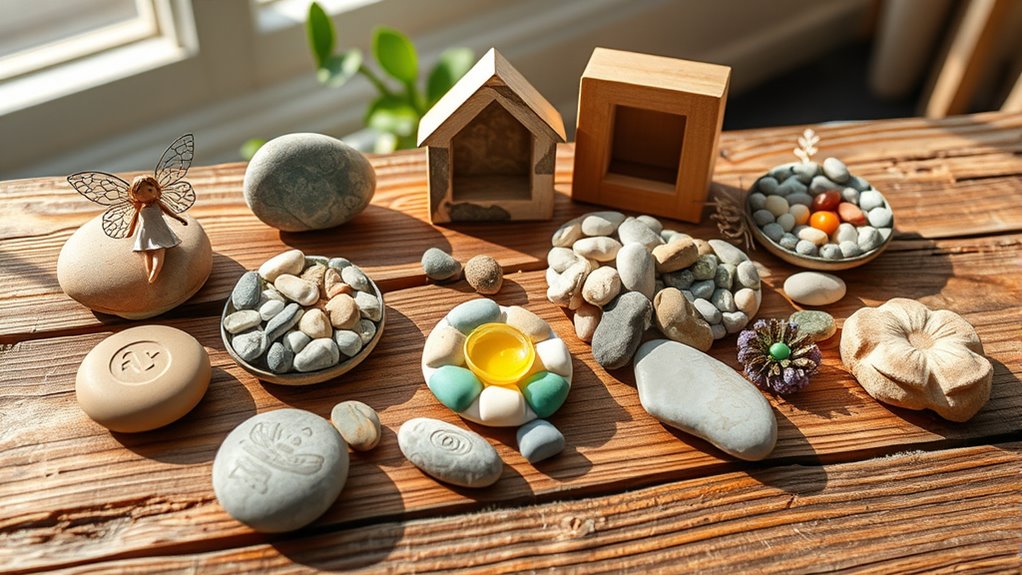

If you’re looking to craft with pebbles and stones, you can create painted magnet sets, garden markers, and decorative coasters. Personalize photo frames or make unique keychains that last. You might also design stone wall art or turn pebbles into lanterns and plant labels for your garden. These projects are simple and fun for all skill levels. Keep exploring for more ideas that will turn natural stones into beautiful, functional crafts for your home and yard.
Key Takeaways
- Create painted pebble magnets and decorative jars for home decor and outdoor ambiance.
- Design personalized stone garden markers and wall art to enhance garden and interior aesthetics.
- Craft pebble photo frames and mosaics with varied shapes and colors for unique artwork.
- Make functional projects like pebble pathways, stepping stones, and custom keychains.
- Use pebbles to assemble coasters, wall murals, and other decorative items for a handcrafted touch.
As an affiliate, we earn on qualifying purchases.
Painted Pebble Magnets

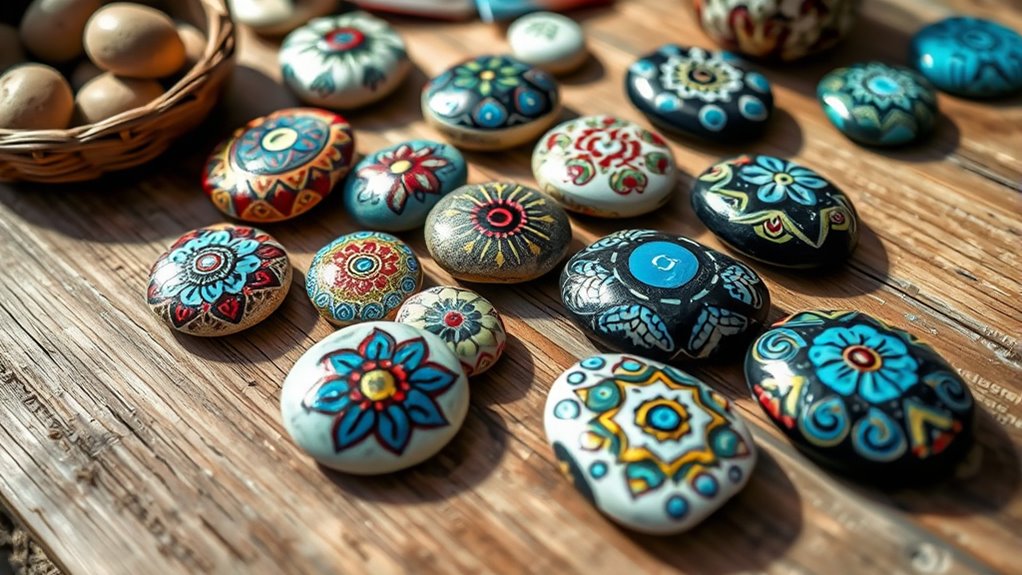
Have you ever thought about turning simple pebbles into charming fridge magnets? It’s easier than you might think. First, pick smooth, flat pebbles that can hold paint well. Clean and dry them thoroughly. Next, use acrylic paints or permanent markers to create fun designs—think flowers, animals, or abstract patterns. Let your creativity run wild! Once the paint dries completely, attach small magnets to the back with a hot glue gun. Make sure the glue is secure before sticking your new magnet to the fridge. These painted pebble magnets are perfect for adding a personal touch to your kitchen or giving as thoughtful handmade gifts. Incorporating rustic decor elements can enhance the charm of your creations even further. For added durability, consider sealing your designs with a clear acrylic spray to protect against weathering and wear. Using high-quality, non-toxic materials can ensure safe play and longevity of your crafts. Exploring artistic techniques can help elevate your pebble designs and make each piece truly unique. Additionally, practicing self-reflection can inspire more personalized designs that reflect your individual style. With just a few supplies, you’ll transform ordinary stones into delightful, functional art.
Stone Garden Markers
Looking to add a charming and functional touch to your garden? Stone garden markers are perfect for labeling plants and creating a rustic, natural look. Choose flat, smooth stones that can stand upright or lie flat. Write plant names or symbols on them using waterproof markers or paint, ensuring your labels stay clear through weather changes. You can personalize each marker with different colors or designs to match your garden’s theme. To set them up, simply insert the stones into the soil near each plant, making sure they’re stable. These markers are durable, eco-friendly, and easy to move or update as your garden evolves. Incorporating weatherproof materials can further elevate your garden’s aesthetic. Additionally, selecting stones with appropriate size and shape ensures they are both functional and visually appealing. Using stones with natural textures and colors can enhance the overall garden design and create a more cohesive look. Choosing stones with natural textures and colors can further complement your garden’s aesthetic and make the markers blend seamlessly with your outdoor space. With a little creativity, you’ll have a beautiful, organized garden that’s both practical and eye-catching.
Pebble Photo Frames
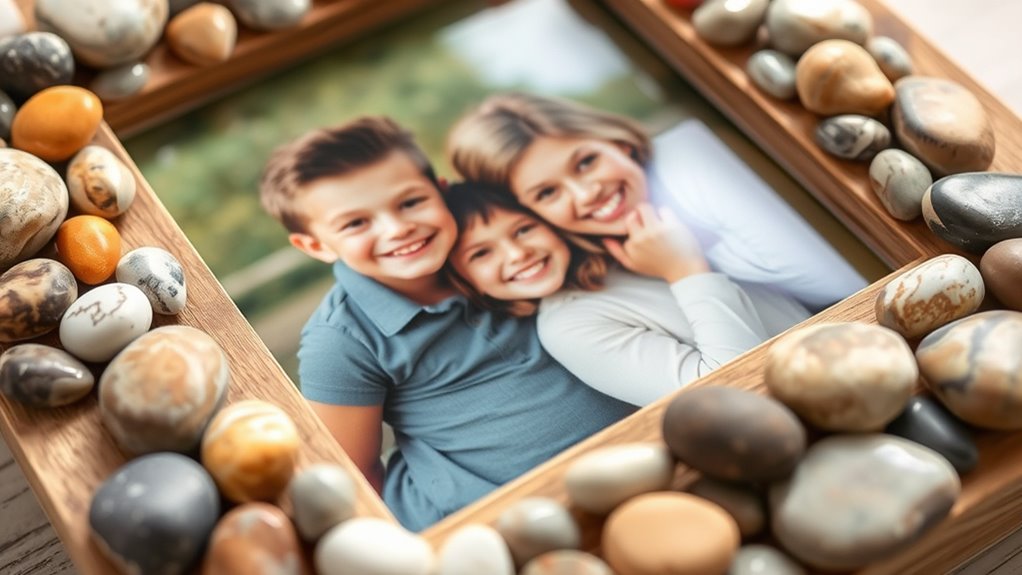
Start by choosing pebbles that complement your photo’s colors and style, then plan your layout to create a balanced design. Once you’re happy with the arrangement, secure the stones firmly in place, and add finishing touches to enhance the frame’s durability. With careful selection and assembly, your pebble photo frame will become a beautiful, personalized piece. Incorporating textile art techniques can also add an extra layer of creativity to your project. Being aware of regional resources can help you find unique stones and additional supplies for your craft. Additionally, understanding merchant services can assist you in setting up efficient payment options if you decide to sell your handcrafted items.
Selecting the Perfect Pebbles
Choosing the right pebbles is essential for creating beautiful pebble photo frames that enhance your pictures. Look for smooth, flat stones with uniform sizes to guarantee they fit well together and provide a stable base. Avoid pebbles that are jagged, too rounded, or uneven, as these can make the frame unstable or difficult to work with. Select stones in colors that complement your photo or match your decor, whether neutral tones or vibrant hues. Consider the texture as well; a mix of matte and slightly glossy pebbles can add visual interest. Always clean your stones thoroughly before starting, and pick ones that are sturdy enough to hold their shape over time. With careful selection, your pebble frame will be both charming and durable. Additionally, understanding vetted options for outdoor tools can inspire creative ways to incorporate natural materials into your craft projects. Exploring quality outdoor tools can help you work more efficiently and achieve a professional look in your craft creations. When selecting pebbles, keep in mind that their durability and stability contribute significantly to the longevity of your finished frame. Incorporating somatic awareness techniques during your crafting process can help you stay mindful and reduce physical strain. Moreover, choosing stones with Croatian heritage or unique markings can add a personalized and meaningful touch to your craft.
Designing the Frame Layout
Once you’ve selected your pebbles, planning the layout is the key to creating an attractive and balanced frame. Start by laying out the pebbles on a flat surface, arranging them in different patterns until you find one that appeals to you. Consider varying sizes, shapes, and colors to add visual interest. Place larger pebbles at the corners or along the edges to form a sturdy border, then fill in gaps with smaller stones for a cohesive look. Keep symmetry in mind if you prefer a formal design, or go for a more random arrangement for a natural feel. Take your time adjusting the placement until you’re satisfied with the overall look. This step ensures your pebble frame will be both eye-catching and stable. Understanding design principles can help you achieve a balanced and aesthetically pleasing result, especially when considering the size and placement of stones for optimal visual impact. Additionally, selecting stones with distinctive features can enhance the uniqueness of your design.
Securing and Finishing Touches
To guarantee your pebble photo frame stays intact and looks polished, securing the stones firmly is essential. Use a strong adhesive, like craft glue or hot glue, to attach each pebble securely to the frame. Apply the glue directly to the back of each stone, pressing it into place and holding it for a few seconds to ensure a good bond. Once all stones are attached, allow the glue to dry completely before handling the frame. For a smooth finish, inspect the frame for any loose stones and reapply glue if needed. To add a professional touch, consider sealing the entire surface with a clear acrylic spray, which helps protect the stones and enhances durability. These finishing touches give your pebble photo frame a sturdy, polished appearance.
Mason Jar Pebble Lanterns
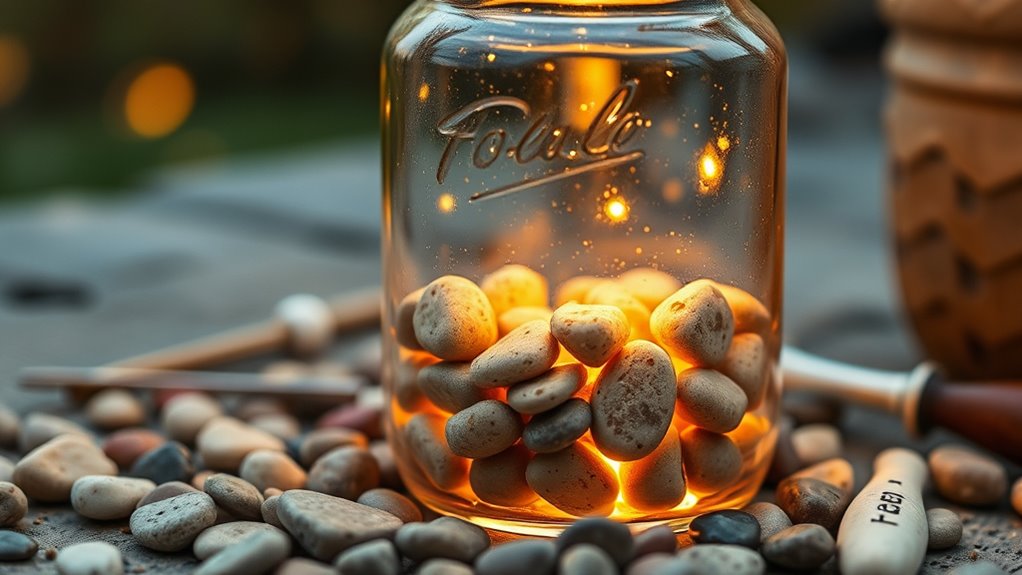
Create charming and cozy lighting by transforming a simple mason jar into a pebble lantern. Start by filling the bottom of the jar with a layer of small, smooth pebbles. Place a battery-operated tea light or fairy light inside, ensuring the light sits above the pebbles for a natural glow. You can add more pebbles around the light to secure it in place. For extra flair, arrange larger stones around the jar’s exterior or tie a rustic twine or ribbon around the neck. When you turn on the light, the pebbles will reflect a soft, warm glow, creating a relaxing ambiance perfect for indoors or outdoor spaces. This project is simple, inexpensive, and adds a handcrafted touch to your decor.
Decorative Pebble Coasters
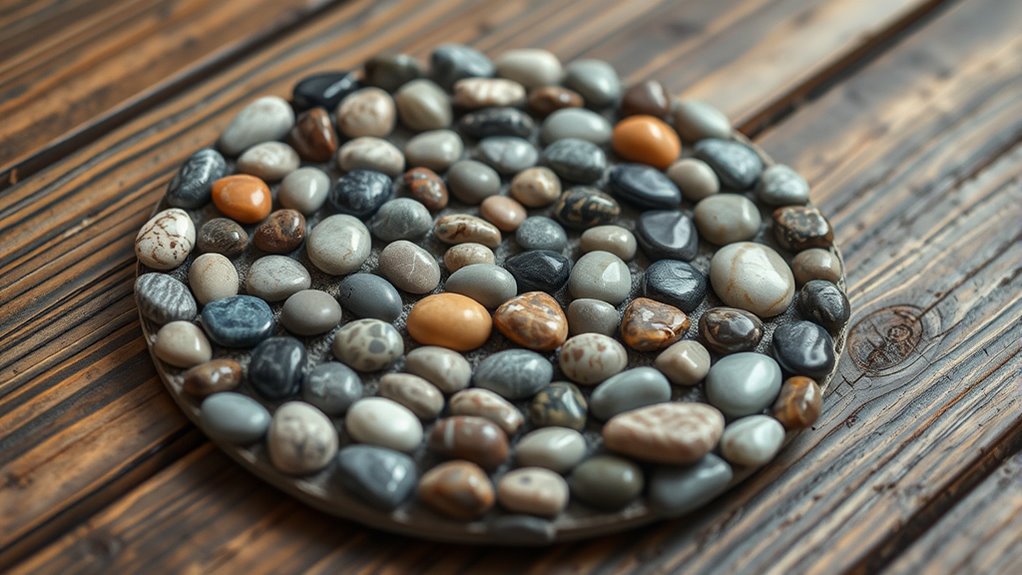
Decorative pebble coasters are both durable and customizable, letting you choose from various materials and designs. You can select different stones and patterns to match your style, ensuring each piece is unique. Using simple assembly tips, you’ll create sturdy coasters that add a natural touch to your space.
Durability and Design Options
When designing pebble coasters, durability depends on the materials and techniques you choose, ensuring they hold up over time and regular use. Selecting high-quality stones with smooth surfaces helps prevent chipping or cracking. Using a strong adhesive guarantees the pebbles stay securely in place, even with frequent handling. To enhance longevity, consider sealing the surface with a clear protective coating, which guards against water damage and stains. For design options, you can arrange the pebbles in patterns or color schemes that match your style, from natural earthy tones to vibrant mixes. Incorporating different shapes and sizes adds visual interest. Remember, combining durability with creative design allows you to craft coasters that are both functional and attractive, making them a lasting addition to your home decor.
Materials and Assembly Tips
Choosing the right materials is essential for making durable and attractive pebble coasters. First, pick flat, smooth pebbles to ensure they sit evenly and prevent wobbling. Next, select a strong adhesive like epoxy resin or waterproof glue to secure the stones firmly. You’ll also need a sturdy base, such as cork or wood, to attach the pebbles and protect surfaces. Lastly, consider sealing the finished coaster with a clear waterproof sealant to prevent water damage and maintain its appearance.
Here are some tips:
- Use a level surface during assembly for even placement.
- Arrange pebbles before gluing to find the best design.
- Apply glue in small sections to avoid messes.
- Allow ample drying time before use.
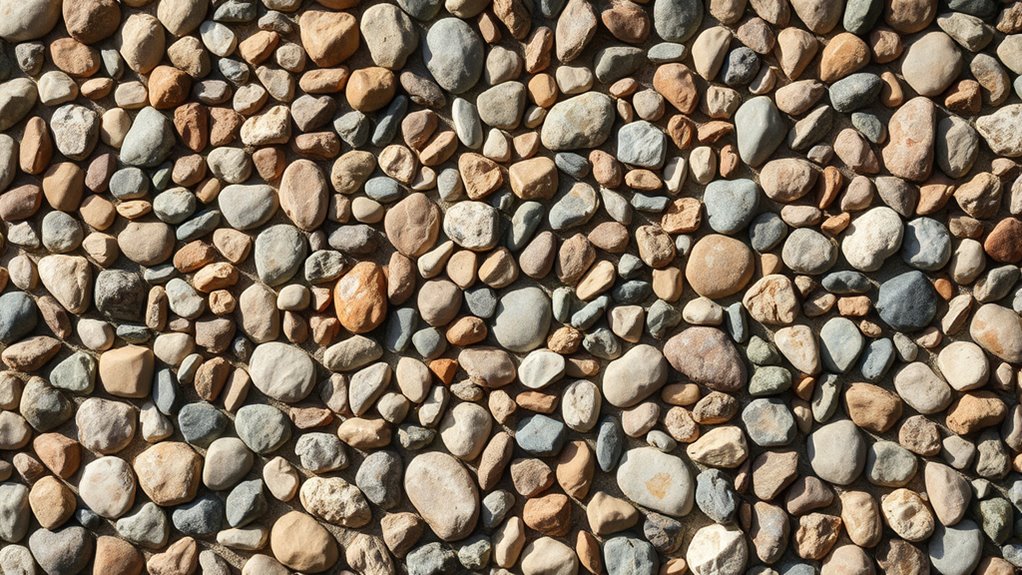
Pebble Pathways and Stepping Stones

Have you ever wondered how to transform a dull yard into a charming outdoor space? Creating pebble pathways and stepping stones is an easy, affordable way to do it. First, plan your design and mark the area you want to cover. Choose flat, smooth stones or create your own with quick-setting concrete and pebbles inside. For pathways, dig a shallow trench and lay a base layer of gravel or sand to stabilize the stones. Place each stepping stone securely, pressing it into the base. You can vary the size, shape, and color of your pebbles for a natural look or a more uniform appearance. Regularly check alignment and levelness. This project adds visual interest and functionality, making your yard more inviting and accessible.
Customized Pebble Keychains
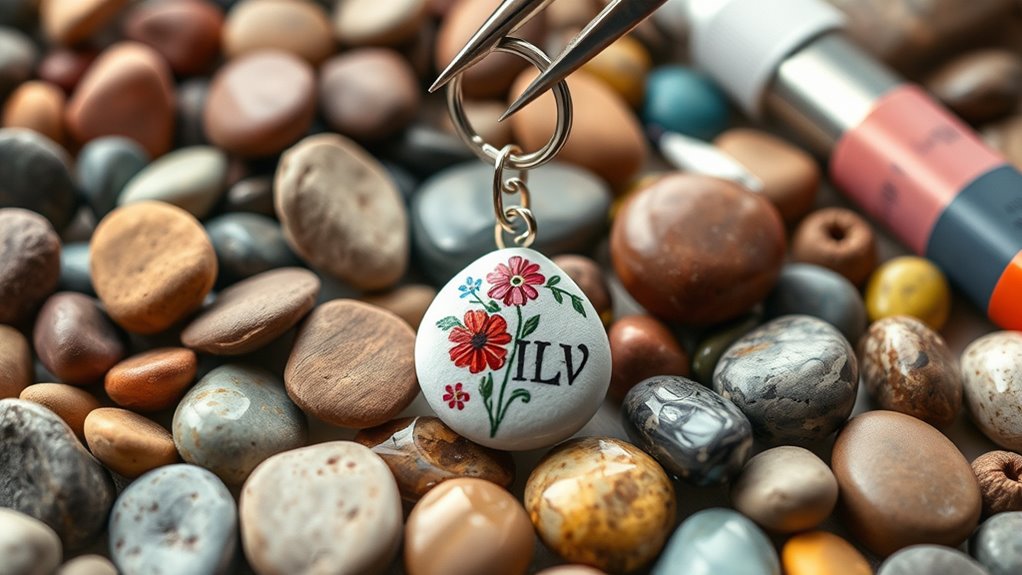
Choosing the right pebbles is key to creating eye-catching keychains, so look for ones with smooth surfaces and interesting shapes. Once you have your pebbles, personalize them by adding colors or designs with paints that withstand daily use. This simple step makes each keychain unique and truly yours.
Selecting Perfect Pebbles
Selecting the right pebbles is essential to creating eye-catching customized keychains. You want pebbles that are smooth, durable, and visually appealing. First, look for pebbles with a smooth surface—rough edges can make handling and attaching difficult. Second, choose stones that are sturdy enough to withstand daily wear without cracking or chipping. Third, pick pebbles with interesting colors or patterns to add personality to your keychain. Finally, confirm the size fits comfortably on your keyring, not too small or bulky. By paying attention to these factors, you’ll find the perfect pebbles that make your keychain stand out and last longer. Remember, selecting quality stones is the foundation of a successful craft.
Personalizing With Paints
Adding personal touches with paints transforms simple pebbles into unique, eye-catching keychains. You can start by choosing vibrant or pastel paints to match your style. Use fine brushes or even toothpicks for detailed designs like flowers, faces, or symbols. Don’t worry about perfection—quirky and imperfect designs add charm. You might write initials, draw tiny doodles, or create patterns that reflect your personality. Once you finish painting, let the designs dry completely before sealing them with a clear varnish or sealant. This step protects your artwork from chipping and water damage. Personalizing your pebbles with paints makes each keychain one-of-a-kind, giving your craft a meaningful touch. Enjoy experimenting with colors and designs to create truly special accessories.
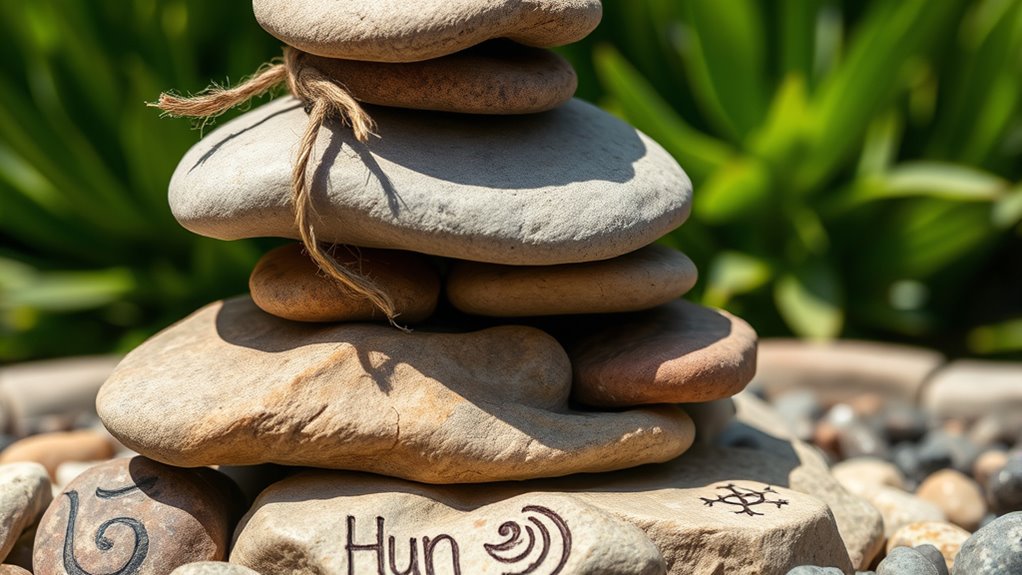
Stone Wall Art and Murals
Transforming a plain wall into a stunning piece of art is easier than you might think with pebbles and stones. You can create eye-catching murals or wall art that add texture and personality to any space. Start by selecting stones of different sizes, shapes, and colors to match your design idea. Next, plan your layout on paper or directly on the wall. Then, adhere the stones using strong adhesive, arranging them to form patterns, landscapes, or abstract designs. Finally, seal the stones with a clear, weatherproof coating to protect your artwork. Here are some ideas to inspire you:
- Create a mosaic of a favorite animal or symbol
- Design a flowing river or mountain scene
- Craft a geometric pattern for a modern look
- Build a textured, nature-inspired wall art
Pebble Plant Labels
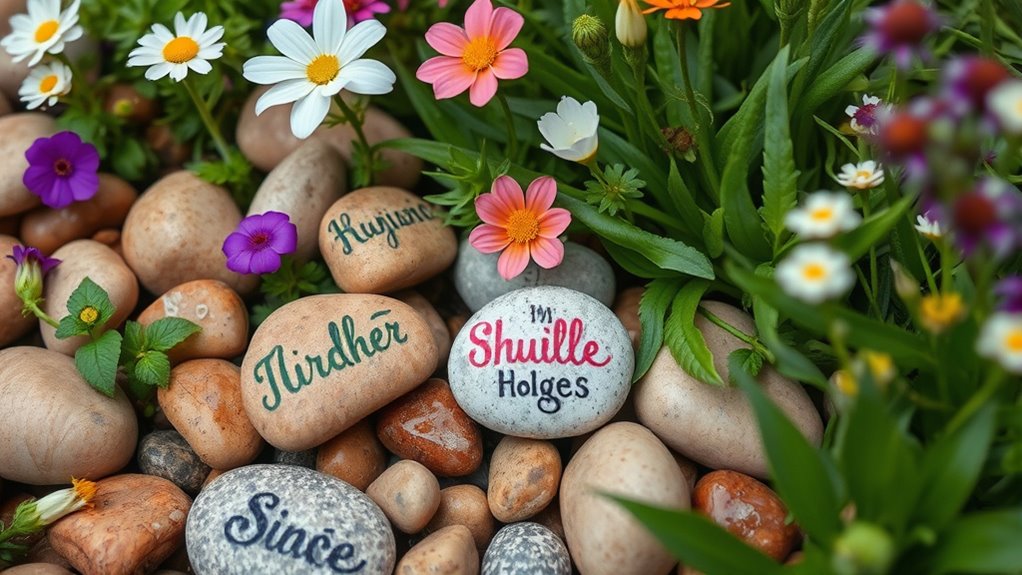
Creating charming and durable pebble plant labels is a simple way to personalize your garden while keeping it organized. To make them, select small, flat stones that are smooth and easy to write on. Use a permanent marker or paint pen to write the plant names clearly on each pebble. For added durability, you can seal the labels with a clear waterproof spray. Place these labels directly into the soil near each plant, ensuring they stand upright and are easy to read. You can also customize the labels further by adding decorative elements like colored patterns or symbols. These pebble plant labels not only help you identify your plants easily but also add a rustic, natural charm to your garden.
Hand-Painted Pebble Stones for Gifts
Hand-painted pebble stones make thoughtful and personalized gifts that showcase your creativity. You can turn ordinary stones into unique keepsakes for friends and family. To get started, choose smooth, flat pebbles as your canvas. Use acrylic paints and fine brushes to add meaningful designs or messages. Here are some ideas to inspire you:
- Customize with initials or names for a personal touch.
- Paint small, colorful patterns or nature-inspired motifs.
- Create mini art pieces or tiny scenes for display.
- Add a protective sealant to prevent chipping and guarantee durability.
These painted stones can be gifted as paperweights, garden decorations, or heartfelt tokens. Your effort and creativity will make each gift memorable and special.
Frequently Asked Questions
What Types of Pebbles Are Best for Outdoor Crafts?
When choosing pebbles for outdoor crafts, you want durable, weather-resistant options. Look for smooth, rounded stones like river rocks or granite, as they withstand rain, sun, and temperature changes better. Avoid softer stones that may crack or erode over time. Opt for colors that complement your design, and make certain they’re clean and free of dirt. These sturdy pebbles will keep your outdoor creations looking beautiful and lasting longer.
How Do I Seal Painted Pebbles to Make Them Weatherproof?
Think of sealing painted pebbles as giving them a shield to brave the elements. To do this, you should apply a clear, waterproof sealer like a spray or brush-on polyurethane. Make sure to coat the surface evenly, covering every nook and cranny. Let it dry completely according to the product instructions. This creates a protective barrier, turning your colorful stones into weatherproof treasures that can withstand rain, sun, and wind.
Can I Use Recycled Materials With Pebbles for Eco-Friendly Projects?
You can definitely use recycled materials with pebbles for eco-friendly projects. Incorporate items like bottle caps, old jewelry, or broken ceramics to add unique touches. Glue or embed these recyclables onto your pebbles or nearby surfaces to create sustainable art. This approach not only reduces waste but also enhances your craft’s visual appeal. Just guarantee the materials are clean and securely attached for longevity and safety in your project.
What Safety Precautions Should I Take When Working With Small Stones?
Did you know that over 2 million people suffer from hand injuries each year? When working with small stones, you should wear gloves to protect your skin from cuts and abrasions. Always work in a well-lit area and keep your workspace tidy to avoid slips and accidents. Use tools like tweezers or pliers for handling tiny stones, and wash your hands thoroughly afterward to prevent any dirt or bacteria transfer.
How Can I Personalize Pebble Crafts for Special Occasions?
You can personalize pebble crafts by selecting stones that match the theme or colors of the occasion. Write messages or names with a permanent marker, or paint intricate designs to add a special touch. Incorporate themed embellishments like ribbons or charms, and arrange the stones creatively. These thoughtful details make your crafts memorable and unique, perfect for birthdays, weddings, or other celebrations, showing how much you care.
Conclusion
Now that you’ve discovered these incredible DIY crafts using pebbles and stones, there’s no limit to your creativity. Imagine turning simple, everyday rocks into stunning art pieces that could leave everyone in awe—your skills could turn a plain garden into a mesmerizing oasis! So, grab your supplies and start crafting today. Who knows? You might just create something so beautiful, it’ll be remembered for generations to come. Your masterpiece awaits!