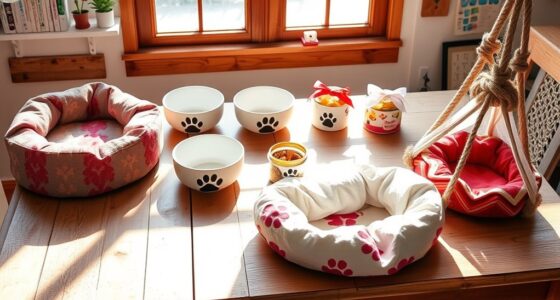

If you’re looking for fun and eco-friendly projects, try turning old jars into candle holders, creating wall organizers from recycled cardboard, or making planters from tin cans. You can craft colorful coasters from fabric scraps, design wind chimes from bottle caps, or decorate with DIY wall art using scrap paper. Repurposing tires into outdoor furniture or planters and making mobiles from reused paper adds variety. Keep exploring to discover more creative ideas using recycled materials.
Key Takeaways
- Repurpose glass jars into candle holders with decorative paint, twine, or lace for stylish, eco-friendly décor.
- Create planters from tin cans or tires, adding plants to enhance sustainability and aesthetic appeal.
- Use recycled plastic bottles to build mini greenhouses, promoting plant growth with upcycled materials.
- Design wall organizers and wall art from scrap cardboard and paper, combining functionality and creativity.
- Make reusable shopping bags from old T-shirts or fabric scraps, encouraging sustainable living practices.
Turn Old Glass Jars Into Elegant Candle Holders
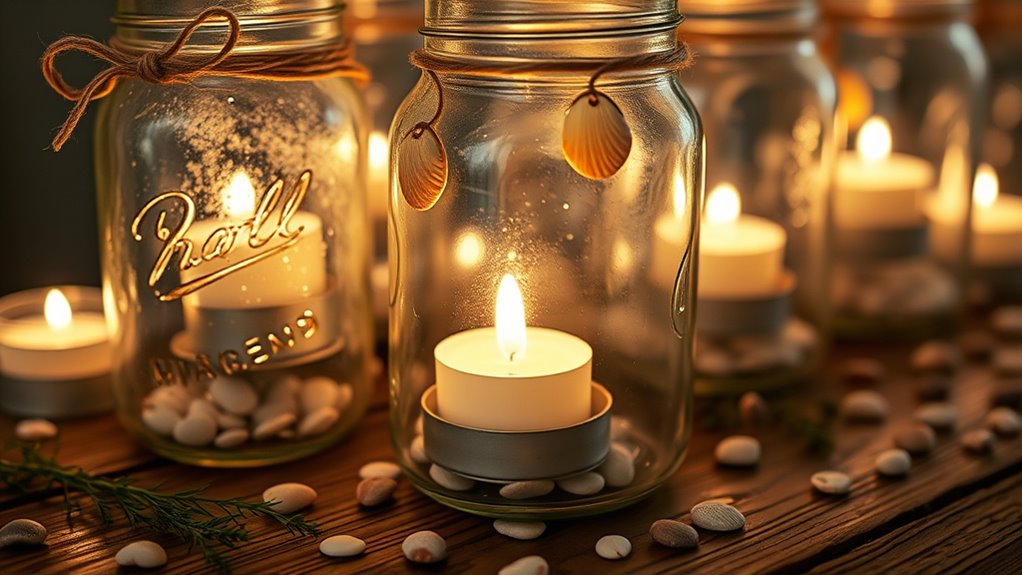
Recycling old glass jars into elegant candle holders is a simple and eco-friendly way to add charm to any space. First, clean the jars thoroughly to remove any labels and residue. You can easily do this with warm water, soap, and a bit of vinegar if needed. Incorporating sustainable practices can further enhance your commitment to environmental responsibility. Once clean, dry them completely. To give your candle holders a polished look, consider decorating the jars with paint, twine, or lace. Painting the outside with metallic or frosted finishes can create a sophisticated vibe, while wrapping twine or ribbon adds rustic charm. Make sure to leave the top open for easy candle placement. When you’re ready, insert a candle—preferably a tealight or votive—and enjoy your handmade, eco-friendly décor piece. These candle holders can brighten up your home or serve as thoughtful gifts and can also be used to promote emotional well-being through creating a warm, calming atmosphere. Additionally, integrating AI-driven visual content creation can help you find inspiring design ideas to customize your projects even further.
Make a Stylish Wall Organizer From Recycled Cardboard
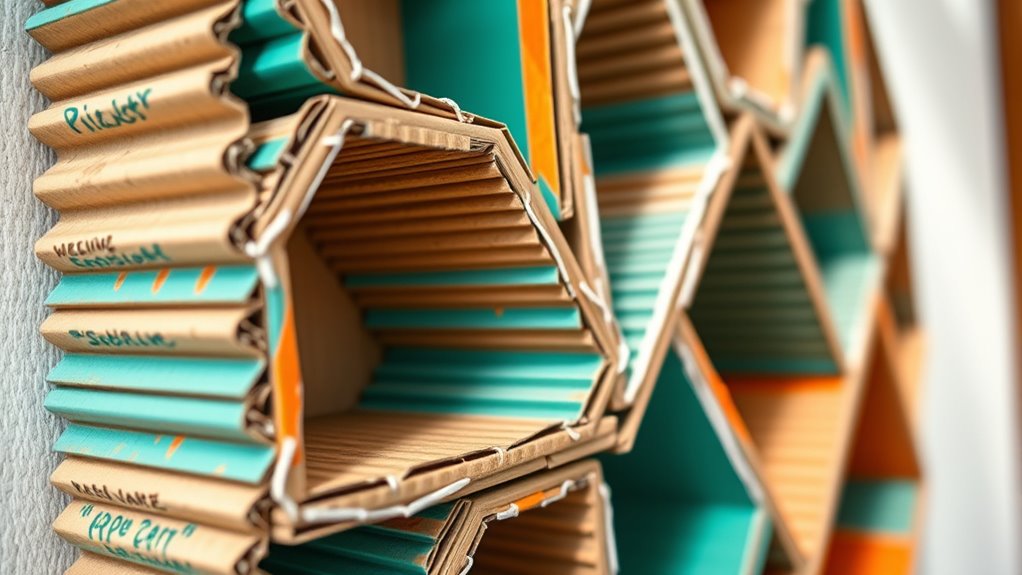
Start by selecting sturdy, clean recycled cardboard that’s easy to work with. Next, plan your organizer’s design and gather the necessary tools for assembly. Once you have your pieces ready, you can begin putting it all together to create a stylish wall organizer. Remember to measure materials accurately to ensure your compartments are even and functional. Additionally, choosing suitable adhesive can help secure the pieces firmly and increase the durability of your organizer. To ensure your project maintains its shape over time, consider reinforcing the structure with additional cardboard layers or support strips. Incorporating space-saving techniques can further optimize your wall organizer for maximum efficiency. Be sure to check the store hours of local craft or beauty supply stores if you need additional supplies or tools.
Choosing Recycled Cardboard
Have you considered which type of recycled cardboard works best for your wall organizer? Look for sturdy, thick cardboard like cereal boxes or shipping cartons—these provide durability and hold shape well. Avoid thin or flimsy pieces, as they may bend or tear easily. Using appropriate materials ensures your project remains sturdy over time. Check for clean, flat surfaces free of excessive tape, staples, or labels, which can complicate cutting and gluing. Recycled cardboard with minimal creases or wrinkles will give your project a cleaner, more polished look. If you find multiple layers glued together, make sure they’re securely bonded and manageable to cut through. Choosing the right material now prevents damage later, ensuring your wall organizer stays sturdy and stylish for years to come.
Assembling the Organizer
Once you’ve gathered your sturdy recycled cardboard pieces, it’s time to begin assembling your wall organizer. Start by arranging the pieces into your desired layout, such as shelves or compartments. Use a pencil to lightly mark where the edges meet. A well-planned layout enhances stability and overall appearance of your organizer. Incorporating structural integrity techniques, like adding internal supports, will help ensure durability. Next, apply a strong, craft-friendly glue along the edges and press the pieces together firmly. Reinforce the joints with masking tape or clips until the glue dries. For added stability, you can cut small cardboard strips to act as internal braces, gluing them inside corners. Ensure that your recycled materials are clean and free of contaminants to achieve the best adhesion. Additionally, considering sustainable practices can help you make eco-friendly choices throughout your project. Using non-toxic adhesives can further support environmental safety and indoor air quality. Make sure everything is aligned properly before the glue sets. Once assembled, allow the glue to cure completely. This step ensures your organizer will hold up well and serve as a stylish, eco-friendly storage solution.
Create Unique Planters With Upcycled Tin Cans
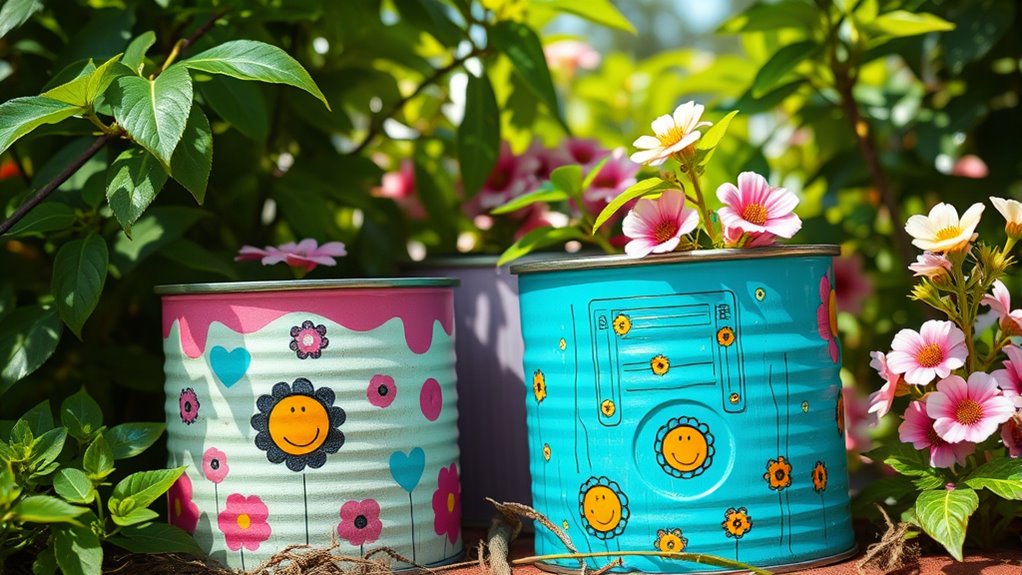
Transforming old tin cans into charming planters is a simple and eco-friendly way to add greenery to your space. First, clean and paint the cans to match your decor. Drill small holes in the bottom for drainage. Fill with soil and plant your favorite herbs or flowers. This upcycling method not only reduces waste but also creates personalized decor. To understand the impact, consider this table:
| Recycled Material | Environmental Benefit | Personal Satisfaction |
|---|---|---|
| Tin cans | Less landfill waste | Unique, DIY decor |
| Old fabric scraps | Saves resources | Creative expression |
| Plastic bottles | Reduces pollution | Cost-effective |
| Cardboard boxes | Less landfill waste | Customizable design |
| Glass jars | Conserves raw materials | Vintage aesthetic |
Using upcycled cans adds beauty and purpose to your space while helping the environment. Additionally, incorporating recycling practices can further enhance your eco-friendly projects. Engaging in creative techniques such as painting or decorating can make each planter truly one-of-a-kind. To expand your environmental impact, consider exploring sustainable materials for future projects. Incorporating environmental benefits into your crafting process can motivate ongoing sustainable habits.
Craft Colorful Coasters Using Scraps of Fabric
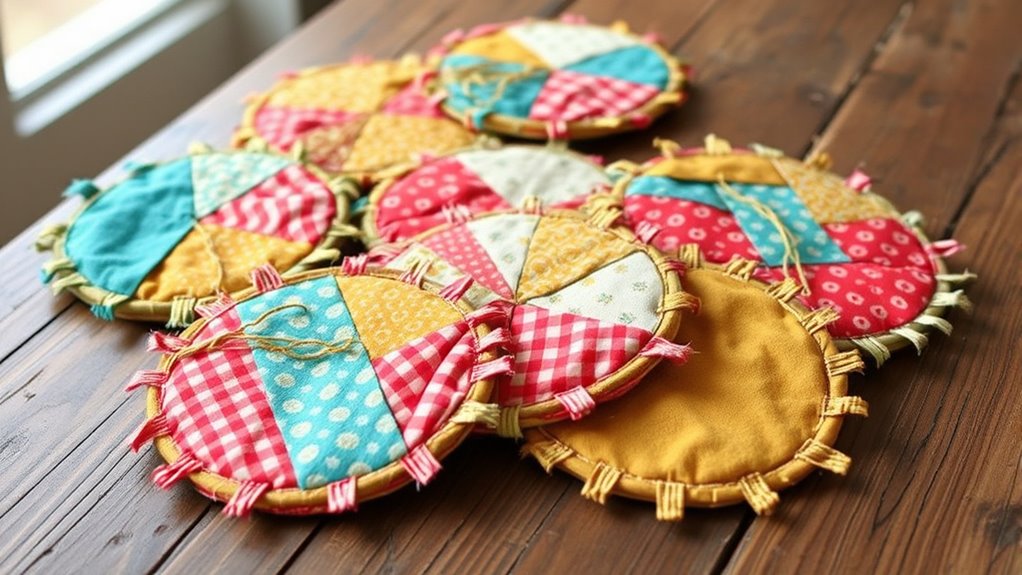
Start by selecting recycled fabrics with vibrant colors and interesting textures to make your coasters stand out. Then, carefully cut and shape the fabric pieces to fit your coaster bases, ensuring neat edges. Incorporate eco-friendly materials into your design to enhance sustainability. Additionally, choosing high-quality recyclable materials can improve the durability of your finished coasters. Incorporating beach-inspired textures can evoke a relaxing coastal vibe. Finally, assemble your layers and add finishing touches to create durable, eye-catching coasters you’ll love.
Choosing Recycled Fabrics
Have you ever considered how colorful scraps of fabric can become vibrant coasters? Choosing the right recycled fabrics makes a big difference in your craft’s appearance and durability.
Look for fabrics with interesting textures, bright colors, or bold patterns to add visual appeal. Natural fibers like cotton, linen, or hemp work well because they’re sturdy and easy to work with.
Avoid fabrics that are too thin or stretchy, as they won’t hold up over time. Also, check for stains or tears that could weaken your coaster.
Cutting and Shaping
Once you’ve chosen your recycled fabrics, the next step is to cut and shape them into coaster-sized pieces. Use sharp scissors to trim your fabric scraps into squares or circles, approximately 4 inches in diameter. Keep the edges clean and straight for a polished look.
If your fabric has a pattern or texture, consider how you want it to appear on the finished coaster. You can also layer different scraps to create a patchwork design, cutting each piece to fit your desired shape. Be precise with your cuts to ensure the pieces fit together neatly later.
Don’t be afraid to experiment with irregular shapes for a more eclectic style. Taking your time now will make the assembly process easier and result in vibrant, unique coasters.
Assembling and Finishing
With your fabric pieces cut and shaped, it’s time to bring them together into vibrant, functional coasters. Start by layering your scraps, arranging colors and patterns to your liking.
Use a hot glue gun or fabric glue to secure each piece firmly, ensuring there are no gaps. Once assembled, reinforce the edges with a zipper or decorative trim for a polished look.
To add durability, consider applying a clear sealant or waterproof spray. Let everything dry completely before using.
Finishing touches, like attaching felt pads on the bottom, will protect surfaces. This process transforms recycled fabric scraps into lively coasters that are both practical and eco-friendly.
- Arrange fabric pieces creatively before gluing
- Seal the surface for water resistance
- Attach felt pads to prevent scratches
Design Decorative Wind Chimes With Reused Bottle Caps
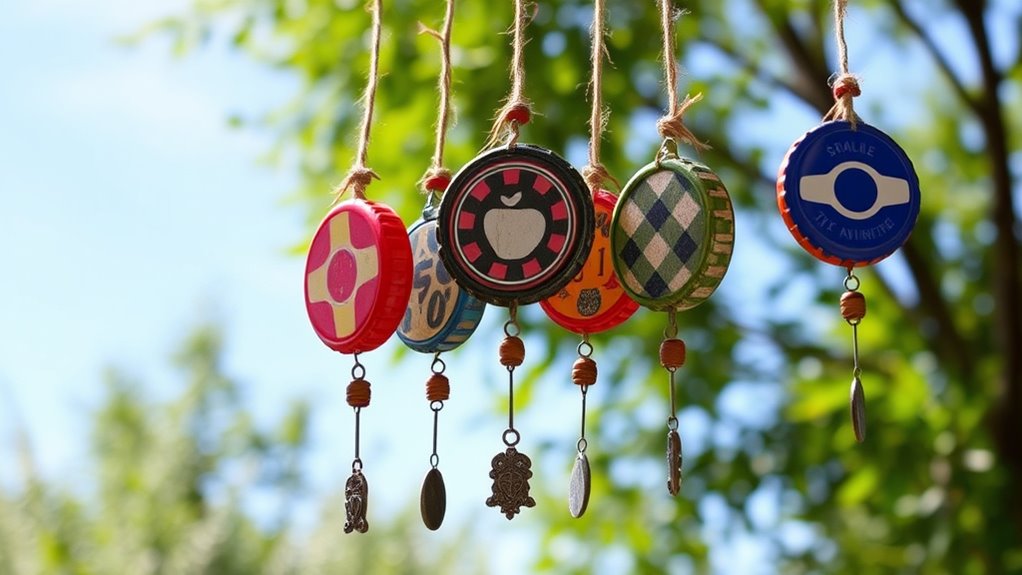
Creating decorative wind chimes from reused bottle caps is a fun and eco-friendly way to add charm to your outdoor space. Start by collecting colorful bottle caps and cleaning them thoroughly.
Drill small holes near the edges of each cap to thread string or thin wire through. Design your pattern by arranging the caps in a way that appeals to you, perhaps mixing colors or creating a specific shape.
Attach each cap to a central hanging point, spacing them evenly to allow movement. Use sturdy string or fishing line to connect the caps and suspend the entire piece from a hook or tree branch.
When the wind blows, the caps will clink softly, creating a pleasant sound. This project is simple, affordable, and perfect for customizing your garden decor sustainably.
Assemble a Rustic Picture Frame From Reclaimed Wood
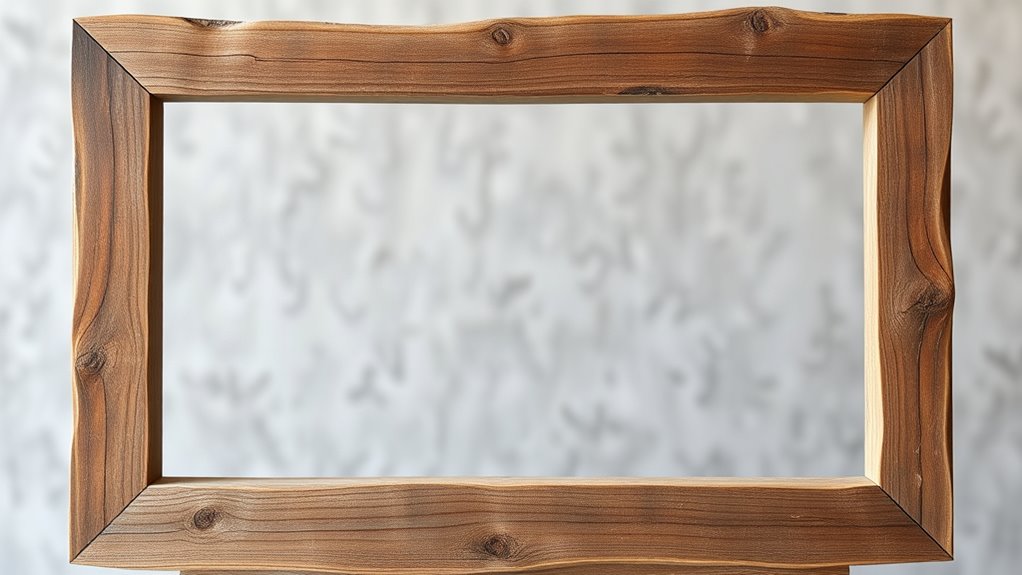
If you want to add a charming, rustic touch to your home decor, assembling a picture frame from reclaimed wood is a rewarding project. It’s simple, eco-friendly, and personalized.
First, gather reclaimed wood pieces, preferably with interesting textures and colors. Then, cut the wood to your desired frame size using a saw. Sand the edges for a smooth finish.
Gather reclaimed wood with unique textures, then cut and sand for a beautiful rustic picture frame.
Assemble the frame by joining the corners with nails or wood glue, ensuring it’s sturdy. Finally, add a glass or acrylic sheet to protect your photo and insert your favorite picture.
To enhance the rustic look, consider staining or leaving the wood natural.
- Choose weathered or distressed wood for authentic charm
- Use leftover hardware or twine for hanging
- Personalize with paint or carvings for unique flair
Build a Chic Storage Box From Cardboard Boxes
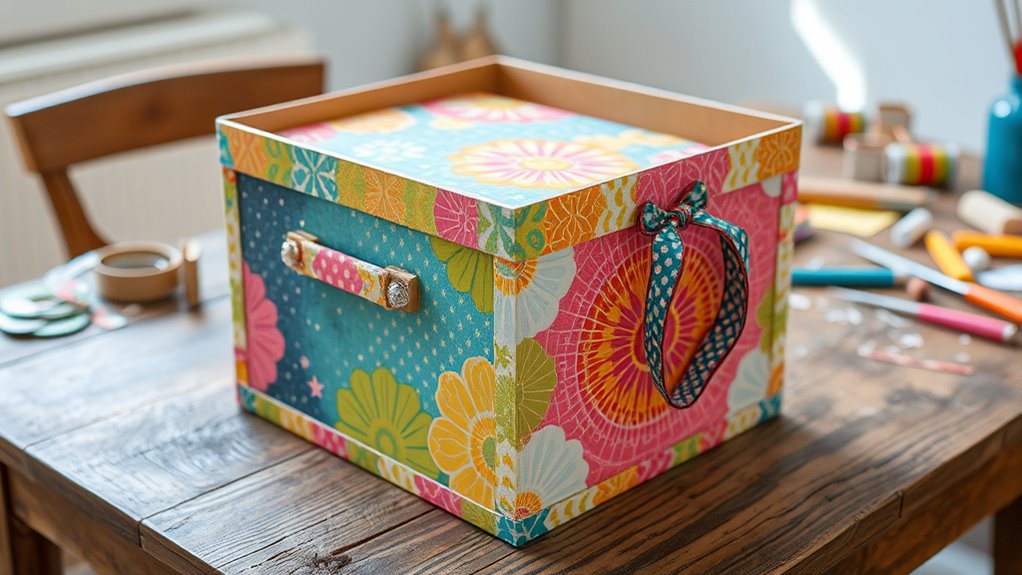
Start by selecting sturdy, clean cardboard boxes that fit your storage needs.
Then, add decorative touches like paint, paper, or fabric to personalize your box.
Finally, finish with a protective seal or coating to guarantee durability and a polished look.
Choosing Suitable Cardboard
Choosing the right cardboard is essential to guarantee your storage box turns out sturdy and attractive. You want thick, corrugated cardboard that can support weight without bending or collapsing. Look for boxes with minimal dents and tears—damaged material weakens your structure.
Make sure the cardboard is clean and free of excessive tape, staples, or labels, which can interfere with cutting and gluing. Flat, unwarped sheets make assembly easier and result in a neater finish.
Also, consider the size—larger sheets reduce the need for joins, giving you a cleaner look. Using high-quality cardboard ensures durability and a polished appearance, making your DIY project both functional and stylish.
Decorative Touches and Finishing
Adding decorative touches and finishing details can elevate your storage box from simple to stylish. Start by covering the box with colorful or patterned paper, fabric, or duct tape to hide rough edges and add personality.
You can also spice it up with painted designs, stencils, or hand-drawn patterns. Attach decorative handles or ribbons for a functional and aesthetic upgrade.
Consider adding a label or tag for easy identification, using a piece of scrap cardboard or a recycled tag. To give your box a polished look, seal the surface with clear spray or Mod Podge.
These finishing touches not only boost the visual appeal but also protect your project, making it durable and unique. Your recycled storage box becomes a charming, practical piece for your space.
Fashion Jewelry Using Recycled Plastic Bottles
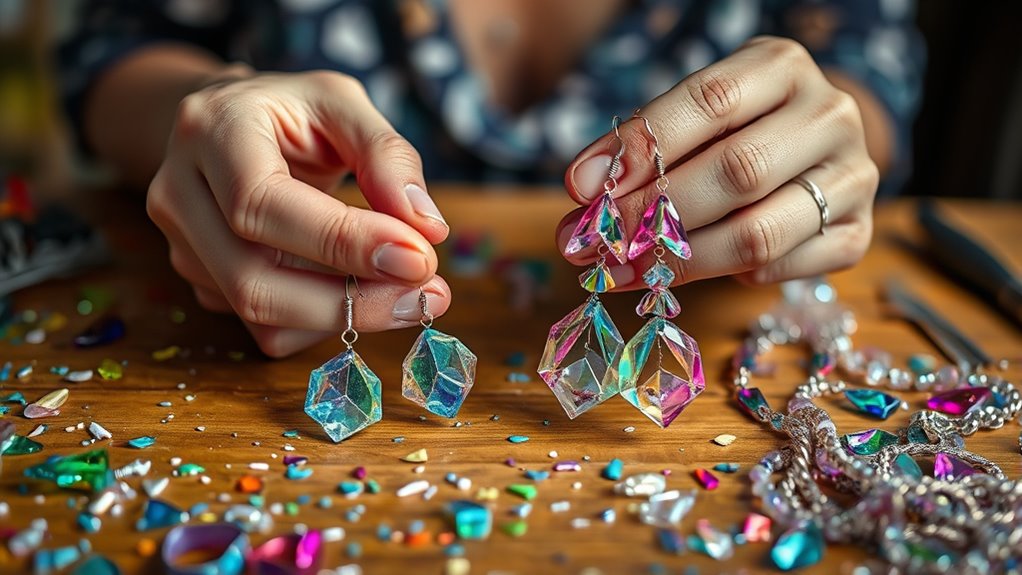
Have you ever considered turning everyday plastic bottles into unique, eye-catching jewelry? With a little creativity, you can craft stunning accessories that are eco-friendly and budget-friendly.
Start by cutting bottles into various shapes like flowers, circles, or beads. Then, sand and polish the edges for a smooth finish. Use colorful paints or permanent markers to add vibrant designs.
Transform bottles into beautiful shapes, then sand, polish, and decorate with vibrant paints for eco-friendly jewelry.
Finally, assemble your pieces with jewelry wire or string to create necklaces, earrings, or bracelets. This project not only recycles waste but also allows you to showcase your personal style.
Plus, it’s simple and fun to do at home. Give it a try and transform ordinary bottles into fashionable, eco-conscious jewelry you’ll love to wear.
- Cutting and shaping techniques
- Painting and decorating tips
- Assembly and fastening ideas
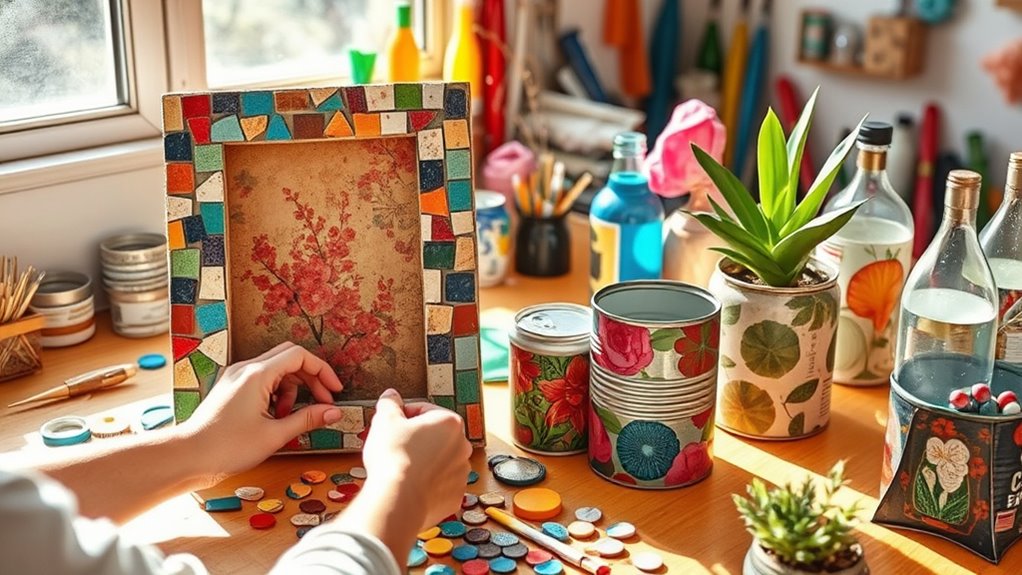
Make a Vibrant Mosaic Tabletop With Broken Tiles and Glass
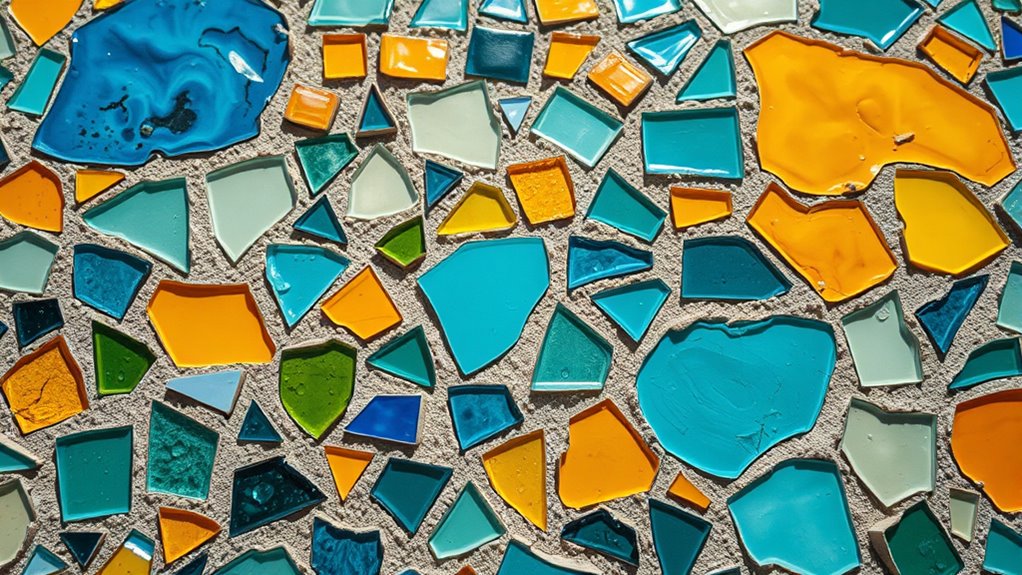
Transforming broken tiles and glass into a vibrant mosaic tabletop is a creative way to breathe new life into discarded materials. First, select colorful tiles and glass pieces that catch your eye. Arrange the pieces on your tabletop surface to create a pattern or design you love. Use a strong adhesive to secure each piece firmly in place. Once dried, fill the gaps with grout, wiping away excess for a smooth finish. This project turns trash into treasure, adding a unique, eye-catching feature to your space.
| Step | Materials Needed | Tips |
|---|---|---|
| Design & Planning | Broken tiles, glass, paper for pattern | Sketch your layout beforehand |
| Adhesion | Tile adhesive, spatula | Press pieces firmly into surface |
| Finishing | Grout, sponge, sealant | Clean excess grout quickly |
Create Eco-Friendly Shopping Bags From Old T-Shirts
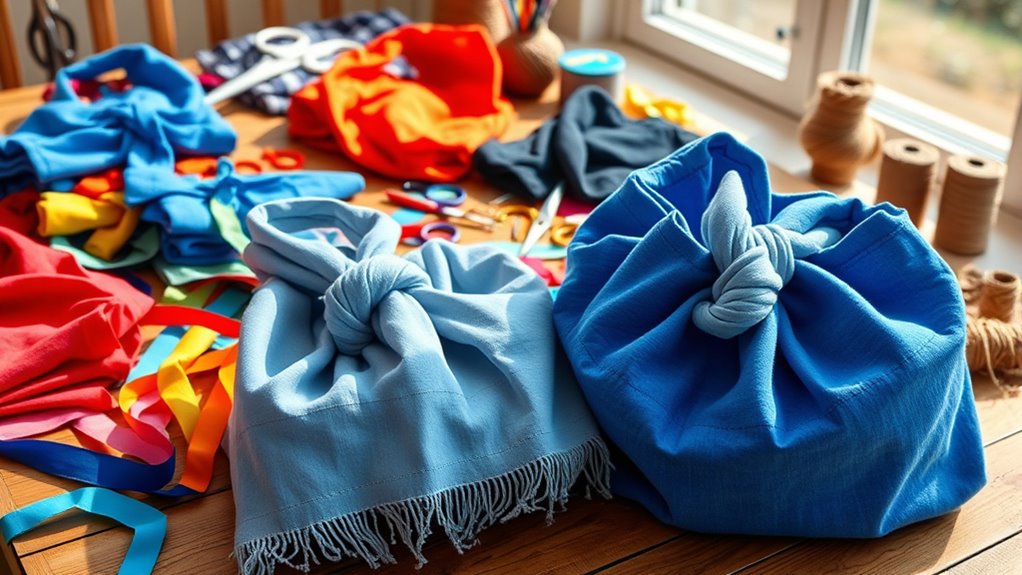
To create eco-friendly shopping bags from old T-shirts, start by selecting suitable shirts that are durable and colorful.
Next, cut and shape the fabric into the right size, then add handles and finishing touches to make your bag sturdy and stylish.
With a little effort, you’ll turn old shirts into practical, eco-conscious accessories.
Choosing Suitable T-Shirts
Choosing the right T-shirts is essential for making sturdy and eco-friendly shopping bags. Start by selecting T-shirts made from thick, durable fabric like cotton or a cotton blend, which will hold up better over time. Avoid shirts with thin or lightweight material that could tear easily.
Look for T-shirts without excessive embellishments, as extra decorations can weaken the fabric or make cutting more difficult. Also, consider the color and pattern—solid colors or simple designs work best for a clean, professional look.
Reusing T-shirts with sentimental value or those already stained or worn out is a great way to give them a second life. By selecting the right shirts, you ensure your DIY bags are both functional and long-lasting.
Cutting and Shaping Fabric
After selecting the right T-shirts, it’s time to cut and shape the fabric into your shopping bag pattern.
Lay the T-shirt flat on a clean surface, smoothing out any wrinkles.
Use a ruler and fabric chalk or a washable marker to outline your desired bag dimensions, typically a rectangular shape with a width of about 15 inches and a height of 16 inches.
Cut along the lines carefully with sharp scissors, removing any excess fabric or seams.
For a cleaner look, you can trim uneven edges.
If you want a flat bottom, cut a small triangle from each bottom corner, then fold and sew the sides accordingly.
Be precise with your cuts to ensure your bag has a neat, professional appearance.
Adding Handles and Finishing
Once you’ve shaped your fabric into a bag form, it’s time to add handles and complete the finishing touches. First, cut two long strips from the t-shirt sleeves or body to serve as handles. Make sure they’re sturdy enough to carry weight.
Sew or knot the handles securely to the top edges of your bag, ensuring they’re evenly spaced for balance. To reinforce the handles, you can double stitch or add extra fabric for durability.
Finish by trimming loose threads and adding decorative touches like fabric paint or patches if desired. These small details give your bag a polished look and extra strength.
With handles in place, your eco-friendly shopping bag is ready for use and any future reuse.
Construct a Mini Greenhouse With Recycled Plastic Bottles
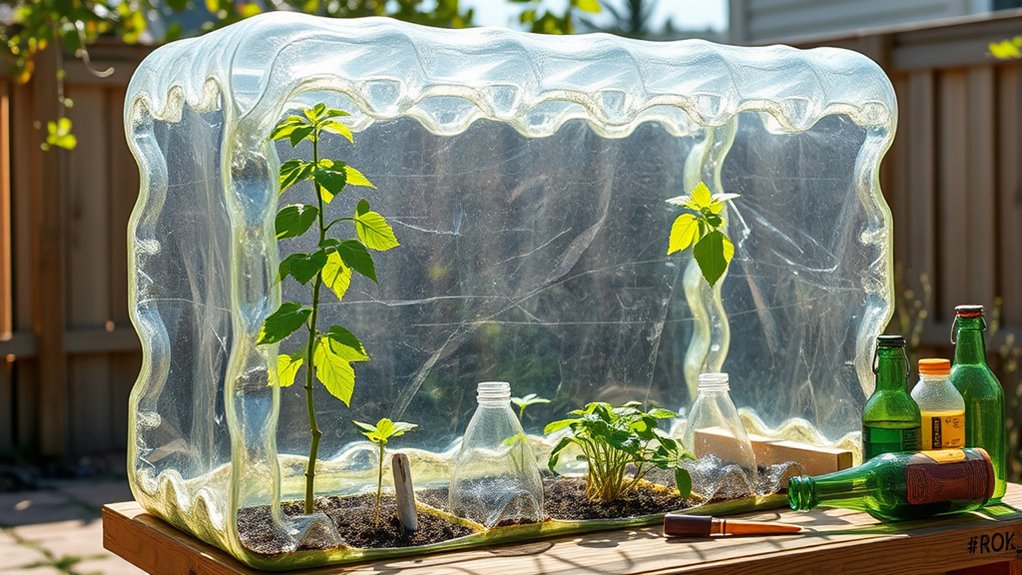
Creating a mini greenhouse from recycled plastic bottles is an easy and eco-friendly way to start your gardening journey.
First, gather empty bottles, ideally 2-liter ones. Cut the bottles in half horizontally, leaving the top part intact with the cap. This will serve as the lid. Remove labels and clean the bottles thoroughly.
Place your plants or seedlings inside the bottom part, then fit the top section back on, sealing in warmth and humidity. You can also cut small ventilation holes on the sides or top for airflow.
Arrange your mini greenhouses in a sunny spot, and watch your plants thrive. This simple project not only recycles plastic but also provides a controlled environment for your plants to grow.
It’s an affordable, sustainable way to boost your gardening efforts.
Decorate Your Space With DIY Wall Art From Scrap Paper and Magazines

If you’re looking to add a personal touch to your space, DIY wall art from scrap paper and magazines is a fun and eco-friendly option. It allows you to transform leftover materials into vibrant, eye-catching decor. Start by gathering colorful magazine pages, patterned scrap paper, or old greeting cards.
Create personalized, eco-friendly wall art by transforming scrap paper and magazine pages into vibrant, unique decor.
Cut them into various shapes or strips, then arrange and glue them onto a canvas or poster board. You can create abstract designs, word collages, or even geometric patterns. This project not only repurposes materials but also reflects your personality and style.
- Use magazine clippings to craft a collage with inspiring words or images
- Create a geometric mosaic with torn paper pieces
- Make a layered, textured piece by stacking different paper shapes
Repurpose Old Tires Into Garden Planters or Outdoor Furniture
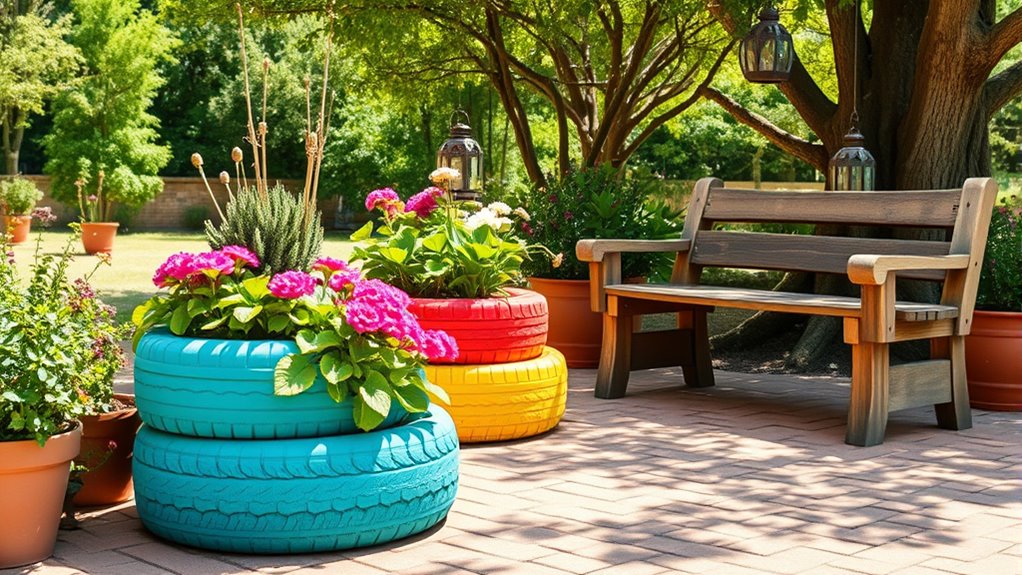
After transforming scrap paper into decorative wall art, you can extend your eco-friendly projects outdoors by repurposing old tires.
Start by cleaning the tires thoroughly and painting them in vibrant colors or patterns that match your outdoor decor. You can cut tires in half to create multi-level planters or leave them whole for a rustic look.
Fill them with soil and plant flowers, herbs, or small shrubs to add greenery to your yard or balcony.
For furniture, stack tires to build sturdy tables or chairs, securing them with strong adhesive or bolts. Cushion the seats with weatherproof cushions for comfort.
This approach not only gives new life to discarded tires but also adds a creative, eco-conscious touch to your outdoor space.
Design a Unique Mobile From Reused Paper and String
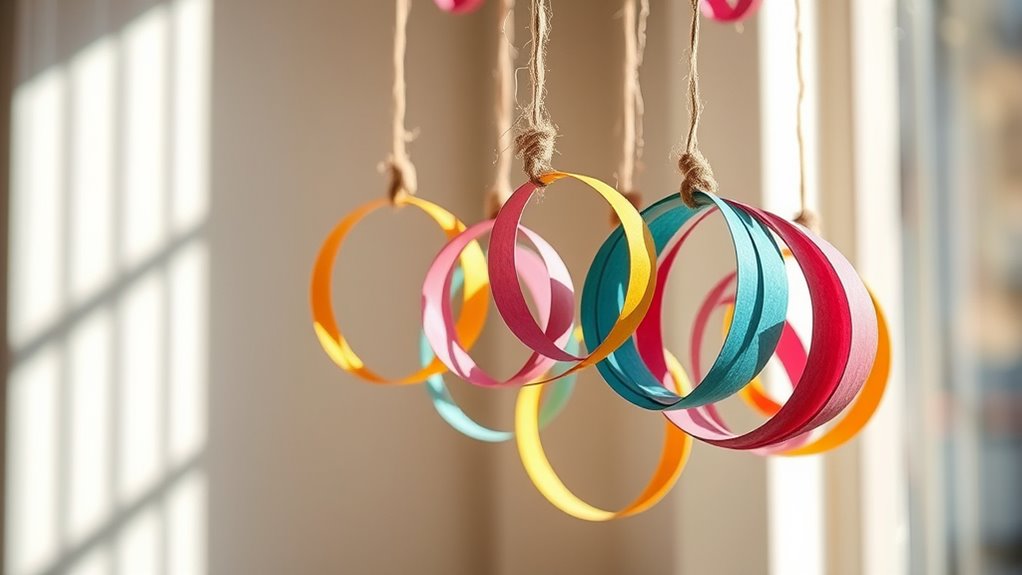
Transforming reused paper and string into a unique mobile is a simple way to add a handmade touch to your space while being eco-friendly. Start by cutting your paper into various shapes and sizes, then punch small holes for hanging. Use colorful string or twine to connect the paper pieces, creating a balanced design. Hang your mobile in a spot where it can sway gently and catch the light.
This project lets you customize colors, shapes, and lengths to match your decor. It’s an affordable, creative way to recycle materials and craft something meaningful. Plus, it’s easy to update or expand as your style evolves.
- Choose vibrant or pastel paper for a lively look
- Experiment with different hanging patterns and lengths
- Attach a lightweight loop for easy hanging
Make Sustainable Candle Holders Using Recycled Cans
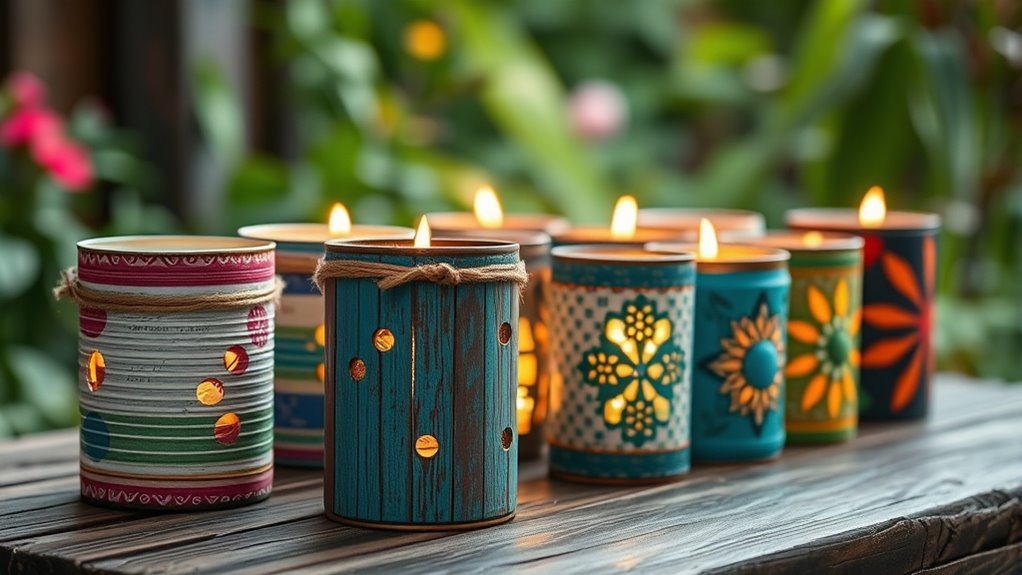
Using recycled cans to create sustainable candle holders is an easy and eco-friendly way to add charm to your space. Start by cleaning out the cans thoroughly and removing any labels.
You can then punch holes in the sides with a nail or pushpin to create decorative patterns or designs. If you want a rustic look, skip this step or make simple shapes.
Next, paint or decorate the cans using leftover paints, fabric, or wrapping paper to match your style. Once dry, place a tealight or small candle inside.
Make sure the can’s edges are smooth to prevent any injuries. These DIY candle holders are perfect for table decor, outdoor gatherings, or cozy nights, giving your space a warm, recycled charm.
Frequently Asked Questions
What Are Some Eco-Friendly Adhesives for Recycled Craft Projects?
When choosing eco-friendly adhesives, you want options that are safe for the environment and your projects. You might consider using natural glues like cornstarch or flour paste, which are biodegradable and non-toxic.
Bee’s wax or plant-based glues are also good choices, as they don’t contain harmful chemicals. These adhesives work well with recycled materials, helping you create sustainable crafts while protecting the planet.
How Can I Safely Clean and Prepare Recycled Materials for Crafting?
Did you know that nearly 80% of recycled materials can be safely cleaned and prepared with simple steps? To do so, rinse items thoroughly with warm water and a mild soap or vinegar solution to remove dirt and contaminants.
Use a scrub brush for stubborn residues, then dry completely to prevent mold. Properly sanitizing your materials ensures your craft projects are safe, sustainable, and free of unwanted bacteria or odors.
Are There Age-Appropriate Recycled Craft Ideas for Children?
You can definitely find age-appropriate recycled craft ideas for children. For younger kids, simple projects like decorating cardboard boxes or making collages with scrap paper work well.
Older children can try more detailed crafts, like creating jewelry from bottle caps or assembling bird feeders from recycled plastic bottles. Always supervise their activities, choose safe materials, and encourage creativity to make crafting fun and safe.
What Tools Are Essential for Working With Recycled Materials?
When working with recycled materials, you need a few essential tools to get started. You’ll want scissors or a craft knife for cutting. Glue or a hot glue gun for sticking pieces together. And sometimes tape for quick fixes.
A ruler helps with measuring. Protective gloves can keep your hands safe. Having these tools on hand makes your craft projects easier, safer, and more fun.
How Do I Ensure the Durability of My Recycled Craft Creations?
Imagine your recycled craft as a sturdy bridge—you want it to last. To guarantee durability, select high-quality recycled materials, clean and prep them thoroughly, and use strong adhesives or sealants.
Reinforce weak spots and consider weatherproofing if outdoors. I once made a planter from old bottles, and sealing the edges with waterproof paint kept it resilient through seasons.
Proper care and thoughtful assembly make your creations last longer.
Conclusion
Just like a gardener tending to a neglected patch, you can transform everyday trash into treasures that breathe new life into your space. Each recycled craft is a seed of creativity, blossoming into beauty and purpose. With every piece you repurpose, you’re nurturing the earth and your soul. So keep planting these ideas, watch them grow, and let your home flourish with the vibrant colors of sustainability and love.