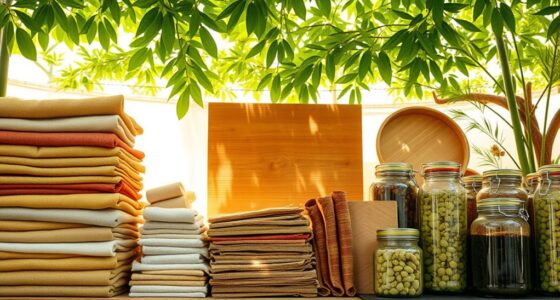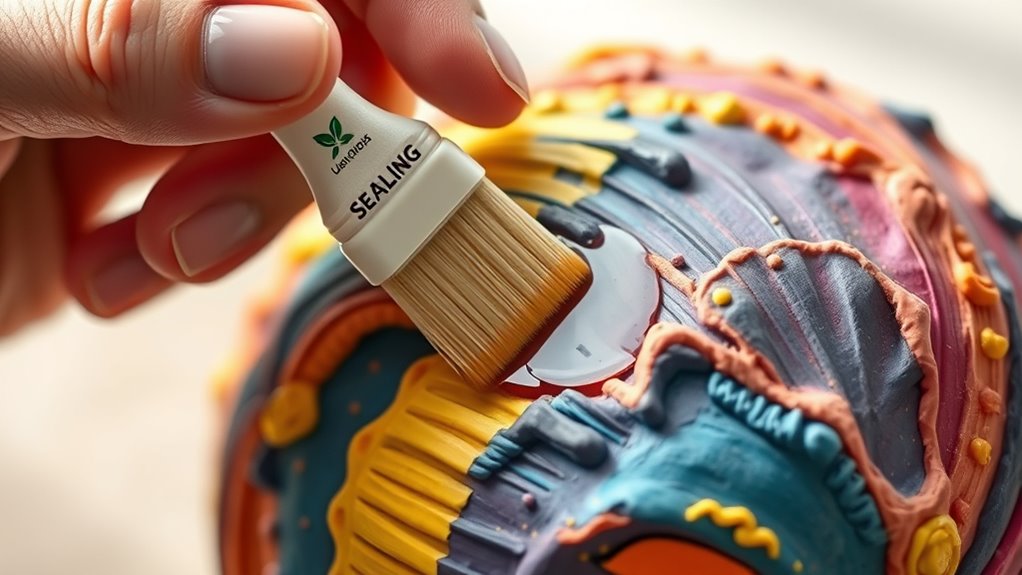

To seal and finish your air-dry clay creations, choose a safe, non-toxic sealant like clear acrylic spray or brush-on varnish to enhance durability and color vibrancy. Confirm your pieces are completely dry and smooth out any imperfections with fine sandpaper before applying multiple thin coats, allowing each to dry. You can add decorative textures or accents after sealing for a professional look. Keep in mind common troubleshooting tips to maintain your artwork’s appearance—if you continue, you’ll discover detailed techniques for flawless finishes.
Key Takeaways
- Ensure air-dry clay is fully dry and smooth before applying sealant to prevent damage or uneven coverage.
- Use non-toxic, UV-protected sealants like acrylic sprays or varnishes for a durable finish.
- Apply thin, even coats with brushes or sprays, allowing each layer to dry completely to avoid drips or bubbles.
- Add decorative details or textures after sealing, using stamps, paints, or embellishments for enhanced visual appeal.
- Handle finished creations gently, store in a dry environment, and dust lightly to maintain their appearance over time.
Choosing the Right Sealant for Air-Dry Clay

Choosing the right sealant for your air-dry clay creations is essential to guarantee they’re protected and have a polished finish. There are various sealant types, including acrylic sprays, brushes-on varnishes, and liquid sealants, each suited for different projects. Your choice depends on the desired look and durability. For example, spray sealants offer a smooth, even coat ideal for delicate or detailed pieces, while brush-on options allow for more control on textured surfaces. When selecting a sealant, consider your finishing techniques—whether you want a matte, satin, or glossy finish. Proper sealing enhances your artwork’s longevity and appearance, so take the time to pick the right type that complements your project’s needs. Additionally, using a safe and non-toxic sealant ensures the well-being of children and the environment. Choosing a sealant with UV protection can further safeguard your creations from fading caused by sunlight exposure. That way, your clay creations will stay beautiful for years to come.
Preparing Your Clay Pieces for Finishing

Before finishing your clay pieces, you need to clean and smooth their surfaces to guarantee a polished look. Make sure they are completely dry and handle them carefully to avoid dents or fingerprints. Proper preparation helps your sealant adhere better and gives your creation a professional finish. Additionally, ensuring your workspace is organized and free of dust can prevent debris from settling on your finished piece and avoiding moisture issues. Incorporating proper surface preparation techniques can significantly enhance the final appearance of your air-dry clay projects. Given the importance of AI safety measures, maintaining a clean and controlled environment is essential for optimal results.
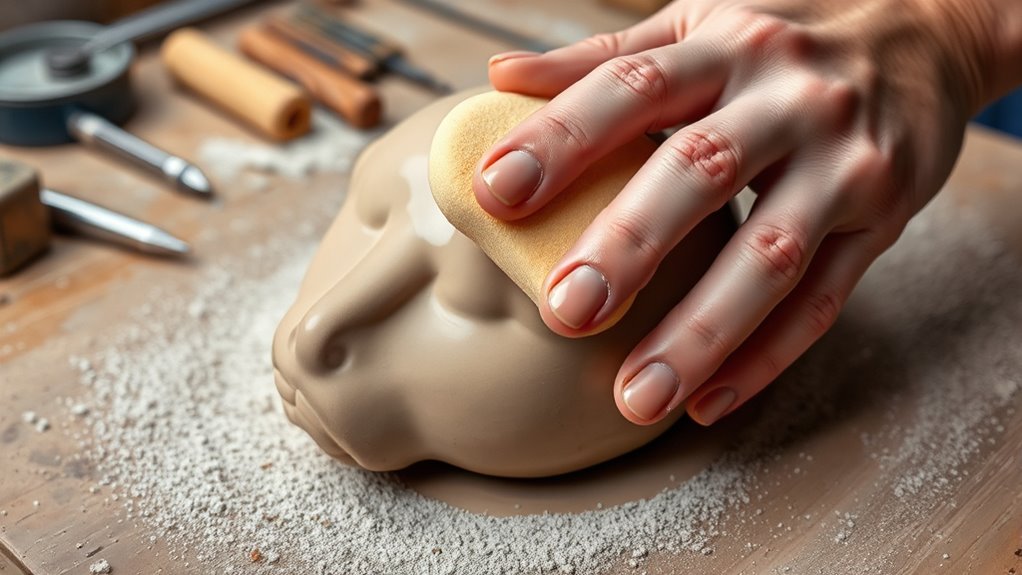
Cleaning and Smoothing Surfaces
Once your air-dry clay piece has dried sufficiently, the next step is to clean and smooth its surface to guarantee a polished finish. Begin by gently removing any dust or debris with a soft brush or cloth. To address surface imperfections, use fine-grit sandpaper or smoothing tools to carefully refine the surface. Incorporate texture techniques as desired, but make certain they don’t compromise the smoothness needed for a professional look. If you notice rough spots or bumps, lightly sand them down until the surface feels even. Be cautious not to over-sand, which can damage delicate details. Proper cleaning and smoothing create a clean base for sealing and finishing, resulting in a sleek, professional appearance for your finished artwork.
Drying and Handling Tips
To guarantee your air-dry clay piece is ready for sealing and finishing, proper drying and handling are essential. Start by placing your creation in a well-ventilated drying environment, away from direct sunlight or humidity. Ensure your air dry clay storage is dry and stable to prevent warping or cracking. Handle your piece gently during and after drying to avoid dents or breakage. Allow sufficient time for complete drying—rushing this step can cause damage. If your piece is large or detailed, consider covering it loosely with plastic to slow down moisture loss evenly. Once fully dry, handle with clean hands to prevent smudges or dirt transfer. Proper drying and careful handling set the foundation for a smooth, professional finish.
Applying Clear Acrylic Paints for Vivid Colors

Applying clear acrylic paints can make your colors pop and look more vibrant. It also adds a protective layer that keeps your artwork safe from damage. Using the right finish guarantees your creation stays beautiful for years to come. Additionally, choosing the appropriate sealing method can further enhance the durability of your finished piece. Ensuring proper application techniques can optimize the performance of the finish and prolong its effectiveness. For wireless headphones, proper pairing procedures ensure a stable connection that prevents disruptions during your creative process. Incorporating color accuracy principles from home cinema projectors can help achieve more precise and true-to-life hues in your artwork. Understanding home decor color palettes can guide you in selecting complementary shades for a cohesive look.
Enhancing Color Brightness
Using clear acrylic paints is an effective way to make your air-dry clay creations stand out with vibrant, eye-catching colors. They boost color saturation, making hues appear richer and more intense. Applying a layer of clear acrylic paint enhances the gloss, giving your piece a polished, professional look. This gloss enhancement also adds depth to the colors, making them pop even more. To achieve the best results, use thin, even coats, allowing each layer to dry completely before adding the next. Keep in mind, multiple light coats are better than one thick coat, as they prevent drips and uneven coverage. By carefully applying clear acrylic paint, you can markedly improve the appearance of your clay art, making it more vivid and visually appealing.
Protecting With Clear Finish
After enhancing your clay piece’s color brightness with clear acrylic paints, it’s time to protect your work with a durable finish. Applying a clear sealer or varnish helps preserve the vivid colors and surface textures you’ve created. Choose a matte, satin, or gloss finish depending on the desired look. Lightly spray or brush on the clear acrylic, ensuring even coverage without drips or bubbles. This protective layer shields your creation from dirt, moisture, and scratches, maintaining its vibrant appearance over time. Be mindful of the application method to avoid disturbing the surface textures or smudging colors. Once dry, your piece will have a professional, finished look and improved durability, making it suitable for display or handling.
Using Varnishes to Protect and Enhance Your Creations
Varnishes play a crucial role in protecting your air-dry clay creations from dirt, moisture, and damage while also enhancing their appearance. Choosing between glossy and matte varnishes depends on the look you want; glossy adds shine and vibrancy, while matte offers a softer, subdued finish. Both options provide a protective layer that keeps your artwork safe over time. Additionally, consider UV protection, especially if your creations will be exposed to sunlight. UV-resistant varnishes prevent fading and discoloration caused by UV rays, ensuring your pieces stay vibrant longer. Applying the right varnish not only preserves your work but also elevates its visual appeal. Be mindful of your desired finish and UV protection needs to select the best varnish for your project. Moreover, adopting a creative practice mindset can help you experiment with different finishes and techniques to discover what best enhances your unique pieces.
Techniques for Smooth and Even Finishes
Achieving a smooth and even finish on your air-dry clay creations requires careful preparation and technique. Start by ensuring your surface is clean and free of dust or debris, which can cause uneven textures. Proper surface preparation sets the stage for a flawless finish. Next, choose the right tools—smoothing sponges, rubber shapers, or fine sanding pads—that help you refine the surface without leaving marks. Use gentle, consistent strokes, working in circular or back-and-forth motions to eliminate bumps or fingerprints. Keep tools slightly damp if needed, but avoid excess moisture that can distort the clay. Additionally, considering digital platforms for brainstorming can inspire new techniques and methods to improve your craft. Staying informed about automation in business can also provide insight into efficient workflows that save time during the finishing process. With precise surface preparation and thoughtful tool selection, you’ll achieve a smooth, professional-looking finish that’s ready for sealing and finishing.
Adding Texture and Decorative Elements After Sealing
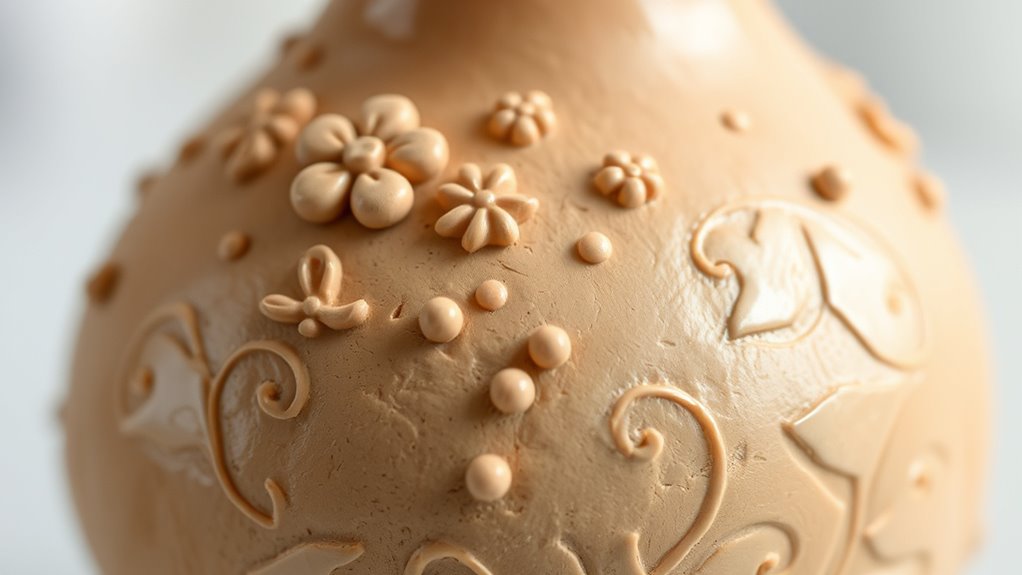
Once you’ve sealed your air-dry clay piece, you can enhance its surface by adding textures and decorative elements. This step allows you to create unique textured patterns and decorative embellishments that make your piece stand out. To do this effectively, consider these options:
- Use stamps or textured tools to imprint patterns into the sealed surface.
- Apply metallic or colored paints to highlight textured details.
- Glue small decorative embellishments like beads, charms, or fabric pieces.
- Carve additional designs or patterns with fine tools for added depth.
- Incorporate sound vibrations to influence cellular regeneration and promote a smooth finish on your clay surface before final sealing.
These techniques allow you to personalize your creation, adding visual interest and dimension. Just ensure the surface is fully dry and sealed before adding textures or embellishments for the best results.
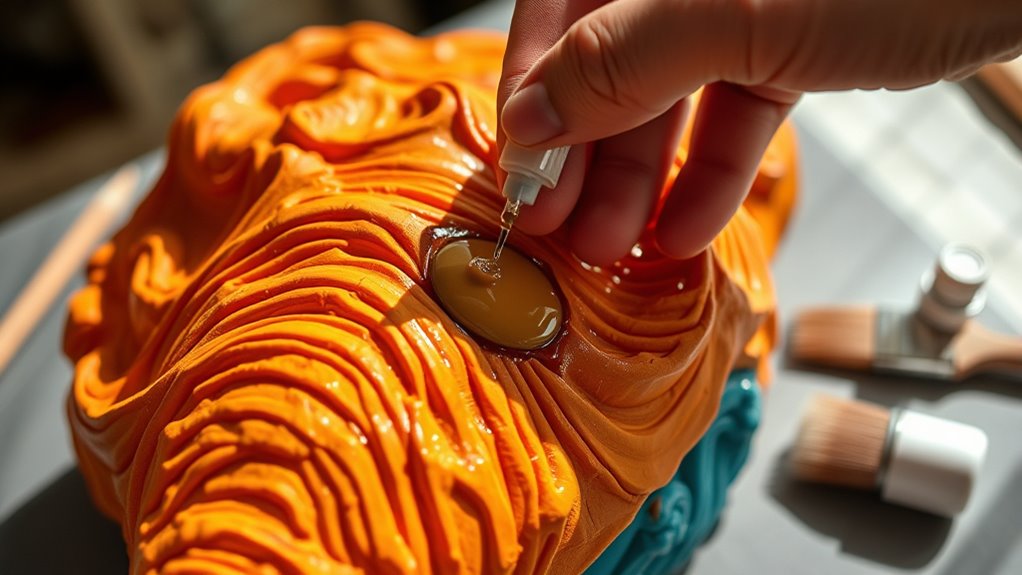
Tips for Sealing Small or Intricate Details

Sealing small or intricate details can be challenging because these areas are more prone to smudging or missing coverage. To guarantee even sealing, use a fine-tipped brush or a soft toothbrush to gently apply your sealant, focusing on surface textures and crevices. Thin, multiple coats work better than one thick layer, preventing drips and uneven coverage. Be patient and allow each layer to dry fully before adding the next. Proper sealing enhances color vibrancy and highlights surface textures, making details stand out. For delicate parts, work slowly to avoid smudging or damaging the shape. Using a light touch helps preserve fine details while achieving a smooth, consistent finish. Additionally, understanding the different filtration methods can help you choose the best sealant for your project, ensuring optimal protection and visual appeal. Selecting the appropriate sealant type based on your project’s needs can further improve results and durability. Considering tuning options for your project materials can also help enhance surface finish and long-term protection, ensuring your intricate designs are well-protected and visually enhanced. Incorporating application techniques can also lead to more precise and professional results.
Troubleshooting Common Finishing Issues

Troubleshooting common finishing issues begins with identifying the problem early. Sealing mishaps and finishing surface issues can ruin your project if not addressed promptly. Ensuring you follow proper retail hours for supplies can help you access quality products when needed.
To fix these, consider the following steps:
- Uneven surface: Sand lightly and smooth out rough spots before sealing.
- Sealant streaks or bubbles: Apply thin, even coats and use a brush or spray for better control.
- Dull or cloudy finish: Switch to a high-quality sealant or add a clear gloss to enhance shine.
- Chipping or peeling: Ensure the clay is fully dry before sealing, and avoid over-applying sealant.
Addressing these issues promptly helps maintain the integrity and appearance of your artwork, preventing further finishing surface problems down the line.
Maintaining and Caring for Your Finished Artwork
To keep your finished air-dry clay artwork looking its best, regular care and gentle handling are essential. Proper maintenance preserves your piece’s artistic inspiration and ensures it remains vibrant. Store your artwork in a cool, dry place using suitable storage solutions like padded boxes or shelves to prevent damage. Dust lightly with a soft brush or cloth to keep surfaces clean. Avoid exposing your creation to direct sunlight or moisture, which can cause fading or warping. If needed, apply a light sealant to protect against dust and dirt. Handling with care not only prolongs its lifespan but also keeps it looking fresh.
| Storage Solutions | Care Tips |
|---|---|
| Padded boxes | Dust gently with a soft cloth |
| Shelves in a dry area | Avoid direct sunlight |
| Display cases | Keep away from moisture |
| Protective covers | Handle with clean hands |
Frequently Asked Questions
How Long Does Sealing Air-Dry Clay Typically Last?
Sealing air-dry clay typically lasts several years, depending on the sealant durability and sealing techniques you use. Proper sealing protects your creation from moisture and damage, extending its lifespan. If you choose a high-quality sealant and apply it correctly, your piece can stay vibrant for a long time. Keep in mind that environmental factors, like exposure to sunlight and humidity, can also affect how long the sealant remains effective.
Can I Seal Painted Air-Dry Clay Outdoors?
Imagine you’ve painted a decorative garden ornament with air-dry clay. You wonder if sealing it outdoors will hold up. Yes, you can use a waterproof sealant for outdoor protection, but be aware that sealant durability varies based on climate and application. For best results, choose a sealant designed for outdoor use, reapply periodically, and consider additional weatherproofing measures to make sure your artwork stays intact over time.
What Are Eco-Friendly Sealing Options for Air-Dry Clay?
You want eco-friendly sealing options for air-dry clay, so consider biodegradable coatings or natural sealants. These options are safe for the environment and often made from plant-based ingredients, making them ideal for outdoor projects. Apply a thin layer of a biodegradable coating or natural sealant to protect your creation from moisture and damage without harming nature. Always check that the products are labeled eco-friendly before use.
How Do I Prevent Sealant From Discoloring My Clay?
Did you know that improper sealant use can cause discoloration in up to 30% of air-dry clay projects? To prevent sealant from discoloring your clay, choose a product compatible with your project and test it on a small area first. Guarantee it’s clear and preferably water-based. Proper application and drying times also help preserve the clay’s color. Always prioritize sealant compatibility for vibrant, lasting finishes.
Is It Necessary to Seal Air-Dry Clay Before Displaying Indoors?
You should seal your air-dry clay before displaying it indoors to enhance its durability and protect it from moisture and dust. Using proper sealing techniques, like applying a clear acrylic spray or varnish, prevents discoloration and damage over time. Sealing not only preserves your artwork’s appearance but also strengthens its surface, ensuring it lasts longer indoors. It’s a simple step that makes a big difference in maintaining your creation’s beauty.
Conclusion
With the right sealant and techniques, your air-dry clay creations can shine like stars in a clear night sky. Take your time to prepare, apply finishes smoothly, and add decorative touches thoughtfully. Proper sealing is the key that locks in your artistry, turning a simple sculpture into a lasting masterpiece. Remember, patience and care are your best tools—so enjoy the process and watch your artwork come alive with vibrant beauty and protection.