
To improve your craft photography, focus on using natural, diffused light near a window to highlight textures without harsh shadows. Style your items with minimal props and simple backdrops that complement your colors, creating a cohesive look. Avoid clutter so the main features stand out. Experiment with different angles and camera settings like a small aperture to achieve sharp focus. For more tips on perfecting your craft photos, keep exploring ways to enhance your staging and lighting.
Key Takeaways
- Use natural, diffused light near windows to softly illuminate your craft and reveal textures without harsh shadows.
- Style your craft with minimal, complementary props on simple surfaces to highlight its unique features effectively.
- Choose backdrops and props that enhance your craft’s color palette, using neutral tones for warm colors and warm backgrounds for cool tones.
- Focus on natural materials and textures, emphasizing tactile details through thoughtful lighting and staging.
- Capture multiple angles with a small aperture and low ISO to ensure sharp, well-lit images that showcase craftsmanship.

Capturing the intricate details and vibrant textures of crafts can be challenging, but with the right photography techniques, you can showcase your work beautifully. One of the most important aspects is product staging. When you set up your craft for a shoot, think about arranging it in a way that highlights its unique features. Avoid clutter and focus on the main elements, ensuring that every item in the scene complements each other. Use minimal props that enhance the craft without overshadowing it. For example, if you’re photographing a handmade jewelry piece, place it on a simple surface with subtle accents like a soft cloth or natural elements that reflect its style. This approach not only draws focus to the craft but also creates a cohesive visual story.
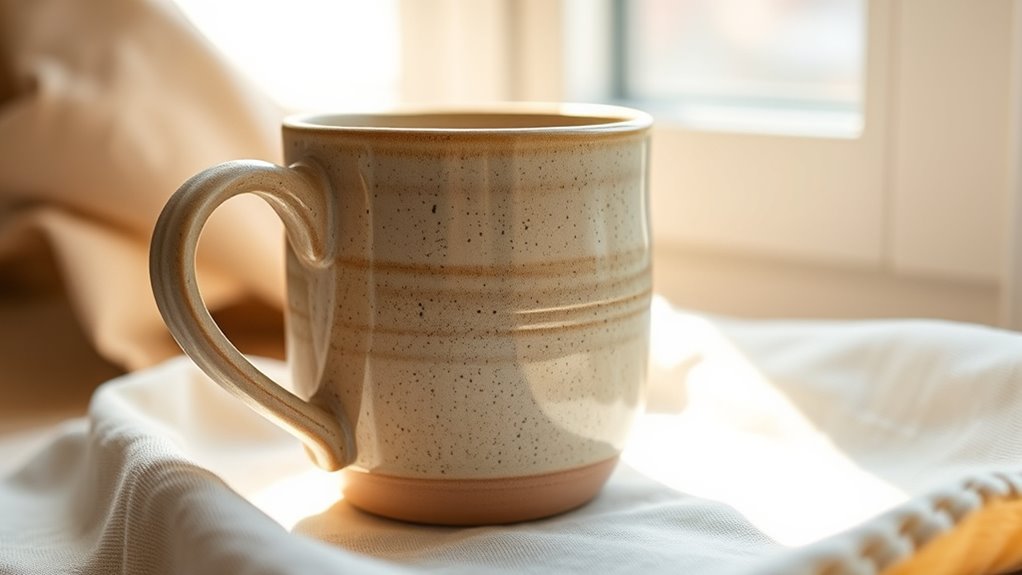
Showcase your crafts with simple staging, minimal props, and thoughtful arrangements that highlight their unique beauty.
Color harmony plays a vital role in making your craft stand out. Before snapping photos, consider the palette of your project and choose backdrops and props that enhance its colors. Harmonious color schemes can make your craft appear more appealing and professional. For instance, if your piece has warm tones like reds, oranges, and yellows, opt for backgrounds in neutral shades or complementary cool tones that allow the craft’s colors to pop without clashing. Conversely, if your craft features cool colors like blues and greens, warm-toned backdrops can create a striking contrast that emphasizes the details. Balancing colors in your staging guarantees your craft is visually compelling and accurately represented.
Lighting is another essential element. Natural light is often best, especially diffused sunlight that softens shadows and highlights textures gently. Position your craft near a window during the day, but avoid direct sunlight that might cause harsh reflections or overexposure. If natural light isn’t available, use softbox lights or ring lights to evenly illuminate your work. Proper lighting reveals the fine details and textures, making your craft look more tangible and inviting. When you’ve set up your scene with thoughtful product staging and harmonious colors, lighting ties everything together, making sure your photo captures the craft’s essence vividly. Additionally, paying attention to the natural materials used in your craft can help you emphasize authenticity and tactile appeal in your images.
Finally, don’t forget to check your camera settings. Use a small aperture to keep the entire piece in sharp focus, and consider a low ISO to reduce noise. Take multiple shots from different angles to find the most flattering perspective. With careful attention to staging, color harmony, and lighting, you can create craft photographs that truly do justice to your artistry.

Torjim Softbox Photography Lighting Kit, 16'' x 16'' Professional Softbox Lighting Kit with 85W 3000-7500K LED Bulbs, Studio Lights for Photography/Video Recording/Live Streaming/Portraits Shooting
- High-Quality Reflective Fabric: Soft, even, wide-range illumination
- Energy-Saving LED Bulbs: 85W, 3000-7500K, long-lasting, efficient
- Sturdy Aluminum Tripod: Reliable, wobble-resistant, durable construction
As an affiliate, we earn on qualifying purchases.
As an affiliate, we earn on qualifying purchases.
Frequently Asked Questions
How Do I Choose the Best Camera Settings for Craft Photography?
To choose the best camera settings for craft photography, start with aperture settings—use a smaller f-number for a blurred background or a higher one for sharp details. Adjust ISO to keep images bright without noise; lower ISO for well-lit scenes, higher for low light. Experiment with these settings to find a balance that highlights your craft’s details, ensuring clarity and vibrant colors. Keep practicing to master your ideal configurations.
What Are Common Mistakes to Avoid in Craft Photography?
Oh, don’t forget to avoid common mistakes like ignoring proper composition or using improper focus—because nothing says “professional” like a blurry shot of your masterpiece. You might think randomly snapping photos works, but strategic framing makes all the difference. Stay mindful of focus points, keep your composition balanced, and resist the urge to rush. Otherwise, you risk turning stunning crafts into pixelated chaos—definitely not what you want!
How Can I Photograph Small Craft Details Effectively?
To photograph small craft details effectively, use close-up techniques and macro photography. Get your camera very close to the subject, making certain sharp focus on intricate details. Use a macro lens or the macro mode on your camera for better clarity. Stabilize your shot with a tripod to prevent blur, and ensure good, even lighting. Experiment with angles to highlight textures and tiny features, making your craft details stand out beautifully.
What Editing Techniques Enhance Craft Photos Without Overdoing It?
Think of your craft photos as a painter’s canvas—subtle tweaks can elevate the image without overpowering it. Use color correction to bring out true hues and guarantee consistency, like a gentle sunrise brightening the scene. Enhance backgrounds subtly to add depth, mimicking a soft glow behind your craft. These editing techniques, when applied with restraint, highlight your work’s beauty and keep the focus sharp and inviting, like a delicate whisper.
How Do I Showcase Textured Crafts to Highlight Their Features?
To showcase textured crafts effectively, focus on surface highlighting to emphasize their unique features. Use side lighting or angled light sources to create shadows that bring out the texture emphasis, making details pop. Keep backgrounds simple and neutral to avoid distraction, and consider close-up shots to capture surface intricacies. This approach highlights the craft’s texture, making it visually appealing and drawing viewers’ attention to its fine details.
Conclusion
Now that you’ve uncovered these craft photography tips, you’re ready to turn your creations into visual stories that sparkle. Think of your camera as a magic wand, transforming simple materials into mesmerizing images. With perfect lighting, thoughtful styling, and beautiful backdrops, your craft photos will shine brighter than ever. Remember, every shot is a brushstroke in your artistic masterpiece—so keep experimenting, stay inspired, and let your passion illuminate every frame.