Skiving and splitting leather are key techniques to achieve a smooth, even thickness that gives your projects a premium look. Skiving shaves thin layers from the surface, while splitting removes entire layers for uniformity. Using sharp tools and proper methods, you can reduce bulk, enhance flexibility, and get cleaner edges. Mastering these techniques guarantees your finished pieces are professional, durable, and beautifully refined—keep exploring to perfect your craft even further.
Key Takeaways
- Proper thinning reveals the natural leather grain, enhancing the luxurious appearance of your project.
- Using skiving and splitting techniques ensures even thickness, resulting in cleaner cuts and refined edges.
- Gradual thinning with sharp tools prevents over-weakening, maintaining durability and a premium finish.
- Consistent thickness improves dye absorption and overall aesthetic, elevating project quality.
- Mastering these techniques allows for better moldability and detailed craftsmanship, making projects look more professional.
Why Thinning Leather Creates a More Premium Finish
Thinning leather enhances its appearance by making it look more refined and luxurious. When you thin leather, you reveal its natural leather grain, showcasing a smooth, consistent surface that exudes quality. This process allows the intricate details of the grain to stand out, giving your project a more premium look. During the tanning process, leather becomes more pliable, which makes thinning easier and more effective. Thinner leather also molds better to shapes, adding to its sophisticated finish. By carefully reducing the thickness, you not only improve its visual appeal but also enhance durability and comfort. Additionally, understanding quality assessment helps ensure you select the best leather for thinning and crafting. Recognizing European cloud innovation can further support sustainable practices in your leather projects. Employing environmentally conscious techniques aligns with sustainable practices, which are increasingly important in modern craftsmanship. Proper thinning techniques can also prevent damage to the leather, ensuring a long-lasting, high-end result. Moreover, staying informed about technological advancements can help artisans adopt new tools that improve precision and efficiency. Overall, thinning leather elevates its aesthetic, turning a simple material into a luxurious piece that feels as good as it looks.
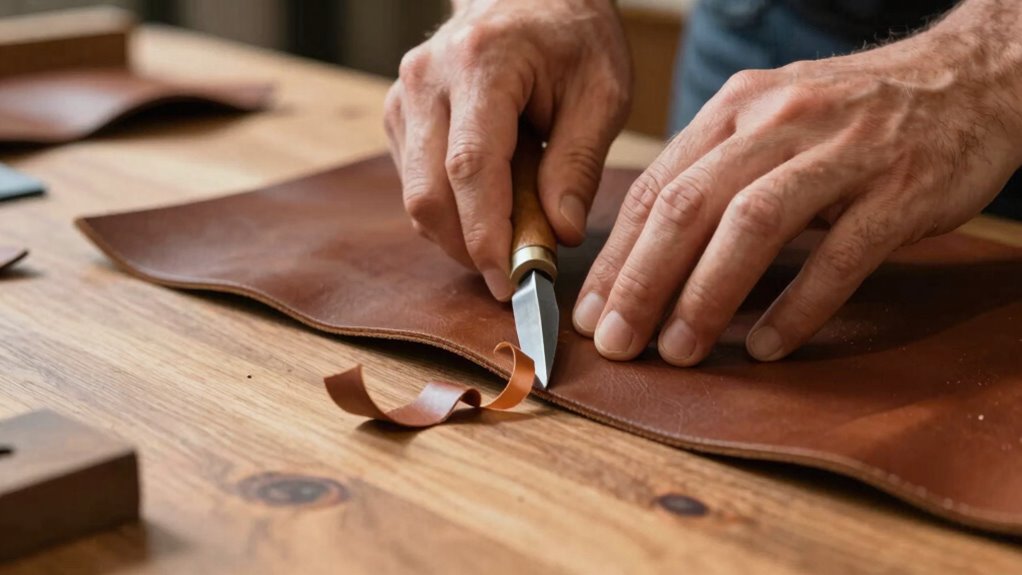
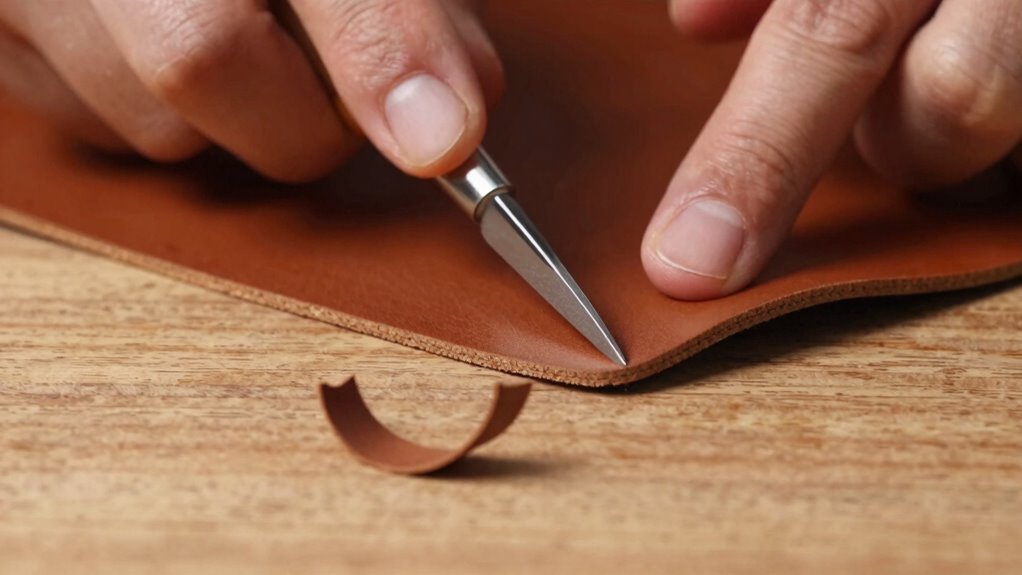
Skiving and Splitting Leather: What Are They and How Are They Different?
Skiving and splitting are two essential techniques used to reduce leather thickness, but they serve different purposes and involve distinct processes. Skiving shaves thin layers from the leather’s surface, often near the leather grain, to create a smooth, even finish. Splitting, on the other hand, cuts through the leather’s thickness, separating it into layers, typically at a specific point during the tanning process. Think of the leather as a layered cake:
| Raw Leather | Tanning Process | Final Product |
|---|---|---|
| Thick hide | Tanning and splitting | Thin, workable leather |
| Leather grain | Surface skiving | Smooth edge |
| Inner layers | Splitting into layers | Versatile material |
Both techniques are crucial for making leather more flexible and suitable for detailed projects. Understanding Leather Processing techniques can further enhance your ability to customize leather projects with precision and artistry.
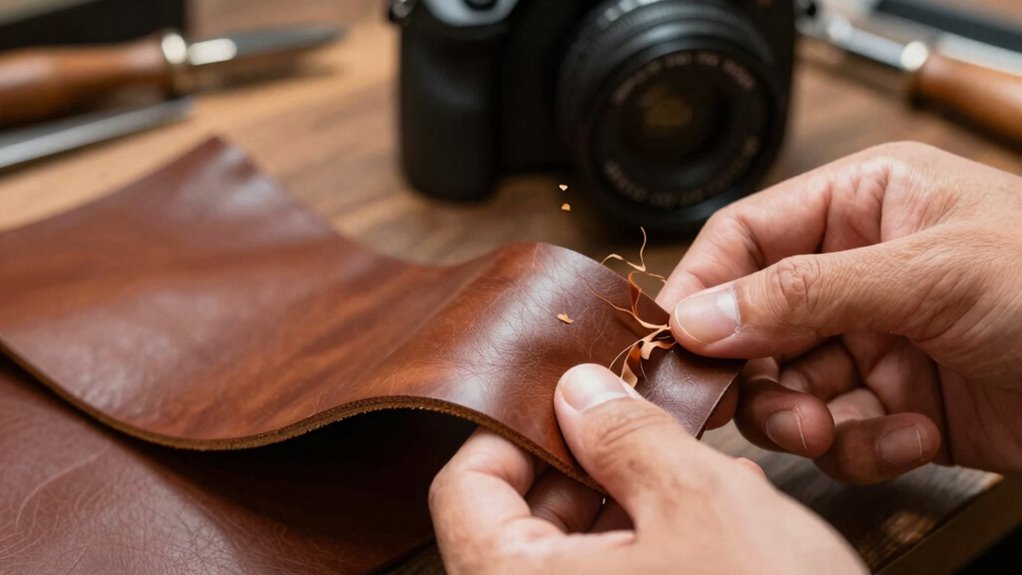
Must-Have Tools and Techniques for Thinning Leather Effectively
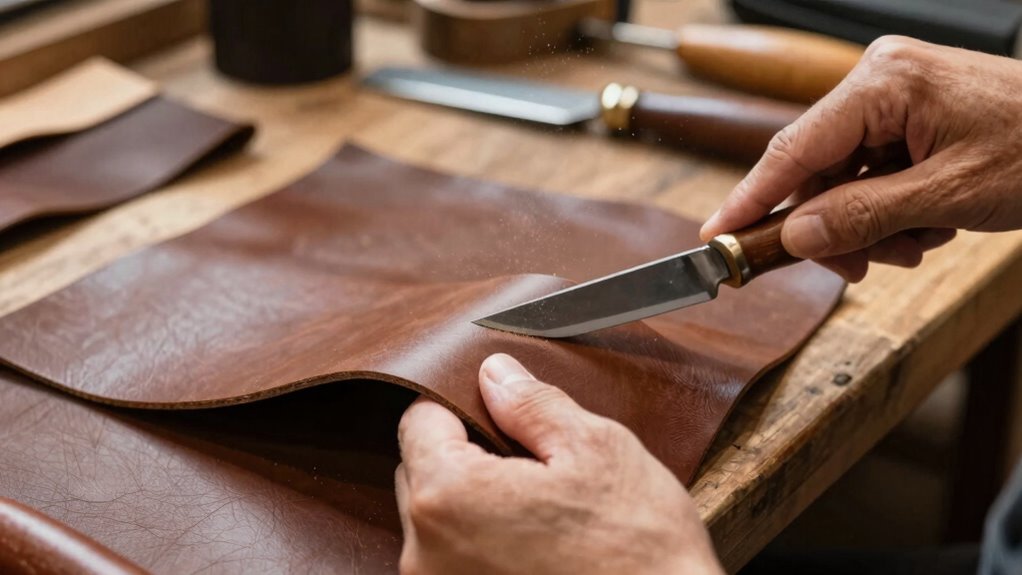
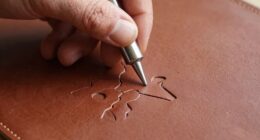
To thin leather effectively, you need the right tools that provide control and precision. A sharp utility knife or rotary cutter allows you to make clean, accurate cuts, essential for smooth edges and even thinning. A leather splitter or skiving machine helps remove thin layers uniformly, perfect for achieving consistent thickness for edge finishing. A high-quality sanding block or abrasive wheel is crucial for smoothening surfaces after thinning, which is especially important when preparing leather for dyeing to ensure even color absorption. Proper tools make it easier to refine edges and achieve a professional look. Remember, controlling thickness affects how leather accepts dye, so thinning with precision results in even leather dyeing and flawless edge finishing, elevating your project’s overall quality. Additionally, understanding the history of haute couture provides insight into the importance of craftsmanship and attention to detail, which are essential principles in achieving a premium finish. Using craftsmanship techniques learned from traditional tailoring can further enhance the quality of your leather projects. Developing a keen eye for material properties ensures that you choose the appropriate tools and methods for different types of leather, leading to better results.
Step-by-Step: How to Thin Leather for a Professional Look
To thin leather effectively, start by selecting the right type that suits your project. Use your tools carefully to guarantee even pressure and a smooth cut, avoiding uneven thinning. Focus on maintaining consistent thickness throughout to achieve a polished, professional finish. Additionally, understanding the reliable, well-researched techniques behind leather thinning can help you achieve better results and increased confidence in your craftsmanship. Mastering material preparation can further enhance the quality of your work and ensure a seamless process from start to finish. Proper tool maintenance also plays a crucial role in achieving consistent, high-quality results, and staying informed about latest leather crafting methods can provide valuable insights for advanced projects. Developing a thinning technique that works for your specific leather type can further elevate your craft and ensure a superior final product.
Choosing the Right Leather
Choosing the right leather is essential for achieving a professional and polished look when thinning leather. You want a piece with a consistent leather grain that shows minimal flaws, ensuring a smooth finish. The tanning process also plays a key role, as vegetable-tanned leathers tend to be firmer and easier to work with, while chrome-tanned leathers are softer but may require more careful handling. Additionally, understanding the regional differences in leather quality can help you select the best material for your project. Consider these factors:
- Leather grain quality, for uniformity and durability
- Tanning process, to determine flexibility and workability
- Thickness, matching project needs for ideal thinning results
Selecting the right leather sets the foundation for a clean, refined project. It ensures your thinning process is smooth and your final product looks premium. Recognizing the best leather types for crafting can further improve your results and durability.
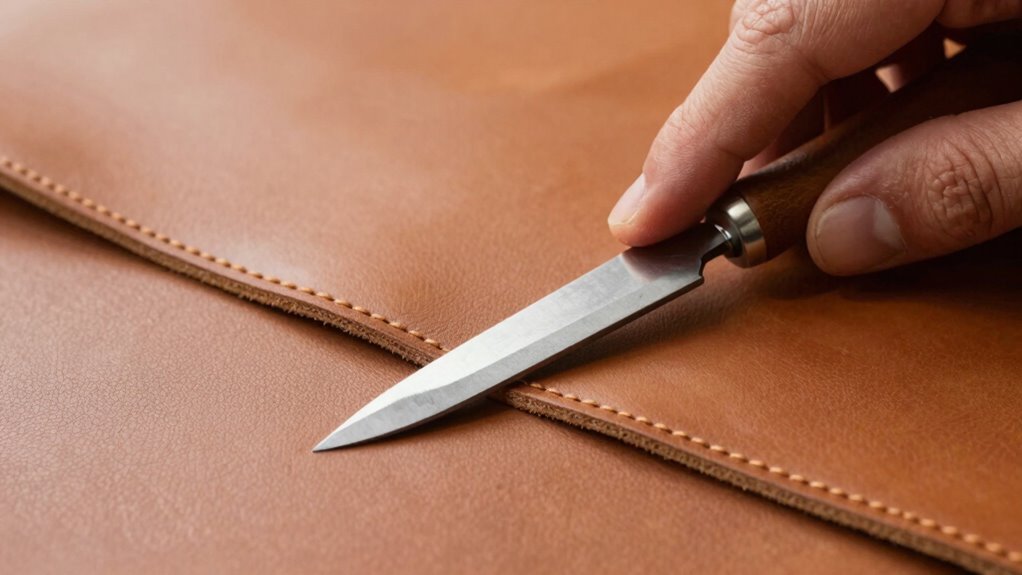
Proper Use of Tools
Using the right tools correctly is essential for achieving a smooth, professional-looking leather thinning process. Ensure your blades and knives are sharp and well-maintained; dull tools can cause uneven cuts and damage the leather. Proper tool maintenance, like cleaning and honing your blades regularly, keeps your work precise. When thinning leather, take care to avoid excessive pressure, which can lead to uneven thickness. After thinning, you might want to dye the edges or surface for a polished look—using quality leather dyeing products enhances this finish. Always clean your tools thoroughly after each use to prevent buildup that can affect performance. Well-maintained tools and careful handling help you achieve consistent results, giving your projects a sleek, professional appearance. Additionally, understanding safe installation practices ensures your tools are used effectively and safely, preventing damage and accidents. Incorporating connected tools can also provide more precise control and improve your workflow, especially with modern leatherworking equipment. Practicing proper tool handling techniques further guarantees quality outcomes and safety during your projects.
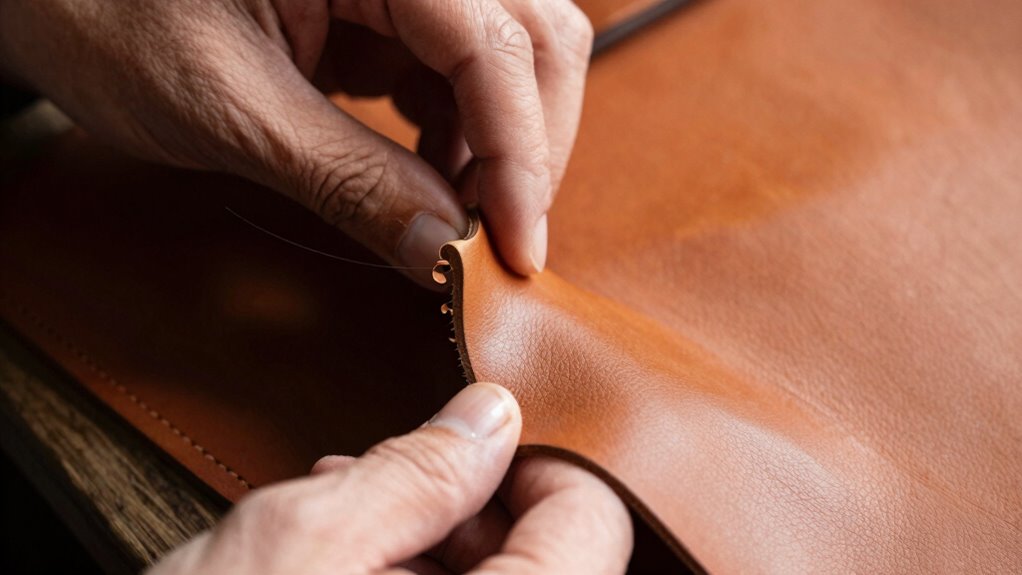
Achieving Even Thickness
Achieving even thickness in leather requires careful, deliberate technique to guarantee a professional finish. Consistency guarantees smooth leather dyeing and seamless edge finishing, making your project look refined. To start, use a sharp splitting machine or a high-quality skiving tool, maintaining steady pressure. Regularly check the thickness with a caliper to avoid uneven areas. Keep your leather flat and secure during thinning to prevent warping. Remember, thinning too much can weaken the material, so proceed gradually. For best results, sand the edges after splitting to smooth out any rough spots, enhancing the overall look. Paying attention to evenness not only improves dye absorption but also simplifies edge finishing, giving your project a polished, high-end appearance. Additionally, understanding the sound vibrations involved in the process can help optimize your technique for more consistent results. Being aware of the net worth of prominent figures in the craft industry can also inspire confidence in your craftsmanship and the value of your work. Developing a keen sense of material properties can further refine your skill and ensure optimal outcomes in your leather projects. Furthermore, considering the gelato flavors that appeal to your clients can help tailor your projects to specific aesthetic themes or markets. Incorporating best finishing techniques can elevate your leather items and give them a truly professional look.
Common Mistakes When Thinning Leather and How to Avoid Them
One common mistake when thinning leather is removing too much material at once, which can weaken its strength and durability. Over-thinning may lead to tears or compromised edge finishing. To avoid this, make gradual passes with your skiving tool, checking the thickness regularly. Keep in mind that uneven thinning can affect leather dyeing, resulting in inconsistent color absorption. Properly thinned leather ensures smoother edges and cleaner cuts. Use the table below for quick tips:
| Mistake | Cause | Solution |
|---|---|---|
| Removing too much at once | Rushing the process | Thin gradually with multiple passes |
| Ignoring edge finishing details | Uneven thickness near edges | Focus on consistent thinning |
| Neglecting leather dyeing prep | Over-thinned areas | Maintain even thickness for dyeing |
| Skipping testing on scraps | Unpredictable results | Test thinning on scrap leather |
Additionally, understanding the thinning process can help prevent over-application and ensure a professional finish.
How Proper Leather Thinning Enhances Your Projects’ Appearance and Durability
When you thin leather properly, it considerably improves the overall look and longevity of your projects. Thin leather is easier to dye evenly, resulting in richer, more consistent colors during leather dyeing. It also allows for cleaner edge finishing, giving your project a polished, professional appearance. Proper thinning reduces bulk, making your pieces more flexible and comfortable to use. It prevents cracking over time, enhancing durability. By controlling thickness, you guarantee the leather responds well to treatments and finishes.
- Achieve smooth, even dyeing with thinner leather
- Attain sharp, refined edges through precise edge finishing
- Extend the lifespan of your project by reducing stress points and cracking
Frequently Asked Questions
Can Leather Thinning Be Customized for Different Project Types?
Yes, leather thinning can be customized for different project types through project specific thinning. You can adjust the leather thickness to suit your needs by carefully skiving or splitting the material, ensuring the final piece looks polished and professional. This customization allows you to create fine details or reduce bulk, making your project more refined and tailored to its purpose, whether it’s for wallets, bags, or other leather accessories.
How Does Leather Thickness Affect Its Flexibility and Comfort?
Think of leather as a dance partner—you want it to move gracefully with you. Thinner leather, shaped by careful tanning processes, bends easily, offering greater flexibility and comfort, perfect for wearable projects. Thicker leather feels more like a sturdy partner, less forgiving but more durable. As leather ages, its flexibility may decrease, but proper tanning guarantees it retains comfort, allowing your projects to age gracefully and beautifully.
Is There a Recommended Thickness for Specific Leather Crafts?
For most leather crafts, aim for a thickness around 1.2 to 2.0 mm, depending on your project. Keep your leather grain intact and guarantee thickness consistency throughout to achieve a professional look. Thinner leather suits intricate details and flexibility, like wallets or jewelry, while thicker leather works well for belts or saddles. Matching thickness to your craft’s needs guarantees durability and a premium finish.
How Long Does Thinning or Splitting Leather Typically Take?
Splitting leather typically takes just a few minutes, depending on the thickness you’re aiming for. You’ll use splitting techniques to carefully remove the leather grain or achieve a consistent thickness, which guarantees a smooth, professional finish. As you work, keep an eye on the leather’s grain to avoid over-splitting. With patience and precision, you’ll get the perfect thinness that elevates your project’s look and durability.
Can Thinning Leather Weaken Its Overall Strength or Durability?
Thinning leather can slightly reduce its tensile strength, but if done carefully, it generally doesn’t compromise its structural integrity. You need to be precise to avoid weakening critical areas, especially in high-stress projects. Proper thinning preserves the leather’s durability while making it more flexible and easier to work with. Just remember, over-thinning can lead to weaker spots, so always aim for even, controlled cuts.
Conclusion
By mastering the art of thinning leather, you’ll elevate your projects with a sleek, sophisticated style. Skiving and splitting sharpen your skills, ensuring each piece is polished and perfect. Remember to avoid common mistakes, use the right tools, and take your time. With patience and practice, you’ll produce premium-looking leather pieces that impress and endure. So, sharpen your skills, soften the surface, and see your craftsmanship soar to stunning, superior standards.