
To create clay trinket dishes with botanical imprints, start by choosing quality clay and fresh, dry plants with interesting textures. Shape the clay, press the botanicals firmly into the surface, and carefully dry the piece to prevent cracks. After drying, you can glaze and fire your dish for durability. Finish with sealing options to protect the imprints. If you want step-by-step tips to make beautiful, personalized pieces, keep exploring further.
Key Takeaways
- Select and press fresh, dry botanicals firmly into leather-hard clay to create detailed botanical imprints on trinket dishes.
- Shape the clay into shallow dishes, ensuring full contact with botanicals for crisp, clear textures.
- Allow the dishes to dry thoroughly before applying glazes or sealants to preserve imprint details.
- Use appropriate glazing and firing techniques to enhance and protect botanical impressions.
- Store and handle finished botanical imprint dishes carefully to maintain their intricate textures and appearance.
Materials and Tools Needed for Botanical Imprint Dishes
To create beautiful botanical imprint dishes, you’ll need a few essential materials and tools. Start with high-quality clay suitable for imprints, such as ceramic or air-dry clay. You’ll also want carving tools or stamps to create your botanical impressions. A variety of glazing techniques can enhance your dish’s appearance, so gather brushes, sponges, and glazes in your chosen colors. To keep your workspace organized, consider storage solutions like small containers for glazes and tools. Keep a sealant or clear glaze on hand for finishing, which helps protect your design. Proper storage of unused clay and tools ensures they stay in good condition for future projects. With these materials and tools, you’re ready to begin crafting your botanical imprint dishes.
Step-by-Step Guide to Crafting Your Clay Trinket Dish
To create your clay trinket dish, start by gathering all your materials and tools. Next, shape the clay and add your chosen imprints or decorations. Then, incorporate specialized techniques to achieve intricate botanical imprints that enhance your design. Finally, cure and finish your dish for a polished, functional piece.
Gather Materials and Tools
Before you start shaping your clay trinket dish, gather all the necessary materials and tools to guarantee a smooth crafting process. You’ll need high-quality clay, a rolling pin, carving tools, and botanical imprints. Keep a small bowl of water nearby to help with smoothing edges and blending colors through simple color blending techniques. To achieve interesting textures, gather various texture tools like sponges, stamps, or textured fabric. These tools will help you add depth and visual interest to your dish. Having everything ready ensures you won’t interrupt your workflow. Being prepared also allows you to focus on experimenting with texture techniques and color blending, creating a beautiful, personalized piece. Once everything’s assembled, you’re ready to start shaping your clay trinket dish confidently.
Shape and Imprint Clay
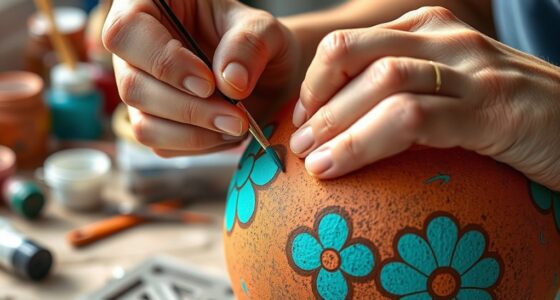
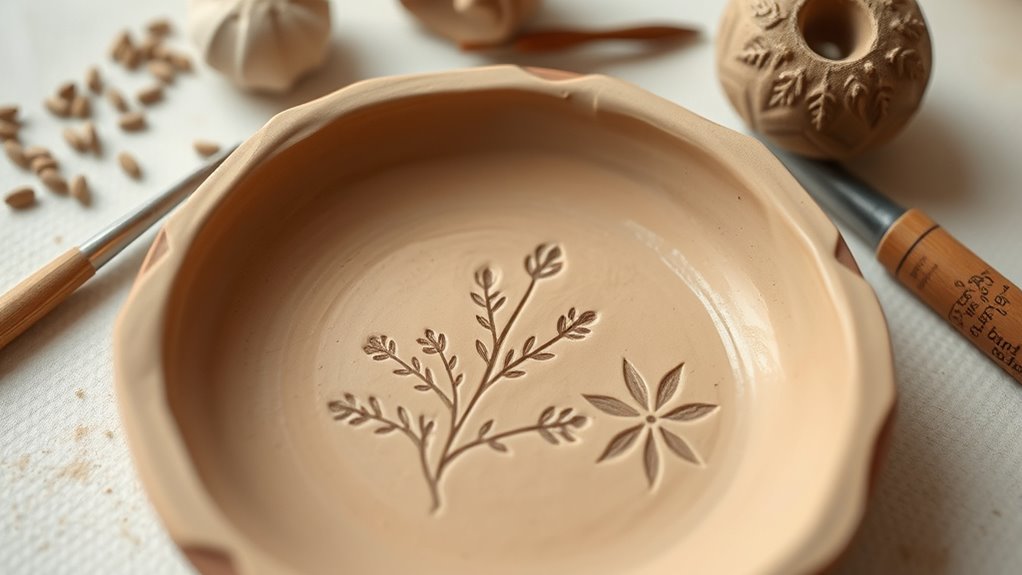
Once you’ve gathered your materials, begin shaping your clay by rolling it out evenly using a rolling pin. As you flatten the clay, consider your texture techniques—pressing botanical imprints or creating ripples for added interest. These textures give your dish a unique, tactile feel. When it comes to color options, you can keep it natural or add pigments to achieve a vibrant or subtle hue. If you’re mixing colors, knead the clay thoroughly to blend seamlessly, or layer different shades for a marbled effect. Use your fingers or tools to gently shape the edges and form your desired dish shape. Imprinting botanical elements while the clay is still soft will guarantee your designs are clear and detailed, making your trinket dish truly one-of-a-kind.
Cure and Finish Dish
After shaping and imprinting your clay dish, the next step is to let it cure properly. Place your piece in a well-ventilated area, allowing it to dry for at least 24-48 hours, depending on thickness. Once fully dry, you can explore glazing techniques to enhance its appearance and protect the surface. Choose glazes that complement your botanical imprints and apply thin, even coats. After glazing, fire your dish in a kiln if you’re using kiln-fired clay, or use a suitable oven-safe glaze if applicable. Once glazed and cooled, consider storage solutions like small trays or bowls to keep your trinket dish safe. Proper curing and finishing ensure your dish is durable, beautiful, and ready for everyday use or display.
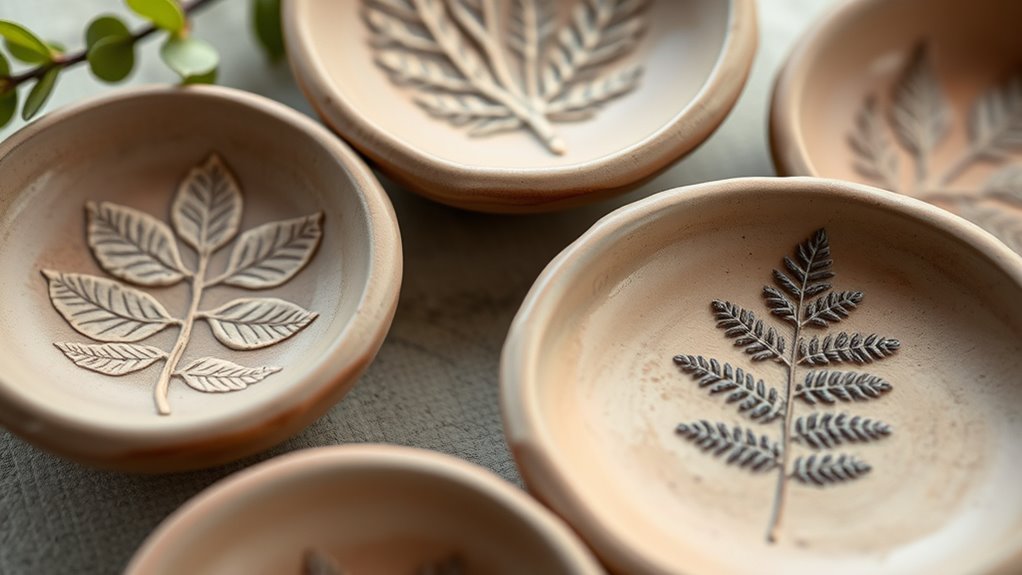
Choosing and Preparing Botanical Imprints for Your Design

Start by selecting botanicals that have clear and interesting textures, like leaves or flowers, to make your design stand out. Prepare your imprints by pressing them firmly into the clay, ensuring they’re clean and dry beforehand. To get sharp, detailed impressions, double-check that the botanical textures are visible and well-defined before you move on. Incorporating remote hackathons can also inspire new design ideas through virtual collaboration and diverse input. Additionally, considering the contrast ratio of your clay surface can help enhance the visibility of intricate imprints, and paying attention to visual contrast can further improve the overall aesthetic effect. Understanding glycolic acid benefits can also assist in preparing your skin for handling clay, ensuring a smooth surface for imprinting. Exploring beach destinations can provide inspiration for nature-themed designs by observing coastal flora and landscapes.
Selecting Suitable Botanicals
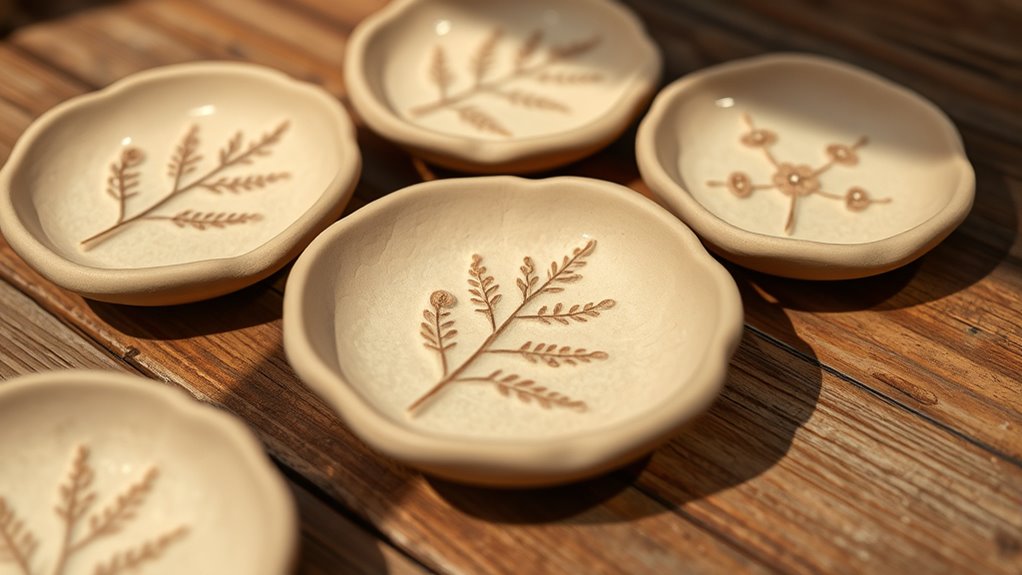
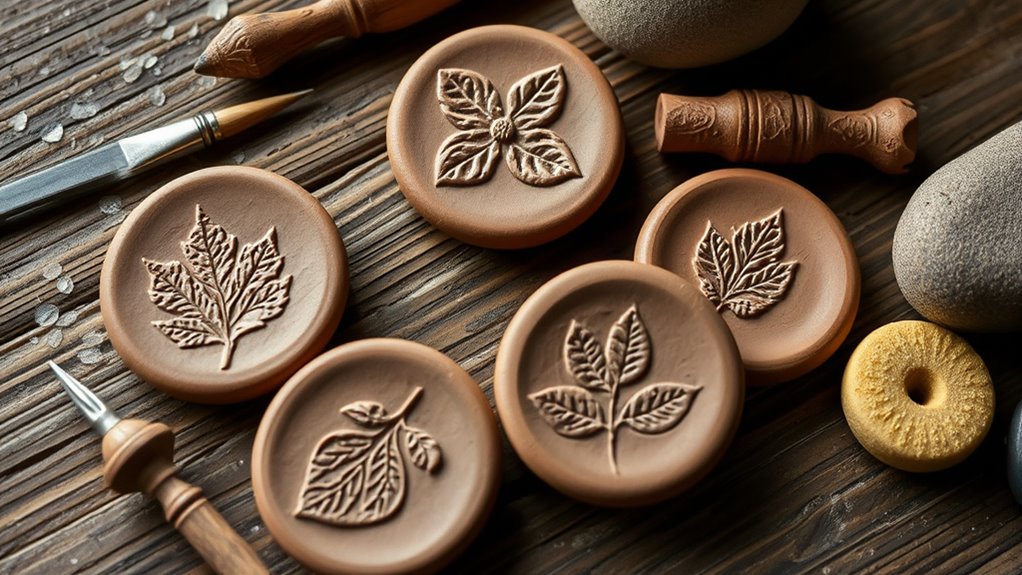
Choosing the right botanicals is essential for creating beautiful and clear imprints on your clay trinket dishes. Focus on plant selection by choosing leaves, flowers, or herbs with distinct shapes and textures that will transfer well onto clay. Seasonal considerations matter too; select botanicals when they are fresh and in peak condition to capture their details vividly. Avoid using dried or wilted plants, as they may lose their imprint clarity. Opt for botanicals with contrasting textures to add visual interest. Test a few samples beforehand to see how they transfer onto your clay surface. By carefully selecting botanicals based on their shape, freshness, and seasonality, you ensure your imprints will be striking and enhance the overall design of your trinket dishes.
Preparing Imprints Properly
To achieve sharp, clear botanical imprints on your clay trinket dishes, you need to carefully prepare your chosen botanicals before pressing them into the clay. Make certain your plant materials are clean and dry to prevent smudging or unwanted textures. Lightly flatten or press the botanicals to make uniform contact with the clay surface, which helps capture fine details. Consider how you’ll incorporate glazing techniques later; selecting botanicals with interesting textures can add depth after glazing. Store your imprinted dishes in a safe, flat storage solution to prevent accidental damage before firing. Proper preparation minimizes the risk of imprints smudging or fading during the firing process and ensures your botanical details remain crisp and vibrant in the final piece.
Ensuring Imprint Clarity
Ensuring imprint clarity begins with selecting the right botanicals for your design. Your botanical selection influences the sharpness of your imprint, especially on clay with varying textures. Choose botanicals with clear, defined details—leaves, flowers, or ferns work well. Before pressing, guarantee your botanicals are dry and free of moisture, which can blur the imprint. Consider the clay texture; smoother clay allows for sharper imprints, while rougher textures may soften details. Proper preparation of your botanicals and clay surface helps prevent smudging or loss of detail.
- Use fresh or thoroughly dried botanicals for crisp impressions
- Gently press botanicals into the clay without excessive force
- Keep your clay surface smooth and even before imprinting
- Test imprint on a small piece first to check clarity
- Adjust pressure based on clay texture for ideal detail
Techniques for Impressing Plants Into the Clay Surface
Impressing plants into clay creates mesmerizing textures and patterns, but the key is to act at just the right moment. To achieve clear botanical imprints, you need to preserve the plant’s shape, which is where plant preservation techniques come in. Use fresh, moist plants for best results, as their natural moisture helps transfer details more precisely. When clay is leather-hard, it’s ideal for impressing, providing enough firmness to hold the imprint without warping. During clay sculpting, press the plant firmly but gently into the surface, ensuring full contact without damaging delicate leaves or petals. Practice makes perfect—experiment with different plant types and pressure levels to find what works best. This careful technique ensures crisp, detailed impressions that elevate your handmade trinket dishes. Additionally, understanding the timing of impression techniques can significantly impact the clarity and depth of your botanical imprints, especially when considering plant preservation methods to maintain shape and texture. Being mindful of clay preparation can also help improve the overall success of your botanical impressions, ensuring a smooth and consistent surface for your designs. Proper plant selection is essential for achieving the desired texture and complexity in your imprints. Incorporating techniques for imprinting can further refine your results and unlock new creative possibilities.
Tips for Drying, Finishing, and Sealing Your Handmade Dish

Once you’ve finished shaping and decorating your dish, proper drying is essential to prevent cracks and warping. Use air drying methods by placing your dish on a flat, well-ventilated surface away from direct sunlight. Rotate it occasionally to ensure even drying. Avoiding cracks is crucial, and gentle handling during this stage will help maintain the integrity of your piece. Proper drying techniques can also help minimize the risk of material warping, which is common if moisture is trapped inside. Once fully dry, consider sealing techniques to protect your piece. Applying a clear, food-safe sealant will safeguard the botanical imprints and enhance durability. Before sealing, ensure your dish is completely dry. Incorporating proper drying techniques can significantly improve the longevity and appearance of your handmade dish. Additionally, choosing the right sealant types will help preserve the botanical imprints effectively. Use a soft brush to remove dust before sealing. Apply thin, even coats of sealant. Wait for each coat to dry thoroughly before the next. Avoid over-sealing to maintain natural texture. Store your dish in a dry, stable environment to preserve it.
Creative Ideas for Styling and Using Your Botanical Clay Dish
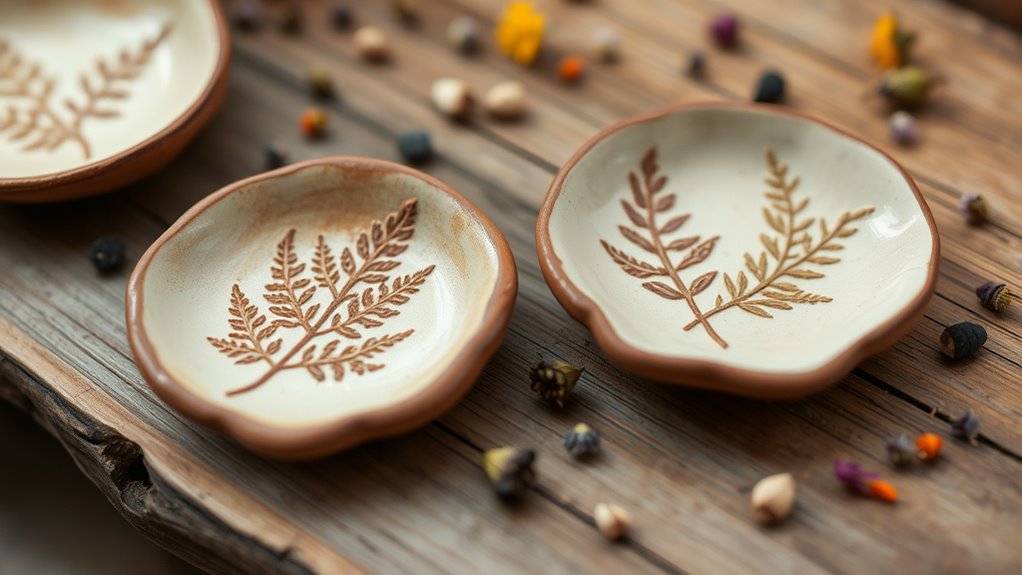
Your botanical clay dish offers endless possibilities for stylishly organizing and decorating your space. Use it as a charming catchall for jewelry, keys, or coins, adding a natural touch to your entryway or nightstand. It’s perfect for showcasing small decorative accents like candles, seashells, or dried flowers. Incorporate it into your plant care routine by holding tiny pots or plant tags, keeping essentials close at hand. To elevate your decor, arrange several dishes together with varying imprints for a layered look. Here’s a quick idea table:
| Use | Placement | Decorative Touch |
|---|---|---|
| Jewelry holder | Vanity or dresser | Add dried flowers |
| Key tray | Entryway table | Add small succulents |
| Coin dish | Living room | Include polished stones |
| Plant care accessories | Near plants | Use as plant tag holder |
| Dried herb or flower storage | Kitchen counter | Enhance with botanical accents |
Additionally, incorporating botanical imprints into your clay dishes can create a cohesive farmhouse-inspired display that enhances your overall bedroom decor. Leveraging AI in Business and other technological innovations can inspire new ways to creatively display and utilize your ceramic pieces. Exploring home decor ideas can help you find even more creative ways to utilize these charming dishes and elevate your interior style. Including wound healing properties when choosing materials or finishes can also add functional appeal to your decorative pieces.
Frequently Asked Questions
What Types of Clay Are Best for Botanical Imprint Dishes?
When choosing clay for botanical imprint techniques, you want a material that’s easy to work with and captures fine details. Air-dry clay is a popular option because it’s user-friendly and requires no kiln. Polymer clay also works well, offering durability and vibrant finishes. Stoneware or porcelain clay can produce more refined, professional-looking dishes, but they need firing. Pick a clay that matches your skill level and the desired finish for your botanical imprint dishes.
Can I Create Botanical Imprints on Glazed or Only Raw Clay?
This is an exciting question—your botanical imprints can be stunning whether on glazed or raw clay! While raw clay offers a more pronounced imprint, glazing techniques impact botanical imprint durability, so you can create beautiful designs on glazed surfaces too. Keep in mind, imprints on glazed clay might be less deep but still vibrant. Experiment with both to see which method brings your artistry to life, and your creations will wow everyone!
How Long Does It Take for the Dish to Fully Dry and Cure?
You’ll want to allow your dish to dry thoroughly before firing, which typically takes 24 to 48 hours depending on thickness, humidity, and air circulation. The curing process continues after bisque firing, so plan for a glaze firing that can take another 24 hours. Patience during the drying time is essential to prevent cracking, and proper curing guarantees your botanical imprints stay intact and your dish is durable.
Are There Eco-Friendly or Non-Toxic Sealing Options?
While sealing your dish, you might consider eco-friendly options, like biodegradable finishes or non-toxic sealants. These alternatives safeguard your piece without harmful chemicals leaching into the environment or your home. Unlike traditional sealants, they’re safe for you and nature, making your craft more sustainable. Choosing non-toxic sealants ensures your botanical imprints stay beautiful and safe, demonstrating your commitment to eco-conscious artistry and responsible crafting.
How Can I Personalize My Botanical Imprint Dish With Colors or Glazes?
To personalize your botanical imprint dish, you can experiment with color blending by mixing different glazes to create unique shades. Try layering or blending glazes to achieve a custom look that highlights your botanical imprints. Glaze customization allows you to add vibrant or subtle tones that complement the botanical designs. Apply your chosen colors carefully, then fire the dish to set your personalized touch, making each piece uniquely yours.
Conclusion
Your botanical clay dish is more than a craft—it’s a garden of memories pressed into clay, a tiny universe held in your hands. As it dries and seals, think of it as a seed of creativity, blossoming into a unique piece of art that captures nature’s delicate beauty. Let each impression remind you that even the simplest things can hold endless stories, turning everyday moments into timeless treasures you’ll cherish forever.