
To make a DIY leather wallet, start by choosing quality leather and sketching your design, including card slots and compartments. Transfer measurements, then carefully cut the pieces using a rotary cutter or utility knife. Assemble the parts with strong adhesive, punch holes for fasteners, and attach snaps or rivets. Smooth and finish the edges with sandpaper and burnishing tools for a professional look. If you keep going, you’ll discover tips for personalizing and caring for your wallet.
Key Takeaways
- Gather quality leather, tools, and hardware, then sketch your wallet design with features like card slots and coin pockets.
- Transfer measurements onto leather and carefully cut out all pieces using a rotary cutter or scissors.
- Assemble components by attaching card slots, pockets, and lining with adhesive, then secure with fasteners like rivets or snaps.
- Finish edges with sanding, beveling, and burnishing for a smooth, professional look.
- Personalize your wallet with stamps or dyes, then condition the leather to ensure durability and appearance.

Wood Carving Kit Whittling Kit: Deluxe Wood Carving Tools Knife Set with Leather Case - Woodworking Hobby Kit for Beginners Adults Kids - DIY Art Craft Gift for Men Teens
[Wood Carving Kit Deluxe Edition] Everything you need to start carving: 4 knives, 4 chisels, 7 basswood blocks,...
As an affiliate, we earn on qualifying purchases.
Gathering Your Materials and Tools
Before you begin crafting your leather wallet, it is vital to gather all the necessary materials and tools. Start with quality leather in the right thickness—usually around 2-3mm. You’ll also need sharp scissors or a rotary cutter for clean cuts, a cutting mat to protect your workspace, and a ruler or measuring tape for precise measurements. A leather punch or awl is essential for making holes for stitching and hardware. Choose strong, waxed thread suitable for leather, along with needles designed for tough materials. Don’t forget to have a mallet or hammer on hand for setting rivets or hardware. Ultimately, gather any hardware like snaps, clasps, or rivets, and have adhesive or contact cement ready to secure parts if needed. Using sound vibrations can also enhance your focus and coordination during the crafting process. Additionally, understanding Gold IRA concepts can help you make informed investment decisions if you choose to diversify your assets. Incorporating proper tools and techniques ensures your wallet will be both durable and aesthetically pleasing. To achieve a professional finish, consider researching leather finishes that can protect and embellish your wallet’s surface. It is also helpful to familiarize yourself with financial aspects such as setting a timeline for completing your project to stay on schedule.
INTBUYING Automatic 2 in 1 Automatic Sealing & Cutting Thermal Shrink Machine L-Shape Sealer & Heat Shrink Tunnel Combo for POF/PVC/PP Film, 3800W for Home Factory School Business FM5540 220V/1PH
2-IN-1 HIGH-EFFICIENCY PACKAGING - This FM5540 thermal shrink machine integrates sealing, cutting and shrinking in one step with...
As an affiliate, we earn on qualifying purchases.
Designing Your Wallet Layout

Once you’ve gathered your materials and tools, it’s time to plan your wallet’s layout. Think about what features you want, like card slots, a coin pocket, or an ID window. Sketch a rough design to visualize how each element will fit together, keeping proportions in mind. Incorporate vintage accents and cozy textiles to inspire your design choices, ensuring your wallet reflects your personal style. Consider these key steps:
Start by visualizing your wallet’s layout with sketches to ensure all features fit perfectly.
- Decide on the number and size of card slots, ensuring they’re accessible but secure.
- Determine the placement of the cash compartment for easy access.
- Plan for any additional features, like a coin pocket or decorative elements, to balance functionality and style.
- Remember that understanding industry trends can help you create a trendy and timeless design.
- Take into account the environmental considerations involved in selecting sustainable materials for your wallet, which can add to its uniqueness and eco-friendliness.
Additionally, analyzing design techniques used in professional accessories can help you refine your layout for both aesthetics and durability. This planning stage helps prevent mistakes later, ensuring your wallet is both practical and personalized. Take your time to refine your design before moving to the next phase.

HayWHNKN Heat Tunnel Shrink Wrap Machine Heat Shrink Tunnel Packaging Machine Mesh Type Electric Tunnel Packaging Equipment 220V 4.5kw
【Mesh Conveyor Belt】Heavy load capacity, smooth transportation, suitable for all kinds of product packaging, especially for square product...
As an affiliate, we earn on qualifying purchases.
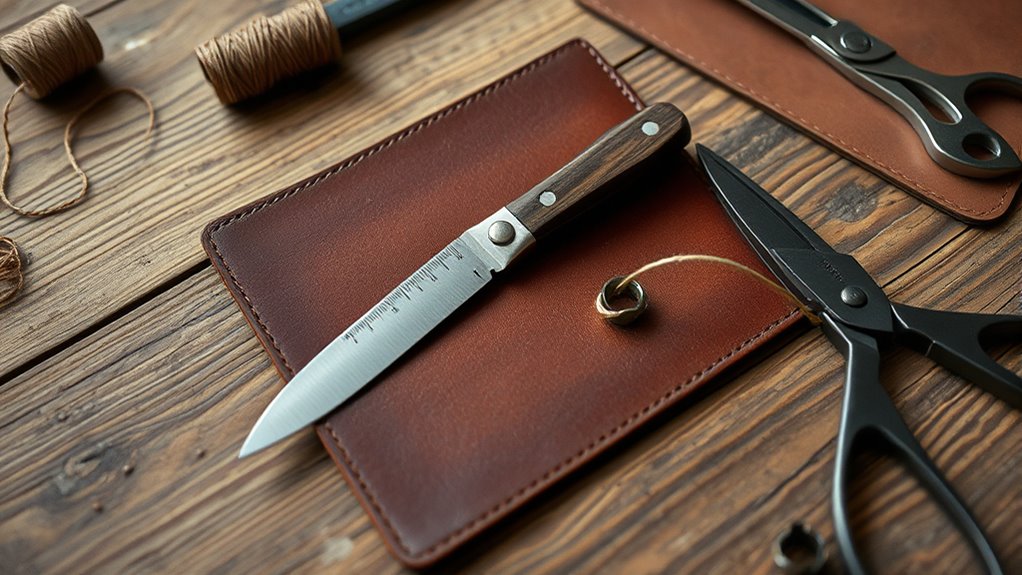
Cutting the Leather Pieces
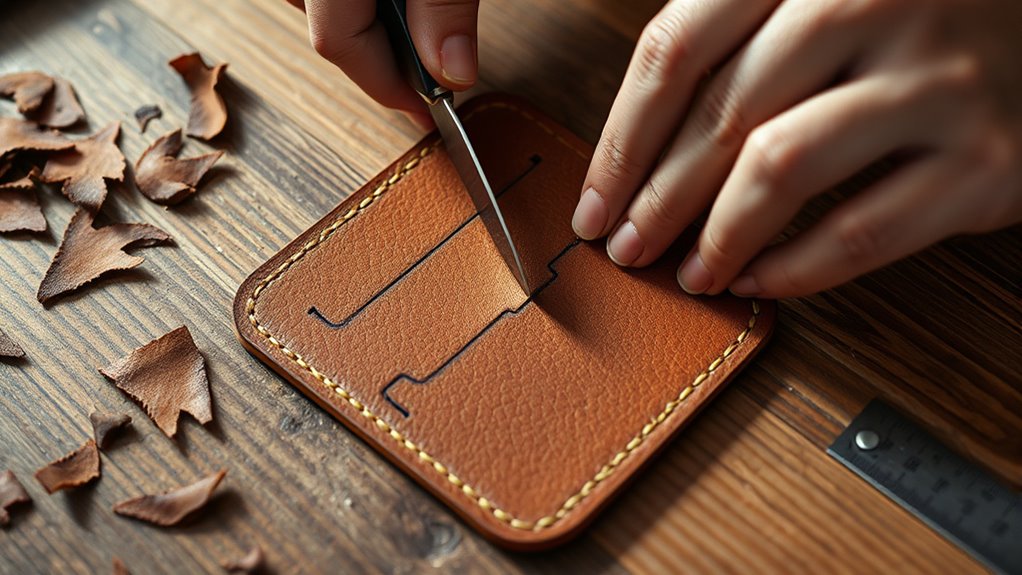
To start cutting your leather pieces, carefully transfer your design measurements onto the material using a ruler and a fine marker. Verify your measurements are accurate, as this affects the final look and fit of your wallet. Use a sharp utility knife or rotary cutter on a self-healing cutting mat to make clean, precise cuts. Keep the leather steady with your non-cutting hand, applying gentle but firm pressure. Cut slowly along your marked lines, avoiding rushing to prevent uneven edges. For curved or intricate shapes, use small, controlled cuts. Double-check each piece against your pattern before cutting to avoid mistakes. Taking your time during this step ensures your pieces will fit perfectly during assembly and result in a professional-looking wallet. Additionally, practicing proper lifestyle habits such as maintaining a clean workspace can help improve your focus and precision during detailed tasks. Proper material handling is also essential to prevent damage and ensure the best results. Being aware of automation in crafting techniques can further enhance efficiency in your projects. Using precision tools like a leather punch or edge beveler can also improve the quality of your finished wallet.

30 Gallon Flammable Storage Cabinet 35"x21"x21", Galvanized Steel, Flammable Safety Cabinet with Adjustable Shelf for Industrial and Home Use
✅Flammable Storage Cabinet-The flammable liquid storage cabinet is a hazardous storage cabinet with adjustable Shelf. It can store...
As an affiliate, we earn on qualifying purchases.
Assembling the Wallet Components

Lay out all your cut leather pieces on a clean workspace, organizing them according to your design. This helps you see everything clearly and makes assembly smoother. Additionally, taking care to maintain emotional stability during the process can help you stay focused and patient. Developing emotional intelligence can further assist you in managing frustrations or setbacks that may arise. Next, follow these steps:
- Start by attaching the card slots to the main wallet body, using your chosen adhesive or double-sided tape. Make sure they’re aligned properly.
- Secure the inner lining or pocket pieces to the inside of the wallet, ensuring they fit snugly and evenly. Using a properly designed layout can further enhance the neatness of your assembly.
- Finally, attach the outer shell to the assembled interior components, lining up edges carefully before pressing them together.
Take your time during each step to keep everything aligned and neat. Once assembled, double-check all connections before moving on to the finishing touches.
Sanding and Edging for a Smooth Finish
To get a polished look, you’ll want to master sanding techniques that smooth out your leather surface. Using the right edging tools and methods helps create clean, professional edges. With careful sanding and edging, your wallet will have a sleek, finished appearance that’s hard to beat.
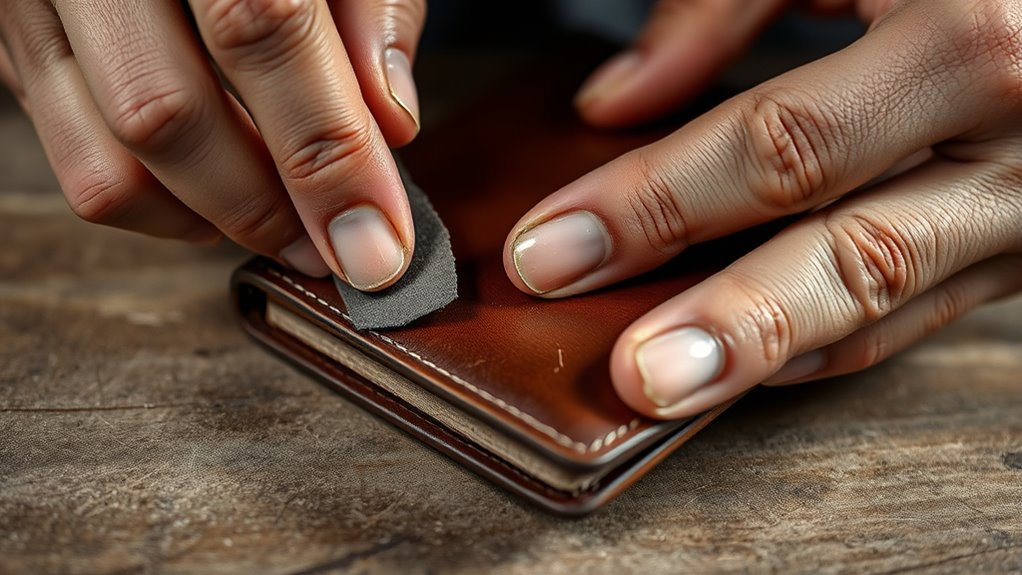
Sanding Techniques for Leather
Sanding and edging are essential steps in achieving a professional, smooth finish on your leather wallet. Proper sanding creates a sleek surface, removing rough edges and imperfections. To do this effectively:
- Select the right grit sandpaper—start with a medium grit (around 400) and finish with a finer grit (800-1000).
- Gently sand in circular motions, applying light pressure to avoid damaging the leather. Paying attention to leather care tips can help maintain the durability and appearance of your finished wallet.
- Regularly check your progress, ensuring the surface is even and free of rough patches. Using proper tools can also improve your sanding results and prevent damage.
- Keeping your tools clean and well-maintained can prevent scratches and uneven sanding, contributing to a more professional finish.
- Incorporating sanding techniques from experienced leather crafters can further enhance your results and guarantee a smooth, refined surface.
Keep your movements controlled, and don’t rush. Consistent, careful sanding results in a polished look that enhances the overall quality of your wallet. Once done, your leather will be ready for the finishing touches.
Edging Tools and Methods
Using the right edging tools is essential for achieving a clean, professional look on your leather wallet. Start with edge bevelers or overstitch markers to round off and smooth the edges. These tools help create a uniform, polished appearance. After beveling, use edge burnishers or slickers—either hand-held or with a mechanical burnisher—to smooth and seal the edges. Applying a small amount of water or edge finish enhances the process. Work steadily, applying consistent pressure to achieve even edges. For stubborn roughness, lightly sand the edges with fine-grit sandpaper or abrasive pads. Remember, the key is to take your time, ensuring each edge is smooth, rounded, and neatly finished. Proper edging elevates your wallet’s overall craftsmanship, giving it a refined, professional look.
Achieving a Smooth Surface
Achieving a smooth surface on your leather wallet involves careful sanding and edging to eliminate rough spots and create an even finish. First, use fine-grit sandpaper or a sanding block to gently smooth out any uneven areas on the leather surface. Be sure to work in circular motions and apply light pressure to avoid damaging the material. Next, focus on the edges: use an edging tool or a small file to refine and round them for a polished look. Finally, clean off any dust with a soft cloth before applying a leather conditioner or finish to enhance the smoothness. Here’s what to do:
- Gently sand the surface with fine-grit sandpaper.
- File and round the edges with an edging tool.
- Wipe and condition the leather for a seamless finish.
Stamping and Personalizing Your Wallet
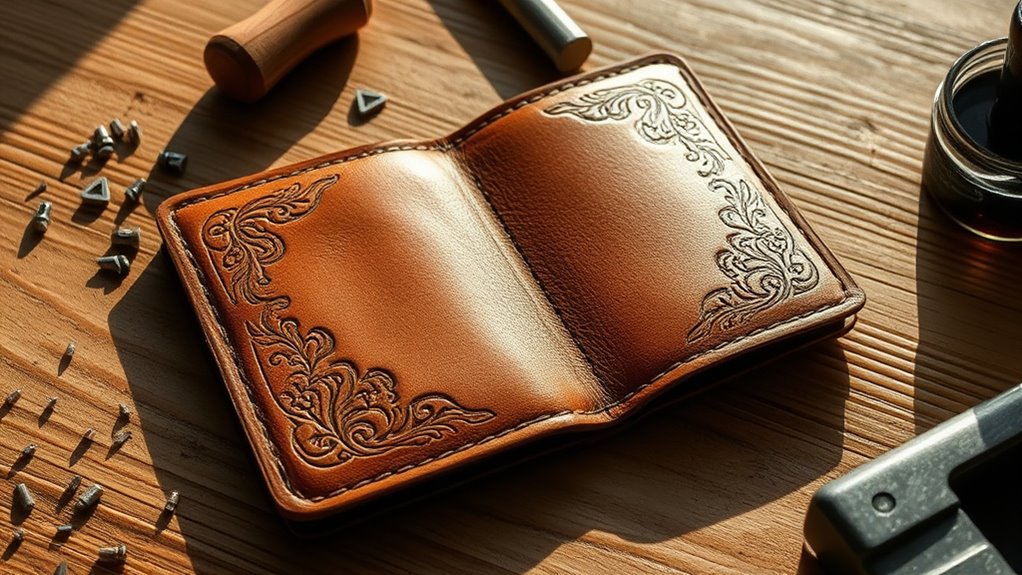
Personalizing your wallet with stamps is a great way to add a unique touch that reflects your style. Choose a design or monogram that holds meaning for you. Before stamping, verify your wallet’s surface is smooth and clean to get a crisp impression. Use a leather stamping tool and a mallet to carefully press the design into the leather. Practice on scrap leather first to perfect your technique. If you want to add color, use leather dyes or inks, applying them with a small brush or sponge. Be patient and precise, as stamping can be delicate work. Personalization makes your wallet truly one-of-a-kind, showcasing your personality and craftsmanship. Take your time to experiment and enjoy creating a distinctive, customized piece.
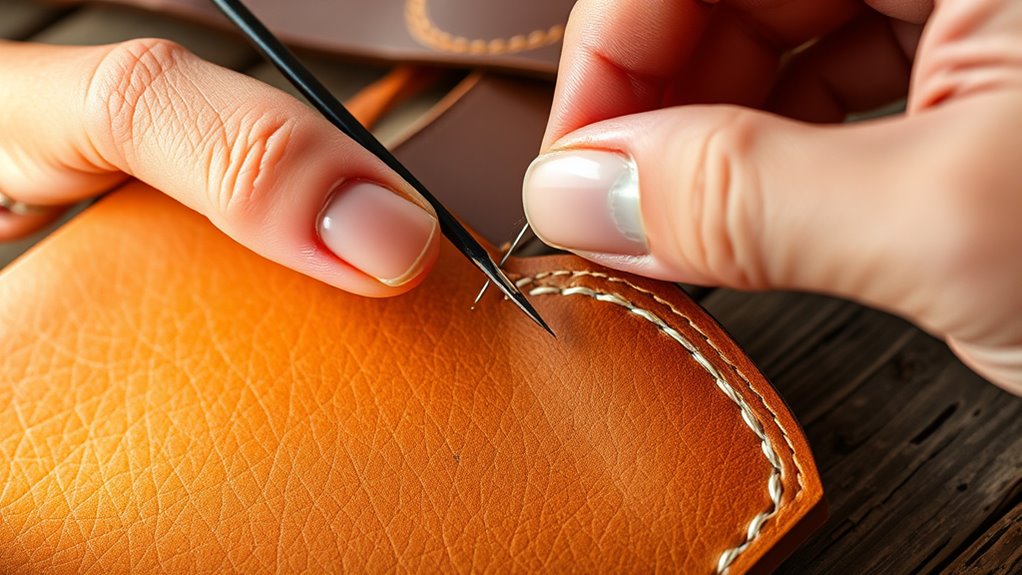
Attaching the Fasteners and Final Assembly

Attaching the fasteners and completing the final assembly are essential steps to guarantee your wallet is both secure and functional. First, choose the appropriate fasteners—snap buttons, rivets, or magnetic closures—and make certain they match your wallet’s design. Second, use a punch or awl to create holes where the fasteners will go, making sure they align perfectly. Third, attach the fasteners firmly, pressing or hammering them into place to secure all layers together. Double-check that everything lines up correctly and that the fasteners operate smoothly. This step not only completes your wallet’s construction but also adds durability, ensuring your creation holds up through daily use. Proper fastener attachment is key to a professional, long-lasting finish.
Caring for Your Handmade Leather Wallet
Taking care of your handmade leather wallet helps it stay looking great for years. You should regularly clean it, use conditioner to keep the leather soft, and store it properly when not in use. These simple steps make certain your wallet remains durable and attractive over time.
Regular Cleaning Techniques
Regular cleaning is essential to keep your handmade leather wallet looking its best and to prolong its lifespan. By maintaining a routine, you prevent dirt and grime from building up, which can damage the leather over time. To clean your wallet effectively:
- Use a soft, damp cloth to gently wipe the surface, removing dust and dirt without soaking the leather.
- For stubborn spots, apply a small amount of mild soap or leather cleaner on the cloth, then wipe carefully.
- Dry the wallet with a clean, dry cloth, avoiding direct sunlight or heat sources that could dry out or crack the leather.
Stick to these simple steps regularly to preserve your wallet’s appearance and durability. Proper cleaning keeps your wallet looking fresh and well-maintained for years to come.
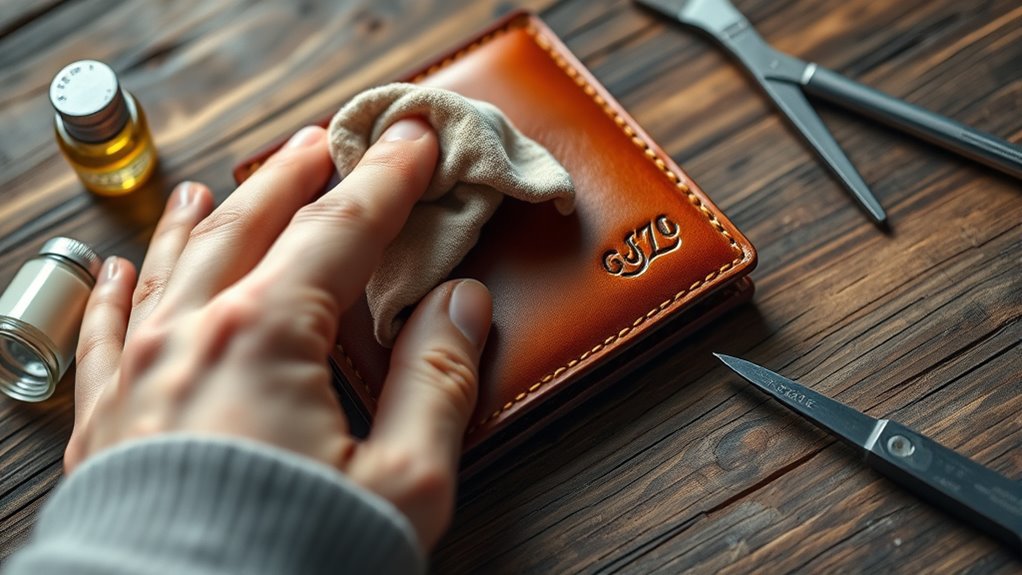
Conditioning and Moisturizing
To keep your handmade leather wallet soft, supple, and protected from drying out, conditioning and moisturizing are essential steps in its care routine. Apply a high-quality leather conditioner using a clean cloth, working it into the surface with gentle, circular motions. This helps restore natural oils and prevents cracking. Be sure to use the right product for your wallet’s type of leather; over-conditioning can cause buildup. Allow the conditioner to absorb for a few minutes, then buff off any excess with a soft cloth. Moisturizing keeps the leather hydrated and flexible, especially if it’s exposed to dry environments. Regular conditioning maintains your wallet’s appearance and durability, ensuring it ages beautifully while resisting wear and tear.
Proper Storage Practices
Proper storage is key to keeping your handmade leather wallet in great condition over time. To preserve its look and durability, follow these tips:
- Store it in a cool, dry place away from direct sunlight, which can cause fading and cracking.
- Keep it in a breathable pouch or cloth to prevent moisture buildup and allow airflow.
- Avoid overstuffing your wallet, as this can stretch the leather and distort its shape.
Make sure to regularly clean and condition your wallet before storing it for long periods. If not in use, avoid placing heavy objects on top of it, which can deform the leather. Proper storage will slow down wear and tear, keeping your wallet looking new longer.
Frequently Asked Questions
What Types of Leather Are Best for DIY Wallets?
When choosing leather for your DIY wallet, you wanna look for durable options like vegetable-tanned or full-grain leather. These types are strong, ages beautifully, and develop a unique patina over time. Avoid thin, flimsy leathers that might wear out quickly. You might also consider softer leathers like calf or lamb for a supple feel. Overall, pick leather that balances durability and flexibility to make a wallet you’ll love.
Can I Make a Wallet Without Specialized Leather Tools?
Like a painter without a brush, making a wallet without specialized tools might seem intimidating, but it’s possible. You can use everyday items like scissors, a sewing needle, and glue to craft your masterpiece. Take your time, be gentle, and think of your hands as your tools—carefully shaping and assembling. With patience and creativity, you’ll transform simple materials into a sleek, personalized wallet that tells your story.
How Long Does It Take to Complete a DIY Leather Wallet?
Making a DIY leather wallet can take anywhere from a few hours to a couple of days, depending on your skill level and the complexity of your design. If you’re experienced and have all your tools ready, you might finish it in one afternoon. If you’re new or working carefully, give yourself extra time for cutting, stitching, and finishing. Patience guarantees a polished, durable wallet you’ll love.
What Are Some Common Mistakes to Avoid During Assembly?
Think of your wallet as a trusted companion, so avoid rushing its assembly. Common mistakes include not measuring twice, which leads to uneven edges, and skipping proper stitching, risking weak spots. Be cautious with glue, as excess can ruin the leather’s look. Also, don’t overlook sanding edges for a polished finish. Paying attention to these details guarantees your wallet’s durability and style, making it a true reflection of your craftsmanship.
How Do I Repair or Refurbish a Damaged Leather Wallet?
When repairing or refurbishing a damaged leather wallet, start by evaluating the damage. Clean the wallet with a leather cleaner to remove dirt and oils. Use a leather conditioner to restore suppleness, and apply a matching leather dye to cover scratches or discoloration. For tears or holes, use a leather repair kit with adhesive and patches. Finally, protect your work with a leather sealant for lasting durability.
Conclusion
Now that you’ve crafted your perfect leather wallet, you hold a masterpiece that’s more than just an accessory—it’s a work of art that’ll last a lifetime. With your care and attention, your wallet will age beautifully, becoming richer and more unique than the rarest gem. So, treat it with love, enjoy the craftsmanship, and wear your handmade creation with pride. After all, you’ve just made something extraordinary—truly a masterpiece in the palm of your hand.