TL;DR
A craft guide from Hunker describes how to form a decorative bowl by drawing connected hot-glue lines over the outside of an upside-down bowl and removing the cooled glue. The result is intended for decoration or light storage, not heavy loads or food use; durability and heat resistance are not specified.
A DIY guide published by Hunker explains how to make a decorative bowl from hot glue by laying connected glue lines over an upside-down bowl, letting them cool and lifting the finished shape away. The method offers a low-cost way to create a custom accent or light-storage container, though the guide cautions that hot glue is not sturdy enough for heavy items.

Get business pricing on tools and workshop supplies
- Business-only prices and quantity discounts
- Tax-exempt purchasing
- Multiple users, one account, clear invoices
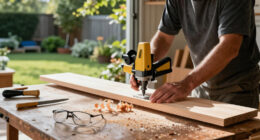
Hunker’s instructions call for a hot glue gun and a bowl whose size and shape resemble the desired finished piece. Before applying glue, turn the bowl upside down and cover its exterior with parchment paper, wax paper or petroleum jelly. The guide says these barriers can make removal easier and help protect painted or decorated surfaces from being pulled away with the glue. It describes the barriers as optional, but recommends them as useful precautions.
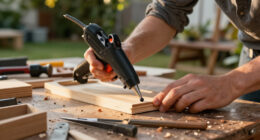
Once the glue gun is hot, Hunker suggests drawing lines or shapes across the bowl’s exterior. A spiral from the base to the rim, intersecting lines, or repeating circles, flowers and waves are among the designs it proposes. The pattern is a matter of preference, but each line should connect to the rest so the bowl holds together when removed. The guide advises letting the glue cool completely before easing it off the mold.
After removal, the guide says the bowl can be decorated with paint or other craft materials. It suggests metallic paint to emphasize the glue’s lines, white for a lace-like effect, or black for a more restrained look. For a more controlled pattern, Hunker recommends placing paper over the mold, tracing a design, and following the lines with the glue gun. Beads or artificial flowers can also be attached, and a handle can turn the piece into a small basket.
Make a Hot-Glue Bowl With Clear Limits
Hunker’s guide uses an existing bowl as a mold for a custom decorative piece. Treat the result as décor or light storage, not tableware or a sturdy container.
Shape the bowl
Work on the outside of an upside-down bowl, using a release barrier to help protect its surface.
Cover the bowl with parchment paper, wax paper or petroleum jelly.
Make a spiral, repeated motif or freeform pattern, joining the glue lines into one structure.
Let the glue cool completely, then ease the shape off the mold.
Personalize the finish
The guide suggests adding color or lightweight decorations after removal.
Highlight the lines
Metallic, white or black paint can change the look of the finished piece.
Trace a design
Place paper over the mold, trace a motif and follow it with the glue gun.
Add decorations
Beads, artificial flowers or a handle can adapt the bowl’s appearance.
Set safe expectations
The guide gives no strength rating or performance testing for the finished piece.
- Decorative display
- Lightweight objects
- Food or hot contents
- Heavy loads, washing or long-term durability
A Custom Accent With Clear Limits
Hunker presents the technique as a way to make a personalized decorative object from materials many households already have. The mold lets crafters produce a shape without building a frame from scratch. Because the glue pattern forms the bowl’s structure, makers can choose between an open, irregular design and a more deliberate repeated motif. Painting and added decorations offer further ways to match the piece to a room or use leftover craft supplies.
Its usefulness has limits. Hunker says hot glue is not a sturdy material and warns against using it to hold heavy items, particularly in a tiered arrangement. The guide does not establish that a hot-glue bowl is suitable for food, washing, high temperatures or long-term storage. The safest reading of the instructions is to treat it as a decorative craft or a place for lightweight objects, rather than as tableware or a load-bearing container.
That distinction matters because a bowl’s familiar shape can suggest ordinary kitchen use even when its material is not designed for it. A finished piece may look like a conventional bowl, but Hunker provides no food-contact, heat-resistance or durability testing. Its role should be set by the material and the guide’s cautions, not by its appearance.
Popular right now

KitchenAid 5.5-Quart Bowl-Lift Stand Mixer, Porcelain White

Roborock Q7 M5+ Robot Vacuum and Mop with Self-Emptying Dock
Vitamix 5200 Blender with 64 oz Container, Black
As an affiliate, we earn on qualifying purchases.
Using a Bowl as the Mold
In Hunker’s method, an existing bowl serves as a temporary form. Working over its outside surface gives the maker more room to guide the glue around the sides than working inside the bowl. The guide also notes that it can be easier to place parchment or wax paper over an exterior than to fit it neatly into a curved interior.
Connected glue lines are central to the design: once cooled, they need to form a joined structure that can retain the mold’s general shape. Hunker presents this as a home craft rather than a tested product-making process. Its instructions give no measurements, drying times beyond cooling completely, or specifications for glue type, bowl material or finished strength.
For more elaborate patterns, Hunker suggests tracing a design onto paper covering the mold before applying glue. The same basic technique can also be combined with other crafts, including attaching decorations or adding a handle. The guide mentions using the bowls in a tiered countertop storage project with thrifted candlesticks, while cautioning that the material may not support heavy contents in upper tiers.
Durability and Safe Uses
Hunker’s instructions do not say how much weight a finished bowl can hold, how long it will last, or how it responds to heat, moisture or cleaning. They also do not identify a particular glue formula or specify whether any paint or decorations change the bowl’s strength. No food-safe use is established, and the guide provides no testing to support using the piece for food, hot items or routine washing.
The guide also does not explain how removal may vary with the mold’s surface and the barrier used, or provide a procedure for cases where glue sticks or a bowl’s coating is damaged. It says barriers can help release the glue and protect finishes, but these details remain unspecified. The craft should therefore be approached as a decorative project rather than a functional substitute for a conventional bowl.
Finishing the Bowl Carefully
Hunker’s guide says that after the glue has cooled fully and the piece has been removed, makers can add paint or lightweight decorations, then use the bowl for display or small, light items. If creating a handle or incorporating the piece into a larger project, keep the limited strength of hot glue in mind and avoid placing heavy objects on it or relying on it to support other pieces.
The guide does not identify a forthcoming product, test or further update. Anyone following its method should make use decisions conservatively: keep the finished bowl away from food and heat unless its materials are independently confirmed as suitable, and do not treat its appearance as evidence of durability. The specific performance limits remain untested in the information provided.
Source: Hunker
Key Questions
What do I need to make a bowl with hot glue?
Hunker’s instructions call for a hot glue gun and a bowl to use as a mold. Parchment paper, wax paper or petroleum jelly can make the cooled glue easier to remove and help protect the mold’s surface.
Should I apply the glue inside or outside the bowl?
Hunker recommends turning the bowl upside down and applying glue to its outside surface. The guide says this gives more room to work around the sides and can make it easier to cover the mold with paper.
How do I keep the finished bowl in one piece?
Hunker advises making sure the glue lines and pattern connect to one another, then letting the glue cool completely before removing it. The guide does not provide a strength rating, so avoid assuming that a connected design can carry heavy items.
Can I use a hot-glue bowl for food or hot items?
Hunker’s instructions do not establish that the bowl is food-safe or heat-resistant. Treat it as a decorative item or use it for lightweight objects, and do not use it for food or hot contents without independent confirmation that its materials are suitable.
Source: hunker.com