To make DIY stamped clay bowls, start by gathering your clay, stamps, carving tools, and a flat workspace. Knead the clay until smooth, then shape it into a bowl form, using your fingers or tools to refine the shape and thickness. Press your stamps firmly onto the surface to create patterns, being careful to lift straight up. Allow the clay to dry thoroughly, then add finishing touches or color if desired. Keep watching to learn the full step-by-step process.
Key Takeaways
- Prepare and knead quality clay until smooth, then shape it into a bowl form, ensuring even thickness and a clean surface.
- Use stamps to impress patterns onto the clay by pressing firmly at a 90-degree angle, then lift carefully.
- Smooth and refine edges with fingers or tools, and add details with carving tools if desired.
- Allow the bowls to dry slowly in a stable, draft-free environment for 24-72 hours before handling or firing.
- Finish by lightly sanding, cleaning, and applying a sealant if needed for durability and aesthetic appeal.

Original Stationery Craft Kits Trinket Dish Studio – Multicolor, 40 Pieces, Air-Drying Clay & Tools – Jewelry Dish Making Kit & DIY Clay Jewelry Bowls
Comprehensive Clay Kit: Explore creativity with the Original Stationery DIY Clay Jewelry Bowls Kit, featuring colorful modeling clay…
As an affiliate, we earn on qualifying purchases.
As an affiliate, we earn on qualifying purchases.
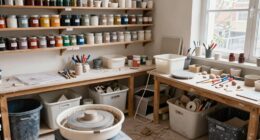
Gathering Your Supplies and Setting Up Your Workspace
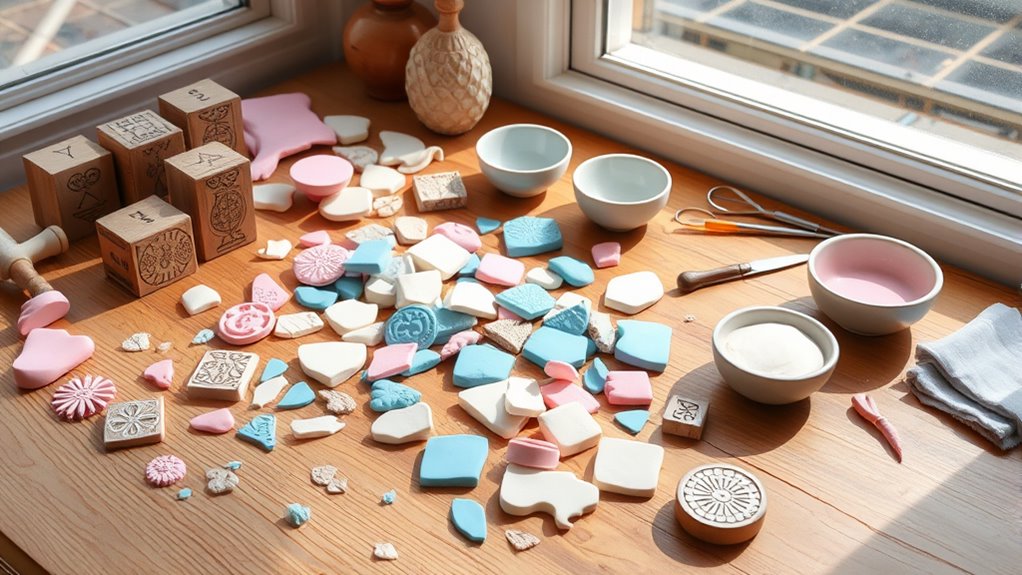
Before you begin crafting your stamped clay bowls, it’s important to gather all the necessary supplies and set up a clean, organized workspace. You’ll need clay, stamps or textured tools, a rolling pin, carving tools, water, and a clean surface to work on. You can also consider local resources that provide quality clay and tools to enhance your project. Having everything within reach keeps your process smooth and enjoyable. Clear your table of clutter, and lay down a protective mat or parchment paper to prevent sticking. Keep a small bowl of water nearby to keep your hands and tools moist, which helps with smooth shaping. Organizing your stamps and tools so you can easily find the right one when needed is essential for efficiency. A tidy workspace not only improves efficiency but also helps you focus on creating beautiful, detailed designs. Additionally, understanding the sound vibrations involved in healing practices can inspire creative patterns and textures in your clay work. Incorporating proper lighting can also enhance your ability to see fine details and achieve precise stamped designs. Paying attention to air quality in your workspace can also help keep dust and debris away from your clay, ensuring a cleaner finished product. Furthermore, maintaining optimal temperature and humidity levels in your workspace can prevent clay from drying out too quickly or becoming too soft, which is crucial for detailed work.

Crayola Air Dry Clay (5lbs), Teacher Supplies, Natural White Modeling Clay for Kids, Sculpting Material, Bulk Craft Supplies for Art Classrooms
CRAYOLA AIR DRY CLAY: Includes 5 pounds of Crayola Sculpting Clay in a re-sealable bucket.
As an affiliate, we earn on qualifying purchases.
As an affiliate, we earn on qualifying purchases.
Preparing the Clay for Your Bowls
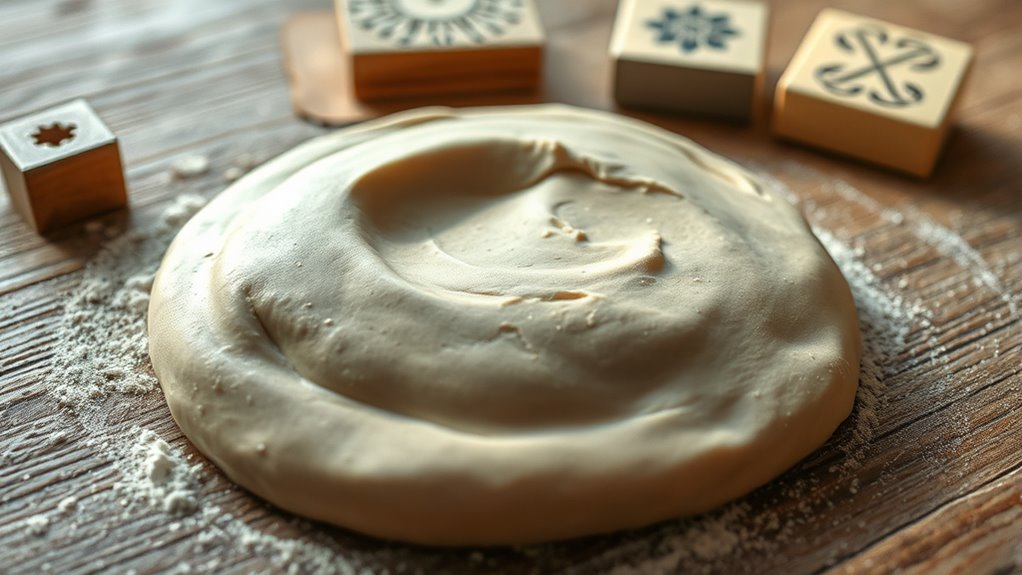
To prepare your clay for shaping into bowls, start by kneading it thoroughly to soften and evenly distribute moisture. This step guarantees the clay becomes pliable and easier to work with, preventing cracks or uneven surfaces later. As you knead, break apart any lumps and fold the clay over itself, applying consistent pressure. If the clay feels too dry, add a small amount of water and knead it in gradually. Conversely, if it’s too wet, knead in a little dry clay or let it sit uncovered for a few minutes to dry slightly. Properly prepared clay will be smooth, flexible, and free of air bubbles, making it ideal for stamping and shaping into beautiful bowls. Additionally, maintaining the correct consistency of the clay ensures optimal performance during the shaping process. For best results, consider the dampness level of your clay, as this affects how well it holds details and maintains shape during drying and firing. Adjusting the moisture content appropriately can help prevent cracking or warping during the drying process.

Blisstime 18PCS Clay Sculpting Tools, Basic Clay Pottery Carving Tool Kit with Wooden Handles and Tool Bag
18 Pieces in Total: This set of clay tools contains most of the basic tools you may need…
As an affiliate, we earn on qualifying purchases.
As an affiliate, we earn on qualifying purchases.
Shaping the Clay Into a Bowl Form
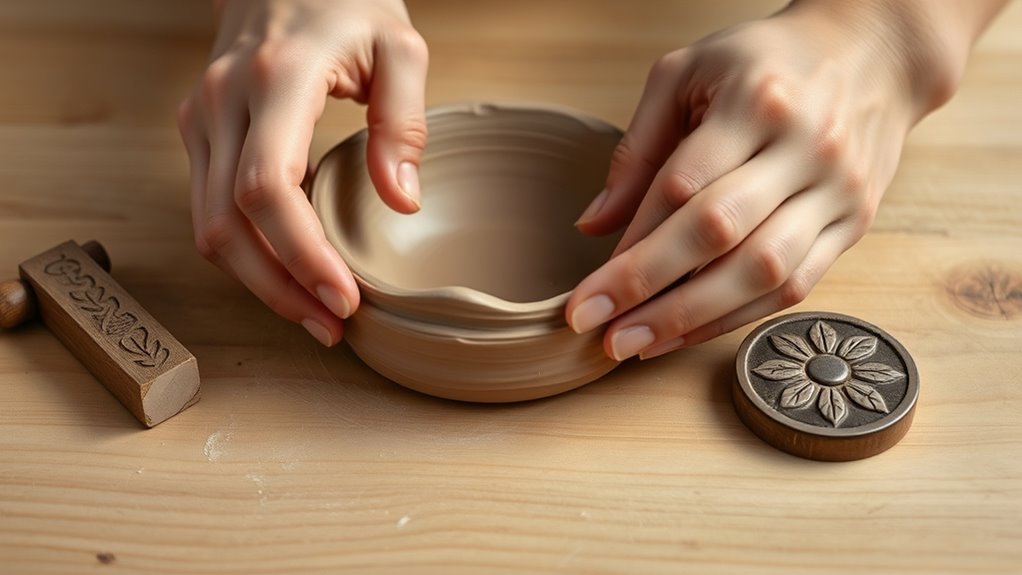
Once your clay is properly prepared, center a portion of it on your work surface and gently press down to form a flat disc. Use your fingers or a sponge to smooth out the surface and guarantee even thickness. To shape the bowl, start by pinching the edges upward with your fingertips, gradually widening the sides. Keep your hands moist to prevent sticking and maintain flexibility. As you pinch and pull, rotate the clay to create a smooth, rounded form. If needed, use your fingers or a shaping tool to refine the curvature and even out the sides. Your goal is a shallow, bowl-shaped form with smooth, consistent walls. Take your time, adjusting as necessary to achieve a balanced, symmetrical shape that will serve as the base for your stamped design. Proper clay preparation ensures your bowl maintains its shape and durability during the shaping process. Additionally, maintaining a consistent clay thickness helps prevent cracking or warping during drying and firing. Being mindful of moisture content throughout shaping can also improve the ease of molding and the final result. Paying attention to air bubbles in your clay can help avoid imperfections and structural issues later on. Incorporating a uniform pressure during shaping can further enhance the consistency of your bowl’s form.

Amrules Clay Tools Kit, 27 PCS Pottery Tools, Practical Polymer Clay Sculpting Tools Kit, Air Dry Clay Tools Set for Adults, Pottery Craft, Dotting, Carving, Drawing, Molding, Modeling, Shaping
LIGHT PRACTICAL: These clay carving tools are made of good quality wood, stainless steel, plastic and other materials,…
As an affiliate, we earn on qualifying purchases.
As an affiliate, we earn on qualifying purchases.
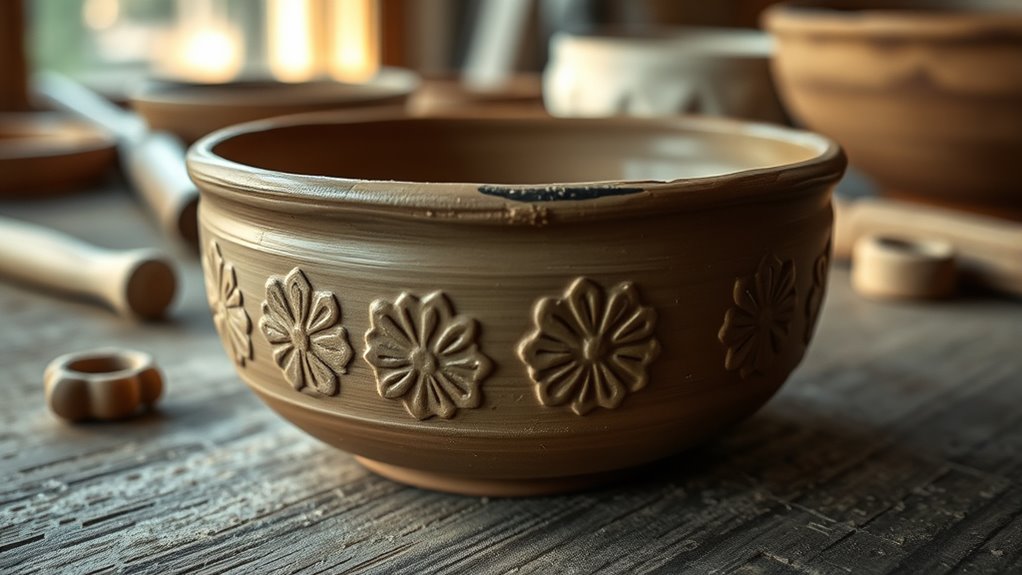
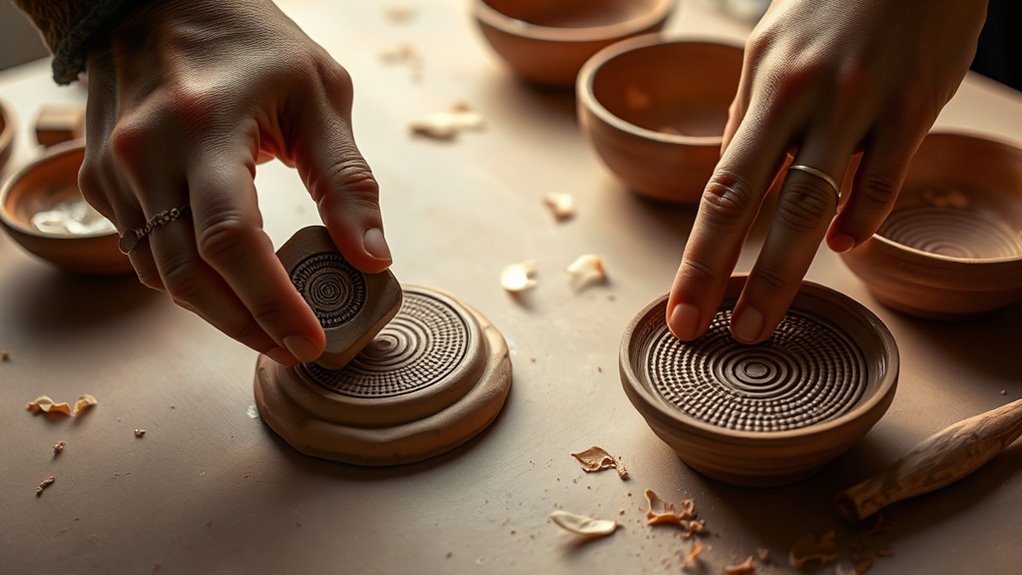
Creating and Applying Your Stamps
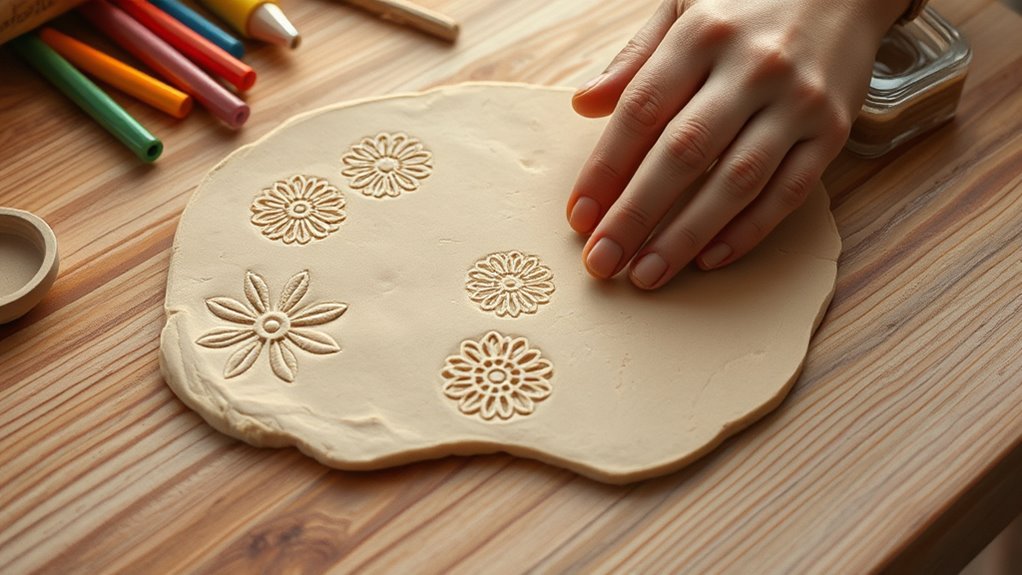
Start by designing patterns that reflect your style, whether simple or intricate. Then, press your stamps firmly onto the clay, ensuring even contact to get crisp impressions. With the right technique, you’ll create beautiful, professional-looking designs every time. Incorporating celebrity lifestyle insights can inspire unique and trendy patterns for your bowls. Additionally, practicing proper shifting gears techniques can help you manage your clay tools more efficiently and smoothly during the stamping process. Developing a consistent stamping pressure can further improve your results and achieve uniform impressions. Using crochet styles for locs as inspiration for pattern variations can add a creative touch to your designs.
Designing Unique Patterns
Have you ever wondered how to make your stamped clay bowls truly stand out? The key is designing unique patterns that reflect your style. Start by sketching ideas on paper before transferring them onto your clay. You can create geometric shapes, floral motifs, or abstract designs—whatever inspires you. Use simple tools like toothpicks or small carving tools to refine your patterns. Consider combining different shapes or layering designs for added complexity. Remember, symmetry isn’t always necessary; asymmetrical patterns can be just as eye-catching. Keep in mind the overall look you want to achieve and guarantee your patterns complement the bowl’s shape. With a little creativity and planning, your stamped clay bowls will become one-of-a-kind pieces. Additionally, understanding optimal angles can influence how your patterns appear when applied to curved surfaces, enhancing the overall aesthetic. Experimenting with different pattern sizes can also help you achieve a more dynamic and balanced design. Incorporating yoga-inspired motifs can add a sense of tranquility and harmony to your designs, making them even more unique. Exploring state-specific design influences might also inspire fresh ideas and styles to incorporate into your patterns.
Proper Stamp Techniques
To achieve clean, consistent patterns on your clay bowls, mastering proper stamp techniques is key. First, make sure your clay is evenly rolled and slightly firm but still workable. When stamping, press straight down with even pressure to avoid smudging or uneven impressions. Hold the stamp steady for a second or two before lifting to prevent smearing. Practice on scrap clay to get a feel for the right pressure and timing. Keep your stamps clean and dry to prevent debris from marring your design. If needed, use a small amount of water or slip to help the stamp release smoothly. Proper technique ensures sharp, clear patterns that elevate your finished bowls.
- Use firm, even pressure when stamping
- Keep stamps clean and dry
- Practice on scrap clay first
- Press straight down and hold briefly
Impressing the Designs Onto the Clay
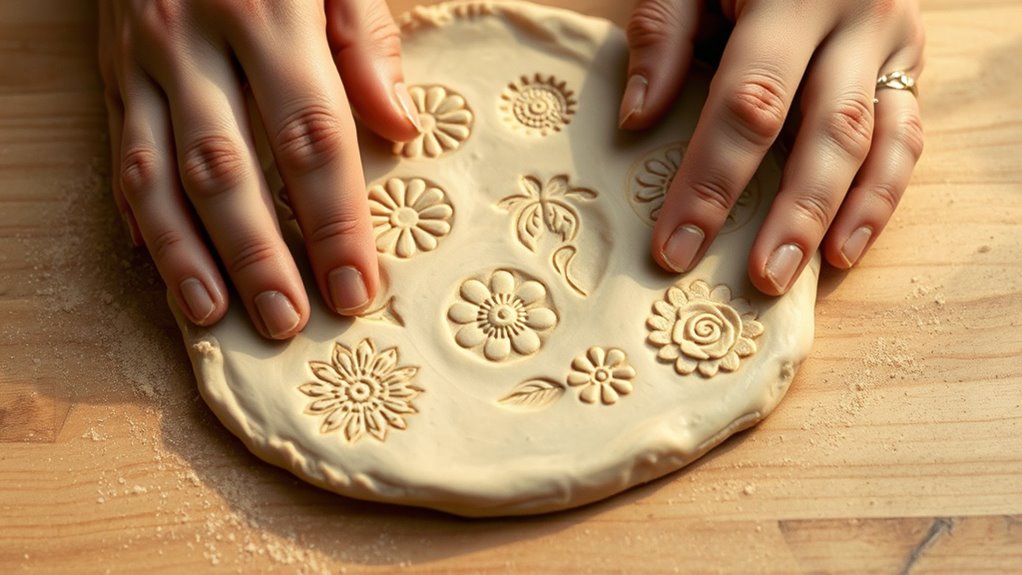
Once your clay has reached the right consistency, you can begin impressing your designs. Lightly dust the surface with cornstarch or flour to prevent sticking. Choose your stamp and press it firmly into the clay at a 90-degree angle, applying even pressure. Don’t twist or rock the stamp, as this can distort the design. If you want cleaner impressions, press straight down and lift straight up. For more detailed patterns, use a gentle tapping motion. Work quickly to avoid the clay drying out before you’ve completed your impressions. If a design isn’t clear, simply re-press or add more clay and try again. Take your time to ensure each impression is deep enough to be visible but not so deep it distorts the shape.
Refining the Bowl’s Shape and Surface
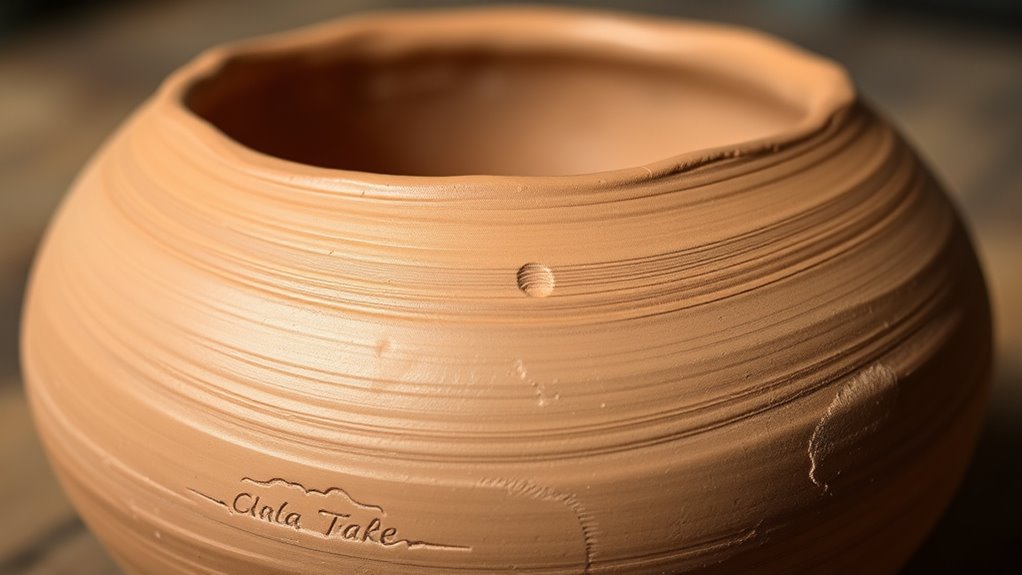
After you’ve impressed your designs, the next step is to refine the bowl’s shape and surface. Use your fingers or smoothing tools to gently shape the edges, ensuring they’re even and smooth. If the surface feels uneven or bumpy, lightly sand it with fine-grit sandpaper or a sponge to create a polished finish. Focus on achieving a consistent thickness throughout the bowl, which helps it hold its shape better. You can also use a damp cloth to wipe away any excess clay dust or fingerprints. This process enhances the overall appearance and prepares the bowl for final drying and firing. Remember, patience is key—taking your time now results in a more professional-looking finished piece.
Refine your bowl by smoothing edges, polishing uneven surfaces, and wiping away dust for a professional finish.
- Even out edges for a smooth finish
- Smooth surface with fingers or tools
- Sand rough areas for a polished look
- Wipe away dust and fingerprints
Allowing the Clay to Dry Properly
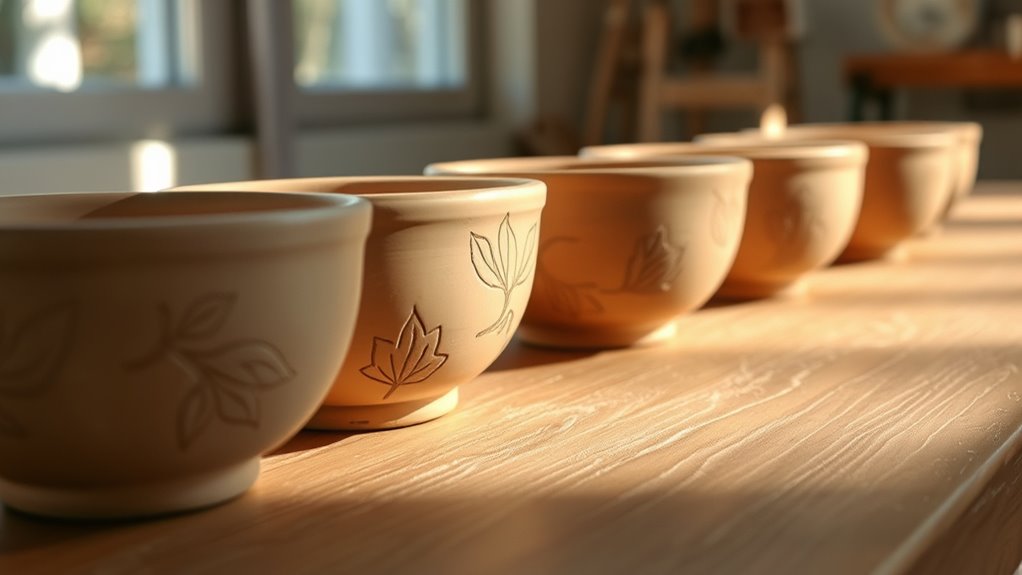
As you let your clay bowl dry, it’s important to give it enough time to air dry completely. Handle it carefully to prevent cracks or warping, especially during the drying process. Paying attention to these details guarantees your bowl maintains its shape and looks great once finished.
Air Drying Time
To guarantee your stamped clay bowls dry properly, it’s important to give the clay enough time to air dry naturally. Rushing the process can cause cracks or warping. Depending on the thickness of your bowls, drying can take anywhere from 24 to 72 hours. Make sure to place your bowls in a well-ventilated area, away from direct sunlight or moisture. Turn them occasionally to ensure even drying. Thinner areas dry faster, so check for firmness before handling. Patience is key to prevent damage. Keep your workspace dust-free to avoid debris sticking to the surface. Once fully dry, you can proceed with sanding or decorating. Proper air drying ensures your bowls stay durable and beautifully shaped.
- Place bowls in a ventilated space
- Turn them periodically for even drying
- Avoid direct sunlight and humidity
- Wait until the clay feels firm to the touch
Proper Handling Techniques
Handling your clay bowls properly during drying helps guarantee damage and ensures they maintain their shape. Always lift your bowls gently by the edges, avoiding pressure on the delicate areas like the rim or the stamped design. Place your bowls on a flat, padded surface to prevent warping or uneven drying. Do not move them excessively once they start drying, as this can cause cracks or misshapen forms. Keep them in a consistent environment—away from direct sunlight, drafts, or humidity—that could cause uneven drying. If you need to rotate your bowls, do so carefully and sparingly, preferably after initial surface set. Proper handling minimizes stress on the clay, helping your bowls dry evenly and retain their beautiful stamped details.
Avoiding Cracks or Warping
Ensuring your clay bowls dry evenly is essential to prevent cracks and warping. Rapid or uneven drying causes stress within the clay, leading to flaws. To achieve proper drying, keep your bowls in a cool, dry space away from direct sunlight and drafts. Cover them loosely with plastic to control moisture loss, but don’t seal tightly, which can trap moisture and cause cracking. Rotate the bowls regularly to promote even drying from all sides. Patience is key; rushing the process increases the risk of damage.
- Cover with plastic wrap loosely
- Keep in a stable, draft-free environment
- Rotate the bowls periodically
- Allow sufficient drying time before firing
Adding Color or Finishing Touches

Once your clay bowls have dried and been carefully sanded, you can add color or finishing touches to enhance their appearance. Use acrylic paints, markers, or inks to highlight stamped patterns or add details. Apply thin layers of paint to avoid obscuring textures, and use a fine brush for precision. If you prefer a natural look, consider staining the bowls with food-safe mineral oils or beeswax. These finishes deepen the color and give a subtle sheen. For a glossy effect, you can seal the surface with a clear acrylic sealer or varnish, ensuring it’s suitable for the intended use. Take your time to evaluate your design, and don’t be afraid to experiment with different colors and finishes to create a unique, polished look.
Baking or Curing the Clay for Durability
To make certain your clay bowls last, you need to bake or cure them properly. Pay attention to the right baking temperatures and follow the recommended curing times. Doing so ensures your bowls are durable and ready for everyday use.
Proper Baking Temperatures
Achieving the right durability in your stamped clay bowls depends heavily on baking at the correct temperature. If you bake too low, the clay may remain soft and fragile, while too high can cause cracking or burning. Always follow the clay manufacturer’s recommended temperature for best results. Use an oven thermometer to ensure accuracy, and avoid using a microwave or toasting oven, which can lead to uneven heating. Proper temperature control helps the clay cure evenly, ensuring your bowls are sturdy and long-lasting. Keep in mind that different clays have varying temperature requirements, so check the packaging. Baking at the right temperature is essential for achieving a durable, professional finish on your stamped clay bowls.
- Follow manufacturer instructions for specific temps
- Use an oven thermometer for accuracy
- Avoid high heat to prevent cracking
- Ensure even heating with proper oven placement
Curing Time Recommendations
Proper curing time is essential to guarantee your stamped clay bowls achieve maximum durability. After baking, avoid handling or using the bowls immediately, as they need time to fully cure. Typically, you should let your bowls cure for at least 24 to 48 hours. For stronger, more durable results, allow them to sit up to a week, especially if you plan to use them regularly. Keep the bowls in a dry, well-ventilated space during this period. If you’ve used air-dry clay, curing time can vary from 48 hours to a week, depending on thickness. Remember, rushing the curing process can cause cracks or weaken the structure. Patience is key to ensuring your stamped clay bowls are both beautiful and long-lasting.
Caring for and Using Your Handmade Bowls
Once you start using your handmade clay bowls, it’s important to handle them with care to guarantee they last. Avoid sudden temperature changes, like placing hot food directly from the oven into the bowl. Hand wash them gently with warm water and mild soap instead of using a dishwasher, which can cause cracking or fading. Store your bowls in a dry, safe place where they won’t be knocked over or scratched. Regularly check for any chips or cracks and avoid using damaged bowls for food. To prolong their lifespan, consider applying a food-safe sealant if you plan to use them frequently. Proper care ensures your bowls remain beautiful and functional for years to come.
- Handle with care and avoid sudden temperature changes
- Hand wash with mild soap, avoid dishwashers
- Store in a dry, safe location
- Inspect regularly for damage and avoid using compromised bowls
Frequently Asked Questions
Can I Use Household Objects as Stamps for My Clay Bowls?
Yes, you can definitely use household objects as stamps for your clay bowls. Items like coins, bottle caps, textured fabric, or even leaves work well to create unique patterns. Just press them gently into the surface of your clay before it dries. Make sure the objects are clean and dry to avoid unwanted marks. Experiment with different textures and shapes to add personal flair to your bowls.
What Are Alternative Materials if I Don’t Have Clay Stamps?
If you don’t have clay stamps, you can get creative with household items. Use textured fabrics, leaves, or coins to create impressions in your clay. You might also try plastic utensils, cookie cutters, or carved potatoes for unique patterns. These alternatives are easy to find and let you experiment with different designs, giving your bowls a personalized, handcrafted look without needing specialized tools.
How Long Does It Take for the Clay to Fully Dry?
You probably wonder how long it takes for the clay to dry completely. Typically, air drying clay needs 24 to 72 hours, depending on thickness and humidity levels. Thinner pieces dry faster, while thicker ones may take longer. To guarantee your stamped bowls are fully dry, check for no damp spots and gently tap them. Rushing drying can cause cracking, so patience is key for a durable finish.
Is Air-Dry Clay Suitable for Functional Bowls?
Did you know that air-dry clay isn’t the best choice for functional bowls? Since it’s not fired in a kiln, it remains porous and fragile, making it prone to cracking or losing shape when used for holding liquids or heavy items. If you want durable, dishwasher-safe bowls, consider using kiln-fired clay instead. Air-dry clay is great for decorative pieces, but for everyday use, it falls short.
How Can I Prevent Cracks During the Drying Process?
To prevent cracks during drying, you should slow down the drying process and keep the clay evenly moist. Cover your project with plastic wrap, removing it gradually over several days. Avoid exposing the clay to direct sunlight or heat, which can cause uneven drying. Additionally, smooth out the surface and avoid thick areas, as these are more prone to cracking. Patience is key for a crack-free finish.
Conclusion
Now that you’ve crafted stunning stamped clay bowls, remember—they’re delicate enough to break with a single drop. Ironically, all that effort to create something so beautiful can lead to a fragile masterpiece. But don’t worry, with a little care, your handmade bowls will bring charm and personality to your space—just don’t throw them in a rush. After all, the true beauty lies in their imperfection and the love you poured into each one.