
To woodburn a custom spoon, start by shaping and smoothing a wooden utensil with carving and sanding tools. Choose a wood like cherry or maple for durability, then use a fine-tipped pyrography tool to carefully burn your chosen design, initials, or patterns onto the surface. After cooling, finish with a food-safe oil to protect and highlight the artwork. If you keep exploring, you’ll discover more tips to create truly personalized and professional-looking pieces.
Key Takeaways
- Select a suitable hardwood spoon and thoroughly sand the surface for a smooth burn area.
- Use a fine-tipped pyrography tool to carefully trace your personalized design or initials on the spoon.
- Practice on scrap wood to master heat control and steady hand movements before working on the final piece.
- Burn the design slowly and evenly, maintaining consistent pressure for clean, detailed lines.
- Finish by cooling the spoon and applying a food-safe oil to protect the design and enhance the wood’s natural beauty.

Ever wondered how to create a truly unique kitchen utensil? Woodburning a custom spoon offers an exciting way to combine craftsmanship with artistry. It all starts with understanding the basics of woodburn techniques, which involve using specialized tools to burn intricate designs or personal touches onto the surface of your wooden spoon. These techniques allow you to add patterns, initials, or decorative details that turn a simple utensil into a meaningful piece. Before diving in, gather your spoon carving tools—these are essential for shaping the wood and preparing the surface for burning. High-quality carving tools will give you better control and cleaner cuts, making the entire process smoother and more enjoyable.
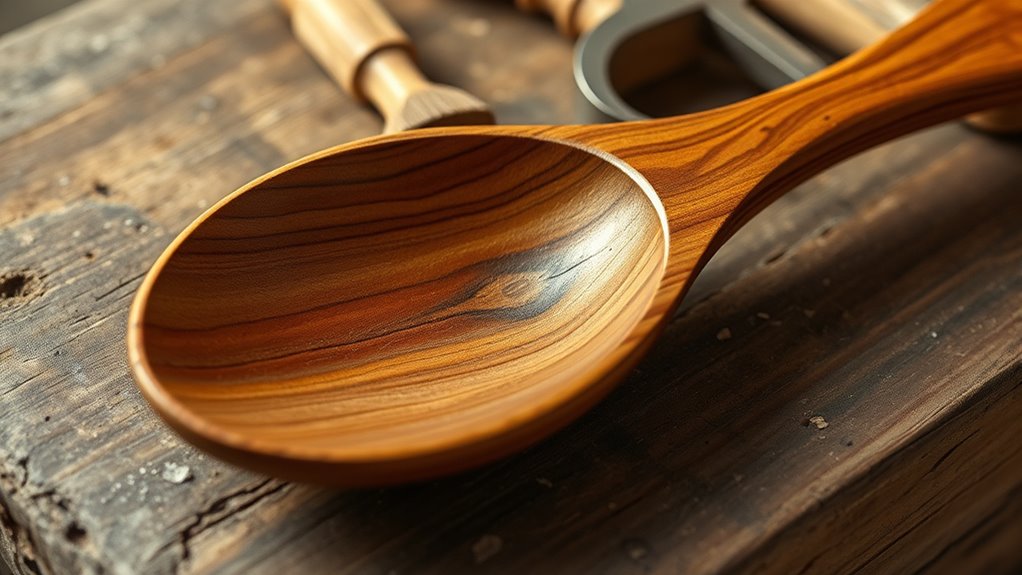
Once you have your tools ready, start by shaping your spoon from a suitable piece of wood, such as hardwood like cherry, maple, or walnut. Use your spoon carving tools to carve the overall shape, ensuring the handle and bowl are smooth and comfortable to hold. After carving, sand the spoon thoroughly to remove any rough spots, creating a clean surface perfect for woodburning. The smoother the surface, the more precise your woodburn techniques will be, resulting in crisp lines and detailed designs. Additionally, understanding woodburn techniques can help you achieve more intricate and professional-looking results.
Shape and sand your wooden spoon for a smooth, perfect surface ideal for detailed woodburning designs.
When you’re ready to burn, select a woodburning pen or pyrography tool with a fine tip, ideal for detailed work. Practice on a scrap piece of wood first to get comfortable with the heat and pressure needed. As you work on your spoon, carefully trace your chosen design, whether it’s a geometric pattern, floral motif, or initials. Keep the tool moving steadily to avoid burning too deeply or unevenly. Take your time—woodburning is a meticulous craft that rewards patience and precision.
The beauty of using woodburn techniques is that they allow you to personalize your spoon in a way that reflects your style or purpose. Whether it’s a gift for someone special or a custom piece for your own kitchen, the designs you create become a part of the utensil’s story. Once finished, let the wood cool completely, then consider applying a food-safe finish like mineral oil to protect your artwork and enhance the natural beauty of the wood. With practice, your skills with spoon carving tools and woodburning will improve, opening up endless possibilities for custom, handcrafted kitchenware that’s both functional and beautiful.
Frequently Asked Questions
What Types of Wood Are Best for Custom Spoons?
You should choose hardwoods like maple, cherry, or walnut for your custom spoon because their tight wood grain provides a smooth finish and reduces splintering. These woods are durable, standing up well to daily use without cracking or warping. Their natural resistance to moisture also helps maintain longevity. By selecting a wood with good grain and durability, you’ll create a spoon that’s both beautiful and long-lasting.
How Long Does It Take to Craft a Custom Spoon?
You might be surprised to learn that crafting a custom spoon can take anywhere from a few hours to several days, depending on your wood selection and the complexity of the design. The crafting time varies because each piece is hand-carved and finished with care. Your choice of wood influences both the process and final look, making each spoon uniquely yours. Patience guarantees a beautifully crafted, durable piece you’ll cherish.
Can I Request Engraved Designs on My Spoon?
Yes, you can request engraved designs or personalized patterns on your spoon. When you place your order, specify your desired engravings, and the artisan will incorporate your unique designs. Keep in mind that adding engraved details may slightly extend the crafting time. Be sure to communicate your ideas clearly, and you’ll receive a beautifully personalized spoon that reflects your style and preferences.
Are There Eco-Friendly Options for Custom Spoons?
Yes, there are eco-friendly options for custom spoons. For example, you might choose spoons made from biodegradable materials like bamboo or recycled wood, which break down naturally and reduce environmental impact. By prioritizing sustainable sourcing, you guarantee the materials come from responsibly managed forests or recycled sources. These options help you enjoy beautiful, personalized spoons while supporting eco-conscious practices and minimizing your carbon footprint.
How Should I Care for My Custom Wooden Spoon?
To care for your custom wooden spoon, regularly clean it with warm water and mild soap, avoiding soaking to protect the wood grain. Dry it thoroughly and occasionally apply food-safe mineral oil to keep it moisturized and prevent cracking. Avoid dishwasher cleaning, as the heat and moisture can damage the wood grain. With proper cleaning tips, your spoon will stay beautiful and functional for years.
Conclusion
Now that you’ve seen how to woodburn a custom spoon, don’t worry if your first attempt isn’t perfect. Just picture your design coming to life with each careful stroke. Remember, even the most skilled artists started somewhere. Keep practicing, and your spoon will become a beautiful, unique piece that shows off your creativity. So grab your tools, visualize your idea, and enjoy the process—your personalized spoon is just a burn away!