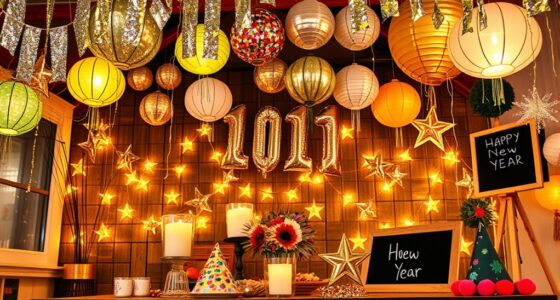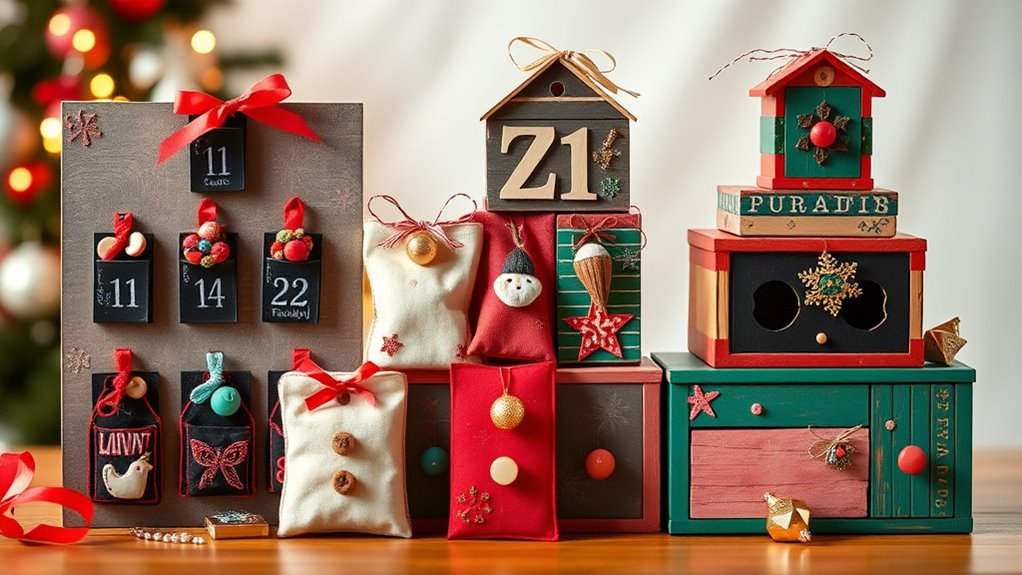

Discover 10 charming DIY handmade advent calendars to create at home. You can craft rustic wooden pockets, assemble colorful paper cup trees, recycle tin cans into festive countdowns, or make clothespin garlands with decorated hooks. Other options include Mason jar number displays, miniature gift box chains, Mason jar lid calendars, stocking-style hangings, and patchwork canvases with buttons. These creative ideas add a personal touch to your holiday decor—learn more to find out how to craft your perfect countdown.
Key Takeaways
- Explore various DIY advent calendar types like wooden pockets, paper cups, tin cans, felt organizers, and miniature gift chains.
- Personalize your calendar with decorative techniques such as painting, buttons, labels, and themed patchwork.
- Learn to create secure hanging displays using sturdy string, hooks, and balanced arrangements for visual appeal.
- Fill each element with treats, notes, or surprises, and organize contents to ensure even weight distribution.
- Follow construction tips for assembling pockets, securing components, and customizing the calendar to match holiday decor.
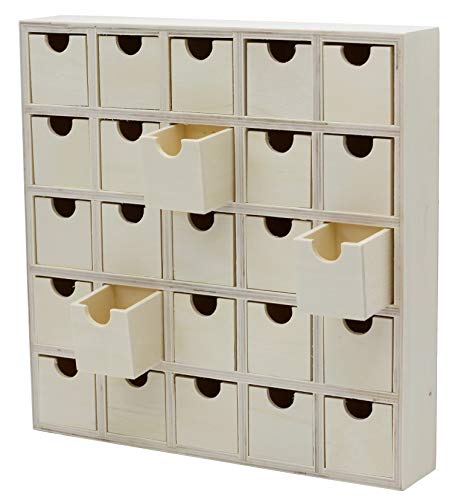
Creative Hobbies 25 Drawer Wooden Advent Calendar, DIY Unfinished Storage Box, Ready to Decorate, Pre Assembled, Storage Organizer
Count Down to Christmas in Style – This pre-assembled 11-inch Christmas Advent Calendar Shadow Box is the perfect…
As an affiliate, we earn on qualifying purchases.
As an affiliate, we earn on qualifying purchases.
Rustic Wooden Pocket Calendar

A rustic wooden pocket calendar offers a charming and durable way to count down to Christmas. You can craft it from reclaimed wood or simple planks, giving it a warm, natural look. Incorporating multimedia storytelling such as photographs or small notes inside each pocket can enhance the personal touch of your calendar. Cut small pockets or compartments into the wood, each representing a day leading up to Christmas. Use small dowels, hooks, or nails to create individual holders for tiny gifts, notes, or treats. Personalize the calendar by painting or staining the wood in festive colors, or leave it natural for a more rustic feel. The pockets can be numbered or decorated to match your holiday theme. This type of calendar isn’t only functional but also becomes a beautiful decorative piece you’ll enjoy year after year. Additionally, considering design principles such as contrast ratio can help ensure the calendar looks appealing in various lighting conditions. When selecting materials, opt for reclaimed wood to add an eco-friendly touch to your project. It’s a practical project that adds a cozy touch to your holiday decor.
Creative Hobbies 25 Drawer Wooden Advent Calendar, DIY Unfinished Storage Box, Ready to Decorate, Pre Assembled, Storage Organizer
Count Down to Christmas in Style – This pre-assembled 11-inch Christmas Advent Calendar Shadow Box is the perfect…
As an affiliate, we earn on qualifying purchases.
As an affiliate, we earn on qualifying purchases.
Mason Jar Number Display
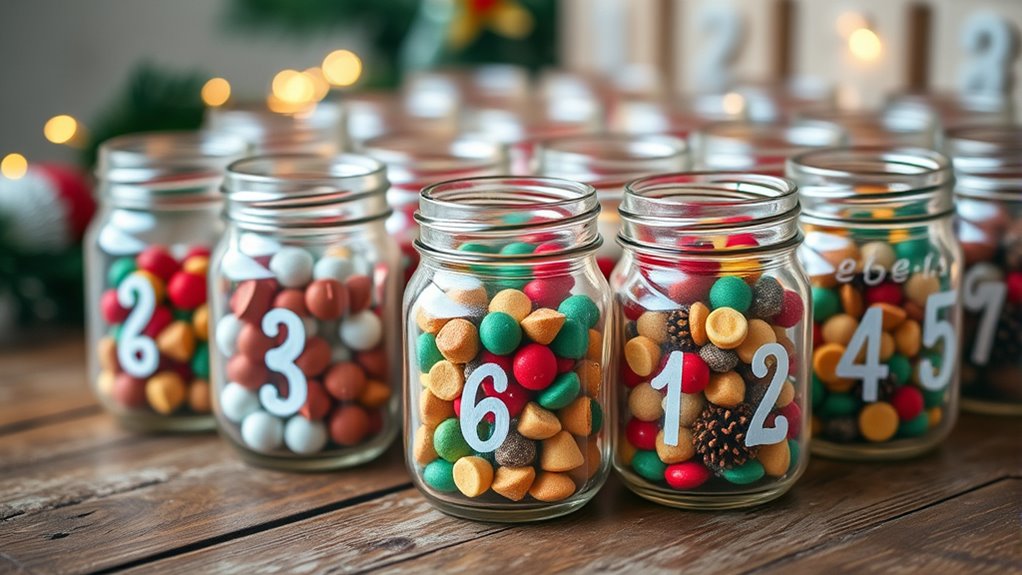
To create a charming Mason Jar Number Display, start by gathering a set of small to medium-sized jars and numbering labels or tags. Label each jar with numbers from 1 to 24 or 25, depending on your calendar. You can write directly on the jars with waterproof markers or attach numbered tags using twine or ribbon. Incorporate a festive touch to ensure each jar is placed carefully and thoughtfully for an eye-catching presentation. Arrange the jars on a tray, a wooden board, or hang them from a sturdy frame. For added visual appeal, fill each jar with small treats, notes, or festive decorations. Guarantee the jars are evenly spaced for an organized look. Paying attention to presentation techniques can enhance the overall aesthetic of your display. Using creative display ideas can make your advent calendar truly stand out. Incorporating security considerations can help protect your contents and ensure the display remains intact throughout the season. This display is versatile and allows you to customize the contents, making it a delightful centerpiece for your holiday decor. It’s simple to set up and adds a rustic, festive touch to your home.

Mason Life Christmas Socks Advent Calendar, 24 Days Countdown Calendar Gifts, 2025 Festive Holiday Countdown with 24 Pairs of Christmas-Themed Winter Warm Slipper Soft Fluffy Socks with Gift Boxes
24 DAYS CHRISTMAS SOCKS ADVENT CALENDAR: Celebrate the holidays with the 2025 Christmas Stocking Advent Calendar. Whether you're…
As an affiliate, we earn on qualifying purchases.
As an affiliate, we earn on qualifying purchases.
Clothespin and String Garlands

Choosing the right string sets the foundation for a charming garland, so pick one that matches your decor style. Decorating with clothespins adds a personal touch, and you can paint or embellish them for extra flair. When hanging your garland, consider how to fill the clothespins and secure everything for a neat, festive display. Incorporating decorative accents can elevate the overall look and make your garland truly unique. Additionally, selecting durable materials ensures your DIY project lasts throughout the holiday season and beyond. Using energy-efficient materials, such as lightweight options, can also help prevent sagging or breaking under weight, ensuring your garland remains stable and attractive during display.
Choosing the Perfect String
Selecting the right string for your Advent calendar is essential to guarantee it looks charming and functions well. You want a string sturdy enough to hold your clothespins and decorations, but also flexible for easy hanging. Jute twine offers a rustic, natural look, while nylon or polyester cords are more durable and smooth. Consider the length needed to span your wall or mantel comfortably. If you plan on hanging multiple rows or a large display, choose a thicker, stronger material. Make sure the string is lightweight to prevent sagging or drooping over time. Additionally, opt for a color that complements your overall decor—neutral tones blend easily, while colorful strings add a playful touch. Understanding home furnishings durability can help you choose a string that maintains its appearance and functionality over time, ensuring your calendar stays beautiful throughout the season. Picking the right string sets the foundation for a beautiful, functional calendar. To further ensure longevity, selecting a material that resists fraying can help your calendar withstand handling and seasonal storage. Using a durable material also reduces the need for frequent replacements, saving you time and effort in the long run. Considering weather resistance is also beneficial if your calendar will be displayed outdoors or in a drafty area.
Decorating With Clothespins
Clothespins are a simple yet charming way to display your holiday photos, notes, or small ornaments on your Advent calendar garland. They add a rustic touch and make it easy to change decorations daily. To enhance your garland, consider these ideas: 1. Clip festive photos or handwritten notes for a personal touch. 2. Hang small ornaments or holiday charms to add sparkle. 3. Attach mini gift tags or messages for a countdown element. Use colorful or wooden clothespins to match your decor style, and space them evenly along your string. You can also decorate the clothespins with paint, glitter, or holiday washi tape for extra flair. This simple method allows for easy customization and keeps your Advent calendar interactive and festive. Incorporating interactive elements like small charms or messages can heighten the engagement and fun of your holiday display, and understanding the cookie categories can help you ensure your online experience remains secure while sharing your creative projects. Additionally, selecting the right mailing list segmentation strategies can help you target your audience more effectively and improve your holiday outreach efforts. Moreover, paying attention to local ingredients can inspire unique decorations or themes that reflect regional culture and traditions. Using simple tools like clothespins also enables you to experiment with voiceover script optimization, ensuring your message is clear and engaging for your audience.
Filling and Hanging Tips
To guarantee your Advent calendar garland stays organized and visually appealing, pay attention to how you fill and hang your decorations. Start by evenly distributing small treats or notes along the string, keeping heavier items closer to the center for balance. Use clothespins to secure each item firmly, ensuring they won’t slip or fall. When hanging, choose a sturdy spot like a mantel or wall hook, and make sure the string is taut to prevent sagging. To add variety and visual interest, alternate between different-sized clothespins and decorations.
| Tip | Description |
|---|---|
| Balance the weight | Distribute treats evenly to avoid sagging. |
| Use sturdy hooks | Secure the garland to prevent falling. |
| Keep string taut | Prevents sagging and maintains shape. |
| Alternate decorations | Adds visual interest and variety. |
| Secure clothespins well | Ensures decorations stay in place. |

ArtSkills 25 Day Christmas Craft Advent Calendar 2025, Crafting Through the Holidays Arts & Crafts Advent Calendar for Kids
Kids Christmas Countdown Calendar: Celebrate your Christmas countdown with 25 fun crafts! Boys and girls alike can have…
As an affiliate, we earn on qualifying purchases.
As an affiliate, we earn on qualifying purchases.
Paper Cup Advent Tree
Creating a paper cup advent tree is a fun and simple way to count down to the holidays. You start by gathering colorful paper cups, stacking them in a tree shape, and attaching them with glue or tape. Each cup can hold small treats or messages.
Create a festive paper cup advent tree to count down to Christmas with treats or messages.
To make your tree stand out, decorate the cups with markers, stickers, or holiday-themed designs. Use a sturdy base like cardboard or foam to support the structure. Number each cup to represent the days leading up to Christmas.
Here are some ideas to get started:
- Stack cups in a triangular shape, gradually decreasing in size.
- Decorate each cup with festive colors and patterns.
- Attach small hooks or string to hang the cups securely.
Recycled Tin Can Countdown
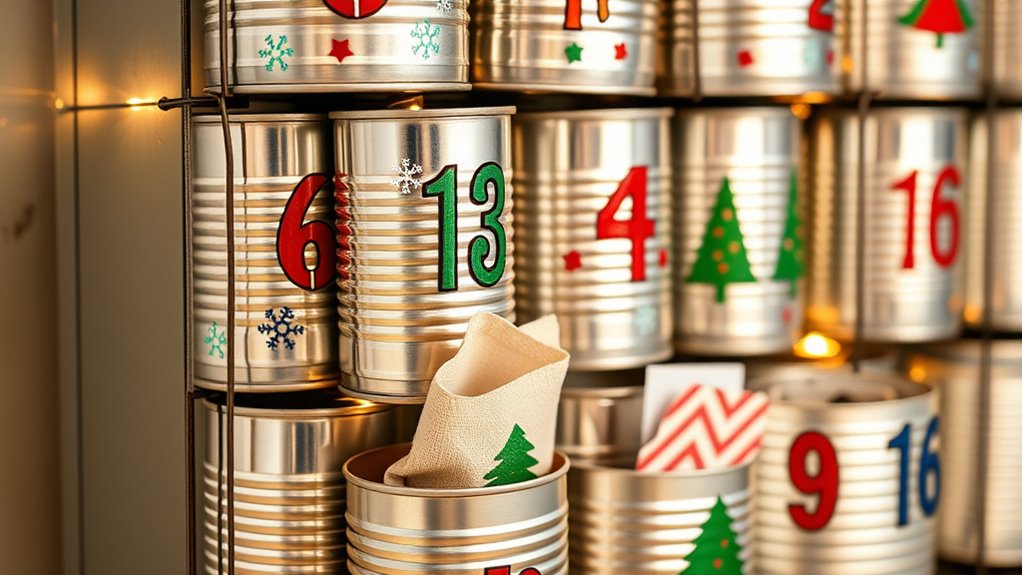
Transforming everyday tin cans into festive countdowns is a creative way to recycle and add a personal touch to your holiday decor. Start by cleaning and removing labels from your cans.
Then, paint or decorate each can with holiday colors, patterns, or quotes. Number the cans from 1 to 24 (or your chosen countdown length) and arrange them in a display, such as a tray, box, or hanging arrangement.
You can fill each can with small treats, notes, or surprises for each day. To make it more festive, add bows, ribbons, or holiday-themed embellishments.
This project is simple, eco-friendly, and customizable, helping you create a charming, sustainable advent calendar that brings joy and a little bit of holiday magic to your home.
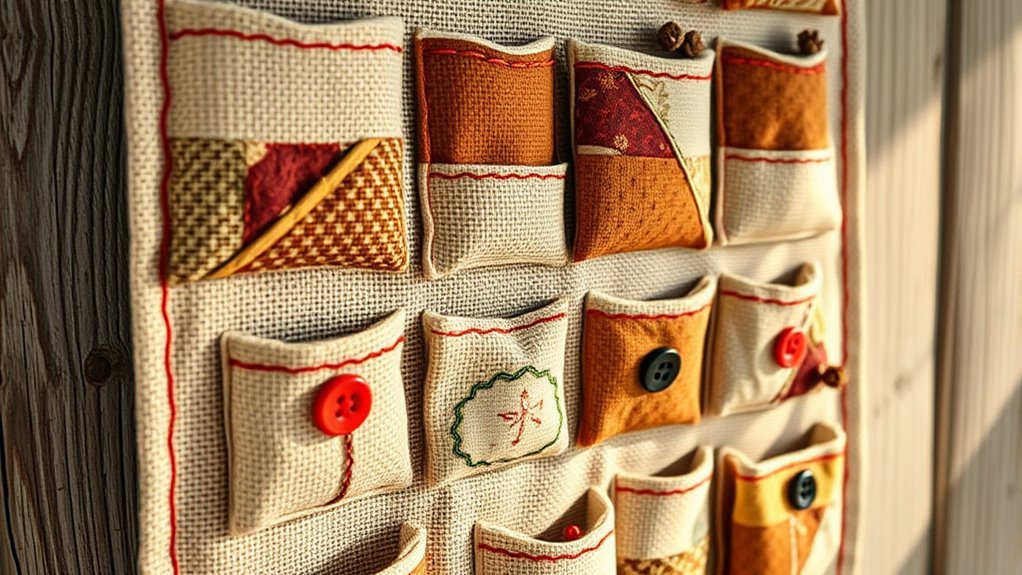
Felt Pocket Wall Organizer
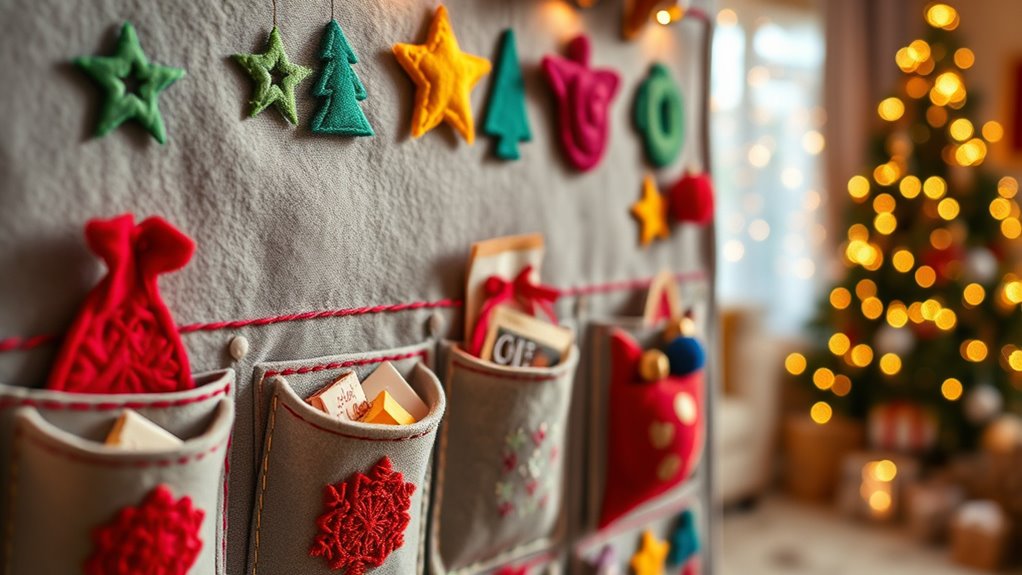
Start by choosing soft, durable felt in colors that match your decor, ensuring your pockets will last through the season.
Next, plan your pocket sizes carefully so each gift fits comfortably without crowding.
Finally, attach sturdy wall hangers securely to keep your organizer in place as you fill it with surprises.
Selecting Felt Materials
Have you considered how choosing the right felt materials can make or break your felt pocket wall organizer? The quality and color of your felt directly impact the finished look and durability.
Opt for high-quality, craft-grade felt that’s sturdy but easy to cut and sew. It should be free of synthetic fibers that can fray easily.
Consider using felt in vibrant colors that complement your holiday decor or match your room’s theme.
Also, check that the felt isn’t too thin, which might cause pockets to sag or tear.
To help you decide, here are key points:
- Choose thick, durable felt for longevity.
- Select colors that coordinate with your decor.
- Ensure the felt is free from synthetic fibers and fraying.
Designing Pocket Sizes
Once you’ve selected the right felt materials, determining the appropriate pocket sizes guarantees your wall organizer is both functional and visually appealing. Think about what you’ll place in each pocket—small candies, notes, or tiny gifts—and size the pockets accordingly.
For most items, a width of 3 to 4 inches and a height of 4 to 6 inches work well. Keep consistency throughout your design to create a cohesive look. Varying pocket sizes can add visual interest, but avoid going too small or too large, which may affect usability.
Measure carefully and sketch your layout before cutting. Remember, the pockets should be easy to access and sturdy enough to hold their contents without sagging. Proper sizing ensures your advent calendar is both practical and charming.
Attaching Wall Hangers
Attaching wall hangers securely is essential to guarantee your felt pocket organizer stays in place and looks neat. You want it to hang evenly and not fall down over time.
First, choose sturdy hooks or wall anchors suitable for your wall type. Second, measure and mark where you’ll place the hangers to ensure even spacing. Third, attach the hangers firmly to support the weight of the felt pockets.
Here are some tips:
- Use strong adhesive hooks or nails to prevent slipping.
- Space the hangers evenly to keep the organizer balanced.
- Check the weight capacity before hanging, especially if your pockets are filled.
Proper attachment ensures your advent calendar remains functional and attractive all season long.
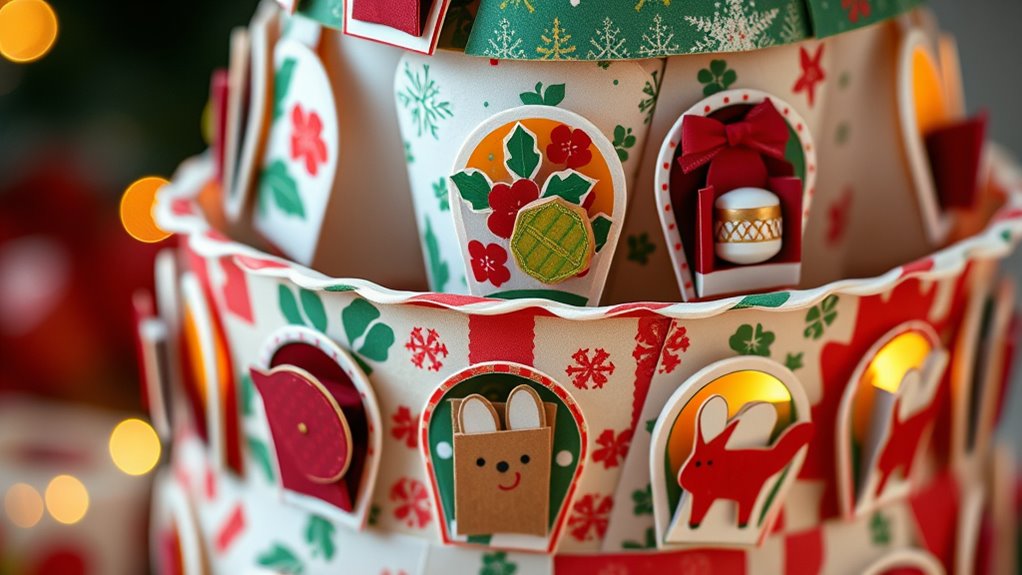
Miniature Gift Box Chain
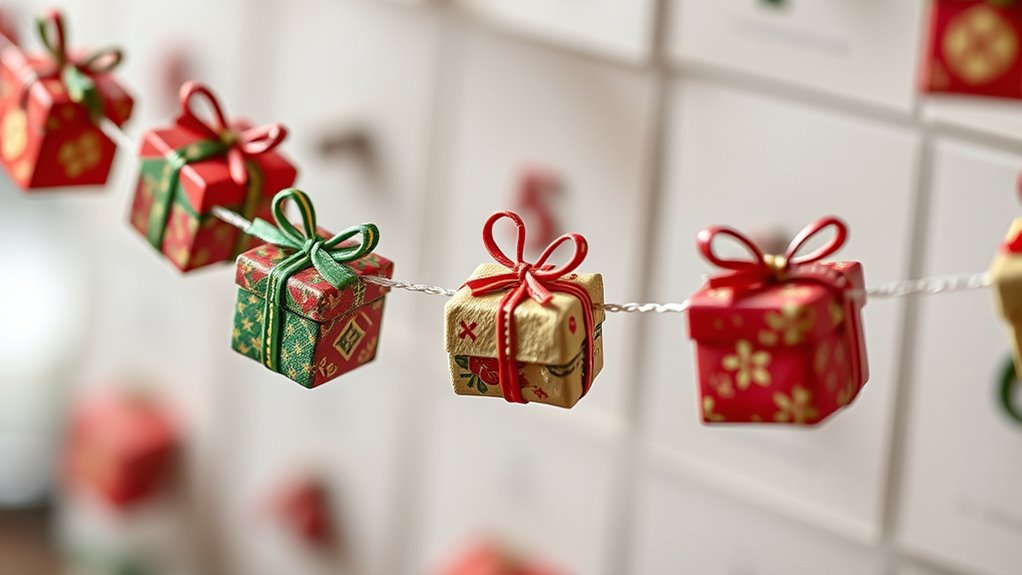
Creating a miniature gift box chain is a simple yet charming way to enhance your DIY Advent calendar. Begin by gathering small gift boxes or making your own from sturdy paper or cardboard. Decorate each box with festive colors, patterns, or labels to personalize them.
Create a charming gift box chain to personalize your DIY Advent calendar effortlessly.
Use a hole punch or small eyelet on each box’s top to thread a sturdy string or ribbon through. Space the boxes evenly along the string, securing each in place with knots or small clips.
Hang the chain across a wall, mantel, or doorway for a whimsical display. This method not only adds visual interest but also creates a fun, interactive element as you can fill each box with surprises or notes.
It’s an easy, versatile project that brings a handmade touch to your holiday decor.
Mason Jar Lid Calendar
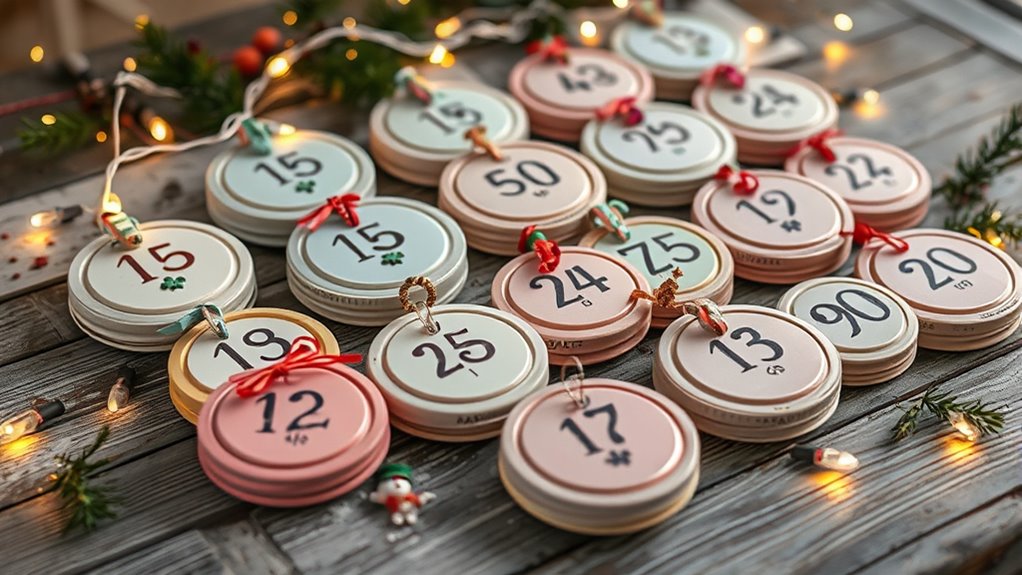
Building on your miniature gift box chain, a Mason Jar Lid Calendar offers a charming and practical way to count down to Christmas. You can repurpose jar lids by decorating them with festive designs, numbers, or stickers. Attach small hooks or strings to hang the lids on a sturdy board or frame. Fill each lid with tiny surprises like candies, notes, or small ornaments to make each day special.
This calendar is customizable, affordable, and easy to update each year.
Here are some ideas to get started:
- Decorate lids with paint, washi tape, or stamps for a festive look.
- Number the lids from 1 to 24 for December.
- Use small bags or cups inside the lids for treats or messages.
Stocking-Style Hanging Calendar
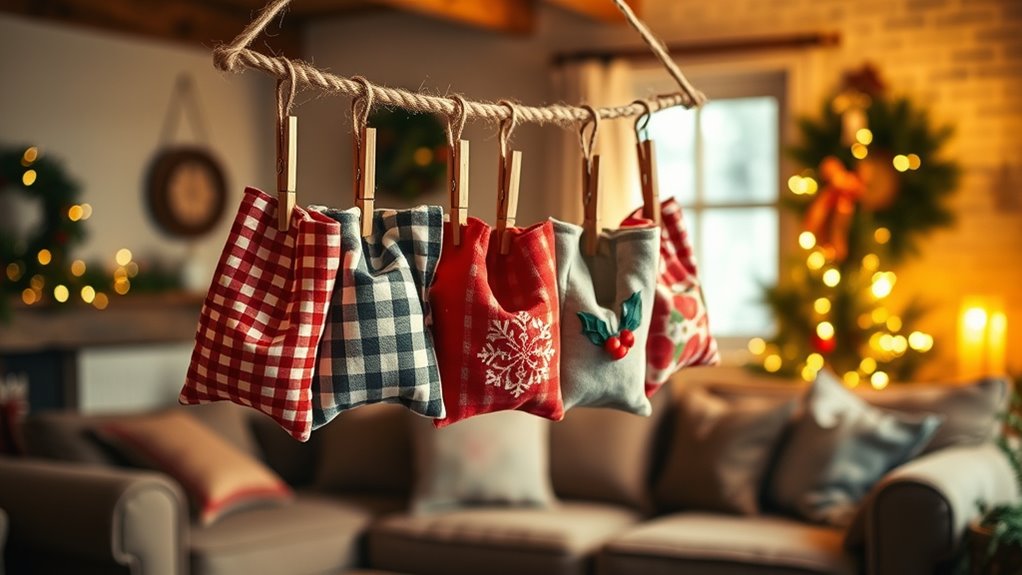
A stocking-style hanging calendar lets you add your own personal touches with festive decorations, making it uniquely yours.
You’ll find it’s simple to hang and adjust, so you can change up the display whenever you like.
This makes it a fun, practical way to count down to Christmas with minimal effort.
Personalized Decorations
Personalized decorations can make your stocking-style hanging calendar truly special by adding a personal touch that reflects your holiday spirit. You can customize your calendar with unique ornaments, handwritten labels, or meaningful images. These personal touches create a warm, festive atmosphere and make the countdown more meaningful.
To get started, consider these ideas:
- Add small photos or keepsakes to each pocket or stocking to highlight special memories.
- Write personalized messages or holiday wishes on tags or cards.
- Decorate with your favorite colors, patterns, or themed stickers that match your home decor.
These simple additions turn a basic calendar into a heartfelt display that celebrates your family’s traditions and personality. Your handmade calendar will become a cherished part of your holiday season.
Easy Hanging Setup
Setting up your hanging calendar is simple and straightforward. First, choose a sturdy spot like a mantel or wall hook. Attach a length of twine or ribbon across the area, ensuring it’s taut. Secure each end with nails, hooks, or adhesive strips.
Next, hang your stockings or fabric pouches directly from the string using clothespins, hooks, or small clips. If your calendar has loops or holes, thread the string through them for added stability.
Make sure everything hangs evenly and is well-balanced. Adjust as needed to prevent slipping or tilting.
This easy setup keeps your advent calendar accessible and charming. Plus, it’s quick to assemble and remove once the season ends. With just a few simple steps, your festive display is ready to enjoy.
Canvas and Button Patchwork
Canvas and button patchwork offers a charming and versatile way to create unique advent calendars. You can customize each pocket or section with different fabric patterns and colorful buttons, making your calendar both functional and decorative.
Create charming, customizable advent calendars with fabric patches and colorful buttons for a fun, decorative touch.
To start, select sturdy canvas as your base and gather an assortment of buttons in various sizes and colors. Sew or glue fabric patches onto the canvas to form pockets or compartments. Then, attach buttons to seal or decorate each section, adding a tactile element.
This method allows for endless personalization, such as adding small labels or numbers. Here are some ideas to inspire your patchwork design:
- Mix and match fabric patterns for a vibrant look
- Use large buttons as closures or accents
- Incorporate decorative stitches for added texture
Frequently Asked Questions
What Are Eco-Friendly Materials for Making DIY Advent Calendars?
When choosing eco-friendly materials, you should consider options that are sustainable and biodegradable. You can use recycled cardboard or paper for the calendar structure, which reduces waste.
Natural fabrics like cotton or linen are great for creating pockets or pouches.
Additionally, opt for non-toxic, plant-based paints or dyes to decorate.
Using these materials helps you craft beautiful, environmentally conscious advent calendars that minimize your carbon footprint.
How Can I Personalize My Handmade Advent Calendar?
You can personalize your advent calendar by adding special touches that reflect your style and memories. Use favorite colors, themes, or photos to make each compartment unique.
Write personalized notes or include small meaningful gifts. Incorporate hand-drawn artwork or stamps for a creative flair.
You might also assign each day a special activity or message. These personal elements turn your calendar into a meaningful, customized holiday tradition that truly reflects you.
What Safety Tips Should I Follow When Using Sharp Tools?
When using sharp tools, you should prioritize safety to avoid accidents. Always handle blades and scissors carefully, keeping your fingers away from cutting edges.
Use a cutting mat or a sturdy surface to protect your workspace.
Wear protective gear like gloves if necessary, and keep your tools sharp to reduce slipping.
Work slowly and focus on what you’re doing, and store tools safely after use to prevent injuries.
How Long Does It Typically Take to Complete a DIY Advent Calendar?
Think of creating a DIY advent calendar as planting a garden—your patience and effort determine the bloom time. Usually, it takes anywhere from a few hours to a weekend, depending on complexity.
If you keep focused and work steadily, you’ll see your festive masterpiece come to life. Rushing can cause mistakes, so enjoy the process.
With dedication, you’ll have a charming calendar ready to count down the days!
Can These Calendars Be Reused Year After Year?
Yes, you can reuse these calendars year after year. If you choose durable materials like wood or sturdy fabric, they’ll last through multiple seasons.
Just make sure to store them properly in between uses to prevent damage. Reusing your advent calendar saves money and adds a personal touch to your holiday tradition.
Plus, over time, it becomes a cherished part of your festive celebrations.
Conclusion
No matter which DIY advent calendar you choose, you’re creating a festive tapestry of anticipation and joy. Each handmade piece is like a tiny star in your holiday sky, lighting up the season with love and creativity. So, gather your supplies, get inspired, and let your imagination run wild—because these calendars turn simple materials into treasured memories. This holiday, make each day sparkle with the magic only a homemade advent calendar can bring.