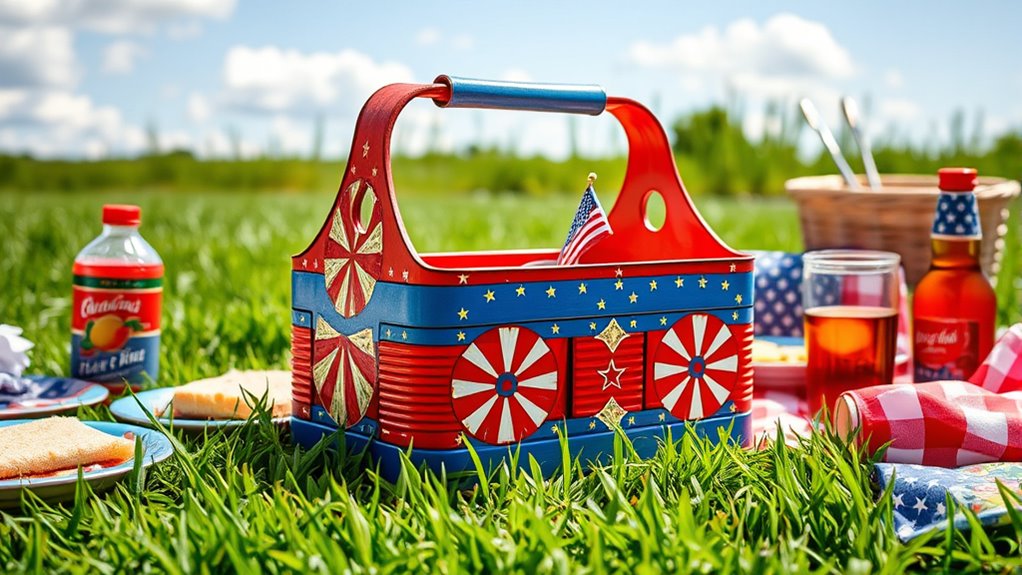

To create a festive Labor Day picnic caddy from tin cans, start by gathering clean, empty cans and plan your design for organization and style. Paint and decorate them with patriotic themes, sealing the finishes for weatherproofing. Attach handles for easy transport and arrange compartments to hold all your picnic essentials. Regularly maintain your caddy to keep it durable and attractive. Keep exploring for detailed steps to craft your perfect outdoor organizer.
Key Takeaways
- Collect and thoroughly clean tin cans, removing labels and sharp edges, to serve as the main structure for the caddy.
- Design and decorate the cans with bright, patriotic colors and motifs, sealing with weatherproof coatings for outdoor durability.
- Attach sturdy handles using wire or can strips for easy transport and organize items with smaller cans or dividers inside.
- Personalize with labels, charms, or flags to enhance visual appeal and festive spirit for Labor Day celebrations.
- Maintain the caddy by cleaning regularly, storing in a dry place, and periodically sealing to prevent rust and prolong usability.
Gathering Materials and Tools
Before you begin assembling your picnic caddy, it’s important to gather all the necessary materials and tools. Start by collecting clean, empty tin cans—these will form the main structure of your caddy. You’ll also need scissors, a hot glue gun, and decorative materials like paint or stickers. As you gather supplies, consider recycling strategies by repurposing items you already have, which offers clear environmental benefits. Using recycled materials reduces waste and minimizes your carbon footprint. Make sure to also have some protective gloves and newspaper or a drop cloth for safety when working with glue and paint. Planning your project with sustainable practices in mind can further enhance its eco-friendliness. Incorporating knowledge about electric bikes can remind us of the importance of contingency planning, which is also useful when organizing supplies for DIY projects. Organizing everything beforehand guarantees a smooth crafting process, so you’re ready to create a functional, eco-friendly picnic caddy that’s perfect for Labor Day. Additionally, understanding project planning can help streamline your assembly process and avoid unnecessary setbacks. Being aware of environmental benefits can motivate you to choose eco-conscious materials and methods throughout your project.
Preparing the Tin Cans for Crafting
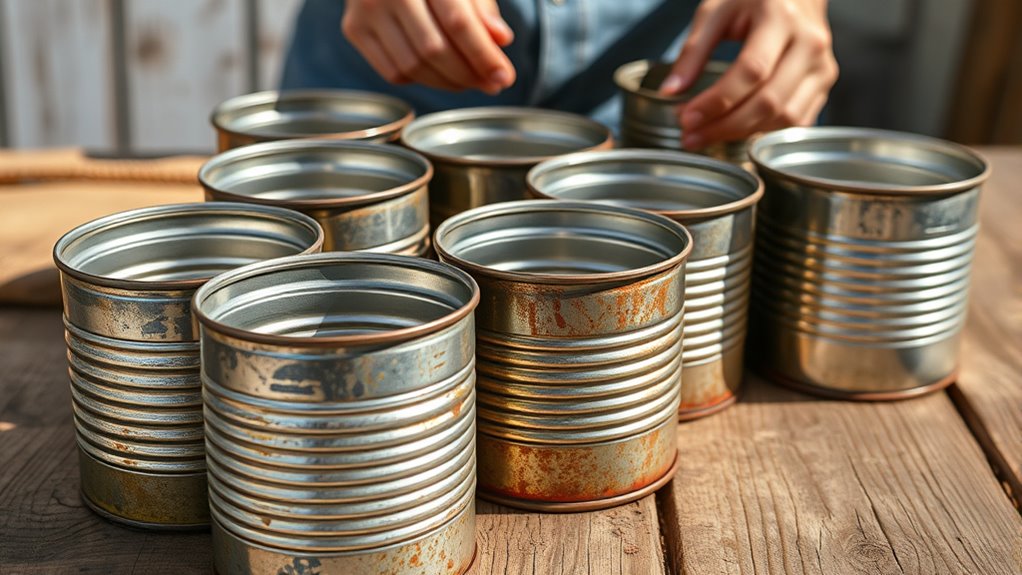
To prepare your tin cans for crafting, start by thoroughly washing them with soap and warm water to remove any labels, adhesive residue, or dirt. Proper tin can cleaning ensures your project looks neat and prevents contamination. Remember to follow safety precautions: wear gloves to protect your hands from sharp edges, work on a stable surface, and use tools carefully. Here are some tips for prepping your cans:
Start by washing cans thoroughly with soap and warm water to ensure a clean, safe crafting surface.
- Remove labels with warm soapy water or soaking
- Scrape off any remaining adhesive gently
- Rinse thoroughly to eliminate soap residue
- Dry completely before proceeding with your craft
Additionally, understanding data privacy challenges can help you be more mindful of securing your personal information during online craft shopping or sharing project ideas.
Taking these steps ensures your cans are safe to handle and ready for customization, making your crafting process smooth and enjoyable.
Designing and Planning Your Caddy
With your tins cleaned and ready, it’s time to plan how you’ll turn them into a functional and attractive picnic caddy. Start by sketching a simple design that considers your needs, such as compartments for utensils, napkins, and condiments. Use eco-friendly materials whenever possible, like biodegradable adhesives or sustainable fasteners, to keep your project environmentally conscious. Safety precautions are essential—wear gloves when handling sharp edges, and ensure all cuts are smooth to prevent injuries. Think about how you’ll arrange the cans for stability and easy access. Decide if you’ll need handles or a carrying structure, and plan how to attach everything securely. Proper planning now guarantees your caddy will be both practical and safe, making your Labor Day picnic even more enjoyable. Incorporating natural materials can further enhance the aesthetic and sustainability of your project. Additionally, considering portability and durability will help ensure your caddy withstands outdoor conditions and is easy to transport. For added stability and health benefits, using chlorophyll-rich materials can also be a creative touch in your design. Planning around store hours ensures you can purchase any additional supplies without inconvenience. To ensure your project reflects your personal style, researching family influences can inspire unique decorative touches that make your caddy special.
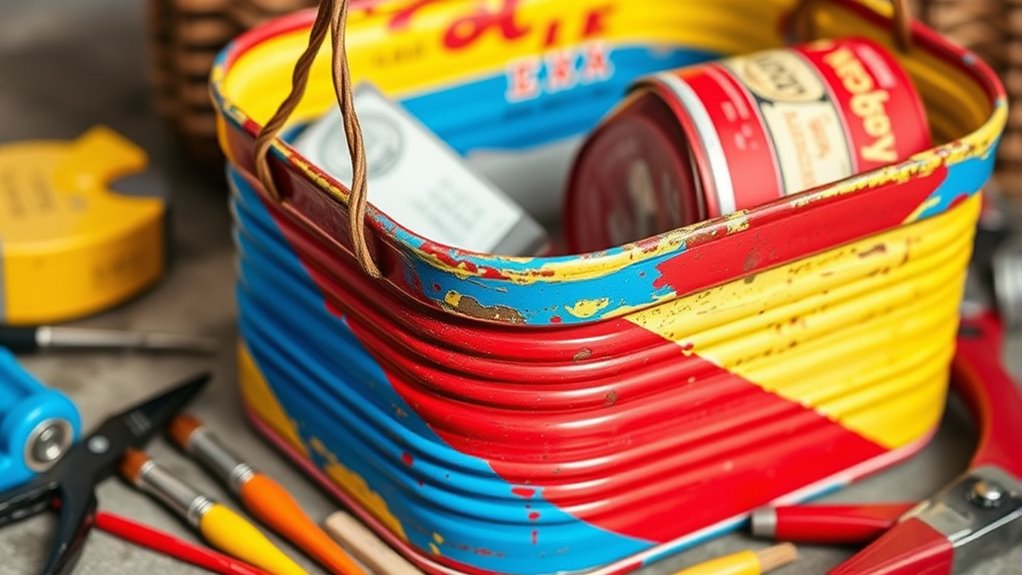
Painting and Decorating the Cans
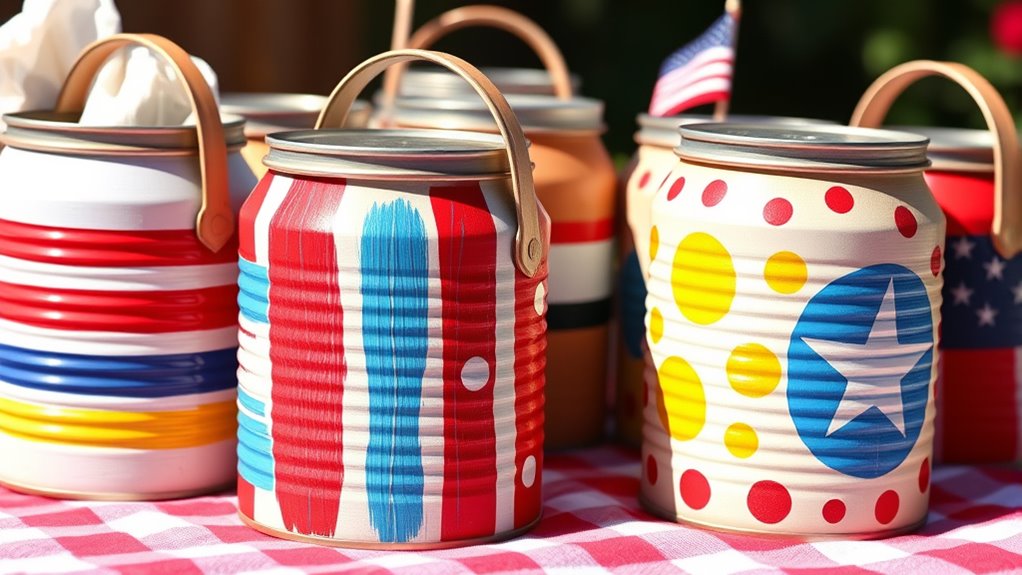
Choose bright colors to make your cans stand out and evoke a festive spirit. Add patriotic designs like flags or stars to show your holiday pride. Once you’ve decorated, seal the cans to protect your artwork and guarantee they last through the picnic. For an extra touch, consider incorporating rustic farmhouse style elements to give your project a charming, handcrafted feel. Incorporating ethical hacking techniques can also inspire creative security-themed decorations to make your caddy both fun and unique. Additionally, selecting durable materials ensures that your decorated cans remain intact during outdoor festivities. Exploring inflation protection strategies might inspire fun themes for your can designs, adding a touch of cultural flair to your project.
Choosing Bright Colors
Bright colors can make your picnic caddy stand out and add a festive touch to the celebration. When choosing colors, think about bold color combinations that catch the eye and complement the seasonal palettes of late summer and early fall. To create a vibrant look, consider contrasting shades like yellow and navy or orange and teal. Mixing bright reds, blues, and greens can also give your caddy a lively, energetic feel. Don’t forget to experiment with different hues to see what appeals most. Incorporate colors that reflect the season’s spirit and your personal style. Remember, the right combination can turn simple cans into eye-catching decorations, making your picnic memorable and fun for everyone.
Adding Patriotic Designs
Adding patriotic designs to your cans is a great way to enhance your picnic caddy and show your holiday spirit. You can paint patriotic symbols like stars, eagles, or fireworks to make your cans stand out. Incorporate flag motifs by painting stripes or small American flags on the sides of the cans. Use bold red, white, and blue colors to emphasize the patriotic theme. Keep your designs simple for a clean look, or add details for more flair. Use paint pens or brushes to create precise lines and small details. These decorations will not only personalize your cans but also add a festive touch to your Labor Day celebration. Remember, the goal is to create a cheerful, patriotic vibe that complements your picnic setup.
Sealing for Durability
To guarantee your patriotic designs last through the festivities, sealing your painted cans is essential. Proper sealant application creates a weatherproof coating that protects your artwork from moisture, sun, and handling. Start by choosing a clear, outdoor-safe sealant designed for metal surfaces. Apply it evenly with a brush or spray, ensuring full coverage on all painted areas. This step locks in your designs and prevents chipping or fading. For extra durability, consider multiple coats, allowing drying time between applications. A weatherproof coating not only preserves your artwork but also keeps your caddy looking fresh during the celebration. Remember, a well-sealed can withstand outdoor elements, making your Labor Day picnic caddy both attractive and long-lasting.
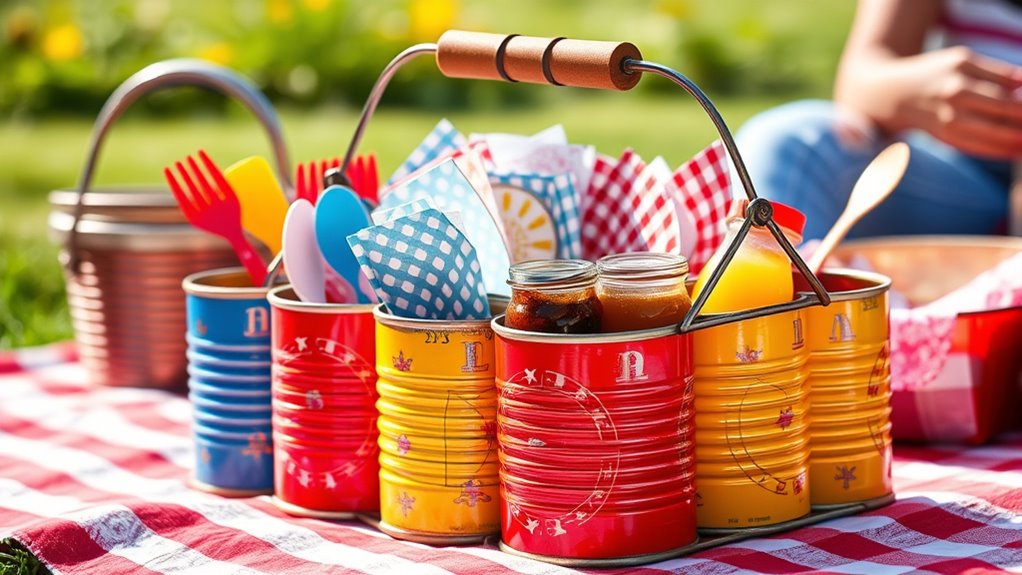
Attaching Handles for Easy Carrying
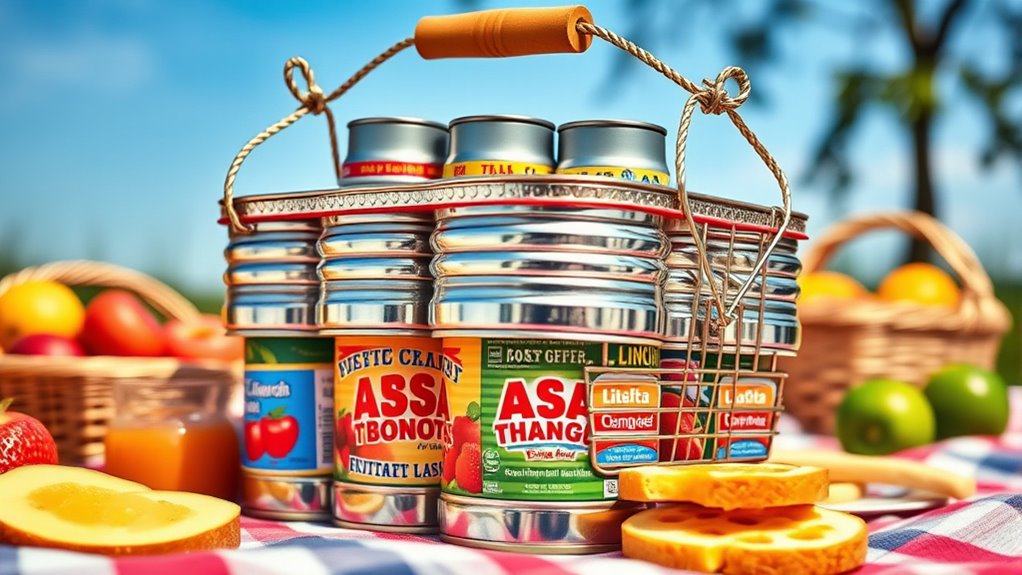
Attaching handles to your picnic caddy makes it much easier to transport, especially when it’s fully loaded. To guarantee a secure handle attachment, choose sturdy wire or sturdy strips of tin can material. Create handles by bending wire or cutting strips into manageable lengths, then attach them firmly to the sides of your caddy using simple techniques like wrapping or twisting. Keep in mind, lightweight construction is key; you don’t want handles that add unnecessary weight or strain. Make sure the handles are comfortable to grip and well-secured to avoid slipping or breaking during transport. Proper handle attachment improves portability and helps you carry your picnic essentials with ease, making your Labor Day picnic more enjoyable and stress-free. Incorporating personal development principles such as goal setting and planning can also enhance your DIY projects and outdoor activities. Additionally, focusing on vibrational energy can help you stay positive and attract a successful picnic experience. When selecting your materials, consider environmental considerations to ensure your project aligns with sustainable practices. Being aware of regional resources and tools can also provide ideas for sourcing affordable and eco-friendly materials to enhance your project.
Organizing Compartments and Storage Areas
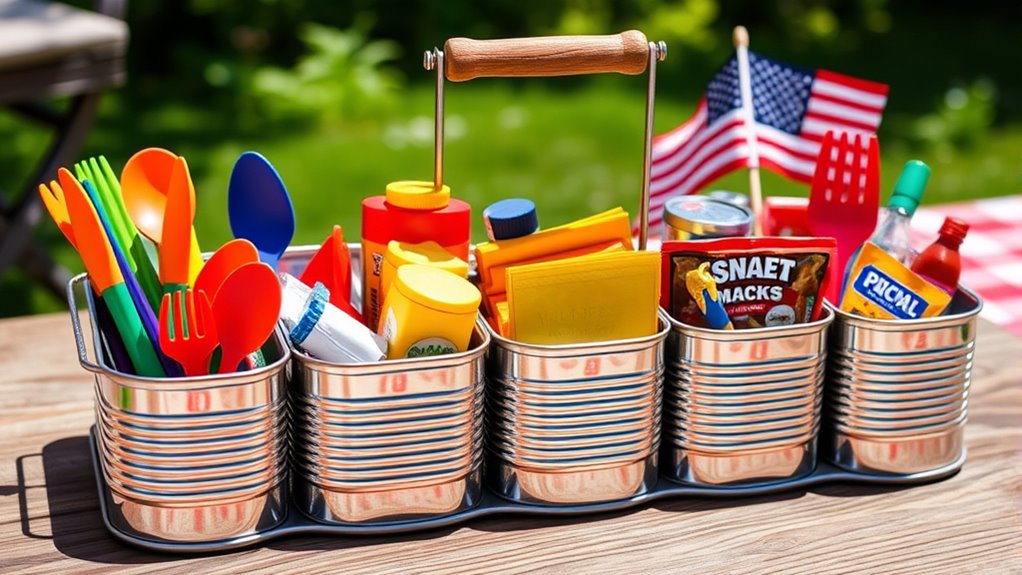
Once your handles are securely in place, focus on organizing the compartments and storage areas inside your picnic caddy. Use canning techniques to create neat, airtight sections for different items. Consider storage container ideas like small jars or repurposed tin cans to keep utensils, napkins, and condiments separated and easily accessible. To maximize space, group similar items together, such as drinks in one section and snacks in another. Use dividers or small containers to prevent spills and clutter. Keep fragile items protected with padding made from recycled materials. Prioritize functionality by designing compartments that suit your picnic needs, making setup quick and cleanup effortless. Proper organization guarantees everything stays in place and ready for your Labor Day celebration.
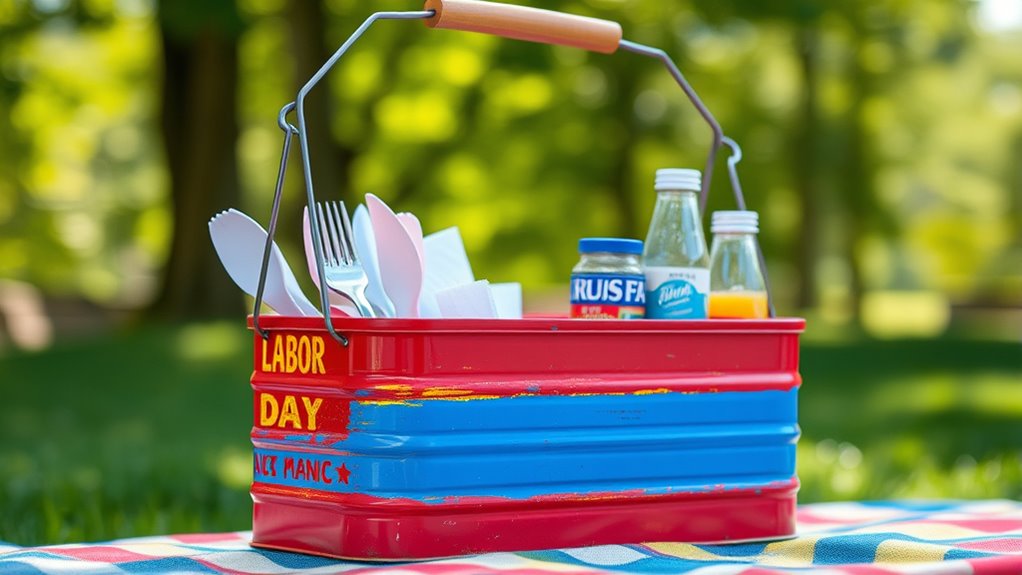
Final Touches and Personalization

Adding personalized labels and decorations gives your picnic caddy a unique touch that reflects your style. You can easily customize containers and sections with stickers or handwritten tags to identify items quickly. Final details like colorful accents or themed decorations will make your caddy both functional and festive.
Personalized Labels and Decorations
Have you thought about how personalized labels and decorations can elevate your Labor Day picnic caddy? Adding custom labels not only makes your caddy stand out but also highlights the recycling benefits of using eco-friendly materials. You can create fun, colorful labels with messages like “Fresh Snacks” or “Drink Station” using recycled paper or biodegradable stickers. Decorations like hand-drawn banners or painted designs add a personal touch while promoting sustainability. Consider these ideas to enhance your project:
- Use recycled materials for labels and decorations
- Incorporate patriotic colors to celebrate Labor Day
- Add fun stickers or stamps for a unique look
- Personalize with family names or picnic themes
These touches make your caddy memorable and eco-conscious, perfect for a festive, sustainable celebration.
Adding Final Details
To give your Labor Day picnic caddy a polished, personalized look, focus on adding final details that reflect your style and theme. Incorporate festival inspiration by adding colorful ribbons, flags, or small banners that enhance the outdoor decor. Consider painting or stenciling patterns that match your celebration’s vibe, whether vibrant and lively or rustic and charming. Attach miniature fairy lights or solar-powered lanterns to make your caddy stand out during evening gatherings. Personal touches like handwritten signs or themed charms can also elevate the overall look. These final details tie everything together, making your picnic caddy uniquely yours and perfectly suited for celebrating Labor Day in style.
Tips for Using and Maintaining Your Caddy
Properly using and maintaining your Labor Day picnic caddy guarantees it stays functional and looks great for years to come. To keep it in top shape, follow these simple tips. Regular cleaning tips include wiping down the cans with a damp cloth and avoiding harsh chemicals that could damage the paint. For storage solutions, keep your caddy in a dry, cool place to prevent rust and deterioration. Consider adding a coat of clear sealant periodically for extra protection. When not in use, disassemble if possible, and store in a sturdy container to prevent dents. Also, check for sharp edges or loose parts that could cause injury or damage. With proper care, your tin can caddy will be a charming, functional centerpiece for many picnics ahead.
Frequently Asked Questions
Can I Customize the Size of My Picnic Caddy?
You can customize the size of your picnic caddy by adjusting the number of cans you use, which is a great way to personalize your storage solutions. When doing so, keep recycling tips in mind to guarantee you’re eco-friendly. Think about how much space you need for your picnic essentials, and modify the can sizes or quantities accordingly. This way, you create a tailored caddy that fits your needs perfectly.
What Types of Paint Are Best for Outdoor Use?
When choosing paint for outdoor use, you should opt for weather resistant paints that can withstand the elements. Look for paints with durable metal finishes to prevent rust and corrosion on metal surfaces. These paints are designed to handle exposure to sun, rain, and temperature changes, ensuring your project stays vibrant and protected over time. Always select a paint suited for outdoor conditions to keep your items looking great longer.
How Can I Waterproof the Finished Caddy?
Imagine your masterpiece exposed to the elements—how do you keep it safe? To waterproof your finished caddy, you need effective sealing techniques and weatherproof coatings. Apply a clear acrylic sealant or outdoor varnish, ensuring you cover every surface thoroughly. For extra protection, consider adding a waterproofing spray designed for outdoor use. This way, your creation stays vibrant and intact, no matter what Mother Nature throws its way.
Are There Eco-Friendly Materials for This Project?
You’re asking about eco-friendly materials for your project, which is great for the environment. Using sustainable materials like recycled paper, biodegradable paints, and natural sealants can reduce your carbon footprint. Recycling benefits extend when you repurpose items like tin cans instead of buying new. These choices help make your project eco-conscious, and you’ll feel good knowing you’re supporting sustainability while creating something useful and environmentally friendly.
How Do I Securely Attach Handles to Heavy Cans?
Imagine your handles as sturdy arms reaching out to support a heavy load. To securely attach them, first drill matching holes in the cans and handles. Use strong, eco-friendly rivets or heavy-duty wire for handle attachment, ensuring they grip tightly for maximum weight support. Wrap the connection with durable tape or sealant if needed. This way, your handles will bear weight confidently, making your project both practical and resilient.
Conclusion
Your homemade tin can caddy is more than just a practical item; it’s a creative tribute to Labor Day spirit. As you fill it with snacks and tools, remember it’s crafted from humble cans, transforming everyday materials into something special. Like a sturdy worker’s tool and a vibrant piece of art, your caddy blends utility with personality. Celebrate your effort, knowing that even simple beginnings can hold the pride of a well-crafted, festive centerpiece.