
To create a DIY Día de los Muertos sugar-skull mask, gather supplies like sturdy base materials, colorful paints, beads, faux flowers, and embellishments. Design your mask shape, build the base with papier-mâché or clay, and carve or mold it to fit comfortably. Paint vibrant colors, add traditional motifs, and decorate with rhinestones, flowers, and glitter for a festive look. Personalize your mask with photos or messages to honor loved ones. If you keep exploring, you’ll discover how to make an eye-catching, meaningful piece.
Key Takeaways
- Gather base materials like papier-mâché, cardboard, or clay to form the skull shape.
- Paint the mask with vibrant colors, emphasizing traditional motifs such as flowers and skull designs.
- Decorate with embellishments like sequins, beads, faux flowers, and metallic charms for ornate details.
- Personalize the mask by adding photos, messages, or cultural symbols like marigolds.
- Allow the mask to dry completely, then store properly to preserve its vibrant appearance.
Gathering Your Supplies and Materials
Before you begin creating your sugar-skull mask, it’s important to gather all the necessary supplies and materials. Understanding cultural symbolism is key, so choose colors, patterns, and decorative elements that reflect the significance of Día de los Muertos. Your base materials should include a sturdy mask or form to build on, along with paints, markers, and embellishments like sequins, beads, or faux flowers. Consider including traditional symbols such as marigolds or crosses to honor the mask symbolism associated with remembrance and spirituality. Have scissors, glue, and brushes ready for detailing. Gathering these supplies beforehand guarantees you can focus on the creative process, allowing your mask to beautifully express the cultural and symbolic meanings behind this vibrant tradition.
Designing Your Mask Shape and Base
Start by choosing a mask shape that reflects your style, whether round, oval, or more intricate. Then, craft a sturdy base using cardboard or foam to guarantee your mask holds its form. A solid foundation makes decorating easier and your mask more comfortable to wear.
Choosing Your Mask Shape
Choosing the right mask shape is a crucial first step in creating a vibrant Día de los Muertos sugar-skull mask that reflects your style. Your shape sets the foundation, so consider how it aligns with cultural symbolism and your personal expression. Whether you prefer a rounded, elongated, or ornate design, select mask materials that suit your vision—paper mâché, clay, or cardboard work well. Think about the cultural significance behind certain shapes, like floral motifs or skull outlines, to add authenticity. Here’s a quick guide:
| Shape Type | Cultural Symbolism | Suitable Materials |
|---|---|---|
| Rounded | Unity, harmony | Paper mâché, clay |
| Elongated | Strength, resilience | Cardboard, foam |
| Ornate | Celebration, beauty | Mixed media, fabric |
Choose a shape that resonates with you and honors tradition.
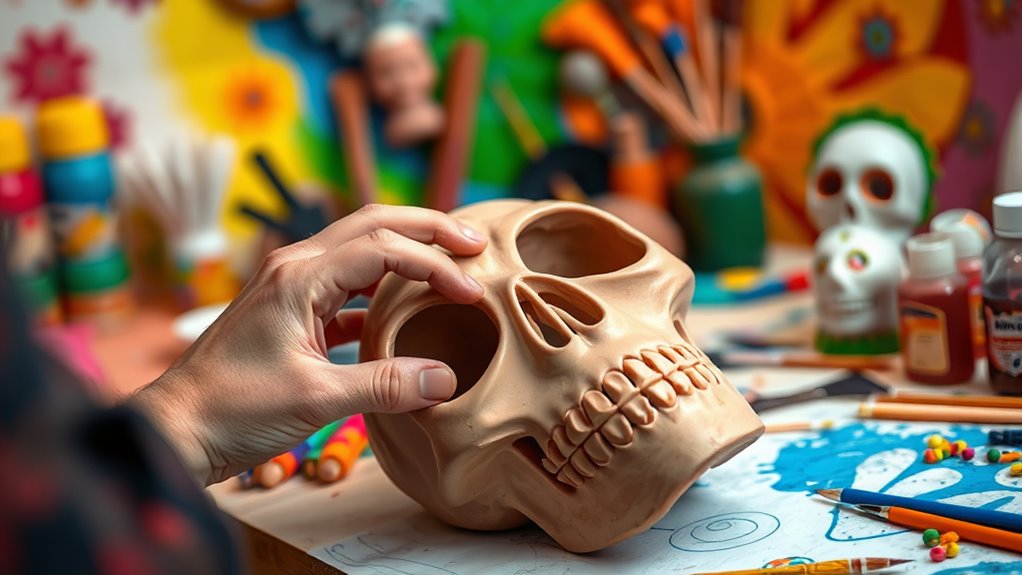
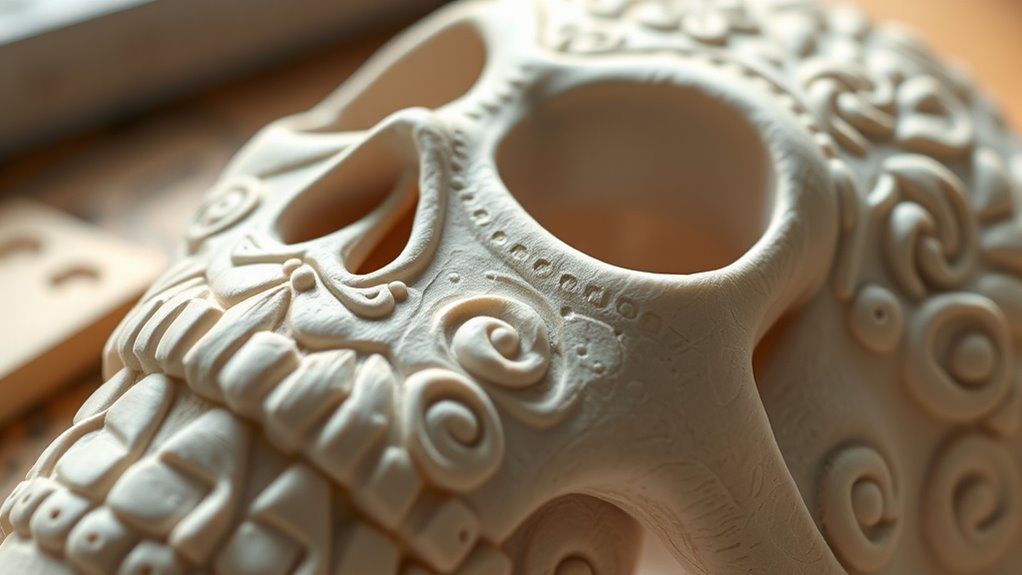
Crafting a Stable Base
Once you’ve selected the mask shape that reflects your style and cultural symbolism, the next step is to craft a sturdy base to support your design. Using innovative techniques like layered cardboard or papier-mâché helps create a durable foundation that maintains its shape. Consider molding the base to fit comfortably on your face, ensuring stability during wear. Incorporate the historical significance of the sugar skull by choosing colors and patterns that honor traditions while adding personal touches. Reinforcing the structure with wire or additional layers improves longevity and resilience. This solid base not only provides the framework for intricate decorations but also ensures your mask remains intact throughout celebrations. A well-crafted foundation is essential for a beautiful, long-lasting Día de los Muertos mask.
Creating the Mask Frame or Mold
Start by gathering all your supplies and tools to guarantee a smooth process. Next, shape your base using your chosen sculpting material, forming the outline of your mask. Once the mold is shaped, let it set completely before moving on to the next steps. To enhance durability, consider adding a layer of natural materials like linen or clay for authenticity and strength. Incorporating color accuracy considerations during the shaping process can also help in achieving a more vibrant final appearance. Additionally, selecting safe and non-toxic materials ensures the mask is suitable for handling and wearing. Understanding state tax laws can help in planning your project costs and materials, especially if you plan to sell or display your masks. Being aware of ethical hacking principles can also be useful if you want to ensure your online tutorials are protected from unauthorized use or copying.
Gather Supplies and Tools
Before you can create a beautiful sugar-skull mask, you’ll need to gather the essential supplies and tools for shaping the frame or mold. Understanding the cultural significance of Día de los Muertos and its historical origins can inspire your design choices. For the frame, gather materials like wire, foam, or paper mâché supplies, depending on your preferred method. You’ll also need tools such as pliers, scissors, and a hot glue gun for assembly. Keep in mind that a sturdy, lightweight base ensures comfort and durability. Having these supplies ready allows you to focus on capturing the vibrant, meaningful details that honor the tradition. Proper preparation sets the foundation for a striking, respectful sugar-skull mask that celebrates cultural heritage.
Sculpt Base Shape
To create a sturdy and comfortable mask, you’ll need to sculpt a solid base shape that serves as the foundation for your design. Focus on face contouring to guarantee the mask fits snugly and comfortably against your face. Start by shaping a basic form that matches your facial structure, paying attention to the curves and angles around your cheekbones, jawline, and forehead. This step is vital for mask ergonomics, as a well-fitting base prevents discomfort during wear. Use clay or papier-mâché to build up the form gradually, smoothing out any rough edges. Keep checking your fit as you go, making adjustments to guarantee the mask contours naturally to your face. A precise base shape guarantees stability and comfort for the detailed decoration ahead.
Let Mold Set
Once your base shape is smooth and well-formed, it’s time to let the mold set so your mask frame or mold maintains its structure. Carefully apply a layer of sugar syrup over the shape to reinforce it, guaranteeing it’s evenly coated. This helps create a sturdy mold that won’t collapse when you remove it. Allow the sugar syrup to dry completely—this may take a few hours or overnight—until it becomes firm and hard. During this drying process, you can use face paint to add decorative details around the edges if desired. Once fully set, gently remove the mold from your base shape, taking care not to crack it. This step ensures your mask will hold its form while you add final touches like paint or additional decorations.
Applying the Base Color and Details
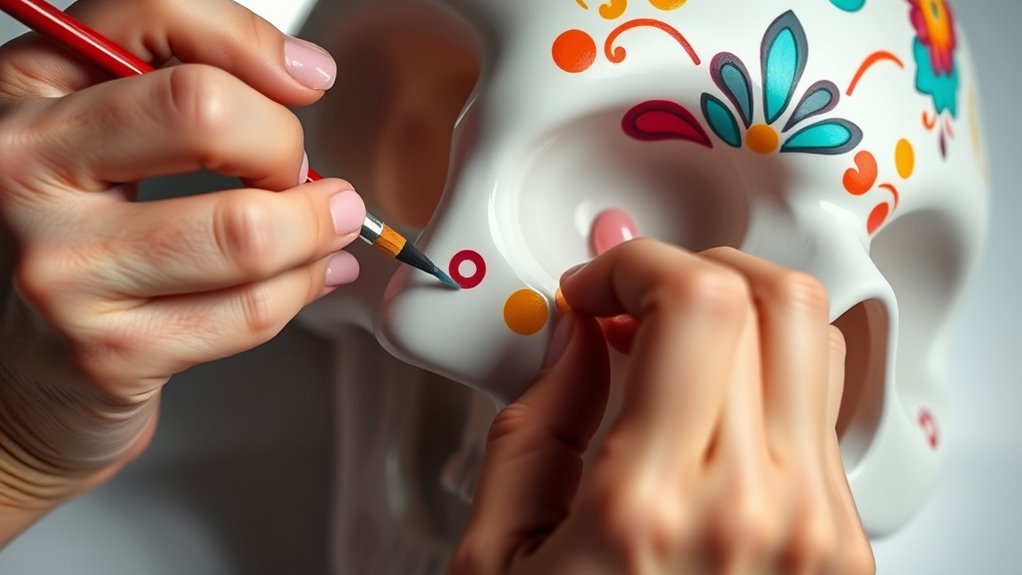
After sketching out your design, it’s time to apply the base color to your sugar skull mask. This step highlights mask symbolism and brings your vision to life, reflecting the cultural significance of Día de los Muertos. Choose vibrant colors like bright pinks, blues, or oranges to honor loved ones and celebrate life. Use even strokes with brushes or sponges to guarantee smooth coverage. Be mindful of the areas you want to stand out later, as the base color sets the tone for intricate details. Remember, the colors you select carry meaning—white for purity, red for love, yellow for happiness. Applying the base color thoughtfully helps you respect the cultural importance behind the tradition while creating a striking, personalized mask. Incorporating cultural symbolism can also help you select colors that honor the tradition and add depth to your design. Additionally, mindful decluttering strategies can also help organize your supplies efficiently, making your crafting process more enjoyable and stress-free. To achieve a professional look, using specialized painting tools can further improve the quality and precision of your work. Proper preparation of your workspace ensures a cleaner environment, which is essential for clean application and an even finish.
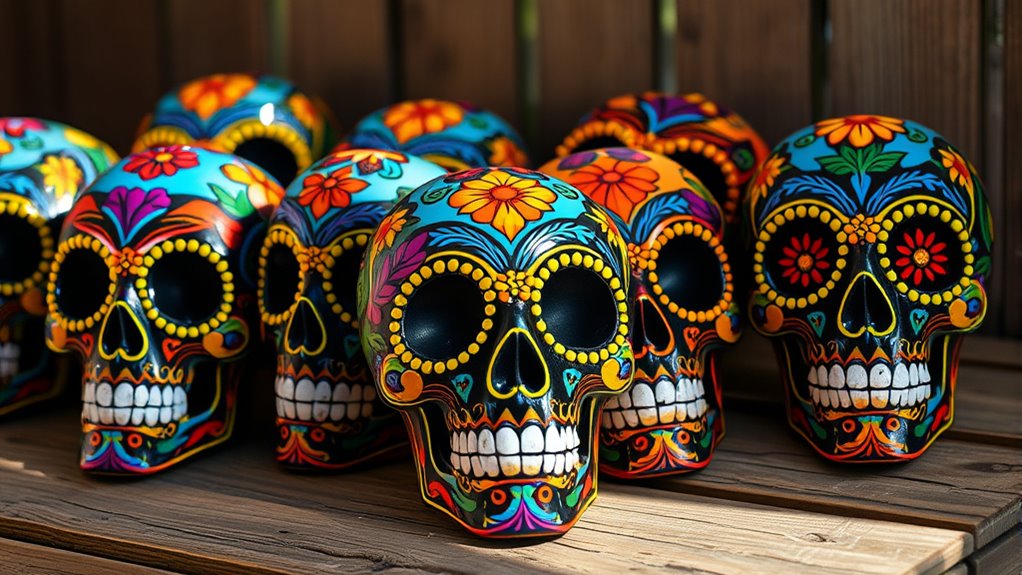
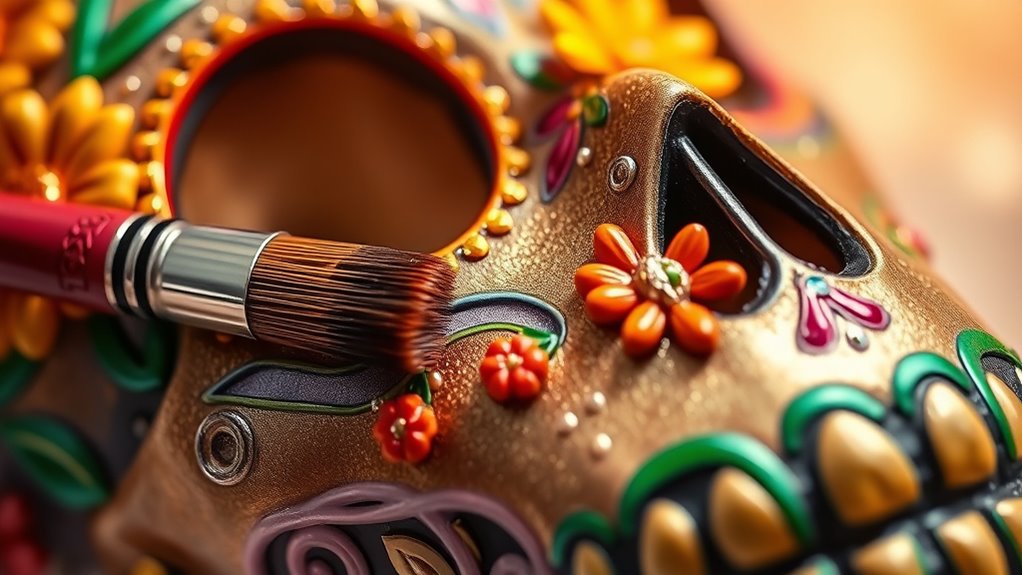
Crafting Decorative Elements and Embellishments
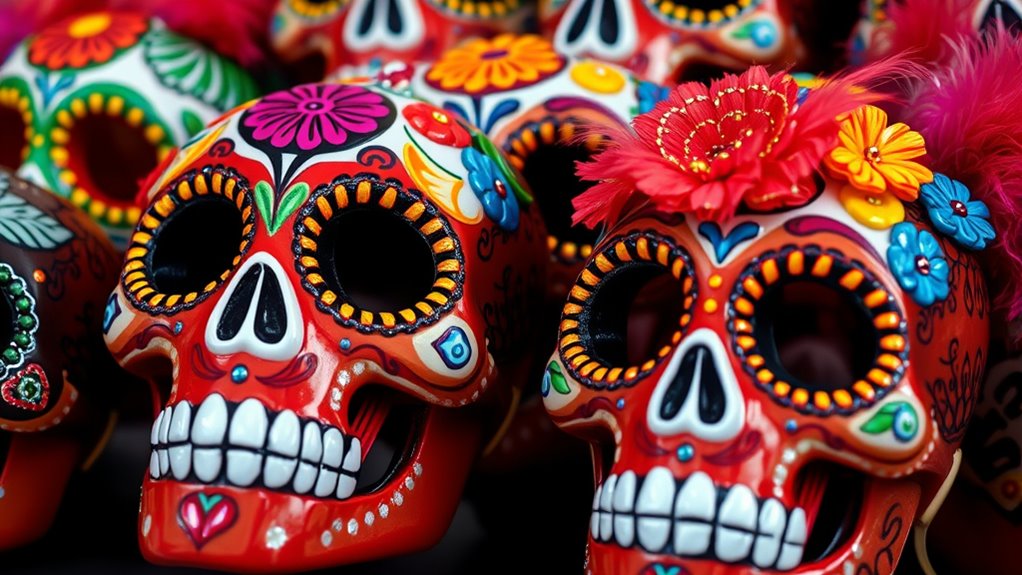
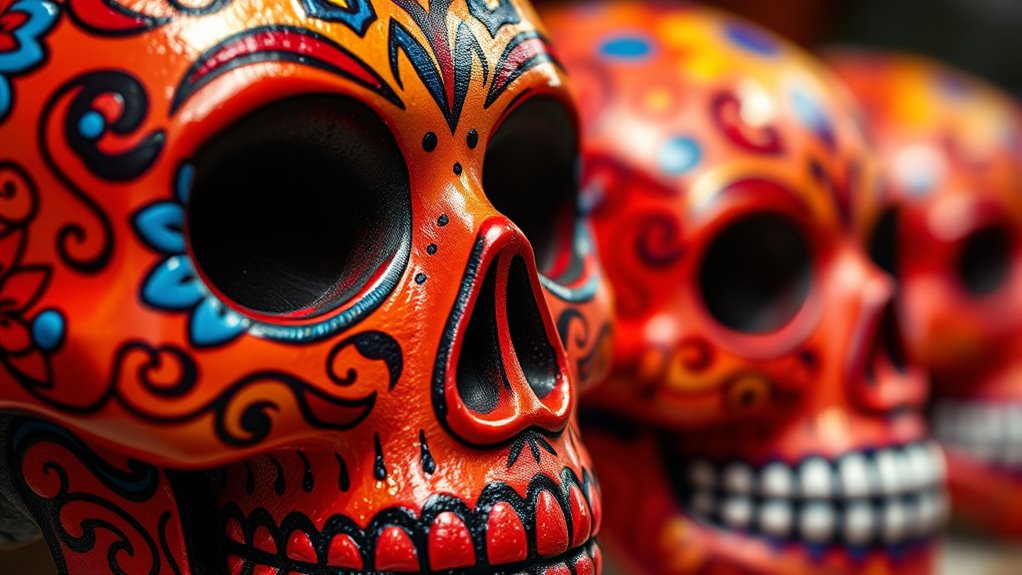
With the base colors in place, it’s time to bring your mask to life through decorative elements and embellishments. You’ll add symbolic motifs that reflect cultural significance, such as marigolds, candles, or sugar skull designs. First, you might glue on vibrant paper flowers around the forehead or cheeks to symbolize life and remembrance. Next, you can attach small, intricate embellishments like rhinestones or sequins that mimic the ornate patterns seen in traditional decorations. Finally, consider drawing or attaching tiny symbolic motifs—like crosses or hearts—that honor loved ones and cultural heritage. These embellishments not only make your mask visually striking but also deepen its cultural meaning, honoring Día de Los Muertos traditions and celebrating the spirit of remembrance.
Painting Intricate Patterns and Symbols
Choose vibrant colors that make your mask stand out and reflect the festive spirit. As you paint, incorporate cultural symbols like marigolds or crosses to honor tradition. These elements add meaning and beauty to your intricate patterns and symbols. Incorporating cultural symbols can also deepen your understanding of the celebration’s significance.
Selecting Vibrant Colors
Selecting vibrant colors is essential to making your sugar-skull mask truly stand out. Your vibrant color selection brings energy and life to your design. To achieve this, focus on three key steps:
- Choose bold hues like fiery reds, bright yellows, and deep blues to create a striking base.
- Use color mixing techniques to blend shades, adding depth and nuance to intricate patterns.
- Incorporate contrasting colors strategically to highlight details and make symbols pop.
Adding Cultural Symbols
Adding cultural symbols transforms your sugar-skull mask into a meaningful work of art. You can incorporate traditional motifs like marigolds, crosses, or floral patterns to honor Día de los Muertos traditions. These symbols add depth and cultural symbolism, making your mask more than just decorative. Use fine brushes to paint intricate patterns that reflect your heritage or personal stories. Incorporate motifs such as skulls, candles, or sugar flowers to enhance authenticity. Below is a helpful guide to some common symbols and their meanings:
| Symbol | Cultural Significance |
|---|---|
| Marigolds | Guide spirits with vibrant energy |
| Crosses | Blend Christian and indigenous traditions |
| Floral Patterns | Celebrate life and beauty |
| Skulls | Embrace mortality and remembrance |
| Candles | Light the way for spirits |
Adding Final Touches With Glitter and Accessories
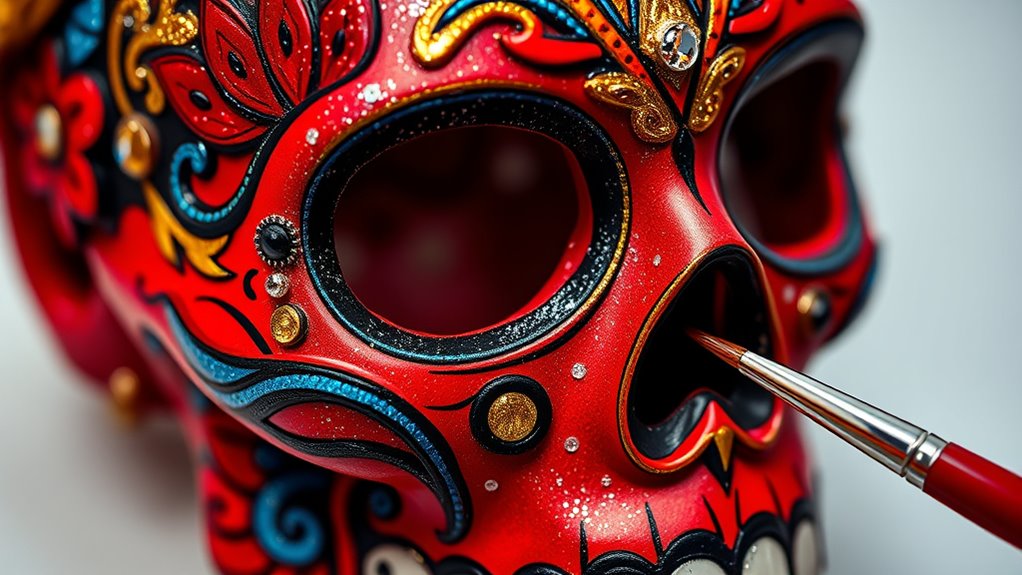
To give your sugar-skull mask a truly striking finish, incorporating glitter and accessories is essential. Start by applying glitter accents to highlight key features like the eyes, forehead, or cheekbones, creating a shimmering effect that catches the light. Next, carefully plan your accessory placement: you might add small faux gemstones, colorful beads, or metallic charms to enhance the design. Consider positioning these items symmetrically for balance or asymmetrically for a more dynamic look. Finally, sprinkle loose glitter around the edges or over the painted details to add depth and sparkle. These final touches will make your mask stand out, blending vibrant colors with eye-catching embellishments that celebrate Día de los Muertos tradition while showcasing your creativity. Incorporating elements inspired by cultural symbolism can also add a unique cultural twist to your design, symbolizing strength and resilience. Additionally, using AI trend insights can help you select the most popular colors and styles to make your mask even more appealing. To further refine your design, experimenting with different glitter textures and finishes can create a variety of visual effects that enhance the overall aesthetic.
Personalizing Your Mask With Photos or Messages
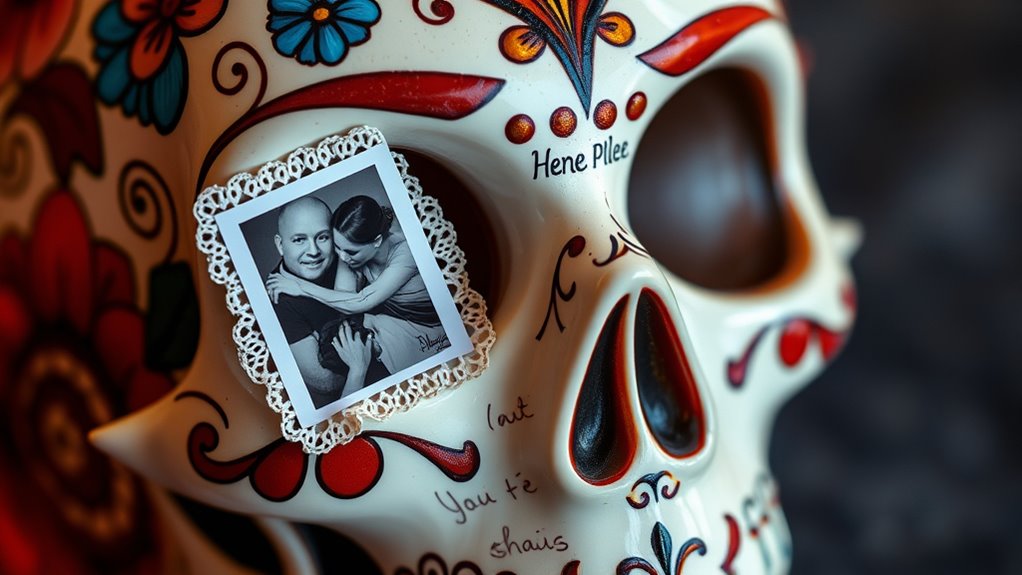
Personalizing your mask with photos or messages allows you to create a meaningful tribute that reflects your loved ones or personal stories. Using different mask materials, like papier-mâché or ceramic, you can add printed photos or handwritten messages that stand out. Incorporate cultural symbols, such as marigolds or skulls, to deepen the significance. You might glue a photo of a loved one onto your mask or paint a heartfelt message. This customization makes your sugar-skull mask uniquely yours, honoring traditions while expressing personal memories. Additionally, understanding financial management principles can help fund your craft projects or purchase quality materials. Being aware of budgeting strategies can ensure you allocate resources effectively for your DIY decorations. Moreover, exploring cost-effective methods can help you achieve beautiful results without overspending. Considering cost-saving techniques can further enhance your ability to create stunning masks on a limited budget. Incorporating automation tools, such as online design templates, can streamline your creative process and save time.
Caring for and Preserving Your Sugar‑Skull Mask
Proper care is essential to keep your sugar-skull mask looking vibrant and intact over time. Since these masks hold cultural significance, preserving their details is important. To protect your creation, consider these preservation techniques:
Proper care preserves your vibrant, culturally significant sugar-skull mask for years to come.
- Gently dust it with a soft brush, avoiding moisture that could cause deterioration.
- Store it in a cool, dry place away from direct sunlight to prevent fading and cracking.
- Wrap it in tissue paper or soft cloth to shield it from dust and accidental damage.
Tips for Displaying and Celebrating With Your Creation
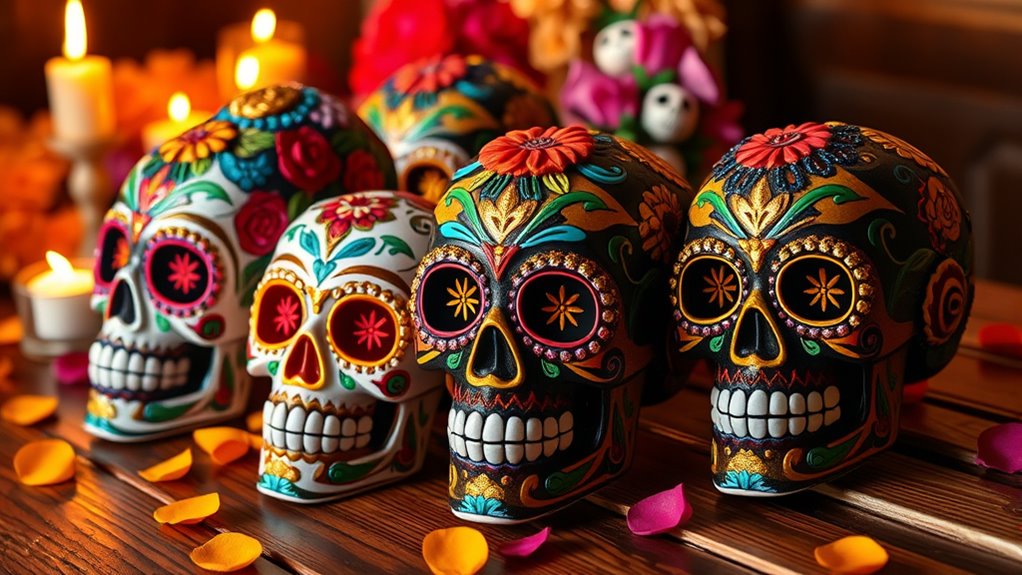
Once your sugar-skull mask is preserved and ready, displaying it thoughtfully can enhance its beauty and honor its cultural significance. To make the most of it, consider integrating it into your event decoration and costume coordination. Place the mask in a prominent spot, such as a decorated altar or centerpiece, to showcase its craftsmanship. Pair it with complementary colors and themes to create a cohesive look. Use the table below to guide your display choices:
| Display Tip | Explanation |
|---|---|
| Highlight with lighting | Use soft or focused lighting to emphasize details |
| Incorporate flowers | Marigolds or vibrant blooms enhance visual appeal |
| Coordinate costumes | Match your attire with the mask for unity |
| Use themed backgrounds | Create a backdrop that reflects Día de los Muertos |
These tips help you celebrate respectfully and beautifully.
Frequently Asked Questions
What Are the Best Non-Toxic Paints for Sugar-Skull Masks?
When choosing non-toxic paints for your masks, you should consider natural pigments or safe acrylic options. Natural pigments, like those derived from plant or mineral sources, are excellent for vibrant, toxin-free designs. Alternatively, look for acrylic paints labeled non-toxic or child-safe, ensuring your creativity stays safe. Both options allow you to craft beautiful, safe sugar-skull masks, perfect for celebrating Día De Los Muertos while prioritizing health and eco-friendliness.
How Long Does It Take for the Mask to Dry Completely?
You want to know how long it takes for your mask to dry completely. Typically, drying time depends on environmental factors like humidity, temperature, and the type of paint used. Usually, it takes about 1 to 3 hours for non-toxic paints to dry, but in humid conditions, it might take longer. To guarantee your design is fully dry and won’t smudge, give it extra time and check that it feels firm before handling.
Can I Make a Reusable Mold for Multiple Masks?
Sure, you can make a reusable mold, but don’t expect it to last forever. With the right silicone flexibility, your mold can survive multiple uses, but mold durability varies. Remember, the more flexible and high-quality your silicone, the longer it’ll serve as your trusty mask-making sidekick. Just don’t get too ambitious—eventually, even the best mold will show signs of wear, turning your masterpiece into a one-hit wonder.
What Safety Precautions Should I Follow During Crafting?
When crafting, you should prioritize workspace safety and wear protective gear like gloves and masks to avoid contact with harmful materials. Make certain your workspace is well-ventilated to prevent inhaling fumes or dust. Keep your area clean and organized to prevent accidents. Always follow manufacturer instructions for tools and materials, and wash your hands thoroughly afterward. These precautions help keep you safe while creating your masks.
How Do I Store My Finished Sugar-Skull Mask Safely?
To store your finished sugar-skull mask safely, follow these storage tips to keep it in pristine condition. Place it in a cool, dry area away from direct sunlight and humidity to prevent damage. Use a sturdy box or a display case if you want to showcase it, ensuring it’s well-supported to avoid dents or cracks. This way, your mask stays beautiful and protected for years to come.
Conclusion
As you step back to admire your vibrant sugar-skull mask, let it be a reflection of your creativity and respect for tradition. Like a glowing lantern in the night, your masterpiece illuminates the spirit of Día de los Muertos. Cherish your craft, for it’s more than just an adornment—it’s a heartfelt ode to life, death, and remembrance. Wear it proudly, and keep the celebration alive in every colorful detail you’ve brought to life.