
To get started with basic macramé techniques, learn essential knots like the square knot, half hitch, and lark’s head knot. Practice maintaining even tension, securing your knots properly, and finishing with secure endings. Combining these knots in patterns creates beautiful designs. Focusing on technique and consistency helps build confidence. As you progress, exploring different knot variations and pattern ideas will elevate your projects—keep going to discover even more creative possibilities.
Key Takeaways
- Master fundamental knots such as the square knot, half hitch, and lark’s head to build a strong foundation.
- Choose the right cord type (cotton, jute, synthetic) based on project purpose and desired look.
- Practice consistent tension and proper knot positioning for neat, even designs.
- Combine basic knots in patterns like repeating sequences or alternating styles for varied textures.
- Finish projects securely by tying off with double knots and trimming excess cords neatly.
Understanding the Types of Macramé Cords
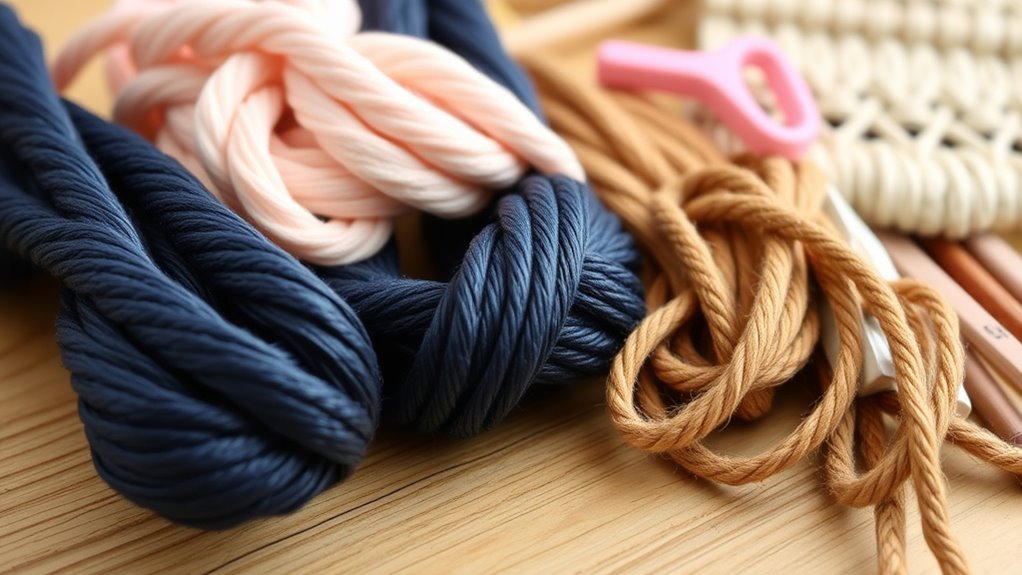
Have you ever wondered which type of cord is best for your macramé projects? Choosing the right cord can make a big difference in your finished piece. Cotton cords are the most popular—they’re soft, easy to work with, and come in many thicknesses. Jute and hemp cords offer a rustic, natural look, perfect for boho-style decor. Synthetic cords, like nylon or polyester, are durable and resistant to weather, ideal for outdoor projects. Leather cords add a touch of sophistication, while rayon cords provide a shiny, smooth finish. When selecting your cord, consider the project’s purpose, desired texture, and appearance. The best cords for macramé are often chosen based on their durability and ease of knotting, ensuring your project is both beautiful and lasting. The right cord not only affects how your piece looks but also how easy it’s to knot and manipulate. Additionally, understanding the different types of macramé cords can help you achieve specific textures and styles in your work. Exploring various fiber compositions can influence the final look and feel of your textile art, and being aware of the family photoshoot fails can inspire you to create pieces that withstand handling and movement.
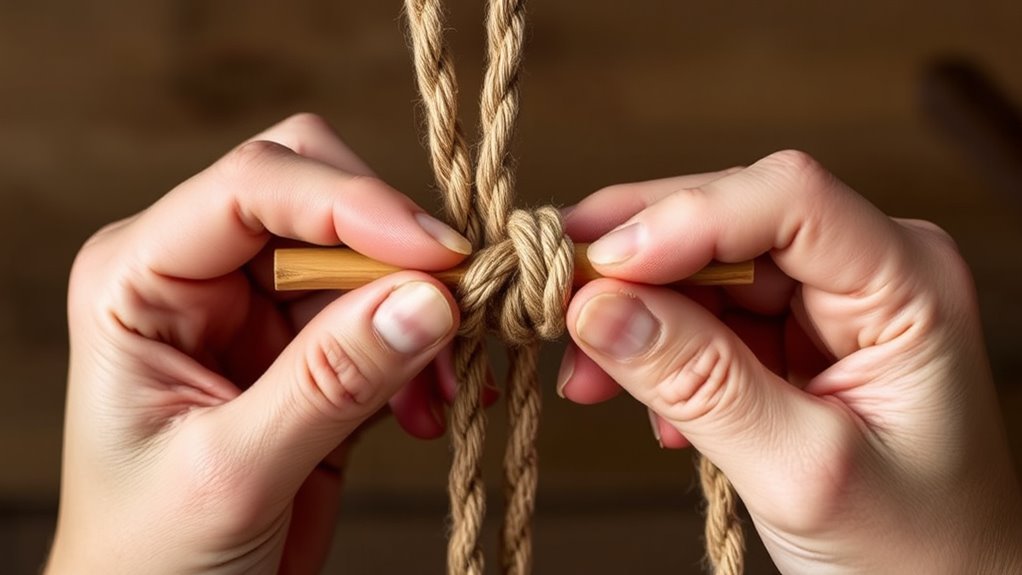
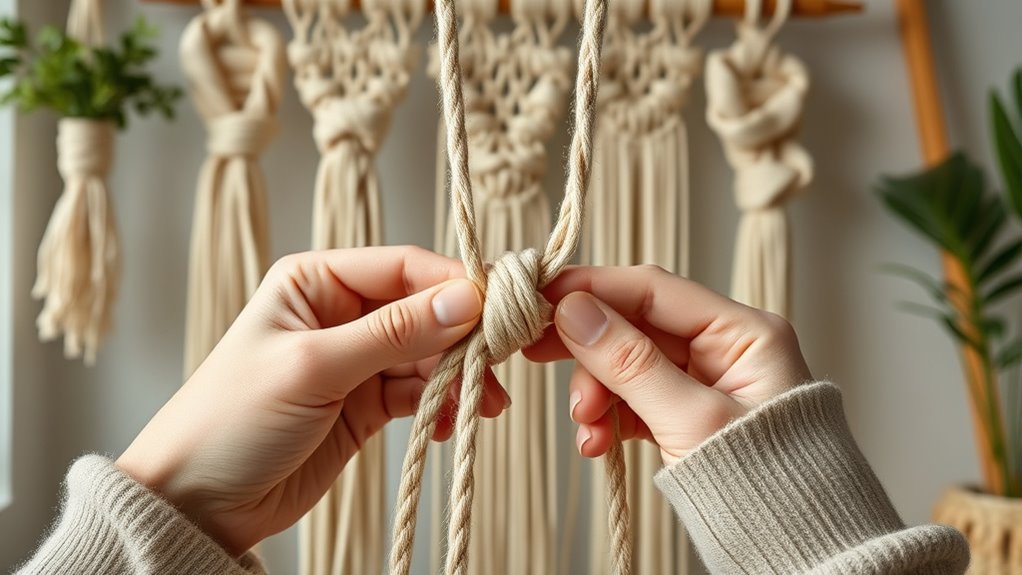
Basic Knot: The Square Knot
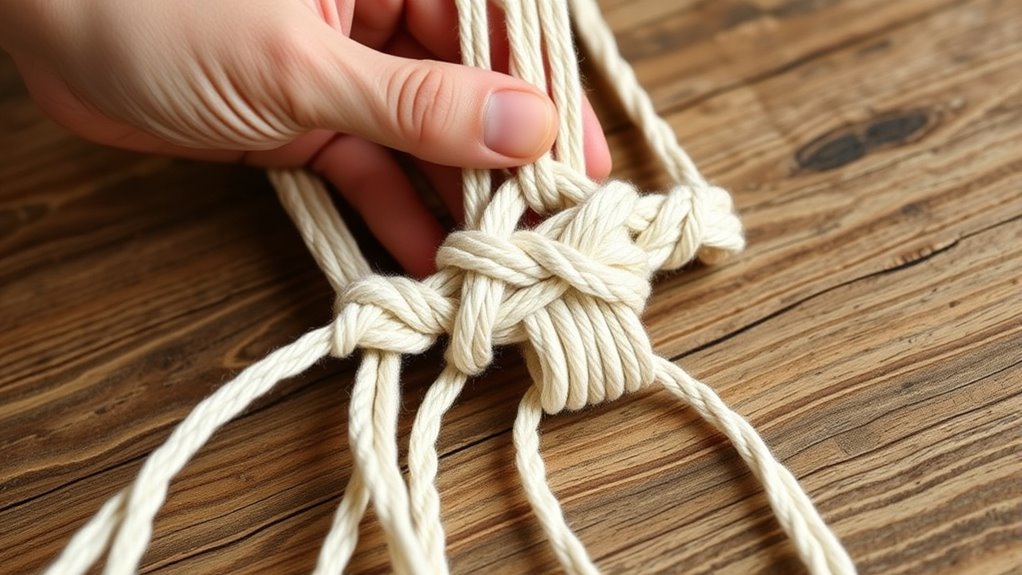
The square knot is one of the most fundamental and versatile knots in macramé. It’s simple to learn and forms the basis for many projects. To make a square knot, you start with two cords: one called the “working cord” and the other the “standing cord.” Cross the working cord over the standing cord, then bring it under and up through the loop. Next, cross it over again in the opposite direction, then bring it under and up through the new loop. Tighten the knot to verify it’s secure. You can repeat this process to create patterns and add texture to your design. Mastering the square knot gives you a solid foundation to explore more complex macramé techniques. Proper technique ensures your knots are neat and durable. Additionally, practicing knot consistency helps in achieving a uniform and professional look in your projects. Developing manual dexterity through regular practice improves your control and precision while tying knots. Incorporating advanced knotting techniques can further enhance your designs and skill set, and understanding how contrast affects knot placement can elevate your overall craftsmanship.
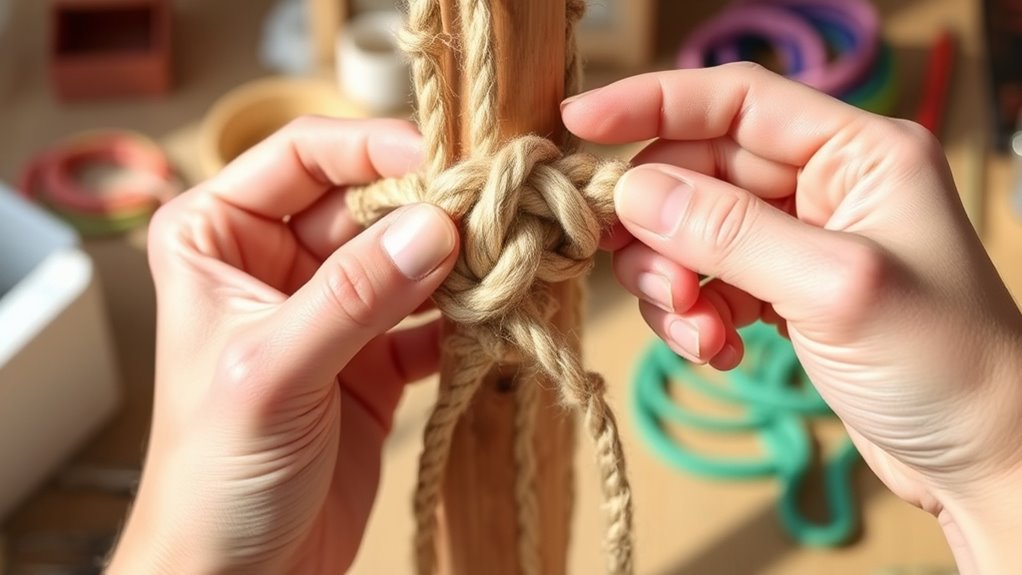
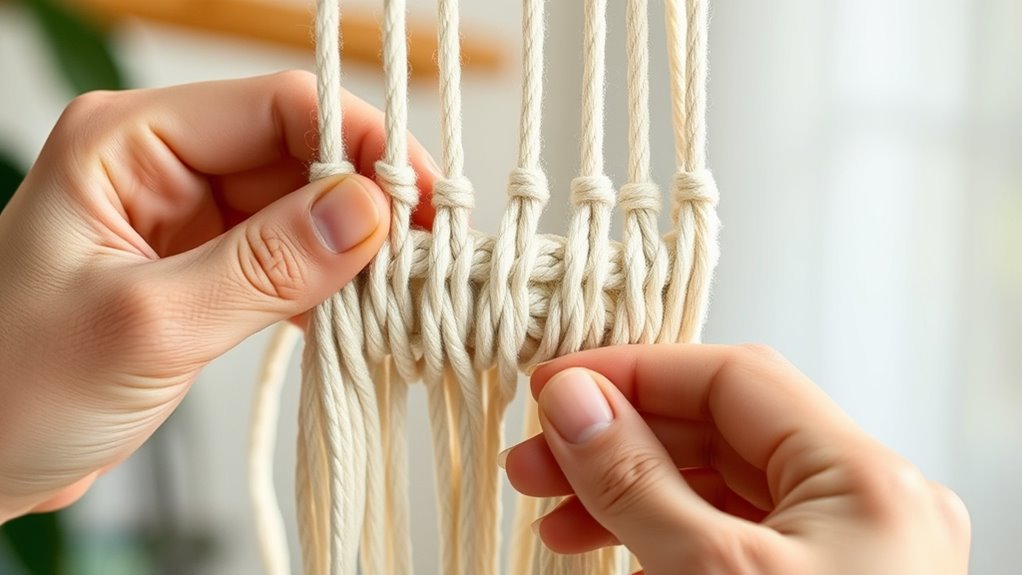
Making the Half Hitch Knot
To create a Half Hitch knot, start by selecting the cord you want to use as your working cord. Then, follow these steps:
- Loop the working cord around the stationary cord, forming a simple overhand loop.
- Bring the working cord back under the stationary cord through the loop.
- Tighten the knot by pulling both ends carefully.
- Repeat the process to make multiple Half Hitch knots for added stability.
- Use the knot to build rows or attach cords securely in your project. Practicing this knot helps develop your macramé skills and ensures consistent tension throughout your work.
This knot is versatile and forms the foundation for many more complex knots. Practice making it smoothly and consistently to ensure your macramé projects look neat. Understanding production quantities can help you gauge the consistency of your tension and spacing during knotting, leading to a more uniform appearance. Additionally, mastering the Half Hitch knot allows for greater design flexibility in your projects. Developing good tension control and technique consistency is essential for creating professional-looking finished pieces.
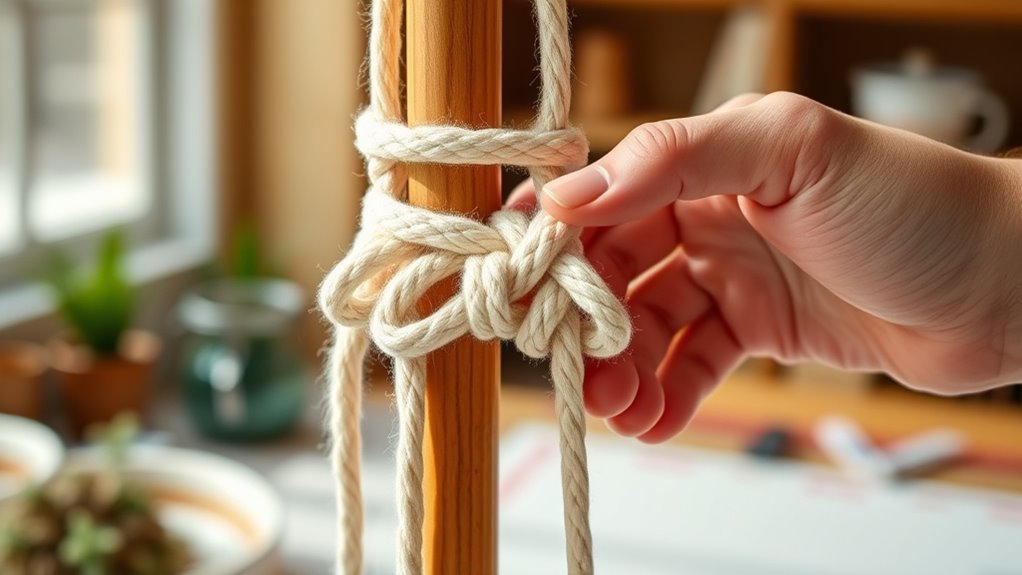
Creating the Lark’s Head Knot
To create the Lark’s Head Knot, start by forming a loop with your cord using the loop formation technique. Make sure the knot is secured tightly but still adjustable so you can tweak the tension as needed. Once in place, you can easily adjust the knot to guarantee your project stays neat and even. Understanding the importance of proper tension can help ensure your knots look professional and consistent throughout your project. Additionally, being aware of knot tying techniques can provide further guidance on achieving a polished finish. Developing strong foundational skills can also help improve your overall macramé craftsmanship and ensure your projects are durable.
Loop Formation Technique
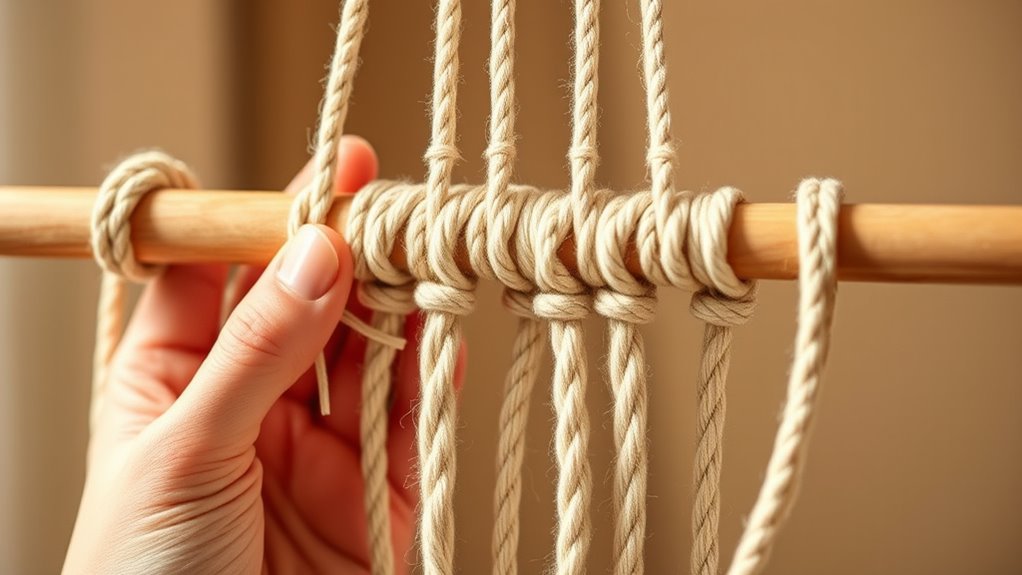
If you want to start your macramé project with a secure foundation, mastering the lark’s head knot is essential. The loop formation technique helps you create this knot efficiently. To do it, fold your cord in half to form a loop, then place the loop over your dowel or ring. Next, pull the loose ends through the loop, tightening to secure. This creates a sturdy, symmetrical knot perfect for beginning your design.
- Verify the loop is even and snug before tightening
- Use your fingers to hold the loop in place during the process
- Adjust the knot’s tension for uniformity across your project
- Practice with different cord thicknesses for varied textures
- Keep the ends aligned for a clean, professional look
- Understanding knot safety ensures your finished piece remains secure over time
- Additionally, controlling tension consistency throughout your work helps maintain the overall neatness and durability of your macramé piece
Securing the Knot
Once you’ve formed the loop, securing it properly is key to creating a stable foundation for your project. To do this, fold your cord in half to create a loop, then place the loop over your chosen dowel or ring. Bring the loose ends through the loop, pulling gently to tighten. This creates the classic Lark’s Head Knot, which holds your cords securely in place. Make sure the knot sits snugly against your base, but not so tight that it’s difficult to adjust later. Keep the tension even as you tighten to ensure a uniform look. Securing your cords with this knot provides a sturdy starting point, allowing you to continue your design confidently. Properly securing your cords prevents slipping and keeps your project neat. Maintaining consistent tension during knotting helps ensure a professional and balanced finished piece.
Adjusting Tension
Adjusting tension when creating the Lark’s Head Knot is essential for a neat and even foundation. If the tension is too loose, your work may look sloppy and come apart easily. If it’s too tight, it can be difficult to manipulate the cords and make adjustments later.
To achieve the right tension:
- Keep your cords parallel and evenly spaced
- Pull firmly but gently to avoid overstretching
- Use your fingers to gauge how tight the knot feels
- Make small adjustments as you go to maintain consistency
- Regularly check the tension throughout your project
Practicing these steps helps ensure each knot is uniform, giving your finished piece a professional look. With patience, regulating tension becomes second nature, making your macramé projects easier and more enjoyable.
Working With the Overhand Knot

When working with the overhand knot, focus on making it secure without tightening it too much. Proper knot positioning guarantees your project stays neat and strong, so pay attention to where you place the knot.
If you encounter issues, like slipping or uneven tension, troubleshooting common errors will help you improve your technique.
Making a Secure Knot
To guarantee your macramé projects hold together securely, mastering the overhand knot is essential. This simple knot creates a strong hold that keeps your cords in place.
To make it secure, ensure you pull the knot tight after crossing the ends. You can also double the knot for extra strength, especially when working with thicker cords. Keep the tension even as you tighten, preventing slack or unevenness.
Using a stopper knot at the end of your cords can prevent slipping over time. Remember to trim excess cord close to the knot to maintain a clean look.
- Use multiple overhand knots for added security
- Tighten knots firmly without damaging the cords
- Work with cords of similar thickness
- Keep cords aligned for even tension
- Practice until the knot feels consistently secure
Correct Knot Positioning
Proper positioning of the overhand knot guarantees your project remains secure and looks neat. To achieve this, hold the working cord firmly, ensuring the tail end extends slightly beyond the knot.
Wrap the working cord around the standing cord, forming a loop, and pass the end through the loop from underneath. Tighten the knot carefully, making sure it sits snugly against the cord you’re working with.
Position the knot close to the previous knot or bead to maintain a uniform appearance. Consistent placement creates a tidy pattern and prevents the knot from slipping or loosening over time.
Always check that the knot is centered and aligned properly before tightening completely, as this will ensure your project remains strong and visually appealing.
Troubleshooting Common Errors
Even experienced crafters encounter common mistakes when working with the overhand knot, but most issues can be quickly corrected with a few simple adjustments.
If your knot is too tight, loosen it gently before tightening again, guaranteeing even tension.
When your knot is uneven, undo and redo it, paying attention to consistent spacing.
If the knot slips or comes undone, add a few more wraps to secure it better.
For a bulky look, reduce the number of wraps; for a tighter knot, increase them.
Ultimately, if your knot is crooked, re-position your working cord for a straight, clean finish.
- Guarantee even tension during each wrap
- Use the correct number of wraps for your project
- Keep your working cord straight and smooth
- Practice loosening and tightening for control
- Double-check knot placement before securing
The Double Half Hitch Knot
The Double Half Hitch Knot is a fundamental technique that adds strength and stability to your macramé projects.
To make this knot, start by wrapping the working cord around the anchor cord, creating a loop. Then, bring the working cord over the standing cord and through the loop. Pull it tight to secure the first hitch.
Begin by wrapping the working cord around the anchor cord, forming a loop, then pull tight to secure.
Repeat this process around the same cord to form a second hitch, which reinforces the knot. This technique is perfect for creating lines or sections in your design and ensures your project holds together well.
Keep your tension even as you knot, and practice to develop a consistent, neat appearance.
Mastering the Double Half Hitch Knot is essential for building a strong foundation in macramé.
Tying the Spiral or Rope Knot
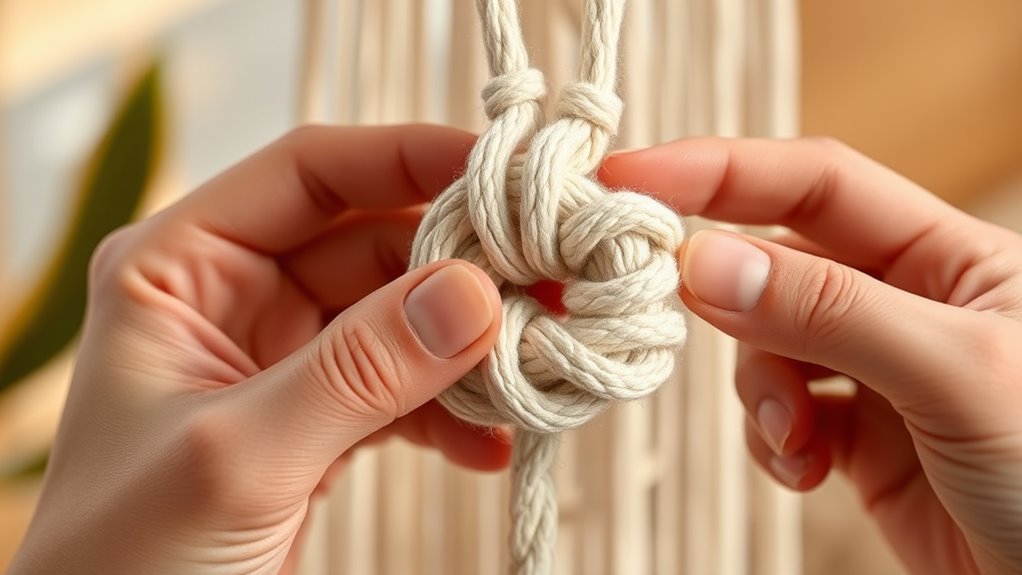
To create dynamic, textured designs in your macramé projects, mastering the Spiral or Rope Knot is a great next step. This knot creates a twisted, spiral effect that adds depth and interest to your work.
To tie it, start with a working cord and anchor it securely. Wrap the working cord around the base cords repeatedly in one direction, pulling each wrap snugly to form a tight spiral. Keep consistent tension to ensure even twists.
You can vary the number of wraps for different effects or combine multiple spirals for complex patterns.
- Use contrasting cord colors for visual impact
- Adjust the number of wraps for different spiral tightness
- Incorporate the spiral into plant hangers or wall hangings
- Practice maintaining uniform tension for even twists
- Combine with other knots for textured designs
Techniques for Finishing and Securing Your Work
When you’re ready to finish your project, tying off knots securely is essential to keep everything intact.
You can also use Fray Check to prevent the ends from fraying over time. These techniques guarantee your work stays neat and durable long after you finish.
Tying Off Knots
Tying off knots correctly is essential for ensuring your finished macramé piece stays secure and looks polished. To do this, make sure your final knot is tight and neat. Use a double knot or square knot to secure your work, preventing slipping over time.
After knotting, trim excess cords close to the knot, but leave a small tail to prevent unraveling. Consider hiding the tail by weaving it back into the knot or nearby cords for a cleaner look. Remember, a well-tied off knot adds durability and professionalism to your piece.
- Keep tension even as you tie off to maintain uniformity
- Double-check that knots are secure before trimming excess
- Use a small amount of glue for extra security if desired
- Avoid pulling cords too tight, which can distort your design
- Practice tying off on scrap cords to perfect your technique
Using Fray Check
After securing your knots, applying Fray Check can provide an extra layer of durability and a polished finish. To do this, carefully dab a small amount of Fray Check onto the ends of your cords or loose threads. Use a toothpick or small brush for precise application.
Allow it to dry completely before handling further; this creates a seal that prevents fraying and guarantees your work stays intact over time. Fray Check is especially helpful on delicate or fray-prone fibers.
Remember, less is more—applying too much can stiffen the material or affect the appearance. Once dry, your piece will look cleaner and be more durable, giving your finished project a professional touch.
This simple step can considerably increase the longevity of your macramé creation.
Tips for Maintaining Tension and Consistency
Maintaining consistent tension is essential for achieving a polished and uniform macramé piece. To do this, keep a steady grip on your cords and avoid pulling too tight or too loose. Regularly check your work to ensure even spacing and tension throughout. Use the same hand pressure for each knot to maintain uniformity.
When working on longer projects, take breaks to prevent fatigue, which can affect tension. Keep your workspace organized so cords don’t become tangled or uneven.
- Hold your cords with a relaxed but firm grip
- Use a measuring tape or ruler for even spacing
- Practice slow, deliberate knots to build consistency
- Maintain the same tension level for each knot
- Regularly adjust your tension as you work to keep it uniform
Combining Knots to Create Patterns
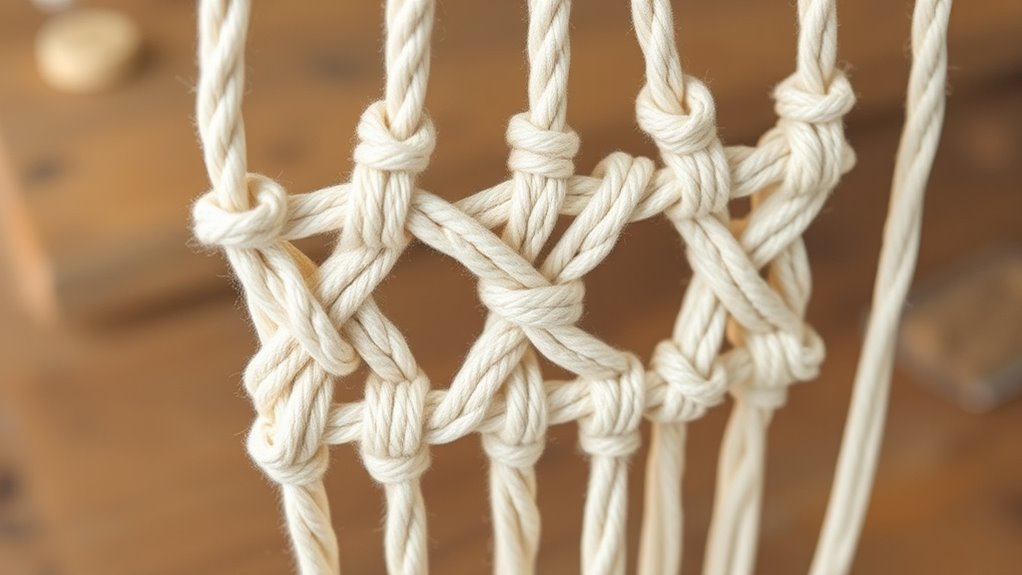
Combining different knots is a fundamental technique for creating intricate patterns in macramé. By mixing knots like square, half hitch, and spiral knots, you can design unique textures and visuals.
Mixing knots like square, half hitch, and spiral creates unique textures and intricate macramé patterns.
Experiment with repeating sequences or alternating knots to produce geometric, floral, or abstract patterns. To help visualize, here’s a simple pattern structure:
| Step 1 | Make a square knot |
|---|---|
| Step 2 | Follow with a half hitch knot |
| Step 3 | Alternate knots for variation |
| Step 4 | Repeat pattern to complete design |
Using these combinations, you craft patterns that are both engaging and personalized. Practice blending knots to develop your style and create stunning, decorative pieces with simple techniques.
Frequently Asked Questions
What Are Common Mistakes Beginners Make in Macramé?
When starting out in macramé, you might pull the cords too tightly, making your knots stiff and difficult to work with.
You could also skip measuring carefully, leading to uneven lengths and imbalanced designs.
Additionally, beginners often use the wrong knot for a project or don’t keep tension consistent, resulting in a less polished look.
Practice patience, measure accurately, and keep tension even to improve your skills quickly.
How Do I Choose the Right Cord Thickness for My Project?
Choosing the right cord thickness is like finding the perfect pair of shoes—it needs to fit your project and comfort.
For delicate wall hangings, go for thinner cords, around 3-4mm, which add a dainty touch.
For sturdy plant hangers, thicker cords, 6mm or more, provide strength.
Think about your project’s purpose and visual appeal, then select a cord that balances durability with aesthetic.
Can I Use Recycled or Unconventional Materials for Macramé?
You absolutely can use recycled or unconventional materials for macramé projects. Just make sure the material is sturdy enough to hold knots and patterns, like old fabric strips, yarn, or even wire.
Experiment with different textures and weights to see what works best for your design. Keep in mind that some materials might be more difficult to work with, but with a bit of creativity, you’ll create unique, eco-friendly pieces.
How Do I Correct Mistakes or Fix Knots in Progress?
Fixing mistakes in your project is like untangling a knot in your shoelaces—you just need patience. If you spot an error, gently undo the problematic knot and re-tie it correctly.
For loose or uneven knots, carefully loosen and rework them. Keep a relaxed grip, and don’t be afraid to experiment. With a little patience, you’ll turn your tangled mess into a beautiful piece.
What Are Some Creative Project Ideas for Beginners?
If you’re looking for creative project ideas, start with simple items like plant hangers, wall art, or keychains. These projects help you practice basic knots while making something useful or decorative.
You can also personalize your projects with different colors or bead accents. As you gain confidence, try combining techniques for more complex pieces.
Conclusion
Think of mastering basic macramé as planting seeds; with each knot you learn, you’re nurturing a garden of creativity. As you practice, your skills will grow stronger and more vibrant, allowing you to design intricate patterns and beautiful projects. Keep experimenting and refining your techniques, and soon you’ll see your ideas blossom into stunning creations. Remember, every knot is a step toward turning simple cords into a lush, woven masterpiece.