
To stop crooked rivets and grommets, focus on accurate measurement, proper marking, and using templates or alignment guides. Gather the right tools and double-check your markings before punching or installing. Reposition any misaligned hardware carefully and use consistent techniques for each project. Developing a routine with repeatable steps ensures flawless results every time. Keep these tips in mind, and you’ll master precise hardware placement—discover more ways to achieve perfect, professional finishes as you continue.
Key Takeaways
- Use templates, rulers, and alignment guides for precise and consistent rivet and grommet placement.
- Mark accurate, straight guidelines before drilling or installing hardware to prevent crookedness.
- Re-measure and verify all marks and spacing prior to punching or riveting for accuracy.
- Employ proper tools and techniques to fix misaligned hardware and maintain a polished finish.
- Follow a repeatable process and conduct final inspections to ensure perfectly aligned and professional results.

UPTTHOW Rivet Placement Template Zipper Ruler Zip Pocket Tool Leathercraft Rivets Marking Guide for DIY Bracelet Belt Combo Measurement Sewing Accessories
Zipper Guide: Combo ruler has two zipper guides, 3/8 '' width and 1/2 '' width, and 3 '',…
As an affiliate, we earn on qualifying purchases.
As an affiliate, we earn on qualifying purchases.
Why Crooked Rivets & Grommets Ruin Your Projects: and Why Precise Placement Matters
Crooked rivets and grommets can quickly ruin the appearance and durability of your project. When hardware isn’t aligned properly, it detracts from your work’s overall hardware aesthetics, making your project look unprofessional. Misaligned fasteners can also compromise project durability, causing stress points that weaken the material over time. Proper measurement and marking are crucial steps to ensure correct placement from the start. Precise placement ensures that rivets and grommets sit flush and straight, enhancing the clean, finished look you want. Properly aligned hardware distributes tension evenly, preventing tearing or damage. Small errors in placement can lead to wobbling, looseness, or even failure under use. By paying attention to accurate placement, you preserve both the visual appeal and structural integrity of your project, giving it a polished look and long-lasting strength. Additionally, understanding best practices for hardware placement can help you achieve consistent, professional results every time. Recognizing the importance of precise alignment techniques ensures your hardware remains secure and visually appealing over the lifespan of your project. Ensuring proper measurements and markings is essential to achieving these results.

BEAMNOVA Grommet Tools Kit 1/2 Inch (12mm) Hand Press Pliers, Handheld Eyelet Setter with 500 Grommet Supplies, for Tarp Leather Canvas, One-Press Operation, Magnetic Alignment
Complete Grommet Setting Kit – BEAMNOVA grommet tool kit includes 1 pair of handheld grommet pliers and 500…
As an affiliate, we earn on qualifying purchases.
As an affiliate, we earn on qualifying purchases.
Prepare Your Tools and Materials for Accurate Hardware Placement
To guarantee precise placement of rivets and grommets, you need to gather and prepare the right tools and materials before starting. Focus on measuring accuracy by choosing a ruler, measuring tape, or a dedicated marking tool that assures your marks are precise. Proper tool selection is essential; pick a punch, awl, or marker suited for your material to create clear, accurate reference points. Double-check that your tools are in good condition—sharp, clean, and functioning correctly—to avoid errors. Organize your hardware, such as rivets, grommets, and washers, within easy reach. Having everything prepared minimizes mistakes, saves time, and helps guarantee that your rivets and grommets will be perfectly aligned during installation. Additionally, understanding the importance of accurate measurement can significantly improve your results. Ensuring your tools are compatible with your project materials can prevent issues related to appliance compatibility during installation or adjustments. Paying attention to family photoshoot fails can help you avoid common pitfalls during setup and ensure a smooth process. Incorporating a step-by-step plan can also enhance your workflow and ensure nothing is overlooked. Furthermore, adopting a creative storytelling approach to documenting your project can enhance your presentation and record-keeping.

WETOLS Pop Rivet Gun Kit with 200 Blind Rivets, Upgraded Manual Single Hand Riveter with 4 Tool-Free Interchangeable Rivet Heads and 4 Drill Bits, Pop Rivet Tool Kit with Sturdy BMC Carrying Case
【4 Interchangeable Rivet Heads】Our professional riveter tool comes with 4 tool-free interchangeable rivet heads:3/32"(2.4mm), 1/8" (3.2mm), 5/32"(4mm), and…
As an affiliate, we earn on qualifying purchases.
As an affiliate, we earn on qualifying purchases.
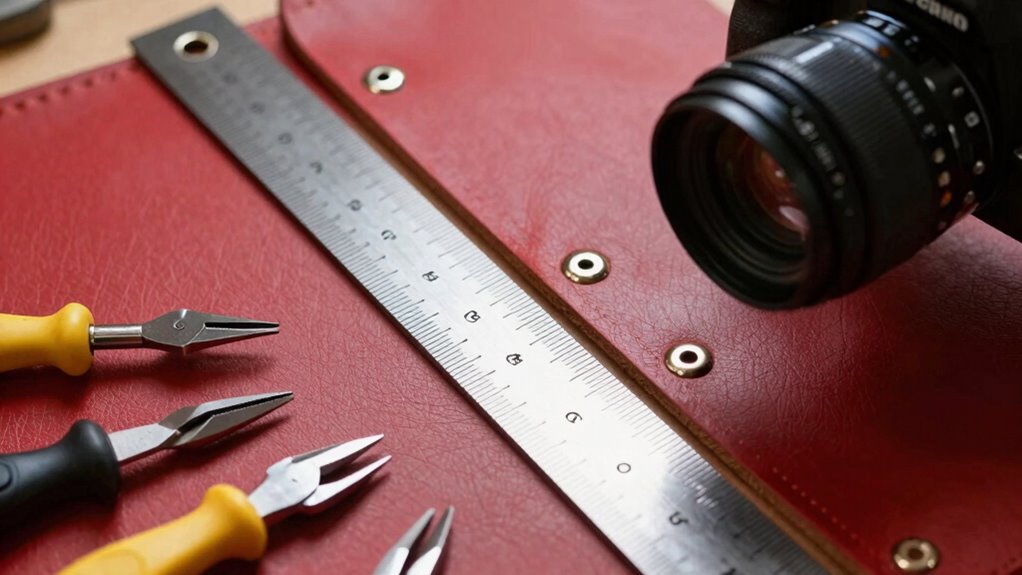
Mark Rivet & Grommet Positions for Perfect Alignment
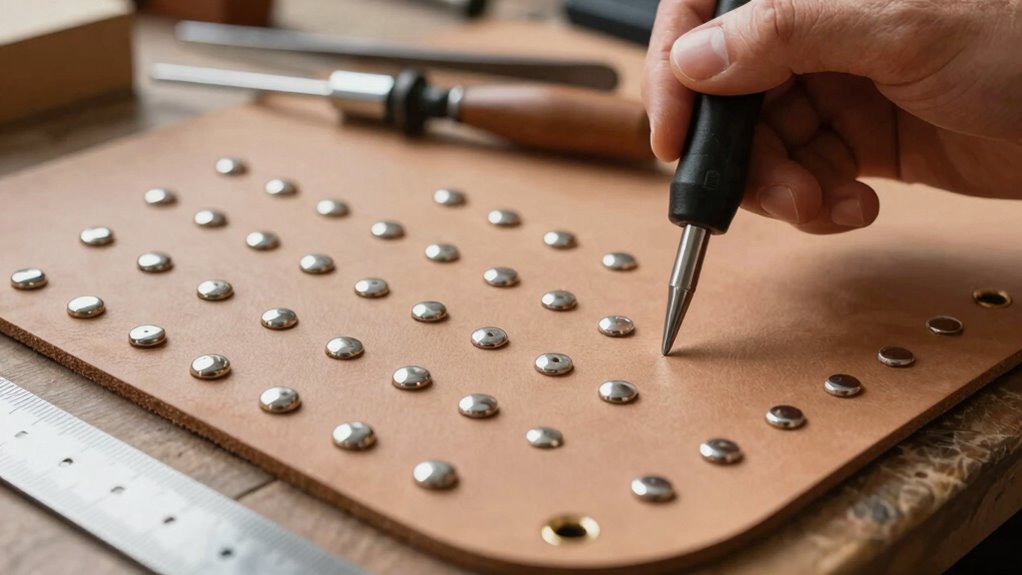
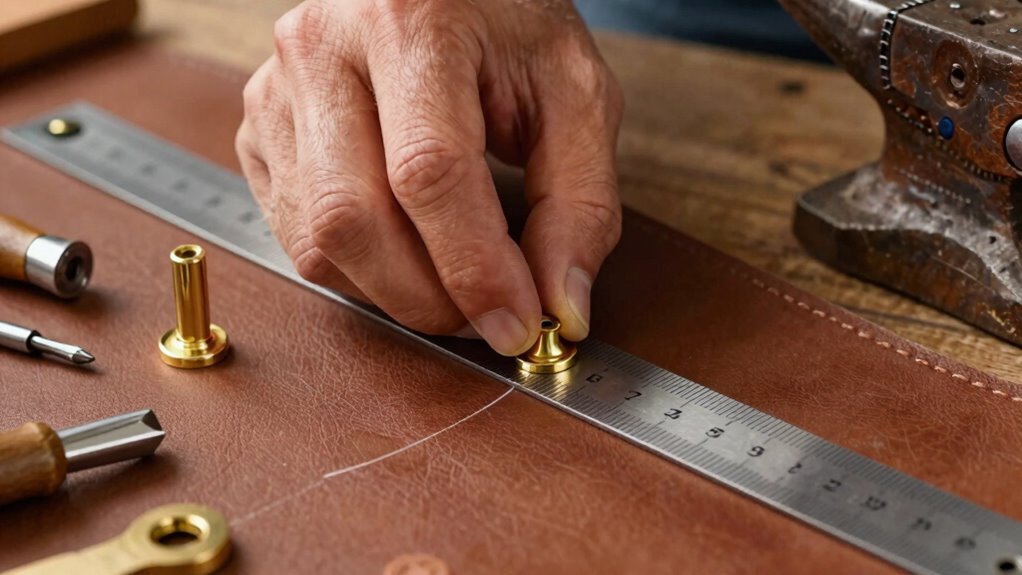
Start by using a centering tool to guarantee your marks are even and accurately placed. Measure and mark each position carefully to maintain consistent spacing. Always double-check your alignment before proceeding to avoid mistakes later on. Incorporating connected equipment can help ensure your hardware is properly aligned and integrated with your overall setup. Additionally, understanding precise measurement techniques can further improve your accuracy and prevent misalignment issues. Developing a consistent measuring method can also be beneficial in achieving precise and repeatable results. Familiarizing yourself with alignment principles can enhance your ability to achieve perfect hardware placement every time. Using standardized measurement tools can further improve your accuracy and ensure your marks are consistent across multiple projects.
Use a Centering Tool
Using a centering tool guarantees your rivets and grommets align perfectly every time. These tools, combined with alignment guides, help you mark precise positions without guesswork. To get started:
- Place the centering tool on your fabric or material, aligning it with your desired spot.
- Use the built-in alignment guides to mark the exact location for your rivets or grommets.
- Double-check the placement before punching or installing to ensure perfect symmetry.
- Proper alignment is essential for a professional look and reliable fastening.
- Consistent use of a centering tool enhances workmanship quality and saves time during your project.
- Incorporating precise positioning techniques reduces errors and ensures a clean, finished appearance.
- Additionally, understanding hardware installation methods can improve overall results and durability.
Centering tools make your work easier by providing consistent, accurate positioning, preventing crooked hardware. They eliminate the need for measuring multiple times and help you achieve professional results effortlessly. Keep your rivets and grommets uniformly aligned, and enjoy a flawless finish every time.
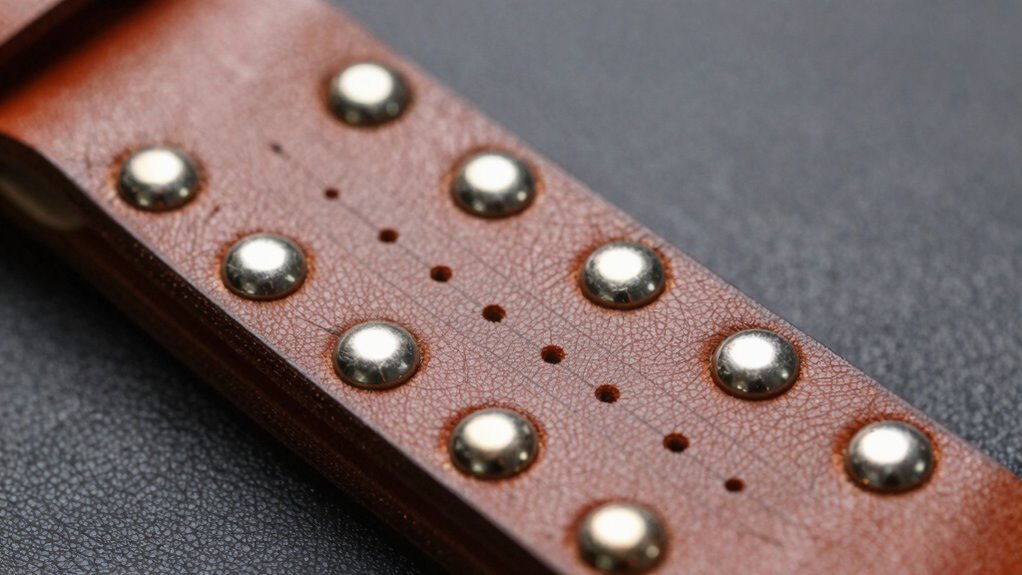
Measure and Mark Precisely
Accurate measurement and marking are essential steps to guarantee your rivets and grommets align perfectly. To achieve this, focus on marking accuracy by using reliable measurement tools like rulers, rulers with a level, or a measuring tape. Carefully measure distances between points, ensuring even spacing and consistent placement across your material. Mark your positions lightly with a pencil or chalk, so adjustments can be made if needed. Precise measurement helps prevent crooked hardware and misaligned finishes. Take your time to double-check measurements before making any marks. Properly marked spots set the foundation for clean, professional results. Remember, attention to detail at this stage saves you from headaches and rework later. Accurate measurement and marking are the keys to flawless rivet and grommet placement.
Double-Check Alignment
After marking your rivet and grommet spots, double-check their placement before proceeding. Proper alignment ensures your hardware sits perfectly straight and professional. Use marking techniques like a ruler or a chalk pencil to verify consistent spacing. Employ alignment tools such as a straightedge or template to confirm your marks are even. Here are three key tips to ensure accuracy:
- Re-measure distances between marks with a ruler for uniformity.
- Use alignment tools to line up marks with existing reference points.
- Visually inspect from different angles to catch any crooked spots before punching or setting.
- Incorporate precision measurement techniques to enhance the accuracy of your placement.
Double-verifying now saves you time and frustration later, guaranteeing your rivets and grommets are perfectly aligned for a polished finish.

Heavy Duty Grommet Tool Kit with 1/2 Inch Die and 300 Sets of 12MM Grommets,Handheld Manual Eyelet Tool Rivet Press Punch Pliers for Leather Canvas Fabric
Ergonomically Designed and experience ease:The grommet tool kit has user-friendly design not only reduces effort but also enhances…
As an affiliate, we earn on qualifying purchases.
As an affiliate, we earn on qualifying purchases.
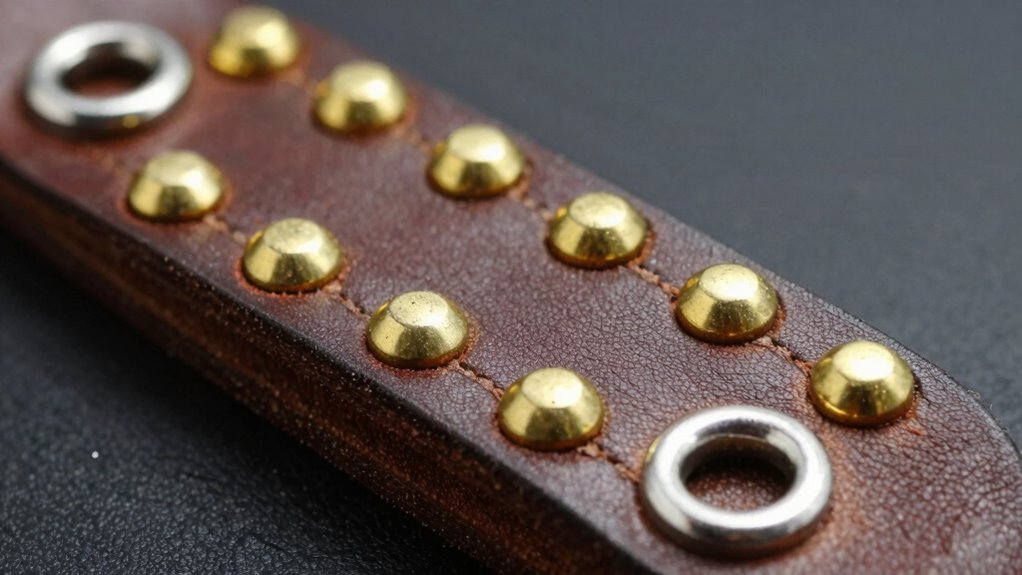
Center and Space Rivets and Grommets Like a Pro
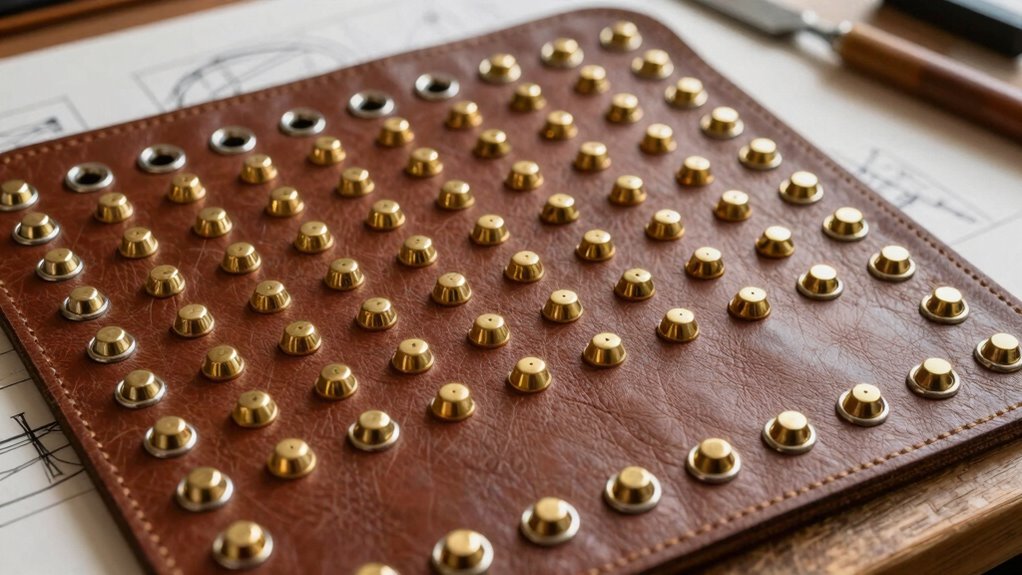
Centering and spacing rivets and grommets properly is essential for a professional-looking finish. To achieve this, start by marking precise placement points, ensuring even spacing across your project. Use a ruler or measuring tape to maintain consistent gaps, which enhances visual appeal. When selecting materials, consider color coordination; matching rivets and grommets to your fabric or leather creates a seamless look. Proper material selection also affects how easily you can align hardware—so choose durable, compatible options. Keep in mind that even spacing and accurate centering make your project look polished and intentional. Take your time during measurement and placement, as these small details markedly impact the overall quality of your work. Accurate hardware placement ensures a balanced and cohesive final appearance. Additionally, practicing precision in measurement can significantly improve the consistency of your results. Developing good measurement techniques is key to achieving consistently professional outcomes. Mastering hardware installation not only improves the durability of your projects but also boosts your craftsmanship confidence. Perfectly spaced hardware elevates your craftsmanship to a professional level, especially when you incorporate accurate alignment techniques for a flawless finish.
Use Templates and Guides to Achieve Crook-Free Hardware
Using pre-marked templates helps you place rivets and grommets accurately every time. Make certain to align your hardware guides precisely before drilling to prevent crooked results. Always double-check your markings and positions to avoid mistakes and ensure a clean, professional finish. Employing proper technique when marking and drilling can significantly improve the accuracy of your hardware placement. Additionally, choosing reliable tools designed for hardware installation can further enhance precision and prevent misalignment. Incorporating accurate measurement practices is essential for achieving perfect hardware alignment and a polished look.
Use Pre-Marked Templates
Pre-marked templates are essential tools that help guarantee your rivets and grommets are placed accurately and evenly. They simplify marking techniques, ensuring consistent results every time. When selecting a template, consider these tips:
- Match the template size to your project for proper fit and spacing.
- Choose templates with clear, durable markings for easy visibility and longevity.
- Use templates with adjustable guides to customize placement based on your design.
- Incorporate outdoor project planning to ensure your hardware placement complements your overall design.
Align With Guides Precisely
Aligning your rivets and grommets with guides makes sure they sit straight and evenly, preventing crooked or misaligned hardware. Use proper alignment tools and marking techniques to guarantee accuracy. These tools help you create precise reference points, reducing guesswork during installation. For example, a template or jig keeps everything aligned as you punch or drill. To emphasize this, consider the following:
| Technique | Tool Used | Benefit |
|---|---|---|
| Marking with guides | Alignment rulers | Consistent placement |
| Using templates | Pre-made templates | Uniform spacing |
| Visual checks | Straightedge | Ensures perfect alignment |
Double-Check Before Drilling
Before you start drilling, double-check your setup to guarantee everything is perfectly aligned. Ensuring measurement accuracy and proper marking techniques prevents crooked hardware and saves time. To double-check effectively, follow these steps:
- Verify your template or guide is securely positioned and aligned with your markings.
- Re-measure key points to confirm measurement accuracy before making any marks.
- Double-check that the drill bit aligns precisely with your marked spots, avoiding slips.
Using templates and guides helps you maintain consistent placement. Taking these precautions ensures your rivets and grommets are perfectly straight, giving your project a professional finish. Always pause to review your setup—it’s the best way to prevent mistakes and achieve flawless results.
Step-by-Step: Installing Rivets and Grommets Straight
To install rivets and grommets straight, start by marking the placement points carefully. Use a ruler or a straight edge to verify your marks are aligned correctly, which is essential for achieving a professional look. Pay attention to hardware aesthetics; straight placement enhances the overall appearance. Check the material compatibility before drilling—some fabrics or plastics may require different tools or techniques to prevent damage. Use a punch or awl to make precise holes at your marked spots, avoiding any misalignment. When inserting rivets or grommets, keep the tools perpendicular to the surface to maintain straightness. Proper marking and careful handling are key to installing hardware that looks great and functions reliably, ensuring your project stays neat and professional.
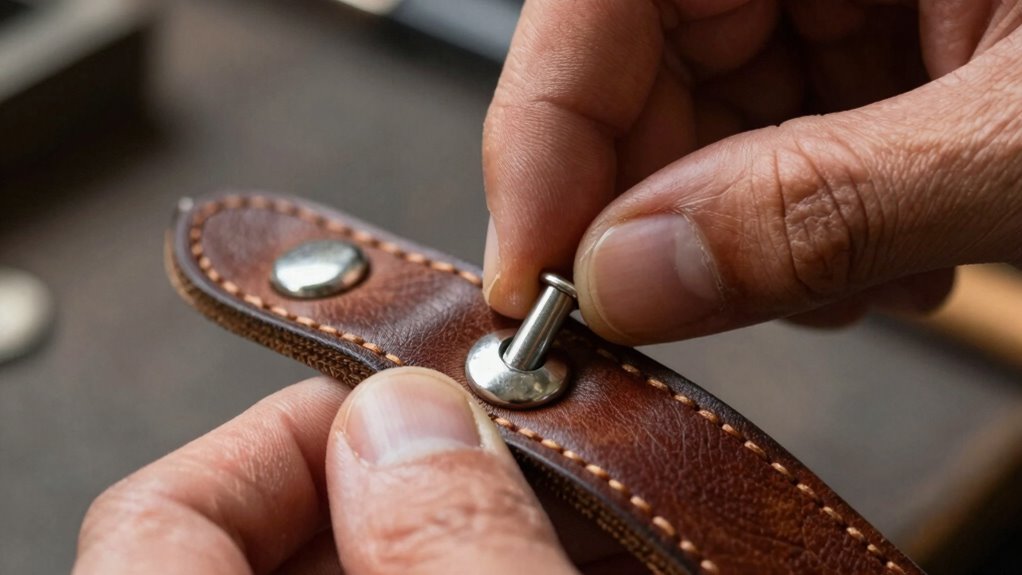
How to Fix Crooked Rivets and Grommets: Easy Troubleshooting Tips
Crooked rivets and grommets can detract from the professional look of your project, but fixing them is often simple. Here’s how to troubleshoot easily:
- Adjust with a hammer or punch: Gently tap the rivet or grommet to straighten it, especially if it’s slightly off-center. Be careful not to damage the material.
- Remove and realign: For severely crooked hardware, carefully pry it out using pliers, then reposition and reattach. Consider using alternative fasteners if alignment issues persist.
- Cover imperfections with decorative options: If fixing isn’t enough, add decorative rivet caps or grommet covers to hide crooked hardware and enhance your design’s look.
These tips help maintain a polished finish while exploring decorative options or alternative fasteners for future projects.
Evaluate and Adjust Your Hardware for a Polished Finish

Once you’ve addressed any misalignments or crooked hardware, it’s time to evaluate and adjust your rivets and grommets to achieve a polished, professional look. Check for hardware consistency across your project—uniform positioning and spacing make a big difference in overall appearance. If some pieces seem off, gently reposition or tighten them as needed. Use a level or straight edge to ensure everything lines up perfectly. Focus on finish refinement by smoothing out any rough edges or uneven surfaces around the hardware. Small adjustments can markedly elevate the look of your project, giving it a clean, cohesive appearance. Taking the time to carefully evaluate and make precise tweaks ensures your rivets and grommets contribute to a high-quality, professional finish.
Best Practices to Repeat Perfect Placement on Multiple Projects
Achieving consistent placement of rivets and grommets across multiple projects requires developing reliable techniques and habits. To guarantee hardware consistency and streamline project repetition, follow these best practices:
- Use a template or stencil for every project to mark exact placement points.
- Maintain a dedicated workspace with consistent tools and measurements.
- Create a checklist to verify alignment and spacing before installing hardware.
These steps help you develop muscle memory and precision, reducing errors and crooked hardware. Repeating these practices ensures each project looks professional and uniform. Over time, you’ll build confidence in your ability to replicate perfect placement, saving time and avoiding frustration. Consistency isn’t accidental; it’s the result of deliberate, repeatable steps that reinforce accuracy. By adhering to these methods, you’ll achieve seamless project repetition and flawless hardware placement every time.
Expert Tips and Tools to Keep Rivets and Grommets Straight Every Time

To keep rivets and grommets perfectly aligned, start with proper marking techniques that guarantee accuracy from the beginning. Using alignment tools can make a big difference in maintaining straight placement, saving you time and frustration. Mastering these tips will give you professional results every time.
Proper Marking Techniques
Ever wonder how professionals guarantee rivets and grommets stay perfectly aligned? Proper marking techniques are key. First, choose the right material—smooth, clean surfaces prevent slipping and make sure accurate marks are made. Second, maintain your tools; sharp marking pens or punches need regular tool maintenance for precise lines. Third, use a straightedge or ruler to draw clear, straight guidelines, reducing errors during installation. These steps help you avoid crooked hardware and save time. Remember, material selection impacts marking effectiveness—avoid textured or rough surfaces. Keep your tools in top shape, and always double-check your marks before punching or riveting. Consistent, careful marking sets the foundation for flawless rivet and grommet placement every time.
Using Alignment Tools
Using alignment tools can markedly improve the accuracy of your rivet and grommet placement. They help ensure your hardware stays straight and neat, saving you time and frustration. Start by selecting the right alignment tools, such as rulers, templates, or specially designed punches. These tools assist with precise marking techniques, making it easier to position rivets and grommets correctly. Here’s a quick reference:
| Tool Type | Use | Tip |
|---|---|---|
| Ruler | Measure spacing accurately | Double-check before marking |
| Templates | Maintain consistent placement | Secure firmly to the fabric |
| Punch Guides | Align holes precisely | Use with marking tools |
Investing in quality alignment tools simplifies the process and guarantees straight, professional results.
Frequently Asked Questions
How Do Different Materials Affect Rivet and Grommet Placement?
Different materials impact rivet and grommet placement based on their flexibility and surface texture. Flexible materials like leather or fabric allow easier, more precise placement, while rigid materials such as metal require stronger tools and careful alignment. Surface texture also matters—smooth surfaces help keep hardware straight, whereas rough or uneven textures can cause misalignment. Understanding these material traits helps you position rivets and grommets accurately and avoid crooked hardware.
What Are Common Mistakes That Lead to Crooked Hardware?
You often get crooked hardware when you make incorrect measurements or work on an uneven surface. Double-check your measurements before drilling, and guarantee the surface is flat and stable. Rushing or not using proper tools can also cause misalignment. Take your time, use a level or template, and secure your materials firmly. These steps will help you avoid common mistakes that lead to crooked rivets and grommets.
Can Temporary Marks Help in Long-Term Project Accuracy?
Ever wondered if temporary markings can boost your long-term project accuracy? They definitely can. Using temporary markings helps you visualize placement and stay on track, reducing mistakes. These markings act as guides during drilling or setting hardware, ensuring everything lines up perfectly. When you remove them, your project remains precise. So, yes, temporary markings are a simple yet effective way to maintain long-term accuracy and achieve professional results effortlessly.
Are There Specific Tools Best Suited for Precise Hardware Installation?
Yes, there are specific tools best suited for precise hardware installation. You should use precision tools like a center punch, a pin vise, or a rivet setter to guarantee accurate placement. Additionally, employing proper installation techniques, such as marking your spots clearly and applying consistent pressure, helps prevent crooked hardware. Investing in quality tools and following careful methods guarantees neat, professional results every time.
How Do I Maintain Consistent Spacing Across Multiple Projects?
Ever wonder how you can keep your spacing consistent across projects? You should focus on template consistency and measurement techniques. Use a template or jig to mark spots uniformly, ensuring each piece aligns perfectly. Measure multiple times before drilling, and use a ruler or caliper for precision. This approach helps you maintain uniform spacing, making your hardware installation look professional and clean every time.
Conclusion
Did you know that properly aligned rivets and grommets can boost your project’s durability by up to 30%? By following these placement tips, you’ll prevent crooked hardware and create professional-looking finishes every time. With the right tools, precise marking, and practice, you’ll master flawless installs. Don’t let crooked rivets ruin your work—stay consistent, troubleshoot when needed, and enjoy polished results that last. Your projects deserve that perfect, straight hardware finish!