
To create DIY fabric wall art, start by gathering your favorite fabric and choosing a sturdy surface like canvas or foam board. Prepare the base by cleaning and applying primer for better adhesion. Cut your fabric to fit and attach it securely with fabric glue or double-sided tape, smoothing out any wrinkles. Add embellishments if desired, then hang your piece using appropriate hooks or adhesive strips. For a step-by-step guide and tips, keep exploring more.
Key Takeaways
- Select and prepare your fabric and surface, ensuring cleanliness and proper adhesion for a smooth finish.
- Design your layout, choosing colors and patterns that complement your decor before attaching.
- Secure the fabric to the backing with appropriate adhesives, trimming excess fabric and maintaining tension.
- Add embellishments like embroidery, beads, or trims to enhance visual interest and dimension.
- Hang your finished fabric art using suitable hardware, ensuring it is taut, level, and securely mounted.
Gathering Materials and Choosing Your Fabric
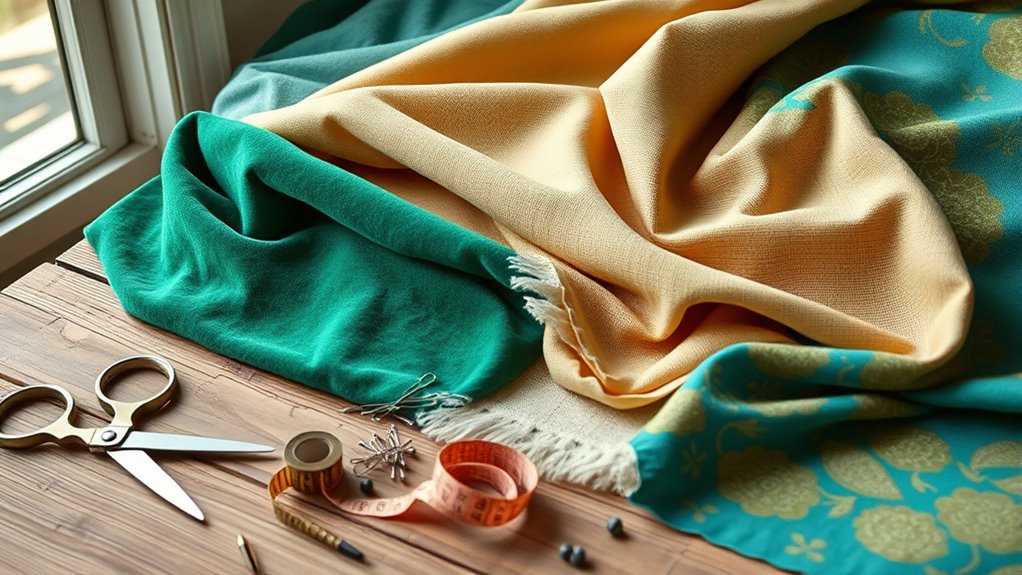
Before starting your DIY fabric wall art, it’s important to gather all the necessary materials and select the right fabric. You’ll need a variety of supplies like scissors, a ruler, a hot glue gun or fabric glue, and a sturdy backing such as canvas or foam board. When choosing fabric, consider the color, pattern, and texture that suit your space. Opt for fabrics that are easy to work with, like cotton, linen, or felt. Make sure the fabric is clean and free of wrinkles before cutting. It’s helpful to buy a little extra in case of mistakes or adjustments. Gathering everything beforehand ensures a smooth crafting process and helps you stay focused on creating a beautiful piece of wall art. Additionally, understanding the horsepower of electric bikes can inspire you to incorporate dynamic, energetic designs into your artwork. Being aware of farmhouse-style decor can also motivate you to select fabrics that complement rustic themes, making your wall art more cohesive and charming. Considering indoor gardening ideas can further influence your choice of colors and textures to create a cozy, inviting atmosphere. Incorporating self watering plant pots into your decor ideas can add a practical and stylish touch to your overall interior design.
Preparing Your Canvas or Base Material
Before starting your fabric wall art, you need to select the right surface that will support your design. Make sure to clean your chosen material thoroughly to remove dust and oils, which can affect adhesion. Ultimately, applying a primer can help create a smooth, even base, ensuring your artwork looks polished and lasts longer and supports the creative process. Ensuring your surface is suitable can prevent toilet clogging and plumbing issues during the project.
Choosing the Right Surface
Choosing the right surface is essential to guarantee your fabric wall art turns out vibrant and durable. Start by selecting a sturdy, smooth base like canvas, MDF, or heavy-duty poster board. These surfaces provide stability and prevent warping or sagging over time. Consider the type of fabric you’ll use; some fabrics cling better to certain materials, so choose a surface that complements your textile. If you plan to add paint or other embellishments, ensure the base is compatible to avoid bleeding or uneven absorption. Keep in mind the final look you want—wood surfaces lend a rustic feel, while smooth boards offer a sleek finish. Picking the right surface sets a solid foundation for your artistic vision and guarantees your wall art looks professional and lasts. Additionally, surface texture can influence how well your fabric adheres and how the final piece appears, making it an important factor in your selection process. When selecting your surface, also consider building codes and any zoning regulations that might affect where you can display or install your fabric art. Moreover, understanding the surface material and its compatibility with various adhesives or paints can help in achieving a more polished and lasting result. Being aware of testing and validation practices can also ensure that your chosen materials will perform well over time and under different environmental conditions.
Cleaning and Priming
To guarantee your fabric wall art adheres properly and looks polished, start by thoroughly cleaning your chosen surface to remove dust, dirt, and grease. Use a damp cloth with mild soap or a gentle cleaner to wipe down the area. Make sure the surface is completely dry before proceeding. Once clean, consider applying a primer suitable for your material—this helps create a smooth, even base that enhances paint adhesion and prevents stains from bleeding through. For fabric surfaces, a fabric primer or a light coat of white acrylic paint works well. Priming also helps to seal the surface, making it easier to achieve clean, vibrant results. Embracing a growth mindset by preparing your surface thoroughly can lead to more successful creative outcomes. Taking these steps ensures your artwork will stay durable and look professional once finished. Additionally, choosing the right base material can significantly impact the longevity and appearance of your wall art. Using proper surface preparation techniques can further improve the adhesion and overall quality of your piece, and understanding the fundamentals of surface conditioning can help you select the best products for your project. Exploring Glycolic Acid benefits for skin can also inspire your creative process by encouraging you to focus on renewal and transformation.
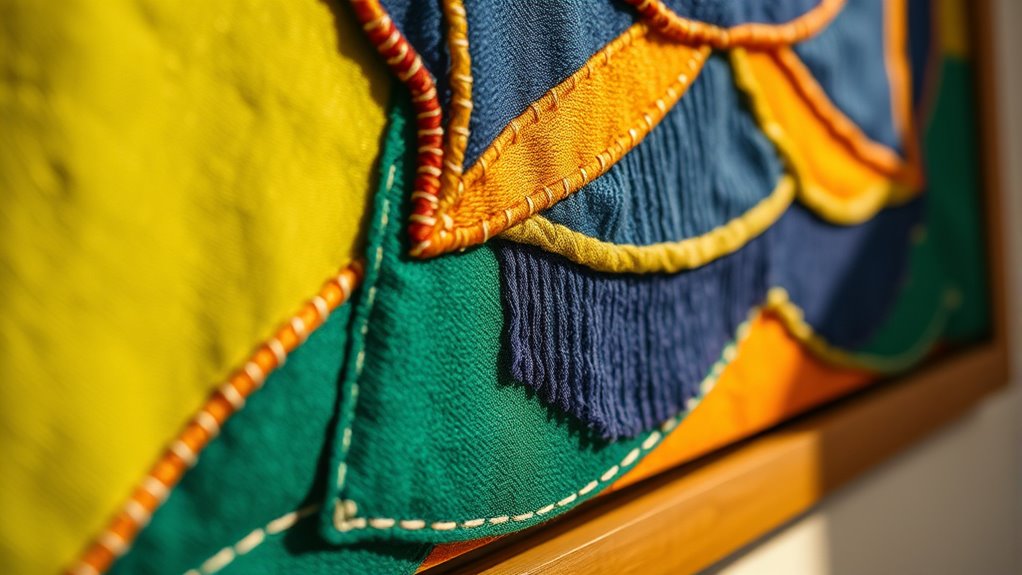
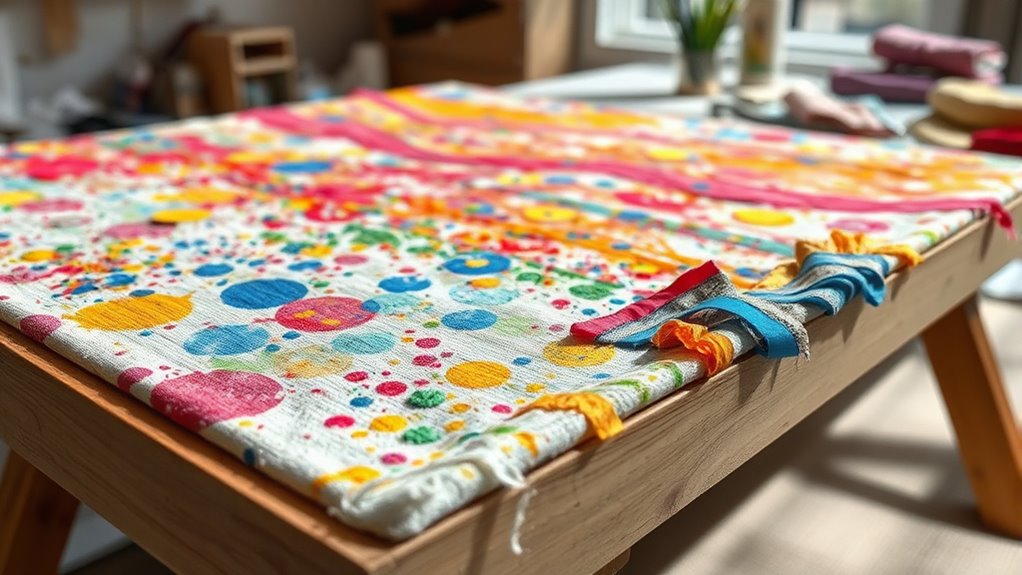
Designing Your Fabric Layout and Pattern
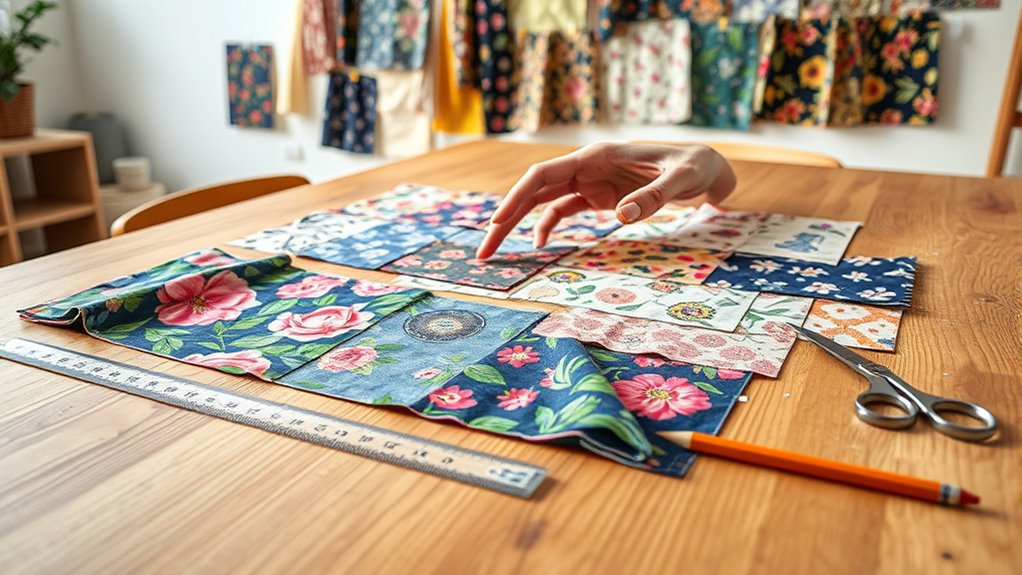
Designing your fabric layout and pattern is a crucial step that sets the tone for your wall art. You want a design that complements your space and reflects your style. Start by choosing colors that match or contrast with your decor. Consider the scale of your pattern—large prints create a bold statement, while smaller patterns add subtle detail. Think about symmetry and balance to make certain your design looks cohesive. Before finalizing, lay out your fabric options to see how they interact. Experiment with different arrangements to discover what feels right. Remember, your layout influences the overall aesthetic and impact of your art piece. Make sure to take your time, and don’t be afraid to try multiple configurations before settling on the perfect design. Additionally, understanding the traits of a covert narcissistic mother can help you create a space that feels emotionally safe and supportive. Incorporating cultural elements relevant to your background can also add meaningful depth to your artwork.
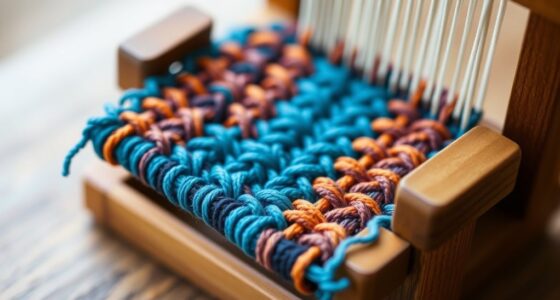
Attaching Fabric to the Base

When attaching fabric to your base, choosing the right adhesive is key to a secure hold. You’ll also want to guarantee the edges are secured neatly to avoid puckering, and maintain proper tension for a smooth finish. Paying attention to these points helps create a polished, professional look for your wall art. Additionally, considering fabric quality and stretchability can ensure your artwork remains durable and visually appealing over time. Using an appropriate adhesive type tailored to your fabric and base material can further enhance the longevity of your piece.
Choosing the Right Adhesive
Choosing the right adhesive is essential for guaranteeing your fabric stays securely attached to the base without puckering or sagging. The adhesive you select impacts the final look and durability of your wall art. For best results, consider the fabric type and the surface you’re attaching it to. Use a glue that offers strong adhesion but remains flexible to prevent cracking or tearing. Test on a small area first to ensure compatibility.
- Opt for fabric glue or spray adhesive designed for textiles
- Avoid hot glue, which can cause puckering or damage delicate fabrics
- Choose an acid-free adhesive if preserving fabric longevity is important
- Follow manufacturer instructions carefully for even application
Securing Edges Neatly
To achieve a clean and professional look, securing the edges of your fabric neatly is essential. Start by trimming any excess fabric, leaving a small border around your design. Use double-sided tape or fabric glue along the edges to hold the fabric firmly in place. For a smoother finish, fold the edges under slightly before attaching, creating a clean hem. Apply adhesive evenly to prevent puckering or wrinkles. Press the fabric firmly onto the wall or backing board, smoothing out any air bubbles or creases as you go. If needed, use clips or weights to keep the edges guarantee while the adhesive sets. Taking your time with this step ensures your fabric stays flat, neat, and professional-looking.
Tension and Smoothness
Achieving proper tension and smoothness when attaching fabric to the base is essential for a polished look. Start by stretching the fabric evenly across the surface, avoiding sagging or wrinkles. Use your hands or a smoothing tool to press out air bubbles and creases as you go. Keep the fabric taut but not so tight that it warps or damages the base. Working gradually from the center outward helps maintain consistent tension.
Remember these tips:
- Pull fabric firmly but gently to avoid stretching or tearing
- Smooth out wrinkles as you attach
- Work in small sections for even tension
- Secure edges firmly to prevent sagging over time
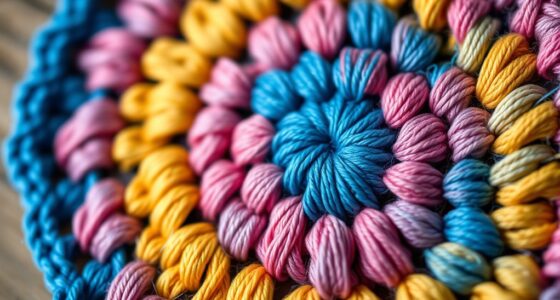
Adding Finishing Touches and Embellishments
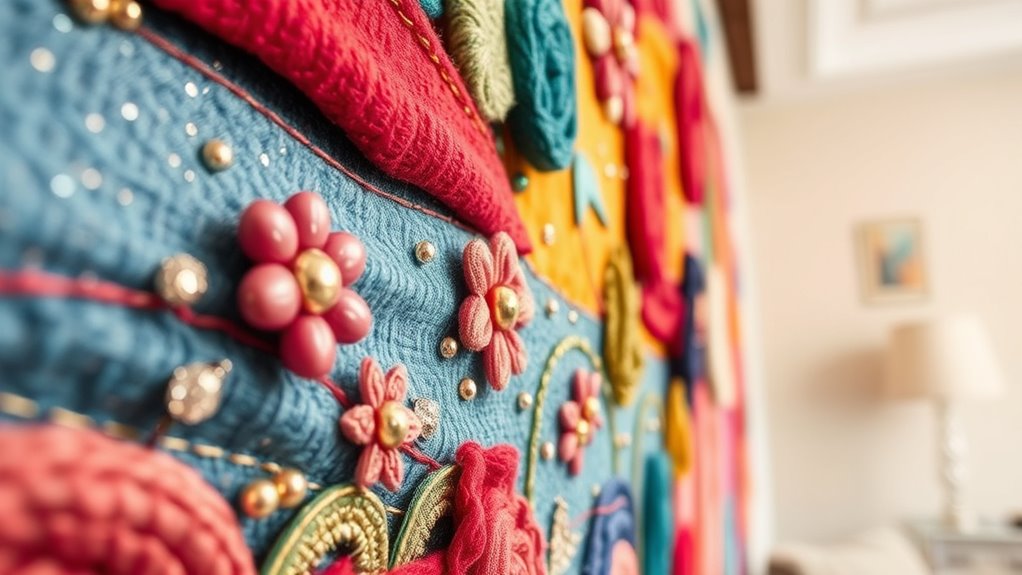
Once you’ve completed the main design of your fabric wall art, it’s time to add finishing touches and embellishments that enhance its appearance. Consider sewing decorative elements like embroidered patterns, appliqués, or fabric flowers to give depth and texture. You can also attach beads, sequins, or buttons for a touch of sparkle. Edging your piece with contrasting trim or piping creates a polished look. If you want to add some dimension, glue or sew on fabric shapes or patches. Just guarantee that embellishments are secure and complement your overall design. These finishing touches make your artwork unique and personalized, transforming a simple fabric piece into a stunning focal point. Keep it balanced—avoid overcrowding, and let each embellishment enhance the artwork.
Hanging and Displaying Your Wall Art
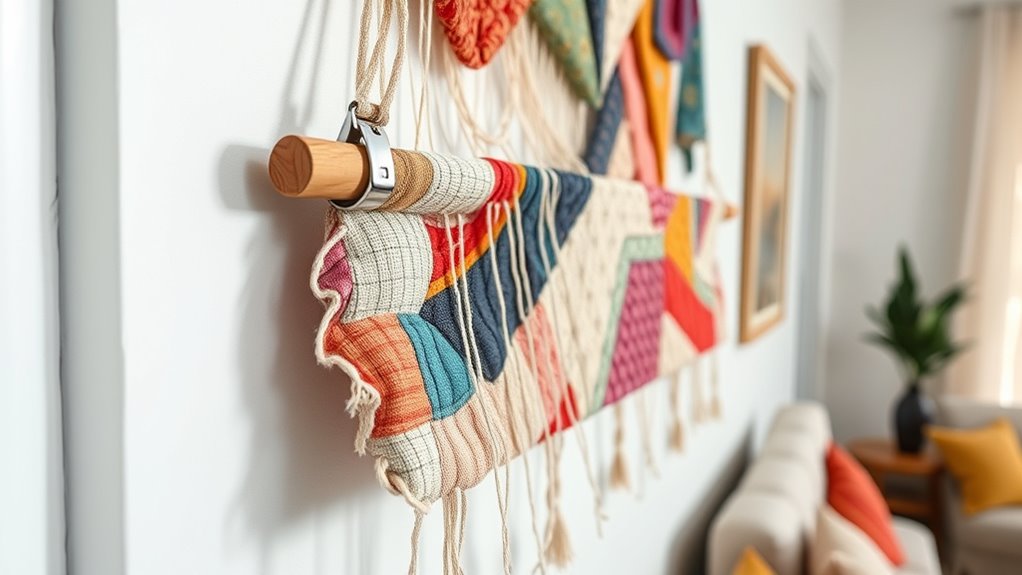
Are you wondering how to display your fabric wall art securely and stylishly? First, choose the right hanging method based on your wall type and artwork weight. Use picture hooks, adhesive strips, or tension rods for lightweight pieces, and wall anchors or nails for heavier fabric. Make certain your fabric is taut and evenly aligned for a polished look. To prevent damage, avoid overloading hooks or adhesives. Consider framing your fabric or using a fabric rod for a clean, professional appearance. Keep your art at eye level for maximum impact. Regularly check the hanging hardware to maintain stability. Remember, proper placement and secure hanging are key to showcasing your DIY fabric art beautifully and safely.
Frequently Asked Questions
What Types of Fabric Are Best for Wall Art Projects?
When choosing fabric for wall art projects, you want options that are durable and easy to work with. Consider cotton for its versatility and affordability, linen for a sophisticated look, or canvas for a sturdy finish. You might also explore velvet or felt for texture. Avoid flimsy or stretchy fabrics that won’t hold shape. Pick fabrics that match your style and guarantee they’re easy to stretch or frame for the best results.
How Do I Prevent Fabric From Wrinkling During Application?
Think of your fabric as a quiet river, smooth and steady. To prevent wrinkles, keep it taut like a drum, pulling gently as you apply. Use a spray bottle to lightly mist the fabric, easing out creases. Smooth with your hands or a soft roller, working from the center outward. This way, your fabric flows seamlessly, like a calm lake, creating a flawless, wrinkle-free masterpiece on your wall.
Can I Reuse or Reposition Fabric After Attaching It?
You might be able to reuse or reposition fabric after attaching it, but it depends on the adhesive you used. If you applied a removable or repositionable adhesive, you can carefully peel the fabric away without damage and reattach it. However, if you used a permanent glue or adhesive, repositioning may cause wrinkles or damage. Always test a small area first and work gently for best results.
What Are Eco-Friendly Alternatives for Wall Art Materials?
You’re wondering about eco-friendly alternatives for wall art materials. Instead of traditional options, consider using recycled fabrics, organic cotton, or bamboo textiles. You can also repurpose items like old curtains, scarves, or even vintage textiles to create unique art pieces. These choices reduce waste and are better for the environment. Plus, they add a personal touch to your space, making your wall art both stylish and sustainable.
How Do I Clean or Maintain Fabric Wall Art Over Time?
To keep your fabric wall art looking fresh, you should dust it regularly, spot clean stains promptly, and avoid direct sunlight that can fade colors. You can gently vacuum using a brush attachment, treat spots with mild detergent and cold water, and hang it away from damp areas to prevent mold. Maintaining your fabric wall art involves careful handling, regular cleaning, and protecting it from environmental damage to enjoy its beauty longer.
Conclusion
Creating your own fabric wall art is like weaving a story on your wall—each step adding a personal touch that transforms your space. Remember, even the simplest design can turn into a masterpiece with patience and care. When I first made mine, I realized it’s not just about the fabric, but about expressing yourself and making your home uniquely yours. So, enjoy the process and let your creativity flow—your wall art is a reflection of your soul.