To build a portable sketch‑book press from scrap wood, start by gathering recycled materials like scrap plywood and old crates, along with basic tools such as a saw, drill, and clamps. Design a simple, adjustable layout that fits your sketchbook sizes and light enough to be portable. Cut and prepare your wood carefully, then assemble the frame, adding sliding and clamping mechanisms for secure pressure. If you keep exploring, you’ll discover detailed steps to guarantee your press works perfectly.
Key Takeaways
- Select durable, straight-grain scrap wood like pine or cedar for easy shaping and stability.
- Measure and cut wood precisely to match sketchbook sizes, ensuring smooth edges with sanding.
- Assemble the frame with reinforced joints using dowels or corner blocks, and secure with wood glue.
- Incorporate adjustable clamps or pressure mechanisms for even, customizable pressure during pressing.
- Test for uniform pressure, smooth sliding, and secure locking, then perform regular maintenance for longevity.

MEEDEN Portable Watercolor Paper Sketchbook: 140lb/300gsm Acid Free Concertina Sketchbook for Travel – Accordion-Fold 100% Cotton Water Color Journal Paper for Wet/Dry Techniques, Cold Press
100% Cotton Paper: 140lb/300gsm thickened blank watercolor paper sketchbook, acid-free, highly absorbent with minimal bleed-through, resistant to aging…
As an affiliate, we earn on qualifying purchases.
As an affiliate, we earn on qualifying purchases.
Gathering Materials and Tools

To build your portable sketchbook press, you’ll first need to gather all the necessary materials and tools. Start by collecting recycled materials, such as scrap wood pieces, which are perfect for creating a sturdy, eco-friendly press. Look for leftover plywood or old crates that can be repurposed. You’ll also need basic tools like a saw, drill, screws, and a measuring tape. Don’t forget to gather some colorful sketches or artwork to test your press’s effectiveness once assembled. These vibrant sketches will help you see how well your press flattens and preserves your artwork. By using recycled materials, you not only save money but also contribute to sustainability. Additionally, ensuring your press has the appropriate color accuracy can help optimize its performance and durability during use. Properly selecting materials with structural integrity will further ensure your press remains sturdy and reliable over time. Achieving a balance between durability and weight is essential for making your press portable and practical for on-the-go use. Once everything is ready, you’ll be set to move on to designing your custom sketchbook press.

Shop Fox D2893 Press Clamp,As the picture shown,Medium
Overall length is 11-1/2-Inch
As an affiliate, we earn on qualifying purchases.
As an affiliate, we earn on qualifying purchases.
Designing Your Sketch-Book Press
Before you start building, take some time to plan the design of your sketchbook press to guarantee it fits your needs and workspace. Consider your artistic inspiration and the types of sketchbooks you’ll use, as this influences the size and pressure needed. If you prefer quick projects, a simple design with adjustable clamps might work best. For more detailed work, you might want a sturdier, larger press. Think about how portable you want it to be—lightweight and compact, or more robust and durable. Sketch out your ideas, keeping in mind your space constraints and the sketchbook sizes you use most often. Proper planning ensures your press will be functional and tailored to your artistic process, especially if you incorporate natural materials for an authentic and rustic touch. Additionally, selecting appropriate tools and ensuring safety during assembly will help create a reliable and enjoyable project. Considering the weight of the press can also influence how easily you can move it around your workspace or take it on the go. For added stability, you may want to include adjustable pressure mechanisms to customize the amount of pressure applied for different projects. Incorporating ergonomic design principles can also enhance comfort during use and improve the overall functionality of your sketchbook press.

JUPEAN Book Press—7.9”x11.6” Wooden Book Binding Press Bookbinding Kit Flower Press Kit Portable and Easy Assemble Books Binding Kits for DIY Bookbinding
What's Included: The book press bookbinding measures 7.9*11.6, which meets most size requirements such as A5 size and…
As an affiliate, we earn on qualifying purchases.
As an affiliate, we earn on qualifying purchases.
Cutting and Preparing the Wood Pieces
Start by choosing the right type of wood that’s sturdy yet easy to work with. Use a saw to cut your pieces to the correct sizes, and shape them as needed for a snug fit. Be precise and careful to guarantee your press will be stable and functional. Incorporating natural materials can also enhance the overall aesthetic and sustainability of your project. Selecting the appropriate wood type is essential for durability and ease of assembly. Considering sustainable sourcing options can further improve the environmental impact of your build. Additionally, choosing materials with low water usage during production can contribute to a more eco-friendly project. Incorporating environmentally friendly materials can further reduce the ecological footprint of your handmade press.
Selecting Appropriate Wood
Have you ever wondered which type of wood works best for your portable sketchbook press? The key factors are wood grain and moisture content. Choose wood with a tight, straight grain to ensure stability and reduce warping. Avoid pieces with irregular or knotty grain, as these can cause uneven pressure or splitting. Moisture content is equally important—aim for wood that’s been dried to around 6-8%, preventing expansion or contraction once assembled. You want stable, well-seasoned wood to keep your press sturdy over time. Softwoods like pine or cedar are good options, but hardwoods such as maple or oak provide greater durability. Selecting the right wood from the start makes your project easier and results in a reliable, long-lasting portable sketchbook press.
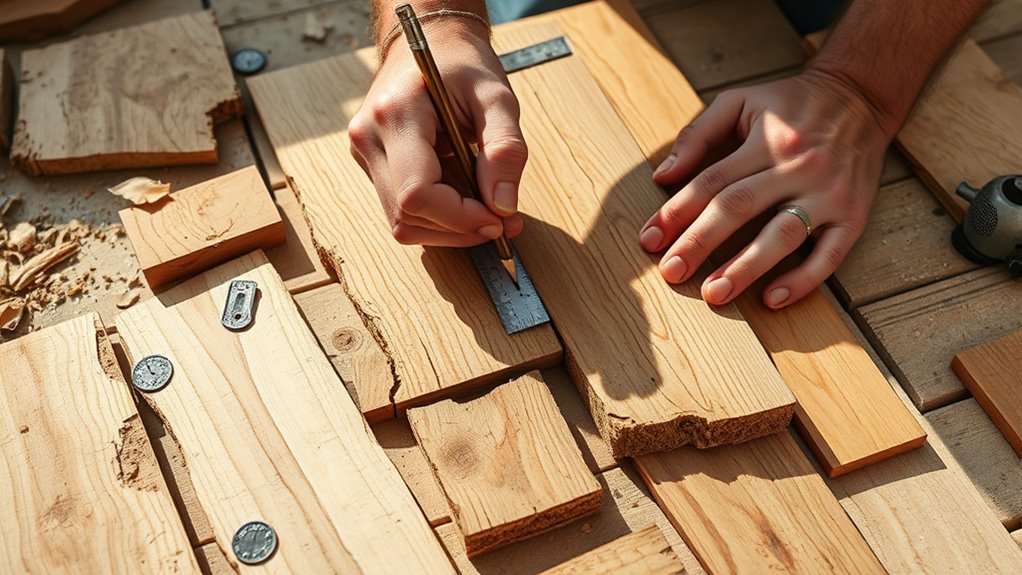
Cutting and Shaping Pieces
Once you’ve selected suitable wood with the right grain and moisture content, the next step is to cut and shape your pieces to the desired dimensions. Use a saw appropriate for your cuts, like a handsaw or a power saw, ensuring you follow safety precautions—wear goggles, gloves, and keep your workspace clear. As you cut, stay focused to avoid accidents, and check measurements carefully to match your artistic inspiration for the project. Shaping may involve chiseling or sanding to smooth edges and achieve precise fits. Take your time and work deliberately, as quality cuts and smooth shaping are *essential* for a sturdy, functional sketch-book press. Prioritize safety and accuracy to bring your creative vision to life efficiently.

HORUSDY 8-Pack Bar Clamps for Woodworking, 12" and 6" Bar Clamps, Wood Working Clamp Sets, Quick Clamps F Clamp with 150 LBS Load Limit (8-Pack Wood Clamps)
1. The complete set includes 4pcs 6" bar clamps,2pcs 12" bar clamps and 2pcs 6" spring clamps, which…
As an affiliate, we earn on qualifying purchases.
As an affiliate, we earn on qualifying purchases.
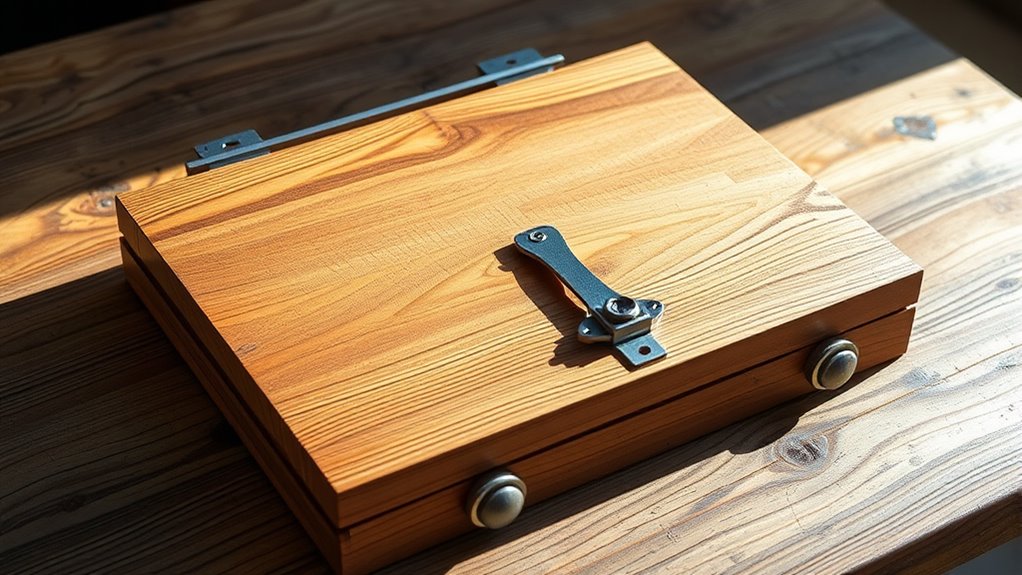
Assembling the Frame of the Press

Before assembling the frame, lay out all the scrap wood pieces and double-check their measurements to guarantee they fit together properly. Use appropriate wood joint techniques like dowels or corner blocks for sturdy connections. Secure each joint tightly, ensuring the frame stays square. To add strength, consider reinforcing joints with wood glue. If you want to personalize your press, incorporate decorative embellishments, such as carved details or painted accents, at the corners or edges. Keep these key points in mind: Self Watering Plant Pots can serve as inspiration for designing functional and attractive details in your project. Proper paint application techniques can also enhance the overall finish and durability of your assembled press. Additionally, taking inspiration from Art News & Views, such as incorporating innovative and modern design elements, can help create a unique and inspiring piece. Incorporating electric power elements, like small battery-powered lighting or motorized parts, can also add a contemporary touch to your design. When working with wood, understanding international trade factors can help you source quality materials at better prices, especially if you plan to expand your project or share it commercially.
Adding the Sliding Mechanism
To guarantee your press operates smoothly, focus on creating a sliding mechanism that moves easily without sticking. You’ll also want to incorporate a secure locking system to hold the press in place during use. These features will make your portable sketch-book press reliable and simple to operate. Ensuring proper maintenance practices will help keep the mechanism functioning effectively over time.
Smooth Sliding Action
Achieving smooth sliding action is essential for the functionality of your sketchbook press, and adding the right sliding mechanism makes a significant difference. To guarantee smooth movement, choose wood with a fine grain, which reduces friction and resists splintering. Before assembling, sand the sliding parts thoroughly, following the wood grain to prevent rough spots. Applying a finish coating, such as linseed oil or a light varnish, helps protect the wood and creates a slick surface for easier sliding. Test the mechanism frequently as you assemble, adjusting or sanding as needed. Properly finished and smooth-sliding parts will make closing and opening your press effortless, giving you consistent pressure without sticking or jamming. This attention to detail ensures your portable sketch-book press functions smoothly every time.
Secure Locking System
A secure locking system guarantees your sketchbook stays firmly closed during transport and storage, preventing accidental openings that could damage your artwork. To achieve this, incorporate a reliable lock mechanism that smoothly engages and disengages, ensuring safety features are in place. These features prevent the lock from accidentally releasing under pressure. When adding the sliding mechanism, focus on precision to guarantee seamless operation.
- Use a sturdy latch or clasp that’s easy to operate
- Ensure safety features prevent accidental unlocking
- Test the lock mechanism repeatedly for durability
A well-designed lock mechanism not only secures your sketchbook but also enhances portability. Prioritize safety features to avoid damage and keep your artwork protected during travel.
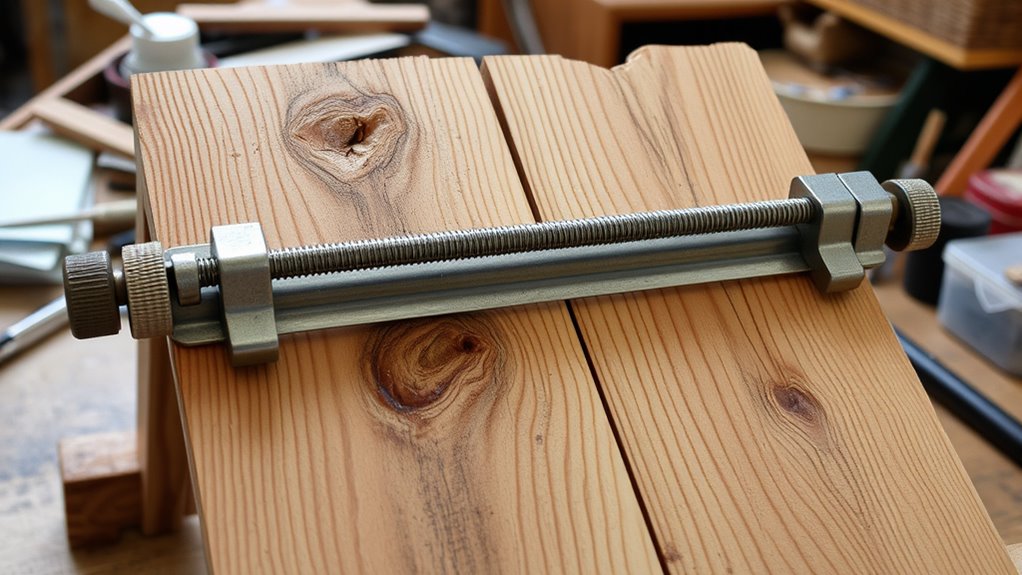
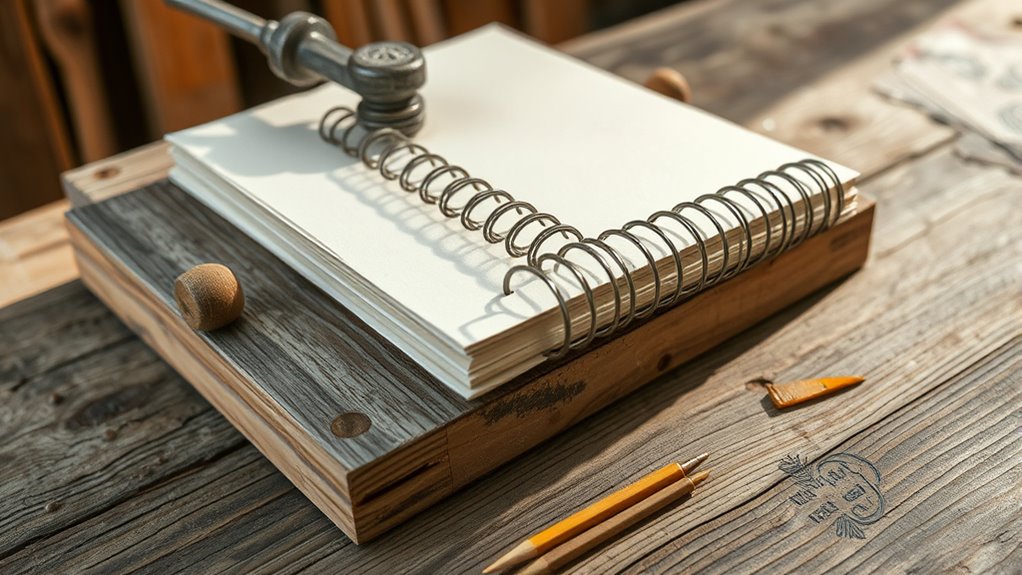
Securing the Clamping Components

Securing the clamping components firmly is essential to guarantee your sketchbook press functions correctly. Proper clamp alignment ensures even pressure across the entire surface, preventing warping or uneven binding. To achieve this, tighten the clamps gradually, checking their position frequently. Make sure the clamps sit squarely on the wood, avoiding tilting or shifting. Distribute pressure evenly by adjusting the clamps so they apply consistent force without over-tightening. This balanced approach minimizes stress points and ensures the pages are pressed uniformly. Use scrap wood shims if needed to maintain perfect alignment. Secure clamps tightly enough to hold the pages in place, but not so tight that they damage the wood or pages. Proper securing guarantees a smooth, flat, and well-bound sketchbook.
Testing and Adjusting Your Press

Have you tested your sketchbook press to guarantee it applies even pressure? Pressure testing is essential to ensure your press works effectively. Start by tightening the clamps and pressing lightly on your sketchbook or paper. Check for uneven pressure distribution or gaps, indicating the need for alignment adjustments.
Remember these key points:
- Use a thin sheet of paper or cardstock to identify pressure inconsistencies
- Make small, incremental adjustments to the alignment components
- Re-test after each adjustment to confirm even pressure across the entire surface
Proper pressure testing and alignment adjustments prevent damage and ensure smooth operation. Take your time during this process—accurate setup makes your portable sketch‑book press more reliable and effective.
Tips for Using and Maintaining Your Press
To keep your portable sketch-book press functioning smoothly, you should regularly clean and inspect its components for wear or damage. Use a soft brush or cloth to remove dust and debris that could affect wood preservation. Check for loose screws, cracked wood, or splinters, and tighten or repair as needed. Applying a light coat of mineral oil or wood preservative helps protect the wood from moisture and extends its lifespan. Always follow safety precautions when handling tools or chemicals, ensuring proper ventilation and wearing safety glasses. Store your press in a dry, stable place to prevent warping or deterioration. Regular maintenance not only keeps your press in top shape but also ensures safe, reliable use every time.
Frequently Asked Questions
How Can I Customize the Size of My Sketch-Book Press?
To customize the size of your sketch-book press, you need to focus on adjusting press dimensions. Measure your sketchbook carefully and then modify the frame accordingly. You can cut the scrap wood to create a larger or smaller press, depending on your needs. By customizing press size, you guarantee your sketchbook fits snugly, providing the right pressure. Always double-check your measurements before cutting to achieve precise, tailored results.
What Safety Precautions Should I Take During Construction?
When constructing your project, prioritize workspace safety by wearing protective gear like goggles, gloves, and a dust mask. Keep your workspace clean and well-lit to avoid accidents. Use tools carefully, following their safety instructions, and guarantee the workspace is stable to prevent slips or falls. Always focus on safety precautions, so you can build your sketch-book press confidently and avoid injuries.
Can I Use Alternative Materials Instead of Scrap Wood?
Thinking about alternatives, you can absolutely explore different materials instead of scrap wood. Consider sustainable options like bamboo, recycled plastic, or cardboard, which offer eco-friendly flexibility and functionality. These materials can serve as durable, dependable substitutes, providing creative comfort and conscientious construction. By choosing alternative materials, you embrace eco-conscious choices, making your project more sustainable, stylish, and suited to your specific needs while reducing waste and supporting sustainability options.
How Do I Ensure Even Pressure Distribution on the Sketchbook?
To guarantee even pressure distribution, focus on proper press alignment. Make sure your pressing plates are parallel and securely fastened to avoid uneven pressure. Use a flat, stable surface and add cushioning, like felt or rubber, to distribute pressure more evenly across the sketchbook. Check the alignment regularly during use, and tighten any loose parts. This way, you’ll achieve consistent pressure and a smooth, professional finish.
What Are Some Creative Ways to Decorate or Personalize My Press?
You can really make your press stand out by adding personalized engravings or decorative finishes that reflect your style. Get creative with paint, wood burning, or colorful inlays to give it a unique touch. You might also consider adding custom handles or attaching small decorative elements like metal accents. When you put your heart into it, your press becomes more than just functional—it’s a true reflection of your personality.
Conclusion
Now you’ve got your DIY sketch-book press ready to tame even the wildest pages. Just imagine lugging it to art shows, only to realize it doubles as a makeshift weight when you forget your gym membership. With a few scrap wood scraps, you’ve created the ultimate portable masterpiece—perfect for pressing, or perhaps, impressing friends with your crafty genius. Just don’t forget: beauty and function are only a saw stroke or two away. Happy pressing!