
To make a paper peony, choose flexible paper like tissue or crepe, cut out multiple petals with slight curves and ruffles, and shape them carefully using your fingers or tools. Layer the petals starting from the center, staggering each for fullness and realism, then secure with glue or wire. Use shades of pink, red, or white, blending colors and adding shading for extra depth. For tips on perfecting your peony craft, keep exploring the details—you’ll find techniques that bring your flower to life.
Key Takeaways
- Select flexible paper like crepe or tissue and cut out multiple, slightly curved petals with ruffled edges.
- Shape petals by gently curling edges with fingers or tools to add dimension and realism.
- Layer petals starting from the innermost, securing each with glue or floral wire, and stagger for fullness.
- Use shades of pink, red, or white, blending colors and adding shading with markers or paint for a natural look.
- Attach a sturdy floral wire stem wrapped with green tape for support and a polished finish.
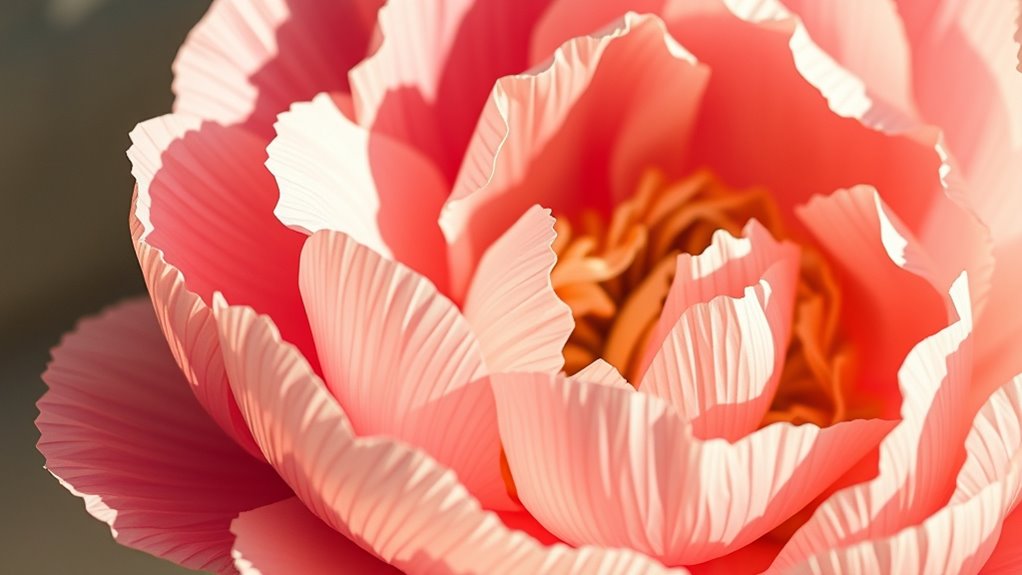
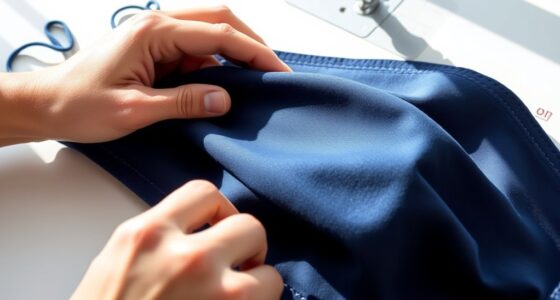
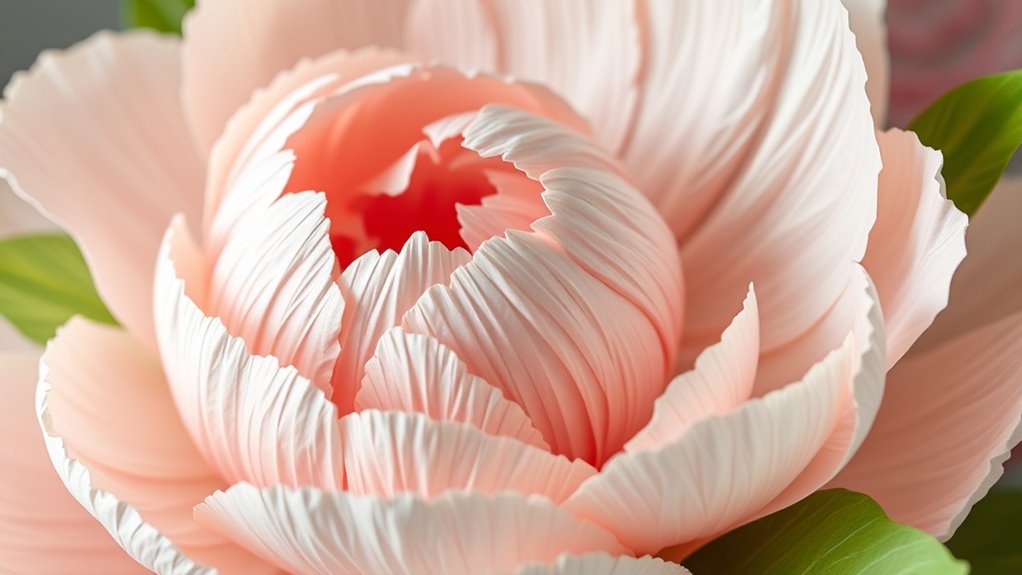
Creating a beautiful paper flower peony is a fun and rewarding craft that transforms simple materials into a stunning floral decoration. The key to making a realistic-looking peony lies in carefully crafting each flower petal. You’ll want to select quality paper—typically crepe paper or tissue paper—since these materials have the flexibility needed for shaping delicate petals. When you start your paper crafting project, focus on the shape and size of your flower petal, as it’s the foundation for the entire flower’s appearance. Each petal should be slightly curved, with a gentle ruffle along the edges to mimic the soft, layered look of a real peony. To achieve this, you can use scissors or a petal template to cut out multiple identical pieces. Remember, the variation in petal size and shape adds to the natural fullness of your paper flower.
Once you have your petals cut out, you’ll want to add dimension by gently curling or ruffling the edges. This can be done with your fingers or a tool like a pencil. These small touches give your paper crafting project a more lifelike quality. When assembling your flower, start with the innermost petals, placing them close together and securing each layer with glue or floral wire, depending on your preferred method. As you add more petals, stagger them slightly to create the illusion of depth and volume. It’s important to layer the petals in a way that mimics the natural arrangement of a peony, with the petals overlapping and radiating outward. Additionally, understanding the regional statistics about flower types can inspire your color choices and style.
Gently curl and layer petals for a lifelike, full peony appearance.
Color choice also plays a significant role in capturing the beauty of a peony. Opt for shades that resemble real peony colors—soft pinks, deep reds, or pure whites—and blend multiple shades if you want a more dynamic look. During the paper crafting process, you can add subtle shading or highlights using markers or paint to enhance realism. When your flower begins to take shape, consider attaching a sturdy stem made from floral wire wrapped with green floral tape. This not only supports your paper flower but also provides a realistic finishing touch.
Making a paper flower peony is about patience and attention to detail, especially with your flower petal designs. The more care you put into shaping and layering each petal, the more stunning your finished flower will look. With some practice, you’ll master the art of paper crafting and create beautiful, lasting floral decorations that brighten any space or serve as thoughtful gifts.

46 Colors Crepe Paper Rolls, 10 x 98 Inch Wide Crepe Paper Flowers Kit with 100 Pcs Floral Iron Wire, Floral Band, Double-Sided Tape, and Scissors for DIY Gifts, Parties, Weddings, Festival Decoration
- 46 Vibrant Crepe Paper Rolls: Includes 46 colorful 10×98 inch rolls
- Complete Floral Craft Kit: Includes floral wire, tape, scissors, and double-sided tape
- High-Quality, Durable Materials: Tear-resistant, fade-resistant, recyclable crepe paper
As an affiliate, we earn on qualifying purchases.
As an affiliate, we earn on qualifying purchases.
Frequently Asked Questions
What Types of Paper Are Best for Making Peony Flowers?
You should use crepe paper or tissue paper for making peony flowers. Crepe paper is ideal because its texture mimics real petals and allows you to shape and curl easily. Tissue paper is lightweight and adds a delicate, soft look, perfect for layered petals. Both types are easy to work with, vibrant in color, and readily available, making them your best choices for creating realistic and beautiful paper peonies.
How Long Does It Take to Make a Paper Peony?
It takes about 2 to 3 hours to make a paper peony, depending on your skill level. You’ll use flower petal techniques and paper folding methods to shape each petal and assemble the bloom. As you practice, you’ll notice your speed improves, and the process becomes more enjoyable. Take your time to perfect each step, and soon you’ll have a beautiful, handcrafted peony that’s worth every minute.
Can I Make a Paper Peony Without Prior Crafting Experience?
Yes, you can make a paper peony without prior crafting experience. This project is perfect for beginner projects and helps build your crafting confidence. Follow simple step-by-step instructions, use basic materials, and take your time. With patience, you’ll create a beautiful paper flower and gain skills for more complex projects. Remember, practice makes perfect, so enjoy the process and celebrate your creative progress!
How Do I Preserve My Paper Peony Once Finished?
To preserve your paper peony, gently spray it with a clear sealant or acrylic spray to protect the colors and keep dust away. You can also use flower preservation techniques like placing it in a display case or on a decorative stand. For best display tips, position it in a well-lit spot away from direct sunlight to prevent fading and keep your beautiful creation looking fresh longer.
Are There Eco-Friendly Alternatives to Traditional Craft Supplies?
Yes, you can use eco-friendly alternatives like recyclable materials such as cardboard, paper, or old magazines for your paper flower peony. Instead of synthetic dyes, opt for natural dyes derived from plants, fruits, or vegetables to color your petals. These choices reduce waste and harmful chemicals, making your craft more sustainable. By using recyclable materials and natural dyes, you create beautiful, environmentally conscious art that’s kind to the planet.
Conclusion
As you hold your finished paper peony, remember that crafting something beautiful from simple materials mirrors life’s most rewarding moments. Just like this delicate flower, your patience and creativity blossom into something stunning. I once watched a beginner, hesitant at first, suddenly light up when her peony took shape—proof that practice and persistence can turn plain paper into art. Keep creating; your efforts bloom into lasting beauty, just like this paper flower.