To make candles at home, gather supplies like wax, wicks, containers, and fragrances. Melt the wax safely using a double boiler, then add colors and scents as desired. Prepare your containers with supports for the wicks, pour the melted wax carefully, and let it cool and set. Trim the wicks, and add final touches for a polished look. Follow these steps closely, and you’ll discover how simple and fun candle-making can be.
Key Takeaways
- Gather quality wax, wicks, containers, and safety gear, then prepare your workspace for a safe candle-making process.
- Melt wax carefully using a double boiler, monitor temperature, and add fragrance and color during the pouring stage.
- Secure the wick in your container, tape it for stability, and pour the melted wax smoothly to prevent imperfections.
- Allow candles to cool at room temperature, trim the wick to ¼ inch, and remove any debris for a clean finish.
- Troubleshoot common issues like tunneling or scent throw by adjusting wick size, wax type, and curing time.

Complete Candle Making Kits for Adults Beginners, DIY Candle Making Supplies Include Soy Wax,Wax Melter,Scents,Dyes,Wicks,Wicks Sticker,Candle Tins & More-Full Candle Maker Set – Arts & Crafts Kits
- Complete DIY Candle Making Kit: All-in-one set with supplies for all levels
- Ideal for Beginners: Includes step-by-step instructions and essentials
- Premium Soy Wax: 100% natural, long-lasting, and aroma-rich
As an affiliate, we earn on qualifying purchases.
As an affiliate, we earn on qualifying purchases.
Gathering Your Supplies and Tools
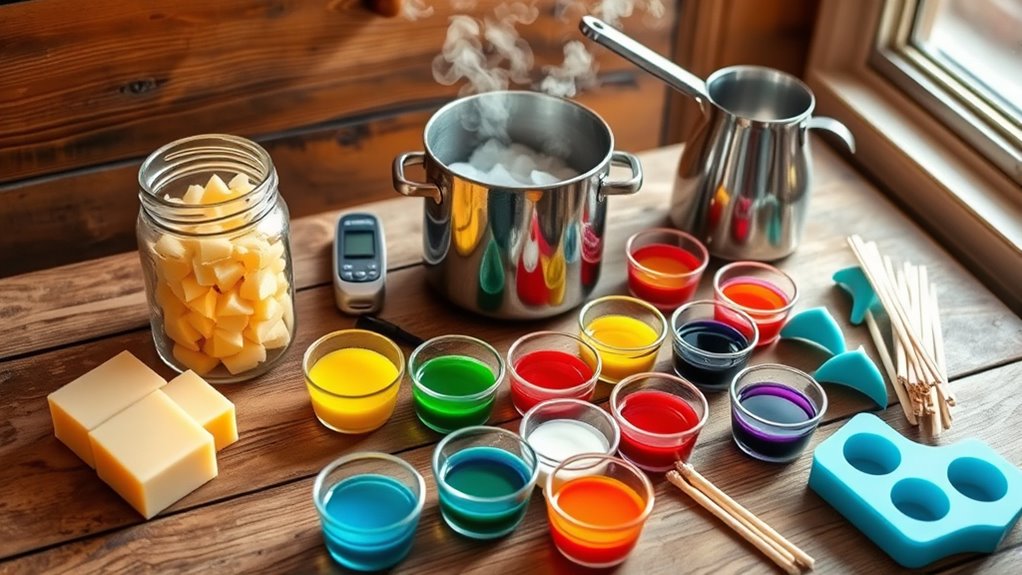
Before you begin making candles, you need to gather all the necessary supplies and tools. Start with basic items like wax, wicks, and containers—think jars or metal tins.
Gather essential supplies such as wax, wicks, and containers to start your candle-making journey.
You’ll also need a double boiler or a heat-safe container to melt the wax safely. A thermometer is essential to monitor the temperature; candles require specific heat levels. Monitoring temperature control is critical to ensure the wax melts properly and the candles set correctly. Incorporating drivetrain maintenance techniques can help ensure the wax melts evenly and prevents issues like uneven curing. Ensuring proper safety precautions during melting and pouring can prevent accidents and injuries.
Keep some stirring sticks or spoons nearby for mixing. Don’t forget safety gear like gloves and eye protection to prevent burns.
Have a scale ready for measuring wax and fragrance oils if you plan to add scent. Additionally, gather any decorative elements or dyes if you want colorful or themed candles.
Once everything’s within reach, you’ll streamline the process and make candle-making smoother and more enjoyable. Understanding the financial impact of entertainment industries can also help you appreciate the value of your craft. Incorporating electric bikes for transporting supplies or visiting workshops can streamline your setup process and reduce effort.
Choosing the Right Wax for Your Candles

Choosing the right wax is a crucial step in making candles that burn well and look beautiful. Your choice affects scent throw, appearance, and burn time. Soy wax is popular for its smooth finish and clean burn, making it ideal for beginners. Paraffin wax offers a glossy surface and excellent scent dispersion but can produce soot. Beeswax provides a natural, fragrant option with a slow, steady burn, perfect if you prefer natural ingredients. Palm wax creates unique crystalline patterns, adding decorative appeal. Consider your candle’s purpose—whether for decoration, scent, or eco-friendliness—and your budget when selecting wax. Each type has distinct melting points and qualities, so choose based on your desired results. Monitoring the quality of your wax and production process can help prevent issues like payment data breaches, ensuring your candles remain safe and reliable. Incorporating sustainable materials into your candle-making process can also enhance your eco-friendly efforts. Understanding the history and evolution of butter can inspire you to explore natural ingredients and sustainable practices in your craft. Being aware of flushing mechanisms can help you troubleshoot common issues during your candle-making process. Additionally, understanding cookie and privacy policies can help you ensure your craft remains compliant with digital safety standards.
Melting the Wax Safely and Effectively
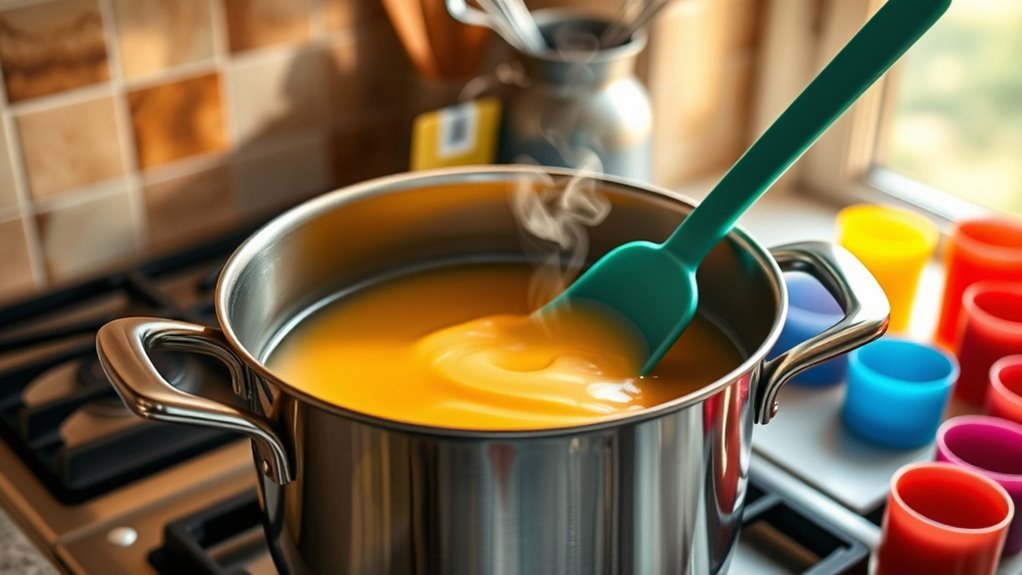
Once you’ve selected the right wax for your project, the next step is melting it safely and effectively. Use a double boiler or a heatproof container placed over a pot of simmering water to melt the wax. Never melt wax directly on the stove, as it can catch fire or overheat. Keep the heat low to prevent splattering or burning. Be aware that essential oils should be added at the right temperature to preserve their properties, so monitor the temperature carefully. Stir gently and occasionally to ensure even melting. Use a thermometer to monitor the temperature; most waxes melt between 170°F and 180°F. Understanding climate control is crucial to prevent accidents during the candle-making process. Proper temperature management helps maintain safety and product quality. Avoid overfilling your melting container to prevent spills. Stay attentive and never leave melting wax unattended to avoid accidents. Once fully melted and smooth, you’re ready to move on to the next step in candle making.
Adding Fragrance and Color to Your Candle Mixture

Now that your wax is melted, it’s time to add fragrance and color. You’ll want to choose the right scent oils to create your desired aroma. Use essential oils such as lavender, eucalyptus, lemon, peppermint, or tea tree for a variety of benefits and scents. Pick candle dyes that suit your color preferences. Carefully selecting these ingredients guarantees your candles turn out both beautiful and beautifully scented. Additionally, consider essential oil blending to create personalized and harmonious fragrance combinations. To ensure your candles have a consistent and appealing appearance, select candle dye quality that yields vibrant and long-lasting colors. Incorporating natural additives like herbs or dried flowers can also enhance the aesthetic and aroma of your candles. Understanding herbal tea for fibromyalgia principles can inspire innovative ways to test the safety and quality of your homemade candles.
Selecting Fragrance Oils
Have you ever wondered how the right fragrance oils can transform your homemade candles? Choosing the right scent is essential for creating the perfect ambiance.
Start by selecting high-quality fragrance oils specifically made for candles; these are designed to blend well with wax and burn cleanly. Incorporating natural materials such as essential oils can also enhance your candle’s aroma and overall quality.
Consider the mood you want to set—lavender for relaxation, citrus for energy, or vanilla for coziness. Vetted fragrance oils, which have been tested for safety and quality, ensure a better burning experience and stable scent throw.
Always check the recommended usage rates on the packaging to avoid overpowering scents or poor burning. Linguistic variations of fragrance names can help you explore different cultural preferences in scents, adding an exotic touch to your candles.
Test small amounts first to see how the fragrance interacts with your wax.
Remember, less is often more; adding too much can affect the candle’s burn quality.
For best results, pay attention to fragrance load and how it influences the scent throw and overall performance of your candles.
With the right fragrance oils, your candles will smell inviting and help create a warm, welcoming atmosphere.
Choosing Candle Dyes
After choosing the perfect fragrance oils, it’s time to add color to your candles with candle dyes. You have options like liquid dyes, dye blocks, or powders. Start with a small amount—less is more—to avoid overpowering the scent or ending up with a muddy color. Melt the dye into your melted wax, stirring thoroughly to ensure even distribution. Keep in mind that colors will deepen as the wax cools. To help you decide, here’s a quick guide:
| Dye Type | Best For |
|---|---|
| Liquid Dyes | Precise color control |
| Dye Blocks | Easy to use, versatile |
| Powder Dyes | Bright, vibrant colors |
| Chips | Consistent, slow melting |
Choose the dye type that best fits your project and desired hue!
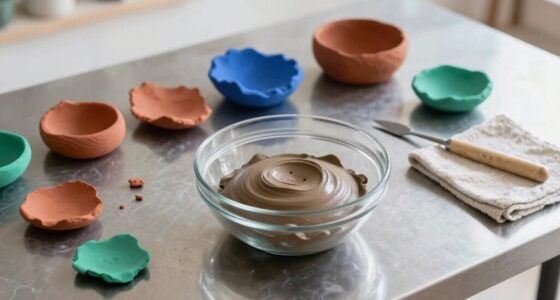
Preparing Your Candle Containers

Selecting the right container is essential for creating beautiful, well-burning candles. You want a container that’s heat-resistant and sturdy enough to hold the wax as it melts.
Clean it thoroughly to remove dust, oil, or residue that could affect adhesion or burning. If you’re reusing a jar or container, wash it with warm soapy water and dry completely.
Consider the size and shape of your candle—your container should match your desired wax amount and style. Ensure the opening is wide enough for easy pouring and wick placement.
If needed, tape the outside of the container to support the wick and prevent tipping. Preparing your containers properly helps ensure your candles burn evenly and look professional.
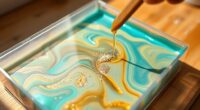
Pouring the Wax Into Molds or Containers

Once your wax has fully melted and reached the appropriate temperature, carefully pour it into your prepared molds or containers. Hold the pouring vessel steady to prevent spills and uneven fills. If you’re using a pouring pitcher, pour slowly to control the flow and minimize splashing.
Leave a small gap at the top of each mold or container to allow space for any expansion as the wax cools. Keep your workspace clean by wiping away any drips immediately.
If you’re adding fragrance or color, do so during the pouring process, stirring gently to evenly distribute. Be mindful of air bubbles; if you notice any, gently tap the mold or container to release them.
Take your time to ensure a smooth, even fill for the best-looking candles.
Setting and Cooling Your Candles

Setting and cooling your candles properly is essential to achieve a smooth, even surface and an even burn. Once you’ve poured the wax into your mold or container, let it cool at room temperature. Avoid moving or disturbing the candle during this time, as shifting can cause cracks or uneven surfaces.
If you rush the cooling process by placing your candles in the fridge or freezer, you risk surface imperfections or cracking due to rapid temperature changes. Instead, leave the candles undisturbed for several hours or until they’re completely cooled and solidified.
Proper cooling helps the wax set evenly and prevents imperfections. After cooling, you can proceed with trimming the wick and adding final touches for a professional finish.
Trimming Wicks and Final Touches
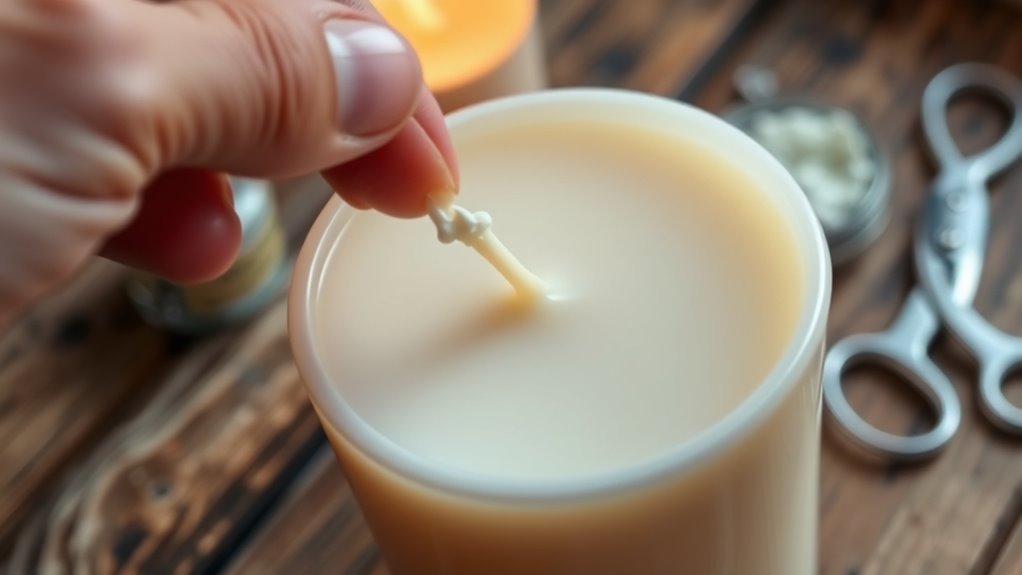
After your candle has cooled completely, it’s important to trim the wick to the right length. Aim for about ¼ inch (6 mm) to guarantee a clean, steady flame without flickering or excessive soot. Use sharp scissors or wick trimmers to make a clean cut.
If the wick is too long, it can cause uneven burning or soot buildup, so trimming regularly helps maintain your candle’s quality. Before lighting, double-check the wick for any debris or loose fibers and remove them.
This final step not only improves the candle’s appearance but also promotes safer, more efficient burning. Once trimmed, you can add any finishing touches, like smoothing the surface or cleaning the jar, to give your homemade candle a polished look.
Tips for Customizing Your Homemade Candles
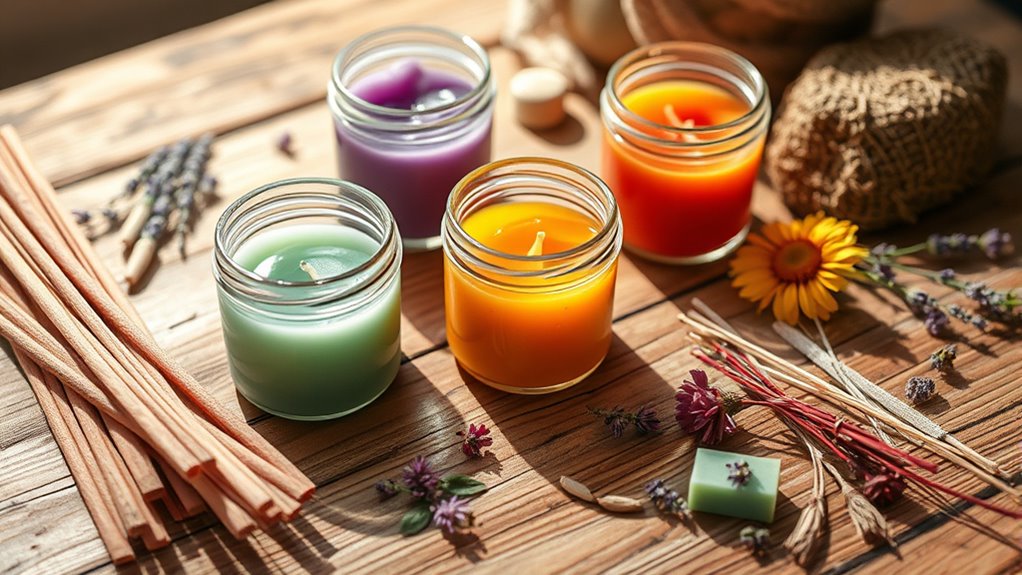
Customizing your homemade candles allows you to create unique designs that reflect your personal style. You can experiment with colors, scents, and decorative elements to make each candle special. Adding dried herbs, flowers, or glitter can give your candles a distinctive look. Using different molds or layering wax colors creates visual interest. You might also embed small items, like charms or shells, for a personalized touch. Keep in mind that some decorations may affect burning performance, so choose wisely. To help organize your ideas, here’s a quick guide:
| Customization Tips | Examples |
|---|---|
| Color and scent blending | Swirling dyes, essential oils |
| Decorative elements | Dried flowers, glitter |
| Embedding objects | Charms, shells |
| Layering techniques | Multi-colored layers |
Troubleshooting Common Candle-Making Issues

You might encounter issues like wax dripping or uneven burn, but these can usually be fixed with simple adjustments.
Scent throw problems often stem from incorrect wax or fragrance ratios, so tweaking those can make a difference.
Tunneling candles happen when the wax melts only in the center, but you can prevent this by burning the candle long enough and ensuring a proper initial melt pool.
Wax Dripping Problems
Wax dripping can be a frustrating issue when making candles at home, but understanding its causes can help you fix the problem. Dripping often occurs when the wax cools too slowly or isn’t at the right temperature. It may also happen if your wick is too large, causing excess wax to melt and spill over the sides. To prevent dripping, keep your wax temperature steady, usually around 170-180°F (77-82°C), and trim your wick properly.
| Issue | Cause | Solution |
|---|---|---|
| Excessive dripping | Wicks too large | Use a smaller wick |
| Wax cooling too slowly | Low ambient temperature | Work in a warmer environment |
| Uneven wax flow | Improper pouring temperature | Maintain consistent melt temp |
| Dripping after cooling | Surface not level | Ensure candle is on a flat surface |
| Wicks not centered | Improper wick placement | Center wick before pouring |
Scent Throw Issues
Scent throw issues can be frustrating because even when your candle looks perfect, it mightn’t fill the room with fragrance as expected. This often happens if the wax blend doesn’t hold scent well or if you didn’t add enough fragrance oil.
To improve scent throw, use high-quality fragrance oils designed for candles, and follow the recommended usage rates. Make sure to mix the scent thoroughly into the wax at the right temperature—usually around 185°F (85°C).
Also, curing your candles for at least a few days allows the fragrance to fully develop. If your candle still doesn’t smell strongly enough when lit, try increasing the fragrance oil slightly or experimenting with different wax types, such as soy or paraffin, which can influence scent throw.
Candle Tunneling
Candle tunneling occurs when the wax melts only in the center, leaving a ring of unmelted wax around the edges. This happens when the burn time isn’t long enough for the wax to melt evenly across the surface.
To prevent tunneling, always allow your candle to burn for at least 1-2 hours per inch of diameter during the first few burns. It helps create a memory burn, encouraging the wax to melt evenly in subsequent uses.
Additionally, trimming the wick to about ¼ inch before each burn reduces excessive flame height, which can cause uneven melting. Remember, proper wick size, initial burn time, and trimming are key to avoiding tunneling and ensuring a clean, even burn throughout your candle’s life.
- Consistent burn time promotes even wax melting.
- Proper wick size prevents excessive tunneling.
- Regular trimming maintains a clean, even burn.
Frequently Asked Questions
Can I Make Scented Candles With Essential Oils Instead of Artificial Fragrances?
Yes, you can definitely make scented candles with essential oils instead of artificial fragrances. Just keep in mind that essential oils are more concentrated, so start with a small amount and adjust to your scent preference.
They also add natural benefits and a pleasant aroma. Be patient as some scents may fade faster, and always guarantee you blend the oils well into the wax for an even scent distribution.
What Safety Precautions Should I Take When Working With Hot Wax?
When working with hot wax, you should always prioritize safety. Keep a fire extinguisher nearby, never leave melting wax unattended, and use heat-resistant gloves to prevent burns.
Work in a well-ventilated area to avoid inhaling fumes, and keep flammable objects away from your workspace.
Use a thermometer to monitor the temperature, and handle wax carefully to prevent spills or splashes that could cause injuries.
How Do I Create Layered or Multi-Colored Candles at Home?
You can create layered or multi-colored candles by pouring wax in stages, letting each layer cool slightly before adding the next. Start with your base color, then pour the next layer after the first cools to the touch.
Use a heat gun or hairdryer to smooth progressions. Experiment with different colors and textures, and remember, patience turns simple wax into a stunning work of art.
How Long Do Homemade Candles Typically Last Before Burning Out?
Homemade candles usually last between 20 and 50 hours of burning time, depending on their size, wax type, and wick.
You can extend their lifespan by trimming the wick regularly and keeping the candle away from drafts.
Proper storage in a cool, dry place also helps preserve the candle’s quality.
With good care, your homemade candles can provide many cozy, warm moments before they burn out.
Can I Recycle Candle Wax From Used Candles for New Creations?
Absolutely, you can recycle candle wax from used candles for new creations. Start by removing any remaining wick and debris.
Then melt the wax gently using a double boiler or microwave. Strain the melted wax to remove impurities, and pour it into your new mold or container.
Recycling wax not only saves money but also reduces waste, making your candle-making process more eco-friendly and enjoyable.
Conclusion
Making candles at home is like planting seeds of creativity—you nurture them with care, and they bloom into beautiful, glowing decorations. With the right supplies, patience, and a bit of practice, you’ll craft unique candles that brighten your space and spirit. Remember, each mistake is just a drop of wax in your journey toward mastery. Keep experimenting and let your imagination illuminate your world, one candle at a time.