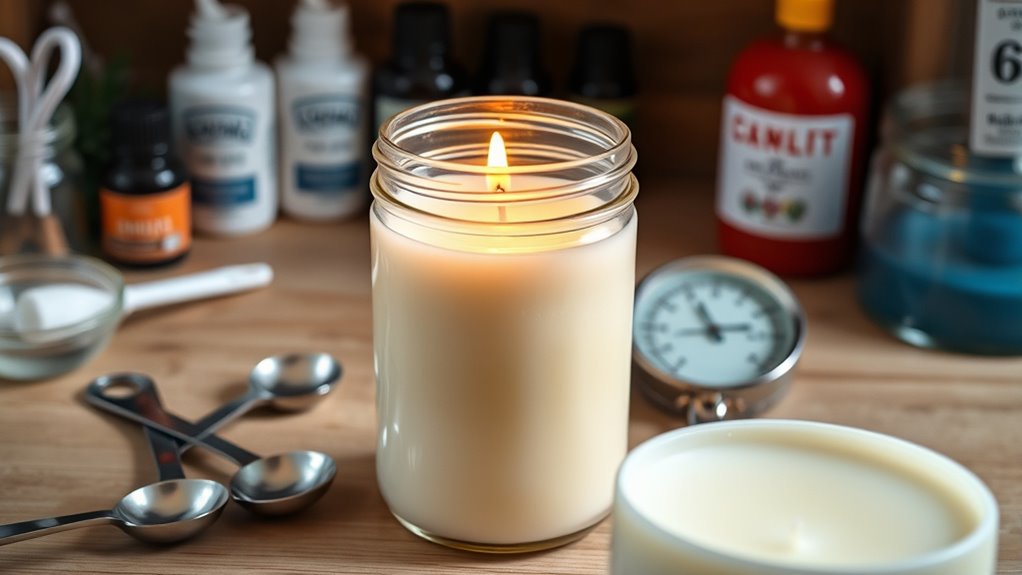
To create beautiful candles, choose the right wax like soy or paraffin and control your temperature between 160-170°F for a smooth finish. Select a wick that fits your container to guarantee a clean, even burn, and trim it properly before each use. Melt and pour your wax at safe temperatures, adding fragrance and color carefully. Use steady pouring techniques and avoid rushing to prevent surface flaws. Keep safety in mind, and you’ll soon master the art of candle making.
Key Takeaways
- Choose the right wax type and maintain proper pouring temperatures (160-170°F) for a smooth, professional finish.
- Match wick size and material to your wax and container to ensure even burning and safety.
- Use a double boiler for melting and temper wax correctly to avoid surface imperfections.
- Add fragrance oils and color at recommended temperatures (~185°F) and stir thoroughly for even distribution.
- Always trim wicks, place candles on heat-resistant surfaces, and never leave burning candles unattended.

SAEUYVB Candle Making Kit with Wax Melter, Candle Making Kit for Adults – DIY Starter Soy Candle Making Kit/Supplies-Perfect as Home Decoration
- Complete Candle Making Supplies: Includes wax, wicks, dyes, and more
- Ideal for Beginners: Detailed, easy-to-follow instructions included
- Premium Soy Wax: All-natural, clean-burning soybean wax
As an affiliate, we earn on qualifying purchases.
As an affiliate, we earn on qualifying purchases.
Choosing the Right Wax for Your Candles

Choosing the right wax is essential for making candles that burn well and look beautiful. You want a wax that melts evenly, holds fragrance well, and creates a smooth finish. Paraffin wax is popular for its versatility and shiny appearance, but soy wax is a great eco-friendly alternative that burns cleaner. Beeswax offers a natural scent and golden hue, perfect for a rustic look. Palm wax gives a unique crystalline texture, while coconut wax provides a soft, creamy finish. Considering the environmental impact and sustainability of your wax choices can also influence your selection, especially as consumers become more aware of Kia Tuning and eco-friendly options. Check the melting point—some waxes require more heat to liquefy. Picking the right wax ensures your candles are both attractive and functional, giving you a satisfying crafting experience. Being aware of onboard experience and the different types of waxes available can help you make informed decisions for your candle-making projects. Additionally, understanding the best waxes for candle making can lead to superior results and a more enjoyable crafting process.
Selecting Quality Wicks for a Clean Burn
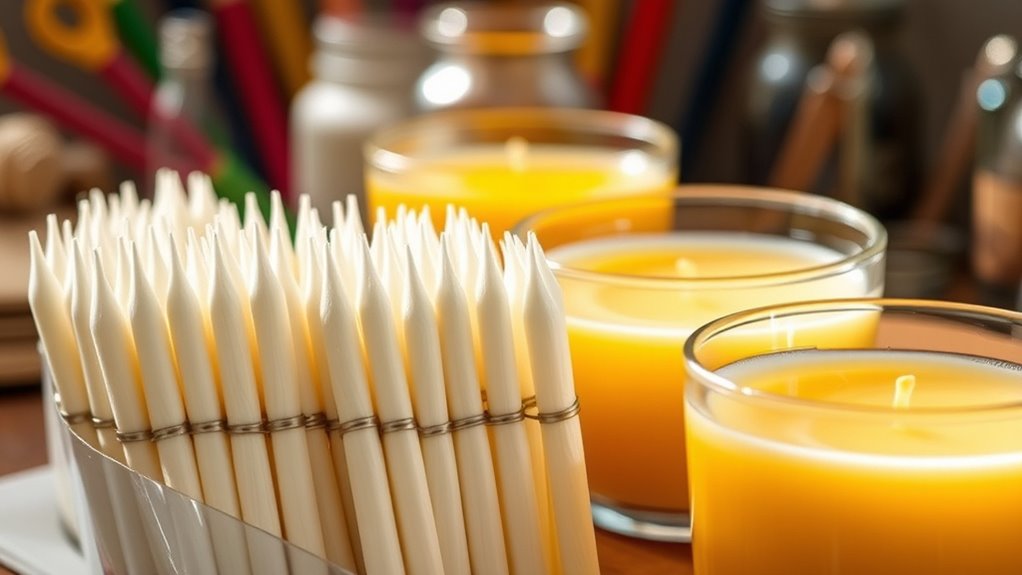
Choosing the right wick material and size is essential for a clean, even burn. You need to match the wick to your candle’s wax and container to prevent soot or tunneling. Additionally, selecting the appropriate wick can influence the overall burning performance and safety of your candle, much like choosing the right motor power and design impacts an electric bike’s speed and efficiency electric motor specifications. Proper wick selection also involves considering the best support hours, which can ensure you get assistance if you encounter issues during your candle making process. Being aware of sustainable practices in candle making can also help you choose eco-friendly materials that support long-term safety and environmental health. Moreover, understanding the retail hours of craft stores can help you plan your shopping trips for supplies more effectively. Incorporating environmentally friendly wick materials can further enhance the sustainability of your candle making process.
Wick Material Choices
Have you ever wondered why some candles burn cleanly while others produce soot or tunnel? Wicker material plays a vital role in a candle’s performance.
Cotton wicks are popular because they burn evenly and produce minimal soot, making them ideal for most container candles.
Wood wicks create a crackling effect and a strong flame, but they require careful selection to prevent uneven burning.
Paper wicks are less common but can work well for small or simple candles.
The key is choosing a wick material that matches your wax type, container size, and fragrance load.
Selecting high-quality wicks guarantees a steady, even burn, reduces soot, and prevents tunneling. Additionally, understanding the diversity of wick materials and their specific characteristics can help improve your candle’s performance and safety.
Considering the cost of different wick types and their durability can help you make more informed choices for your candle-making projects.
Proper wick selection is also essential for safe candle burning and reducing potential hazards during use.
AI security advancements highlight the importance of selecting appropriate materials and safety measures in candle making to ensure a safe and reliable burn.
Proper Wick Sizing
Selecting the right wick size is essential for ensuring a clean, even burn and preventing issues like tunneling or excessive soot. A wick that’s too small won’t melt the wax evenly, while one that’s too large may cause overflowing or smoking. To find the perfect fit, consider the candle’s diameter and wax type. Additionally, understanding WWE Raw’s financial impact can help you appreciate the importance of proper candle-making techniques in creating a successful product. Using the correct wick can also influence the candle’s overall safety, reducing the risk of flare-ups or uneven burning that could pose hazards.
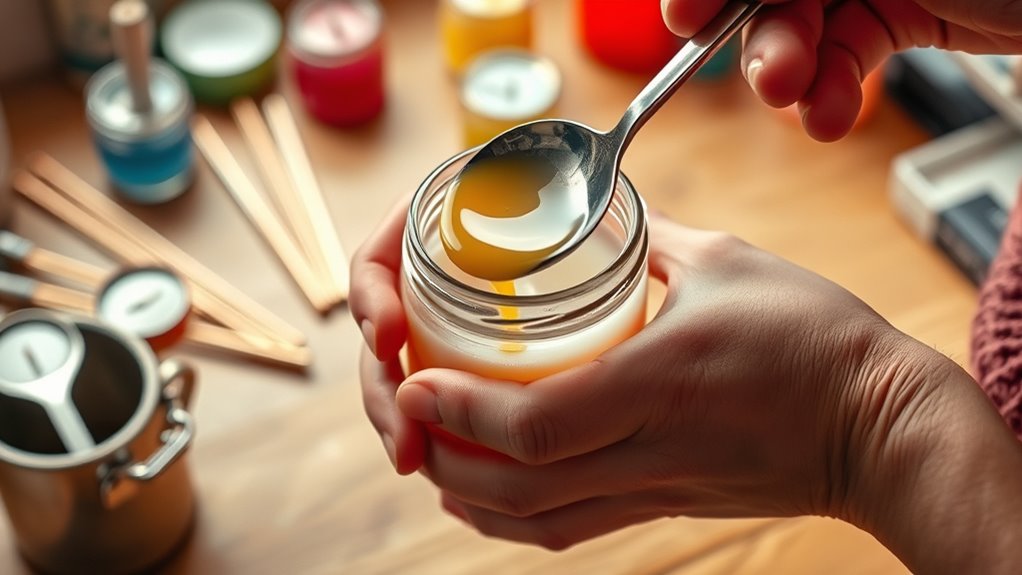
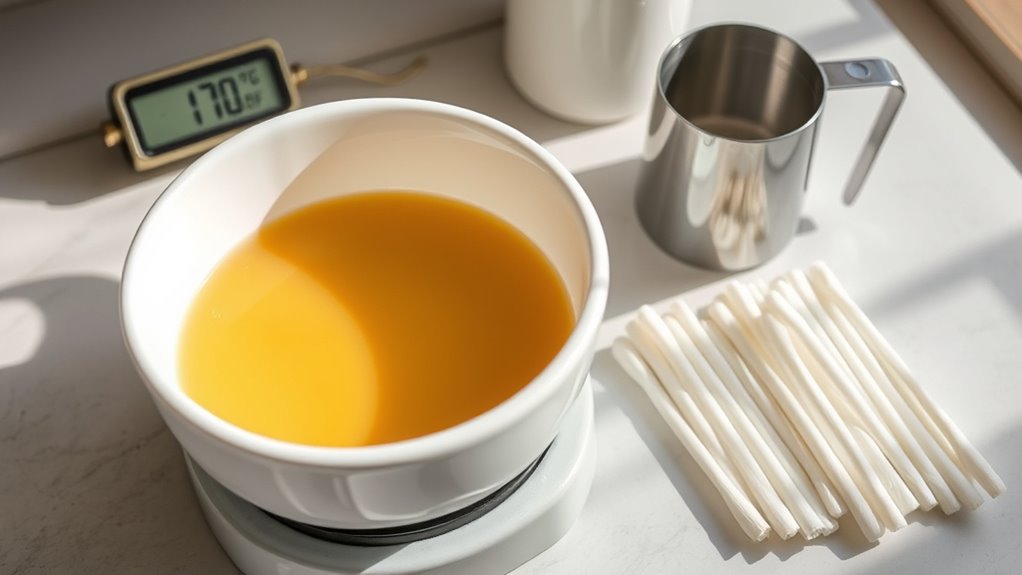
Properly Melting and Tempering Your Wax

To melt your wax properly, use a double boiler to prevent direct heat and reduce the risk of burning. Keep a close eye on the temperature, aiming for a smooth, even melt without overheating. Achieving the right consistency guarantees your candle will have a professional finish and burn evenly. Incorporating a temperature-controlled process can help maintain optimal wax melting conditions for the best results. Additionally, monitoring keto diet tracking ensures you stay on target with your goals and maintain proper nutrient intake during your candle-making process. Being aware of privacy policies and cookie management options can also help ensure your online shopping and research are secure and tailored to your preferences.
Use a Double Boiler
Using a double boiler is the safest and most effective way to melt and temper your wax evenly. Fill the bottom pot with water and bring it to a gentle simmer. Place your wax in the top pot or a heat-safe bowl, making sure it doesn’t touch the water. The indirect heat prevents scorching and allows you to control the temperature better. Stir the wax gently as it melts to promote even heating. Keep an eye on the water level to avoid boiling dry, which could cause the wax to overheat. Using a double boiler also minimizes the risk of hot spots that can cause uneven melting. This method ensures your wax reaches a smooth, uniform consistency, ready for pouring and candle making. Incorporating mindfulness techniques into your candle-making process can help you stay focused and present, improving your overall craftsmanship. Additionally, maintaining a calm environment can enhance your creative flow and ensure a more enjoyable experience. Being aware of your wax temperature throughout the process can further prevent overheating and ensure optimal results. Regularly monitoring the melting process can also help prevent accidental burns or spills, making your candle-making safer.
Maintain Correct Temperature
Maintaining the correct temperature is essential for producing high-quality candles. If your wax gets too hot, it can burn or develop a dull finish, while too cool a temperature may cause uneven melting or poor adhesion of additives. Use a reliable thermometer to monitor the wax’s temperature closely. Proper temperature control is also important for sound healing science, as specific frequencies can influence cellular regeneration and overall health. When melting, keep the temperature around 170-180°F (77-82°C), depending on the wax type. During pouring, some waxes require a specific temperature—often between 160-170°F (71-77°C)—to ensure a smooth surface. Avoid rushing the process by adding fragrance or dye too early or too late, as this can affect the final appearance. Consistent temperature control helps you achieve a cleaner pour, better scent throw, and a polished finish on your candles.
Achieve Smooth Consistency
Achieving a smooth candle surface begins with properly melting and tempering your wax. Start by using a double boiler or melting pot to heat your wax slowly, maintaining a consistent temperature. Use a thermometer to monitor the wax, ensuring it reaches the ideal melting point without overheating.
Once melted, gently stir the wax to eliminate air bubbles and promote even consistency. Tempering your wax involves cooling it to the right temperature before pouring; this helps reduce surface imperfections and promotes a sleek finish.
Avoid rushing the process or pouring at too high a temperature, as both can cause uneven surfaces or cracks. With careful melting and tempering, you’ll create a smooth, professional-looking candle surface every time.
Adding Fragrance and Color Safely
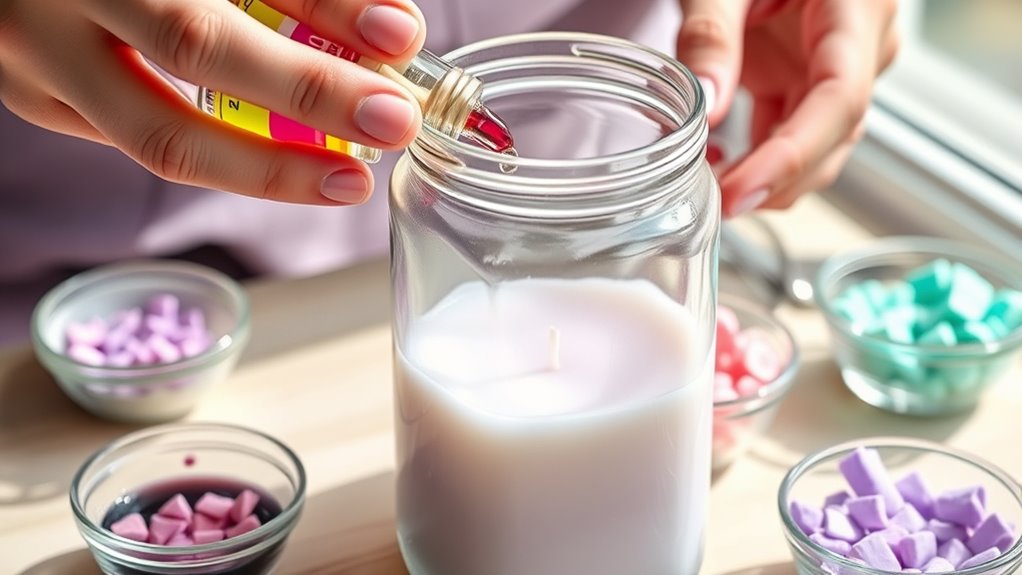
To add fragrance and color to your candles safely, it’s essential to follow proper techniques and guidelines.
First, always use fragrance oils specifically designed for candle making, as others can cause uneven burning or safety hazards. Measure your fragrance precisely, typically around 6-10% of the wax weight.
When adding color, opt for candle dyes or color blocks, and melt them thoroughly into the wax to prevent clumping. Avoid over-coloring, which can affect burn quality.
Keep the wax at the recommended temperature before adding fragrance and color—usually around 185°F (85°C). Always stir gently to ensure even distribution.
Finally, work in a well-ventilated area to avoid inhaling fumes, and never add fragrance or color to hot wax directly from the heat source.
Mastering the Pouring Technique
Mastering the pouring technique is essential for creating candles with a smooth, professional finish. To achieve this, ensure your wax is at the right temperature—usually between 140°F and 150°F—before pouring.
Pour slowly and steadily, aiming to fill the container without spilling or creating air bubbles. Keep your wick centered and upright as you pour, which helps maintain a clean, even surface.
If you notice bubbles forming, gently tap the sides of the container to encourage them to escape. Pouring in layers or multiple pours? Allow each layer to cool slightly to prevent cracking or sinking.
Practice patience and focus on consistency; these small adjustments make a big difference in the overall look of your finished candle.
Avoiding Common Candle Making Mistakes
One of the most common mistakes in candle making is using the wrong wax or not measuring ingredients accurately, which can affect the candle’s appearance and burn quality. If you choose the wrong wax type, your candle may not melt or burn properly, leading to tunneling or uneven burning.
Accurate measurements are essential—use a kitchen scale for precise ingredient ratios to prevent issues like sinkholes or cracking. Avoid rushing the process; rushing can cause improper curing or poor adhesion of the wax.
Also, don’t ignore the importance of temperature control during melting and pouring, as inconsistent temperatures can lead to surface imperfections. By paying attention to these details, you’ll create cleaner, better-burning candles and avoid common pitfalls that can ruin your efforts.
Ensuring Candle Safety and Burn Quality
Choosing the right wax and measuring ingredients carefully helps prevent common candle-making issues, but guaranteeing safety and burn quality requires additional attention.
Always trim your wick to about a quarter inch before each use to prevent uneven burning or soot. Place your candle on a heat-resistant surface and never leave it unattended while burning. Keep the flame away from drafts, curtains, or other flammable objects to avoid accidents.
Fill your container no more than ¾ full to allow proper airflow and prevent wax spills. Use a thermometer to monitor the melt pool and ensure it stays below the flash point of the wax.
Packaging and Storing Your Handmade Candles
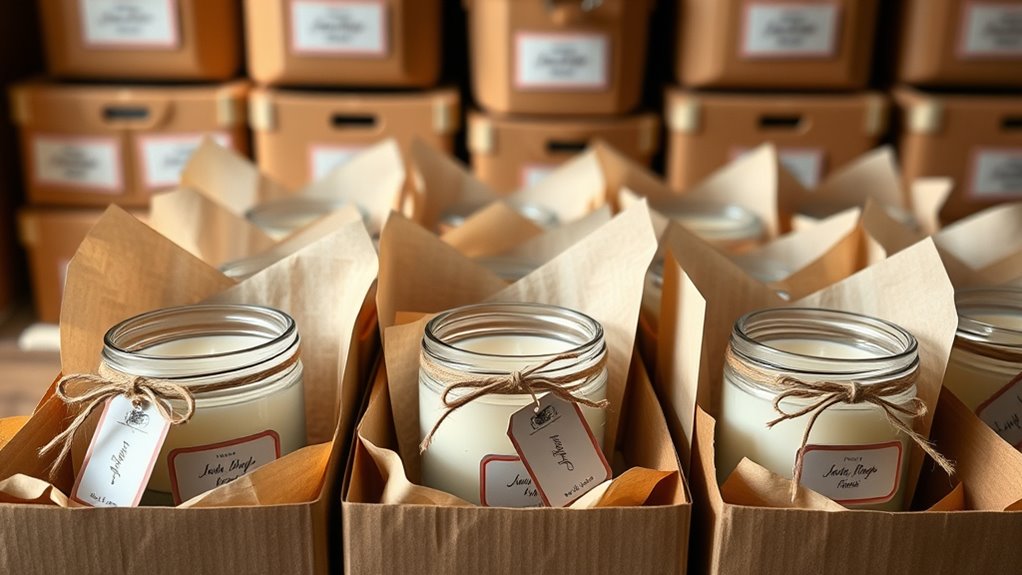
Proper packaging and storage are essential to keep your handmade candles in top condition. Well-packed candles prevent damage, preserve scent, and maintain their appearance. Use sturdy boxes or containers to shield your candles from dust and impacts. Wrap individual candles in tissue paper or bubble wrap to prevent scratching or chipping.
Store candles in a cool, dry place away from direct sunlight, which can cause discoloration and melting. Consider labeling your candles with the scent and date made for easy identification.
Here are some tips to keep in mind:
- Use airtight containers for scented candles to preserve fragrance
- Keep candles upright to prevent warping or breaking
- Avoid storing near heat sources or in humid areas
Frequently Asked Questions
How Do I Troubleshoot Uneven Burning or Tunneling?
When you notice uneven burning or tunneling in your candles, it’s usually due to an improper wick size or uneven wax melting.
To fix this, trim the wick to about a quarter inch before each burn, and let the wax pool completely to the edges during the first burn.
Keep the candle away from drafts, and if tunneling persists, re-melt the top layer to even out the wax surface.
What Are Eco-Friendly Alternatives to Traditional Candle Wax?
You can choose eco-friendly alternatives to traditional candle wax like soy, beeswax, or coconut wax. Soy wax is renewable and burns cleaner.
Beeswax is natural and purifies the air.
Coconut wax is sustainable and often blends well with other natural waxes.
These options not only reduce environmental impact but also provide a healthier burning experience, making your candles more eco-conscious and better for the planet.
How Can I Prevent Fragrance Fading Over Time?
To prevent fragrance fading over time, you should store your candles in a cool, dark place away from direct sunlight and temperature fluctuations.
Make sure to use high-quality fragrance oils and add them at the right temperature during pouring.
Avoid burning your candles for too long and trim the wick regularly.
Proper curing, typically for a few days to a week, also helps lock in the scent for longer-lasting aroma.
What Tools Are Essential for a Beginner Candle Maker?
Imagine building a sturdy ship—you need the right tools to navigate smoothly. For a beginner candle maker, essential tools include a double boiler or melting pot to guarantee safe wax melting, a thermometer to keep temperatures in check, and stirring sticks for even mixing.
You’ll also want a scale for precise measurements, candle wicks, and molds. These tools are your compass, guiding you toward successful and beautiful candles.
How Do I Create Custom Shapes or Molds Safely?
To create custom shapes or molds safely, start by choosing heat-resistant silicone or metal molds.
Always wear gloves and eye protection when pouring hot wax.
Pour carefully to avoid splashes, and keep your work area well-ventilated.
Allow the wax to cool completely before removing the candle from the mold.
Clean your molds thoroughly after each use to maintain their shape and safety for future projects.
Conclusion
Remember, practice makes perfect, so don’t get discouraged if your first few candles aren’t flawless. Keep experimenting with different waxes, wicks, and fragrances, and you’ll improve each time. Safety should always come first, so follow proper procedures and store your candles carefully. As the saying goes, “A journey of a thousand miles begins with a single step.” Stay patient, keep learning, and soon you’ll be creating beautiful, professional-quality candles you can be proud of.