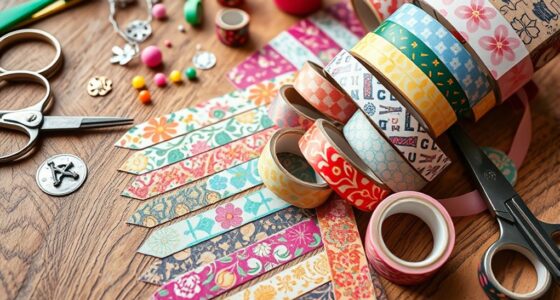

If you want to craft fun and personalized bookmarks, try wrapping washi tape around a paperclip to make a colorful clip, or attach a favorite quote magnet to mark your spot without damaging pages. You can also create tassel and bead bookmarks for a stylish touch, fold origami paper into unique shapes, or decorate cardboard with pressed leaves and embroidery for a natural look. For more creative ideas, keep exploring these fun techniques!
Key Takeaways
- Create personalized bookmarks using washi tape and paperclips for colorful, functional designs.
- Make magnetic or button ribbons with favorite quotes and charms for easy page marking.
- Craft tassel, bead, felt flower, or origami paper bookmarks for decorative and textured options.
- Use recycled fabric and cardboard, adding embroidery or embellishments for eco-friendly, stylish bookmarks.
- Incorporate natural elements like pressed leaves or vintage buttons for nature-inspired, unique bookmarks.

APZDFGIFCD PVC Washi Cards,Storage Bookmark Washi Tape Separate Office School Supplies 40 pcs
- Material: PVC matte with transparent sections
- Portability: Compact and easy to carry
- Convenience: Wraps around dispensing plate for storage
As an affiliate, we earn on qualifying purchases.
As an affiliate, we earn on qualifying purchases.
Paperclip and Washi Tape Bookmark

Have you ever thought about turning a simple paperclip into a charming bookmark? It’s easy and quick. Grab a sturdy paperclip and your favorite washi tape. Wrap the tape around the top or side of the paperclip, creating a colorful border. You can layer different patterns or colors for a fun, personalized look. If you want, add small embellishments like stickers or tiny charms to the tape for extra flair. Once you finish wrapping, press down the tape to guarantee it sticks well. Now, your paperclip bookmark is ready to mark your spot in any book. This simple craft not only keeps your pages intact but also adds a pop of personality to your reading experience. Incorporating creative techniques can further personalize your bookmark and make it a reflection of your style. Exploring DIY projects can inspire more unique ideas for your reading accessories. Regularly assessing and revisiting your belongings can help maintain an organized and clutter-free reading space. Additionally, understanding contrast ratio and how it affects image quality can be beneficial if you plan to set up a home theater or display area for your collection.
Bookish Quote Magnet Bookmark
A bookish quote magnet bookmark combines inspiration with practicality, making it a delightful accessory for any reader. You simply attach a small magnet to each side of a favorite quote or phrase, allowing it to cling securely to your page. This keeps your place without damaging the paper and offers motivation every time you open your book. To make it more personalized, choose quotes that resonate with you. Here’s a quick look at some popular themes:
| Theme | Quote Example | Magnet Type |
|---|---|---|
| Inspiration | “Read, Dream, Repeat” | Neodymium Magnet |
| Humor | “Just One More Chapter” | Flat Magnet |
| Wisdom | “Knowledge is Power” | Clip Magnet |
| Adventure | “Escape into a New World” | Decorative Magnet |
| Friendship | “Books & Friends Make Life Better” | Magnetic Bookmark |
This DIY project adds a personal touch to your reading routine.
Tassel and Bead Bookmark

Ever wondered how to add a touch of elegance and personality to your reading routine? A tassel and bead bookmark is perfect for that. To make one, gather embroidery floss, small beads, and a charm or decorative element. Cut several strands of floss, then thread beads onto each strand before gathering them together. Tie a secure knot at the top, leaving enough length for a tassel. To create the tassel, wrap the remaining floss around your fingers or a small card, then tie it off at one end and trim for a neat finish. Attach the tassel to the knotted top of your bookmark, adding a charm if desired. This simple craft results in a beautiful, personalized accessory that keeps your place while elevating your reading experience. Additionally, choosing high-quality materials can ensure your bookmark lasts longer and maintains its appearance over time. Incorporating durable supplies can further enhance the longevity of your handmade bookmark.
Origami Paper Bookmark
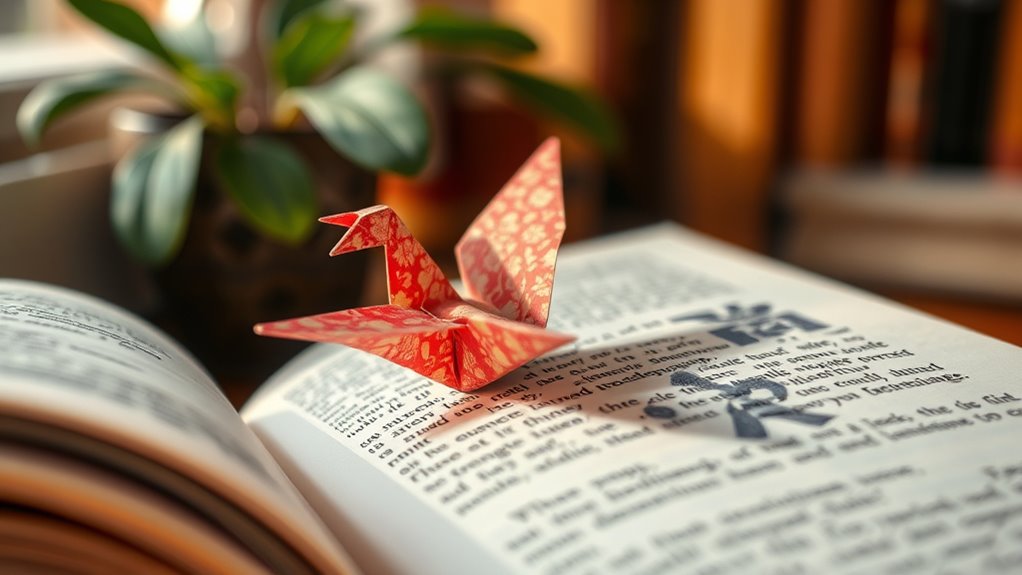
Creating an origami paper bookmark is a fun and practical way to add a personal touch to your reading accessories. You can craft a unique, foldable marker using simple techniques. To get started, choose colorful or patterned paper that matches your style. Follow these steps for a perfect fold:
- Fold the paper in half diagonally, creating a triangle.
- Fold the top corners down to the point at the bottom.
- Fold the bottom flap upwards, tucking it into the pocket.
- Flatten all creases to finish your bookmark. Incorporating creative techniques can make your bookmark even more personalized and unique. Exploring different origami folding methods can help you develop new designs and styles for your bookmarks. Being aware of family influences is important when personalizing your craft projects, as it can inspire unique design elements. Additionally, understanding crochet styles for locs can inspire textured designs or embellishments for your bookmarks, adding a tactile element to your craft. Considering air purifier features and technology can also inspire innovative design ideas, such as incorporating layers or textures into your paper crafts to enhance their visual appeal.
Personalized Photo Bookmark
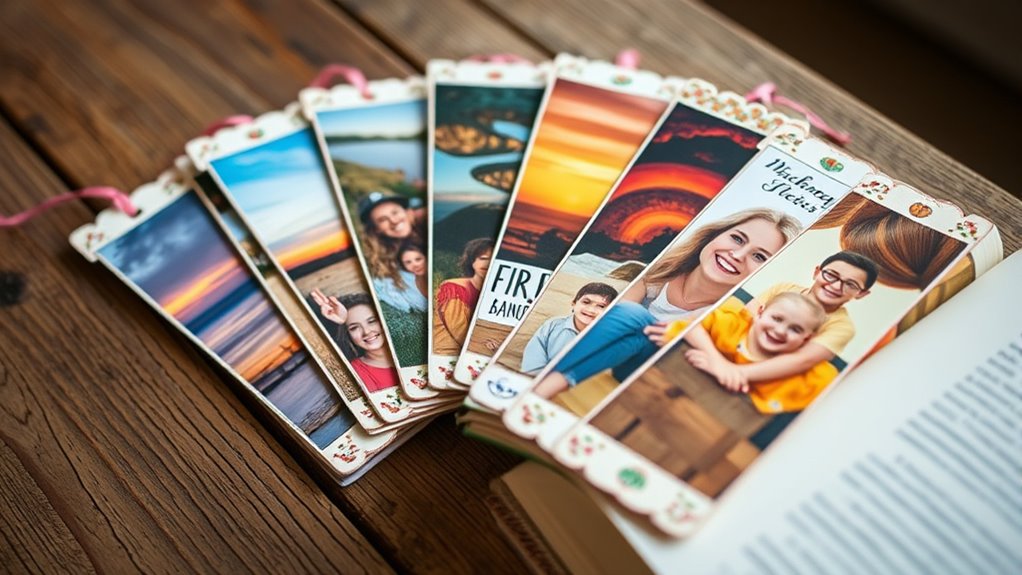
Adding a personal touch to your reading experience becomes easy with a personalized photo bookmark. Choose a favorite photo—like a special memory, a pet, or a loved one—and print it in a size that fits your bookmark. Laminate the photo to protect it from wear and tear, ensuring it lasts through many books. You can attach a ribbon or a tassel at the top for easy marking and added charm. This DIY project is simple and meaningful, making each reading session more special. Plus, it’s a great way to showcase your favorite moments while keeping your place in your current book. Creating a customized accessory can also reflect your unique style and interests. With just a few materials, you create a unique accessory that reflects your personality and love for reading. Incorporating personalized designs can further enhance the charm and individuality of your bookmark. Additionally, using book-related themes can make your bookmark more captivating and aligned with your literary interests. Exploring Bitcoin-themed graphics or symbols could add a modern twist to your personalized creation.
Felt Flower Bookmark
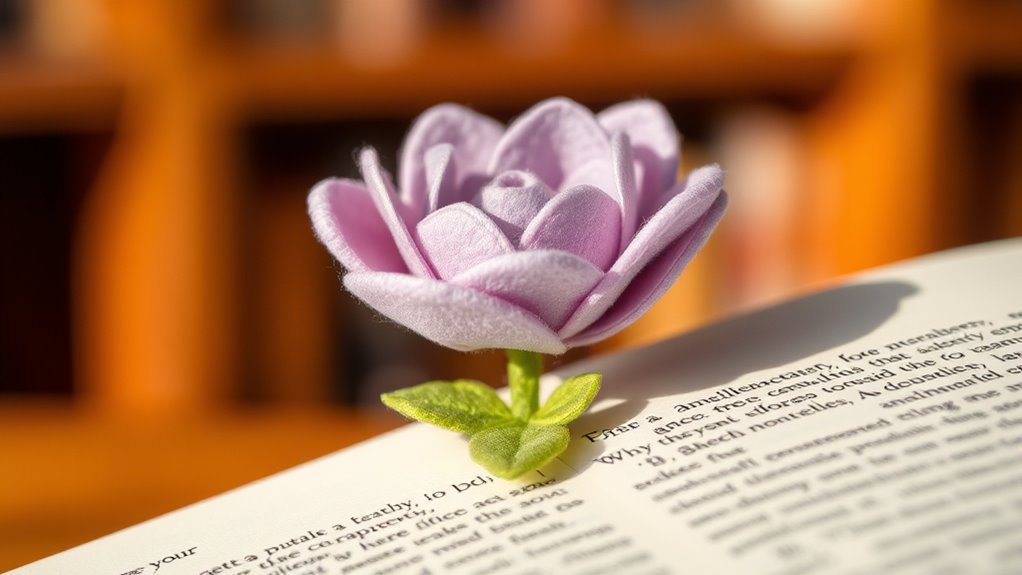
A felt flower bookmark is a charming way to add a touch of elegance to your reading. Its soft felt material makes it comfortable to hold, while the easy crafting steps let you create it quickly. Plus, the decorative flower design adds a lovely, personalized finish to your favorite books. Incorporating textile art techniques in your craft projects can make your bookmarks stand out even more. Understanding DIY crafting methods can help you customize your designs and achieve professional-looking results. Using eco-friendly materials like sustainably sourced felt can further enhance your commitment to eco-friendly living.
Soft Felt Material
Soft felt material is perfect for crafting delicate and colorful flower bookmarks. Its velvety texture makes it easy to cut and shape, allowing you to create charming designs that stand out. Felt’s flexibility means you can layer colors, add details, and customize your bookmark effortlessly. Plus, it’s durable enough to withstand frequent use without fraying or tearing. Using soft felt also means you won’t need glue or sewing for many designs, simplifying the process. Whether you prefer bold or pastel shades, felt offers endless color options to match your style.
Here are four standout features of soft felt material:
- Easy to cut and shape for intricate designs
- Soft texture adds a cozy feel to your craft
- Available in vibrant colors for personalization
- Durable for long-lasting bookmarks
Easy Crafting Steps
Ready to create a charming felt flower bookmark? First, cut a rectangular piece of felt for the base. Then, cut petal shapes from different colored felt pieces. To assemble, position the petals in a layered circle, securing them with hot glue. Next, attach a small felt circle in the center to form the flower’s core. Finally, glue the flower onto the bookmark base and add a ribbon or string for extra flair.
Here’s a visual to guide you:
| Step | Description |
|---|---|
| 1 | Cut felt base and flower petals |
| 2 | Layer petals and glue together |
| 3 | Attach flower to bookmark base |
| 4 | Add ribbon or string for charm |
Decorative Flower Design
Creating a decorative felt flower adds a charming and personalized touch to your bookmark. It’s a simple way to make your reading accessories stand out. To craft your felt flower, start by choosing vibrant felt colors and cutting petal shapes. Then, layer and glue the petals together to form a full bloom. Adding a small felt leaf enhances the natural look. Finally, attach the flower securely to your bookmark base.
Here are some ideas to elevate your design:
- Use contrasting colors for petals and leaves for visual interest
- Sew or glue a button or bead at the flower’s center for detail
- Incorporate additional felt layers to create a 3D effect
- Attach a ribbon or string for a dangling flower accent
Recycled Cardboard Bookmark

Using recycled cardboard to craft your own bookmark is an eco-friendly and budget-smart project that yields a durable, personalized accessory for your reading adventures. Start by selecting a sturdy piece of cardboard from old boxes or packaging. Cut it to your preferred bookmark size, typically around 2 inches by 6 inches. To add personality, decorate it with stamps, doodles, or printed images. You can also paint or cover it with decorative paper for a colorful touch. Reinforce the edges with clear tape or laminate it for extra durability. Punch a small hole at the top and add a ribbon or string if you like. This simple project not only saves waste but also creates a unique, functional item that keeps your page marked in style.
Embroidered Fabric Bookmark

Choosing soft fabrics like cotton or linen makes your embroidered bookmark comfy and easy to work with. You can get creative with embroidery design ideas, from floral patterns to initials. Finish your project with neat edges and added embellishments to give it a polished look.
Selecting Soft Fabrics
When selecting soft fabrics for an embroidered bookmark, it’s important to prioritize materials that are gentle to the touch and durable enough to withstand handling. Soft fabrics improve comfort and guarantee your bookmark lasts through many reads. Look for fabrics that are not too thick or stiff, which can be difficult to sew and uncomfortable to hold. Consider the following options:
- Cotton twill – lightweight, smooth, and easy to work with.
- Felt – soft, thick, and sturdy, perfect for beginner embroidery.
- Linen – breathable and durable with a natural texture.
- Velvet – luxurious feel, though more delicate, it adds elegance.
Choosing the right fabric enhances both the appearance and longevity of your embroidered bookmark. Pick one that suits your style and sewing skill level for the best results.
Embroidery Design Ideas
Once you’ve selected a soft fabric that feels comfortable and looks attractive, it’s time to contemplate the embroidery design that will bring your bookmark to life. Think about motifs that resonate with your reading habits or favorite themes. You might opt for simple geometric patterns or intricate floral designs. Using vibrant threads can add a splash of color, while metallic threads create a luxurious touch. Consider your skill level when choosing a design; beginners may prefer straightforward patterns, while experienced crafters can experiment with detailed images. Here’s a quick guide to popular embroidery ideas:
| Design Type | Description |
|---|---|
| Floral Patterns | Adds elegance and a touch of nature |
| Quotes & Words | Personalizes your bookmark with favorite lines |
| Geometric Shapes | Modern, minimalistic, and easy to stitch |
Finishing Touch Techniques
After completing your embroidery, the final step is adding finishing touches that enhance your bookmark’s durability and appearance. These small details can make your creation stand out and last longer.
- Secure Edges: Use a zigzag stitch or fray check to prevent fabric fraying.
- Add a Protective Coating: Apply a clear fabric sealant or Mod Podge to protect your embroidery from moisture and wear.
- Attach a Tassel or Ribbon: Sew or glue a colorful tassel or ribbon to the top for easy marking and added charm.
- Trim Excess Fabric: Cut any uneven or loose threads for a neat, professional look.
These finishing touches ensure your bookmark is both beautiful and resilient, perfect for daily use.
Nature-Inspired Pressed Leaf Bookmark

Creating a nature-inspired pressed leaf bookmark is a simple and charming way to bring the outdoors into your reading routine. Start by collecting leaves that catch your eye—think vibrant colors or interesting shapes. Press them between heavy books or a plant press for about a week until they’re dry and flat. Once pressed, carefully affix the leaf onto a piece of cardstock or thick paper using clear-drying glue or double-sided tape. To protect the leaf, cover it with a thin layer of clear adhesive or laminate it. Trim the edges neatly, leaving a small border for durability. This DIY project not only creates a unique, eco-friendly bookmark but also preserves a piece of nature, adding a personal touch to your reading experience.
Button and Ribbon Bookmark

A button and ribbon bookmark is a charming and customizable project that adds a pop of personality to your reading experience. You can choose buttons that match your style and ribbons that complement your book covers. This simple craft is perfect for personal use or as a thoughtful gift. To get started, consider these ideas:
Create a personalized bookmark with buttons and ribbons—fun, simple, and perfect for gifts or your own reading enjoyment.
- Select unique buttons, like vintage or themed designs, to make your bookmark stand out.
- Use colorful or textured ribbons for added flair.
- Secure the button to the ribbon with a strong glue or sew it for durability.
- Customize by adding charms or beads to the ribbon for extra decoration.
This project is easy, quick, and lets you create a functional accessory with a personal touch.
Frequently Asked Questions
What Are Some Eco-Friendly Materials for DIY Bookmarks?
You’re wondering about eco-friendly materials for your DIY bookmarks. Consider using recycled paper or cardboard, which are sustainable and easy to decorate. You might also choose bamboo or cork, both renewable and durable options. Fabric scraps, like old tea towels or linen, work well too and add texture. Using natural dyes or stamps made from plant materials can make your project even greener. These choices help you create beautiful, eco-conscious bookmarks.
How Can I Make Bookmarks Suitable for Children?
To make bookmarks suitable for children, you can use bright colors, fun shapes, and playful designs that appeal to their interests. Incorporate simple materials like laminated paper, foam sheets, or cardboard for durability and safety. Add engaging elements like stickers, drawings, or little charms. Keep the designs age-appropriate, and guarantee edges are smooth to prevent any injuries. This way, kids will love using their personalized, safe, and colorful bookmarks.
What Tools Are Essential for Advanced Bookmark Crafting?
You might think advanced bookmark crafting needs fancy tools, but that’s not always true. In reality, essential tools include precision scissors for detailed cuts, a craft knife for intricate designs, and a self-healing cutting mat to protect your workspace. Additionally, strong adhesive or double-sided tape helps secure embellishments. These tools empower you to create professional-looking bookmarks with complex designs, making your crafting both easier and more precise.
How Can I Waterproof My Handmade Bookmarks?
To waterproof your handmade bookmarks, you can use clear sealing spray or Mod Podge with a waterproof finish. Spray or brush a thin, even layer over your bookmark, making sure to cover all surfaces. Let it dry completely before using. This creates a protective barrier that resists water and smudges, ensuring your bookmarks stay pristine even when exposed to moisture during reading or spills.
Are There Any Safety Tips for Crafting With Small Parts?
Touching on safety when working with tiny treasures, you’ll want to stay vigilant. Keep small parts away from curious little fingers and pets, and use fine-tipped tools carefully to avoid mishaps. Work in a well-lit area and wear protective gear if needed. Always store small items securely when not in use. These simple steps help you craft happily, ensuring your creative journey stays safe and enjoyable.
Conclusion
With these DIY bookmark ideas, you can turn each page into a personal masterpiece, like planting seeds of creativity in your reading garden. Whether you choose a simple paperclip or a beautifully pressed leaf, your bookmarks become your own story keepers. So, grab your supplies and start crafting—because every book deserves a bookmark as unique as its reader. Let your imagination be the compass, guiding you to endless literary adventures.