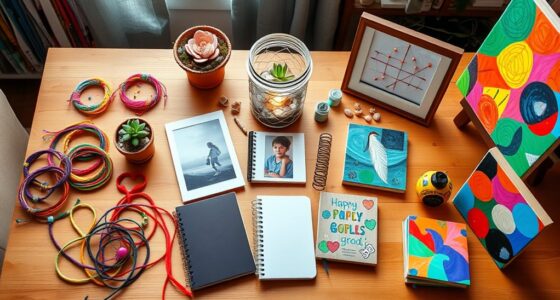

You can easily make 10 DIY felt crafts at home, including vibrant felt flower wall art, practical coasters, adorable animal pins, cozy bookmarks, colorful garlands, soft keychains, festive ornaments, fun felt food sets, and personalized gift envelopes. These projects use simple techniques like cutting, sewing, and gluing, making them perfect for all skill levels. Keep exploring to discover step-by-step instructions, tips, and creative ideas to bring your felt crafts to life.
Key Takeaways
- Includes popular felt crafts like flower wall art, coasters, pins, bookmarks, and garlands for easy home projects.
- Emphasizes simple assembly techniques with sewing, gluing, and layering to create personalized decor.
- Highlights material choices such as eco-friendly, high-quality felt for durability and vibrant colors.
- Offers design ideas with fun shapes, contrasting colors, and embellishments for customization.
- Provides tips on crafting community inspiration, sustainable sourcing, and decorative finishing touches.

Brother CS7000X Computerized Sewing and Quilting Machine, 70 Built-in Stitches, LCD Display, Wide Table, 10 Included Feet, White
70 UNIQUE BUILT-IN STITCHES: The Brother CS7000X sewing and quilting machine includes 70 built-in stitches including utility, decorative,...
As an affiliate, we earn on qualifying purchases.
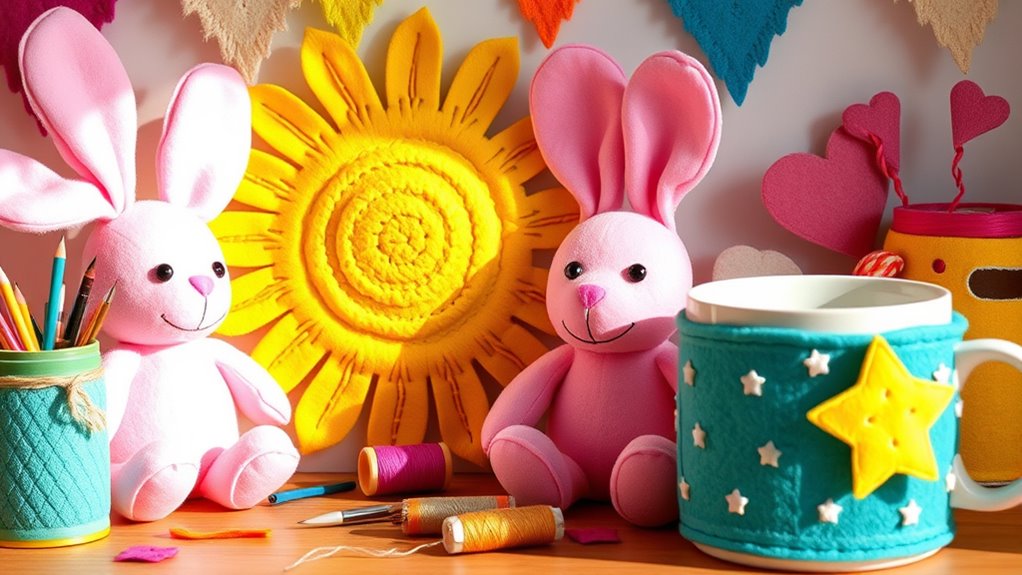
Felt Flower Wall Art
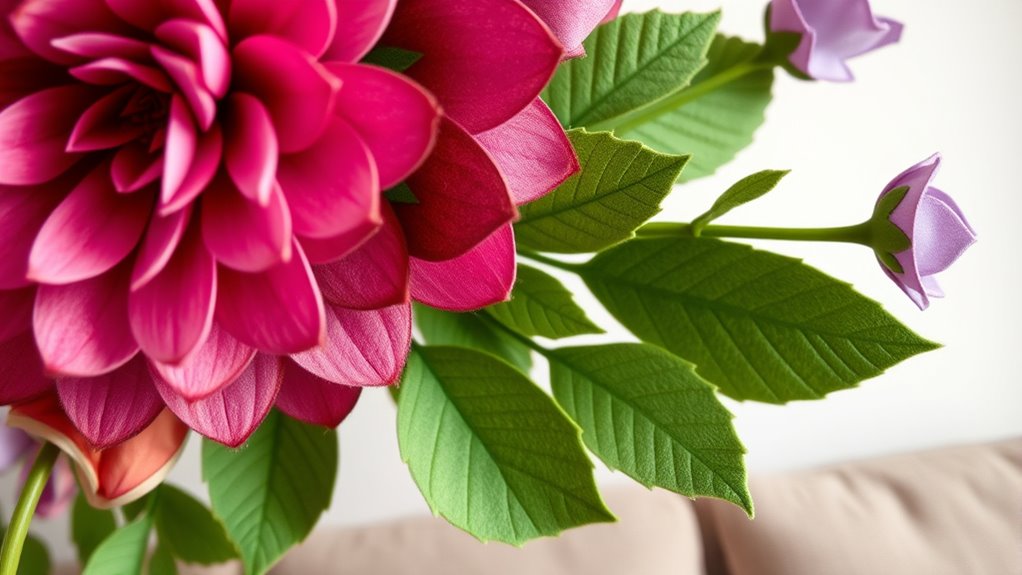
Are you looking to add a vibrant, personalized touch to your home decor? Felt flower wall art is the perfect DIY project to brighten any space. You can create stunning, colorful floral arrangements using felt sheets in various shades. Start by cutting out different flower shapes and sizes, then layer and assemble them with hot glue or sewing. Add leaves and stems for a realistic touch. Arrange your felt flowers on a blank wall or canvas for a striking display. This craft allows you to experiment with colors and designs, making each piece uniquely yours. Plus, felt is easy to work with and durable, so your art will stay vibrant over time. With a little creativity, you’ll have a beautiful, handcrafted focal point in your home.

Brother XR9550 Sewing and Quilting Machine, Computerized, 165 Built-in Stitches, LCD Display, Wide Table, 8 Included Presser Feet, White
165 unique built-in stitches: The Brother XR9550 computerized machine includes 110 built-in utility, decorative and heirloom stitches including...
As an affiliate, we earn on qualifying purchases.
Handmade Felt Coasters
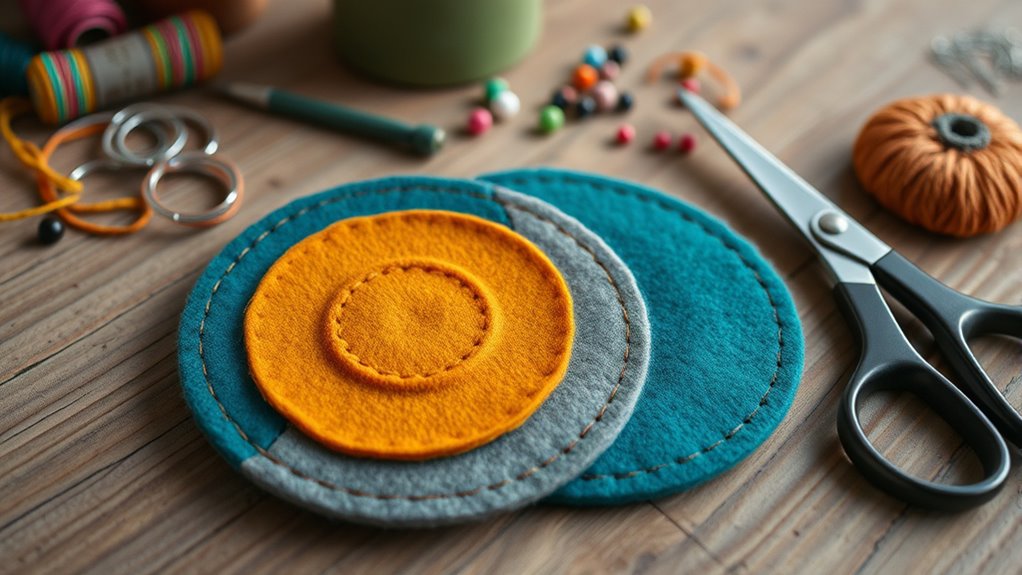
Creating handmade felt coasters is a simple and practical way to add a cozy, personalized touch to your living space. Start by cutting felt squares or circles in your preferred size, usually about 4 inches. To prevent slips and protect surfaces, add a backing layer of felt or a thin cork sheet. You can decorate your coasters with simple embroidery, contrasting colors, or small felt shapes like hearts or stars. Use fabric glue or sew the layers together for a secure hold. For a polished look, trim any uneven edges and consider adding a waterproof coating or sealant. These coasters are not only functional but also serve as charming handmade gifts. With a few basic supplies, you can craft a set that’s both stylish and practical. Incorporating natural materials and eco-friendly practices aligns with sustainable environmental considerations, making your craft both beautiful and responsible. Additionally, exploring crafting industry trends can inspire innovative design ideas to keep your projects fresh and engaging. Incorporating farmhouse textiles such as linen or cotton accents can further enhance their rustic appeal and cohesiveness with farmhouse decor. To ensure durability and longevity, consider using non-toxic adhesives that are safe for household items and environmentally friendly. Moreover, selecting high-quality materials can help your finished coasters withstand daily use over time.

SINGER Quantum Stylist 9960 Computerized Sewing & Quilting Machine – Metal, Plastic, with Extension Table, Hard Case & Accessories, 600 Stitches, Lettering, LED Light, 1-Step Buttonhole
VERSATILE STITCH OPTIONS: The SINGER Quantum Stylist 9960 offers 600 built-in stitches and 1,172 stitch applications, including essential,...
As an affiliate, we earn on qualifying purchases.
Adorable Felt Animal Pins
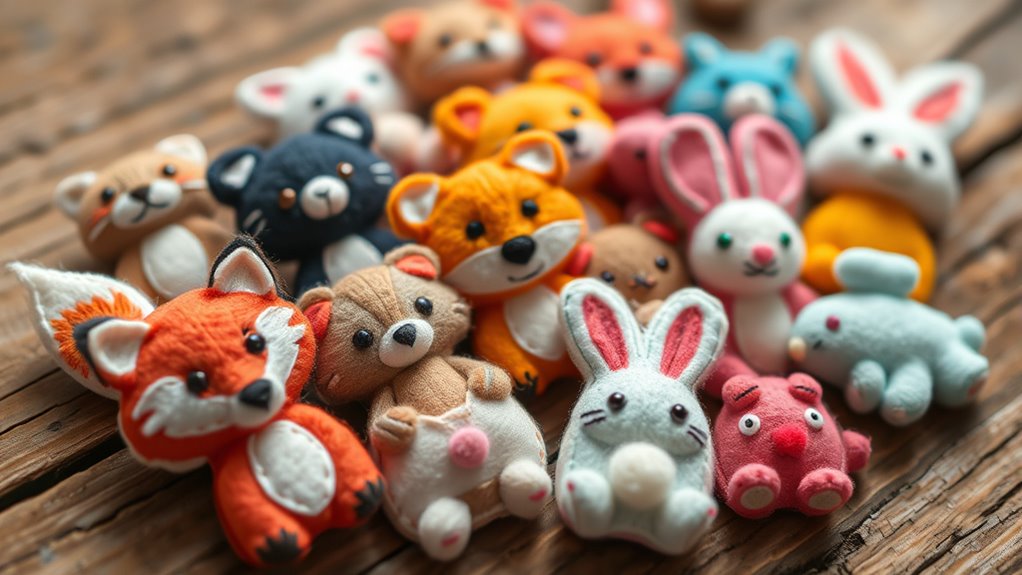
To create adorable felt animal pins, start by choosing bright, eye-catching colors that bring your designs to life. Follow simple, step-by-step instructions to assemble your pin pieces securely. Don’t forget to personalize each pin with unique details to make them truly special and fun to wear.
Choosing Bright Colors
Choosing bright colors for your felt animal pins instantly makes them stand out and catch the eye. Vibrant hues like cheerful yellows, bold reds, or lively blues add personality and charm to your creations. When selecting colors, think about the character you want to portray—playful, cute, or eye-catching. Bright shades also help details pop, making features like eyes, noses, or accessories more noticeable. Mix and match contrasting colors for a fun, dynamic look or stick to a monochrome palette for a sleek style. Keep in mind that your color choices can reflect your mood or the message you want your pins to convey. Ultimately, bold colors make your felt animal pins more appealing and memorable, perfect for accessorizing or gifting. Incorporating curiosity into your craft choices can inspire unique and innovative designs that truly stand out. Exploring color psychology can further enhance your ability to select colors that evoke specific feelings or messages, adding depth to your creations. Considering how AI security impacts technology can also inspire you to incorporate modern and innovative ideas into your craft projects.
Step-by-Step Assembly
Once you’ve selected your bright, eye-catching colors, it’s time to bring your felt animal pin to life through assembly. Begin by cutting out all your pattern pieces, then use fabric glue or a needle and thread to stitch the smaller details, like eyes or tiny ears, onto the main body. Start with the larger shapes, attaching them carefully to ensure clean edges. For a smoother finish, sew along the edges with small, even stitches. Be sure to secure all pieces firmly, but don’t pull too tight to avoid puckering. Color accuracy impacts the overall appearance of your felt crafts, especially when choosing vibrant hues. Paying attention to proper tool selection can make your assembly process more precise and enjoyable. Using quality materials such as premium felt and strong thread can enhance the durability and look of your finished pin. Additionally, understanding self watering plant pots can inspire you to incorporate practical elements into your craft projects, like adding functional details to your felt creations. Once all parts are attached, check your pin for any loose areas and reinforce stitches if needed. Finish by adding a safety pin or brooch back to the back of your felt creation. Your adorable felt animal pin is now ready to wear or gift! Mindfulness techniques can also be incorporated to make crafting a more relaxing and enjoyable experience.
Personalizing Your Pins
Adding personal touches to your felt animal pins makes each piece unique and special. You can customize them by choosing colors that reflect your personality or match your wardrobe. Add tiny details like embroidered eyes, noses, or mouth expressions to give each pin character. Consider attaching small accessories, such as bows or tiny charms, to enhance their charm. Handwriting initials or a short message on the back adds a sentimental touch. Experiment with different stitching styles or layering felt pieces for depth. Personalizing your pins not only makes them one-of-a-kind but also turns them into meaningful gifts or accessories. Take your time to play with colors and details—your creativity is the only limit. The more personal, the more your pins will stand out.
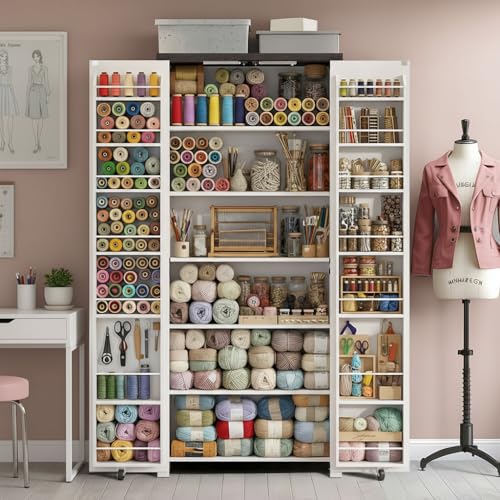
NEWOWNDS Craft Storage Cabinet with LED Lights – 72" Adjustable Shelves Sewing Organizer, Multi-Purpose Sewing Cabinet for Craft Room/Home Office Storage
Multi-Functional Craft Organizers and Storage Cabinet: This 30"W x 16"D x 72"H craft storage cabinet doubles as a...
As an affiliate, we earn on qualifying purchases.
Cozy Felt Bookmarks
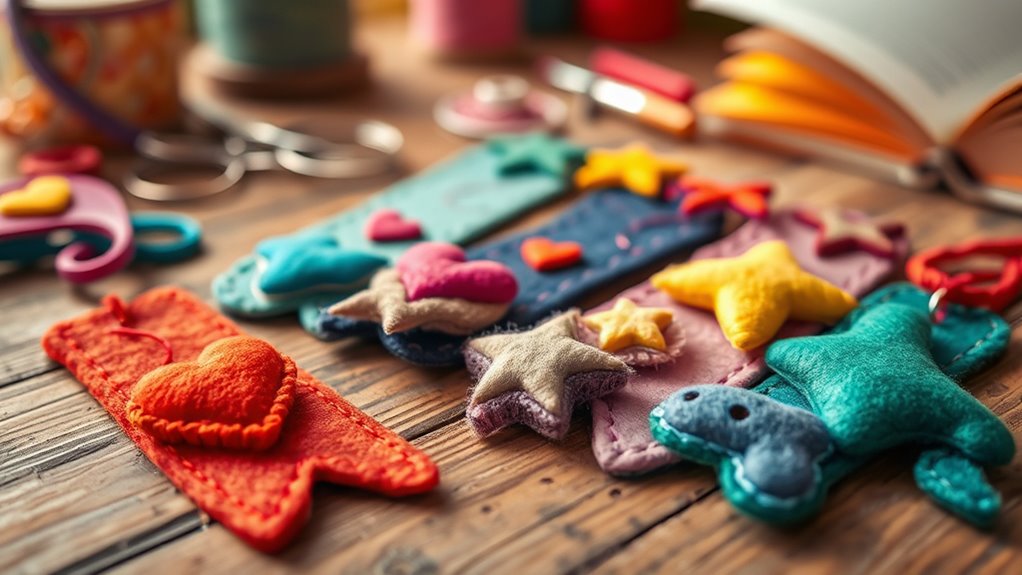
Start by choosing soft felt materials that feel gentle to the touch and hold up well over time. Get creative with fun design ideas, like adding tassels or embroidery, to make your bookmark unique. Then, follow easy assembly tips to put everything together quickly and create a cozy accessory for your reading stash. Using versatile felt allows for more creative options and durability in your craft.
Choosing Soft Felt Materials
Choosing the right soft felt materials is essential for creating cozy, durable bookmarks that feel good to hold. Look for high-quality felt made from 100% wool or a wool blend, as these tend to be softer and more sturdy. Avoid cheap, synthetic felt, which can be stiff and brittle over time. Consider the thickness; a medium weight felt (around 1.4 mm) offers a nice balance of durability and ease of cutting. Pick colors that match your style or the theme of your gift, and make sure the felt is free of loose fibers or pilling. Test a small piece first to check its suppleness and how well it cuts. Selecting the right felt ensures your bookmarks will last longer and feel comfortable in your hand. Additionally, exploring crafting community events like hackathons can provide inspiration for innovative DIY projects and connect you with fellow enthusiasts. Pay attention to material quality to ensure your felt maintains its softness and appearance over time, as certified organic felt can offer additional assurance of natural fibers and eco-friendliness. When choosing felt, it’s also helpful to consider sustainable sourcing to support environmentally responsible practices in crafting. For optimal results, research eco-friendly felt options that support sustainable manufacturing practices.
Fun Design Ideas
Once you’ve selected soft, high-quality felt, it’s time to get creative with your designs. Start by choosing fun shapes like stars, hearts, or animals to add personality to your bookmarks. Use contrasting colors to make details pop—think bright yellow suns or vibrant pink bows. Incorporate simple embellishments like embroidered details, tiny beads, or felt cutouts for added texture. You can also experiment with layered pieces to create depth or add small charms for a playful touch. Feel free to personalize your bookmarks with initials or favorite patterns that reflect your style. Remember, the key is to keep your designs simple yet expressive, making each bookmark a charming, functional accessory you’ll love to use or gift. Understanding personality traits can help tailor your designs to match your mood or personality, adding an extra layer of meaning to your crafts. Additionally, exploring textile art techniques can inspire new creative ideas and help you develop your personal style.
Easy Assembly Tips
To assemble cozy felt bookmarks with ease, begin by gathering all your materials—felt pieces, needle, thread, scissors, and any embellishments. Cut your felt into the desired bookmark shape, such as rectangles or fun curves. Use the scissors to trim any uneven edges for a clean look. Thread your needle with a matching or contrasting thread, and start sewing the edges together with small, even stitches. Leave a small opening to add stuffing if you want a plush feel. Once sewn, close the gap securely. Add embellishments like buttons, embroidery, or small decorations to personalize your bookmark. Keep your stitches tight and consistent to ensure durability. With these tips, your felt bookmarks will come together quickly and look professionally crafted.
Felt Garlands for Decor
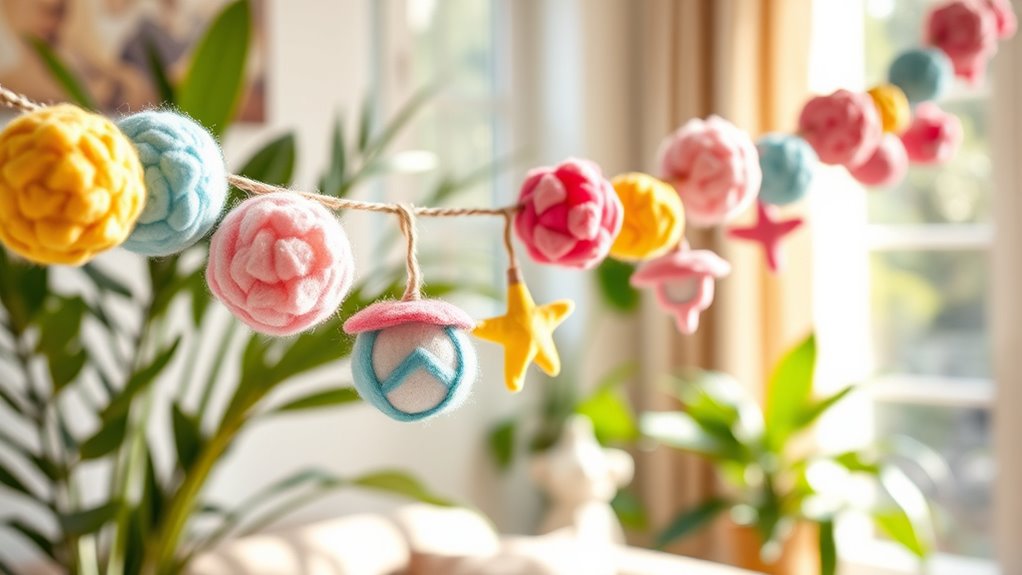
Felt garlands add a charming and customizable touch to any space, making them perfect for seasonal decorations, parties, or everyday decor. You can create a garland using colorful felt pieces cut into shapes like hearts, stars, or banners. To assemble, thread a sturdy needle with twine or ribbon and carefully sew or knot the felt pieces in place. Feel free to mix and match colors to match your theme or mood. For added flair, incorporate small beads or sequins between shapes. These garlands are easy to hang, whether draped across mantels, windows, or walls. They’re lightweight, reusable, and add a cozy, handmade vibe to any room. Plus, making them is simple and budget-friendly, giving you a personalized touch in minutes.
Custom Felt Phone Cases
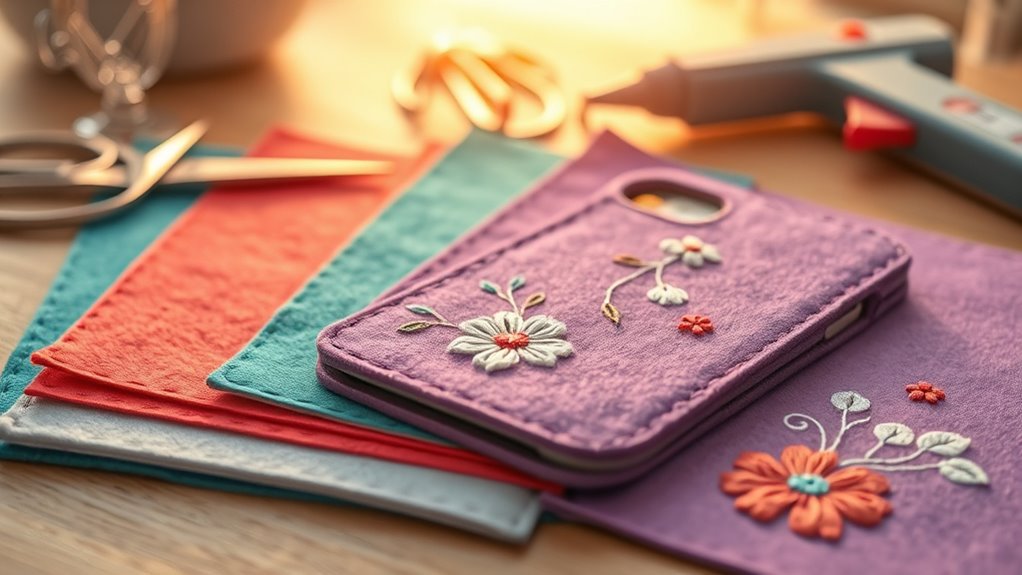
Creating a custom felt phone case lets you showcase your personality with unique designs and colors. You’ll want to choose quality felt and keep your craft simple for the best results. With some basic tips, you can craft a stylish and durable case that truly stands out.
Personalized Designs Ideas
Designing a custom felt phone case allows you to showcase your personality and style effortlessly. You can personalize it with favorite colors, patterns, or themes that reflect who you are. Consider adding simple geometric shapes, floral designs, or playful characters for a fun touch. If you’re into nature, craft leaves, animals, or celestial symbols to make it uniquely yours. Monogram initials or meaningful quotes can also add a special, personal element. Mix and match different felt colors to create contrast and visual interest. You might even incorporate small decorative details like tiny bows or charms for extra flair. The key is to think about what excites you and translates your personality into your design—making your phone case truly one-of-a-kind.
Material and Craft Tips
Choosing the right materials and following practical craft tips can make your felt phone case both durable and attractive. Use high-quality, thick felt for a sturdy cover that holds its shape. Sharp scissors will give you clean edges, so take your time cutting your shapes precisely. When sewing, opt for strong, matching thread to ensure your case stays intact over time. Reinforce stress points with extra stitches, especially around the edges and corners. If you plan to add embellishments, glue or sew them securely to prevent peeling. Keep your workspace tidy and organized to avoid mistakes, and test your design on scrap felt first. These tips help you craft a professional-looking phone case that lasts and looks great every day.
Soft Felt Keychains
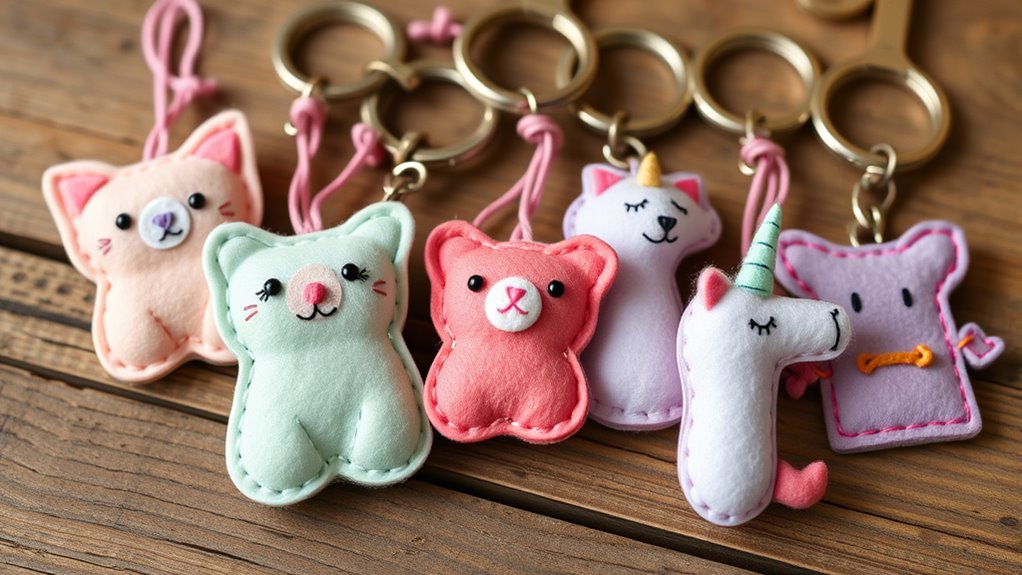
Have you ever wanted a cute, personalized accessory that’s easy to make? Soft felt keychains are perfect for adding a touch of charm to your keys or bags. They’re simple to craft and customizable with different colors, shapes, and embellishments. To create your own, start by selecting your felt colors and cutting out your desired shapes, like hearts or animals. Next, sew or glue the pieces together securely. Finally, attach a keyring or clasp to complete your keychain. Here are some tips to enhance your project:
- Use a sharp needle for precise stitching.
- Add small decorative elements like beads or embroidery.
- Opt for contrasting thread to make details pop.
- Seal small glued parts with fabric glue for durability.
Festive Felt Holiday Ornaments
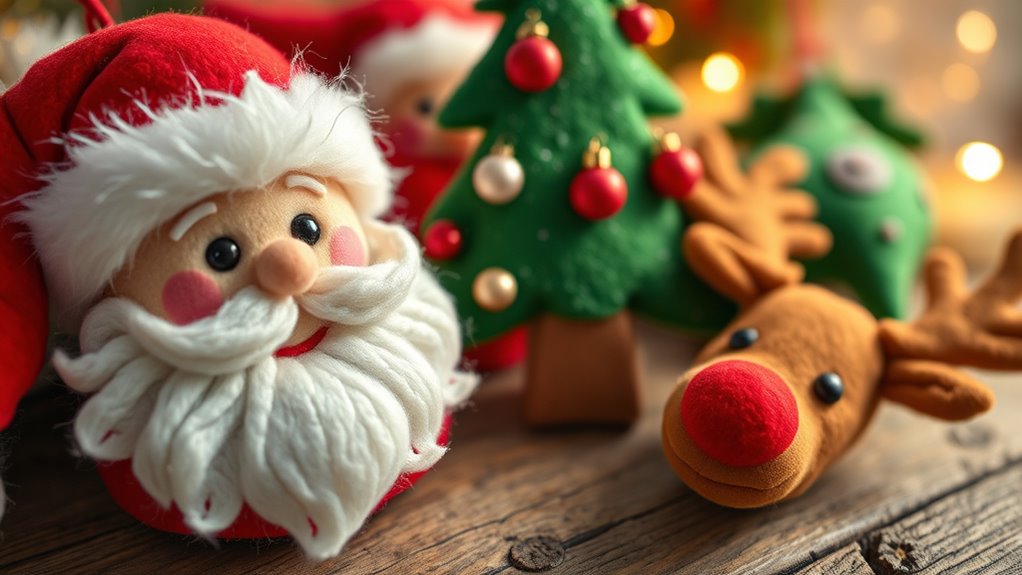
Festive felt holiday ornaments are a delightful way to add handmade charm to your seasonal décor. With just a few supplies, you can craft personalized ornaments that reflect your style. Start by selecting colorful felt sheets, scissors, and a needle with thread or hot glue. Cut out shapes like stars, snowflakes, Christmas trees, or ornaments themselves. Embellish with embroidery, beads, or glitter for extra sparkle. You can also add small loops of ribbon or string to hang your creations on the tree. These ornaments are quick to make and can be customized for each holiday or family tradition. Plus, they make thoughtful DIY gifts for friends and loved ones. Creating festive felt ornaments turns decorating into a fun, meaningful activity that adds a warm, personal touch to your home.
Felt Food Playset for Kids

Looking for a fun and educational toy that sparks creativity? A felt food playset is perfect for your little chef. It encourages imaginative play, fine motor skills, and healthy eating habits. You can craft realistic-looking items that mimic real food, making playtime both entertaining and educational. To add depth, consider these key features:
- Use vibrant colors and detailed stitching for realism.
- Incorporate different textures to enhance sensory experience.
- Include a variety of food types—fruits, vegetables, dairy, and baked goods.
- Design accessories like plates and utensils for complete playsets.
This project allows you to customize the set to your child’s favorites, fostering role-play and storytelling. Plus, felt food crafts are easy to clean and safe for kids to handle, making them a practical addition to any playroom.
Personalized Felt Gift Envelopes

After creating a felt food playset, you might want to add a personal touch to your gift-giving by making customized felt envelopes. These envelopes are simple to craft and perfect for wrapping small gifts, cards, or notes. Start by cutting two pieces of felt into the desired envelope shape, then sew or glue the edges together, leaving a flap open. Decorate the front with embroidered initials, cute designs, or appliqué details to make it unique. You can also add a button, ribbon, or velcro for closure. Personalizing your felt envelope makes your gift more memorable and adds a handmade touch. Plus, they’re reusable and eco-friendly, making your gifting more sustainable. It’s a charming way to showcase your creativity and thoughtful effort.
Frequently Asked Questions
What Types of Felt Are Best for DIY Crafts?
When choosing felt for your DIY projects, you want to contemplate the type that best suits your needs. Wool felt is durable, soft, and has a rich texture, making it ideal for detailed crafts. Polyester felt is affordable, easy to cut, and comes in vibrant colors, perfect for quick projects. Fleece felt combines softness and flexibility. Pick the felt type based on your craft’s purpose and your desired finish.
How Do I Choose the Right Needle for Felting?
When choosing the right needle for felting, think about your project and the type of felting you’re doing. For detailed, intricate work, opt for a fine, sharp needle like a 38-gauge. For general felting, a medium gauge needle works well. Always consider the needle’s length and barbs; longer, barbed needles help shape wool quickly, while shorter ones are better for detail. Safety first—handle needles carefully!
Can I Wash or Clean Felt Crafts?
Yes, you can clean felt crafts, but you need to be gentle. Hand wash them in cool water with a mild detergent, avoiding hot water which can cause shrinking or distortion. Gently squeeze out excess water without wringing, then lay your craft flat to dry. If your felt craft is delicate or heavily soiled, spot cleaning is best. Always check for specific care instructions, especially if using delicate or specialty felt.
What Tools Are Essential for Beginner Felt Projects?
For beginner felt projects, you’ll want a few essential tools. You need sharp scissors for precise cuts, a felting needle or needle tool for shaping, and strong fabric glue for assembly. A foam pad or felting mat helps guard your workspace and needles. Keep a ruler or measuring tape handy to guarantee accurate sizes. These tools make your crafting easier, safer, and more enjoyable as you create beautiful felt projects.
How Long Does It Take to Complete a Felt Craft?
Did you know that most beginner felt projects take about 2 to 4 hours to complete? When you ask how long a felt craft takes, it really depends on the complexity and your experience. Simple items like keychains or small ornaments can be finished in an afternoon, while more intricate projects might take a weekend. So, plan your time accordingly and enjoy the creative process!
Conclusion
Now that you’ve explored these 10 DIY felt crafts, you’re ready to add a personal touch to your home and accessories. Did you know that felt crafts can reduce stress and boost creativity? Imagine turning a simple piece of felt into a beautiful wall art or a charming keychain—each project offering a relaxing, rewarding experience. So grab your felt and start crafting; your unique creations will brighten your space and your day!