
Want to style your handmade shelves creatively? You can upcycle old crates, vintage suitcases, and unique decor pieces for a rustic or vintage look. Use paint stencils, labels, and lighting tricks to add personality. Proper materials, tools, and installation techniques guarantee safety and durability. Incorporate multi-tiered arrangements, small space solutions, and personal touches like plants or photos. Keep everything neat, fix issues early, and transform your shelves into stylish focal points—more ideas await if you keep exploring.
Key Takeaways
- Incorporate vintage and upcycled items like suitcases or crates for personalized, rustic shelf displays.
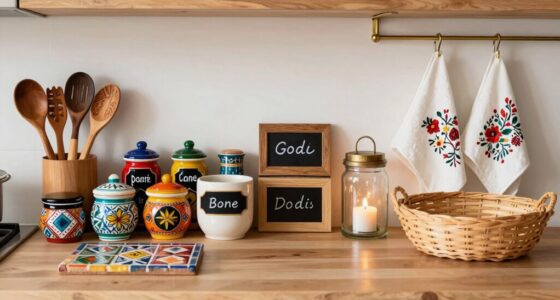
- Use creative labeling with chalkboard or hand-painted signs to organize and add decorative flair.
- Mix textures and materials, such as wood, metal, or glass, for visual interest and eclectic style.
- Arrange books with decorative objects, varying heights, and colors for balanced, eye-catching displays.
- Enhance shelves with layered lighting, like warm bulbs or LEDs, to highlight decor and create ambiance.

MOQRUAO 3 Pack Large Wooden Storage Crates 16 x 12 x 9.5 Inches Unfinished Wood Farmhouse Milk-Style Crates with Handles Unassembled Decorative Boxes for Home Office DIY Crafts (Natural Wood (3))
What You Will Receive- You will receive 3 unfinished wooden storage crates, each measuring approximately 16 x 12…
As an affiliate, we earn on qualifying purchases.
As an affiliate, we earn on qualifying purchases.
How to Choose the Right Materials for Handmade Shelves

Choosing the right materials for your handmade shelves is essential to guarantee they’re sturdy, functional, and visually appealing. You want to prioritize material durability, ensuring your shelves can hold your items without sagging or breaking over time. Consider wood types like oak or maple, which are strong and long-lasting. If you prefer a modern look, metal or glass can work well, but make sure they’re sturdy enough for your needs. Color coordination also matters; select materials that complement your room’s palette. Light-colored woods create a bright, airy vibe, while darker finishes add warmth and richness. Think about how the material’s tone and texture will blend with your existing decor, and choose options that enhance your overall design aesthetic. Additionally, understanding the properties of different building materials can help you make more informed choices for your DIY project. Incorporating sustainable materials can also contribute to environmentally friendly and eco-conscious living practices. Considering material properties can ensure your shelves not only look great but also stand the test of time.

Treasure Art Vintage Style Luggage Train Wall Mounted Rack with Shelf & Hooks
Wall mounted rack with hooks. Many uses, luggage, hat & coat, pots & pans, kitchen towels & oven…
As an affiliate, we earn on qualifying purchases.
As an affiliate, we earn on qualifying purchases.
Essential Tools for Building DIY Shelves
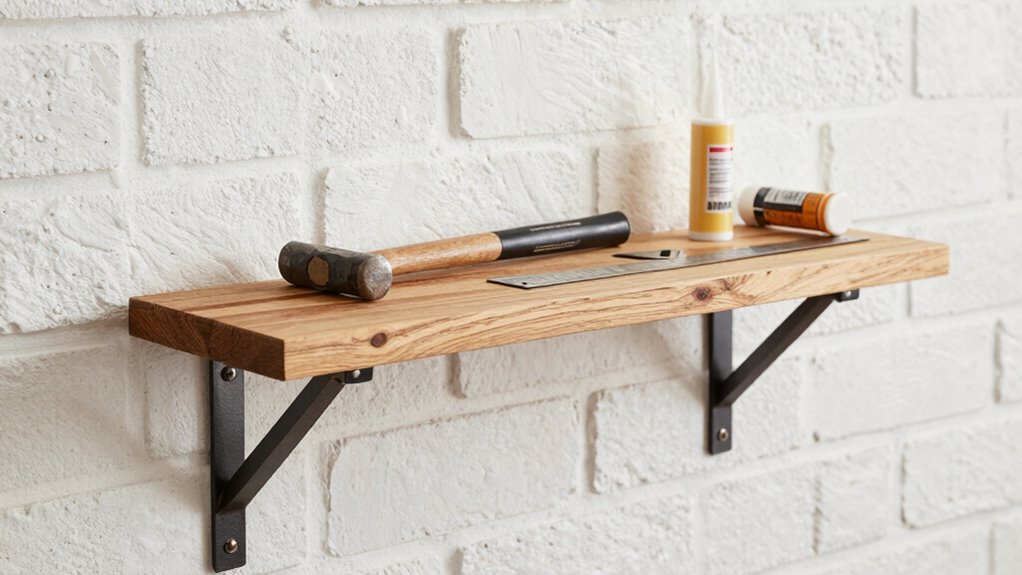
To build sturdy DIY shelves, you’ll need some basic hand tools like a hammer, screwdrivers, and a saw. Using power tools such as drills and sanders speeds up the process and improves precision. Don’t forget essential measuring instruments like a tape measure and a level to make certain everything fits perfectly. Incorporating product comparisons can help you choose the best tools for your project. Additionally, understanding kitchen appliance options can streamline your workspace and enhance overall functionality.
Basic Hand Tools Needed
Before you start building your DIY shelves, it’s important to gather the essential hand tools that will make the process smoother. A hammer is indispensable for securing nails or brackets, while a screwdriver helps tighten screws for sturdy shelves. A tape measure guarantees accurate measurements, crucial for seasonal decorating and shelf maintenance. A level guarantees your shelves are perfectly horizontal, preventing items from sliding or falling. Pencils are handy for marking cut lines and drill points. A small hand saw is useful if you need to trim wood pieces. Having these basic tools on hand guarantees you can efficiently complete your project, keep your shelves in top shape, and easily update your display for seasonal decor. They’re the foundation of any successful DIY shelving project. Proper tool selection ensures safety and precision during your build. Additionally, understanding the importance of proper tool use can help you avoid accidents and ensure your shelves are both functional and durable. Being familiar with woodworking safety tips further enhances your ability to work confidently and securely. Incorporating energy-efficient tools can also make your DIY upgrades more environmentally friendly and cost-effective in the long run.
Power Tools for Efficiency
Ever wondered how to speed up your DIY shelving project without sacrificing quality? Power tools are your best allies for efficiency tips and quicker results. They reduce manual effort and deliver precise cuts and fast assembly. Essential power tools include:
- Cordless drill for drilling and screwing
- Circular saw for straight, clean cuts
- Jigsaw for curved or intricate cuts
- Orbital sander for smooth finishes
- Clamps to hold pieces securely during assembly
Using these tools, you’ll complete your project faster and with greater accuracy. Proper tool usage enhances safety and helps minimize mistakes and save time, making the entire process more enjoyable. Investing in quality equipment also ensures your finished shelves are durable and professional-looking. Additionally, understanding the appropriate safety precautions when operating power tools can prevent accidents and improve your overall DIY experience. Being familiar with power tool safety guidelines can significantly reduce the risk of injury.
Essential Measuring Instruments
Using power tools makes the building process faster and more accurate, but precise measurements are the foundation of a sturdy, well-constructed shelf. Essential measuring instruments help guarantee measuring accuracy and proper calibration techniques. You’ll need a reliable tape measure for length and width, a combination square for checking right angles, and a level for ensuring your shelf is perfectly horizontal. Think of these tools as your measuring trio:
| Tool | Purpose |
|---|---|
| Tape Measure | Length and width measurements |
| Combination Square | Checking corners and angles |
| Level | Ensuring horizontal placement |
| Pencil | Marking measurements |
These tools help you visualize, measure precisely, and guarantee your shelves are both functional and visually appealing. Proper measurement techniques are crucial to achieving professional-looking results, especially when considering accurate measurements for a balanced and stable shelf. Additionally, understanding measurement accuracy can prevent common errors that compromise the shelf’s integrity. Developing a good measurement routine ensures consistency and helps avoid costly mistakes during assembly. Being aware of calibration techniques for your tools can further enhance the precision of your measurements.
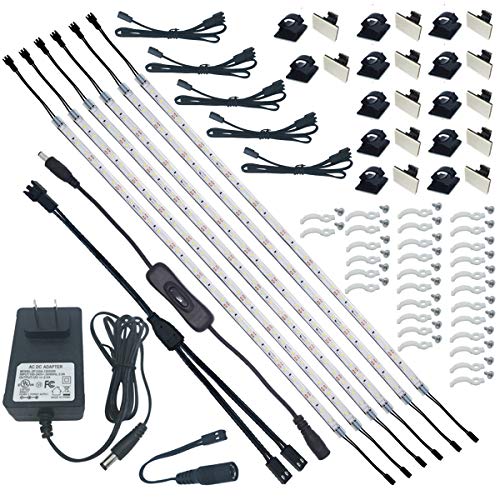
Litever Under Cabinet Light, 6 PCS 20 Inches Flexible LED Strips with Power Adapter, 24W,1800 Lumen, Daylight 5000K. Suitable for Kitchen Cabinets, Counters, Under Shelf, Closets (6-Strip-5000K)
Easy Installation. The super strong self-adhesive tape on the back, mounting clips and screws, small extension cables and…
As an affiliate, we earn on qualifying purchases.
As an affiliate, we earn on qualifying purchases.
How to Build Simple Wooden Shelves: A Step-by-Step Guide
Are you ready to create your own simple wooden shelves? Building them is straightforward if you follow a few key steps. First, gather your materials: wood planks, screws, brackets, a drill, and a level. Remember to prioritize DIY safety by wearing goggles and gloves. Mark your measurements carefully to ensure shelf durability and proper support. Use the level to make sure your shelves are straight. Secure the brackets firmly into the wall studs for strength. Sand the wood edges for a smooth finish. Paint or stain if desired for a polished look. With patience and precision, you’ll end up with sturdy shelves perfect for displaying your favorite items. This simple project adds style and functionality to any space.
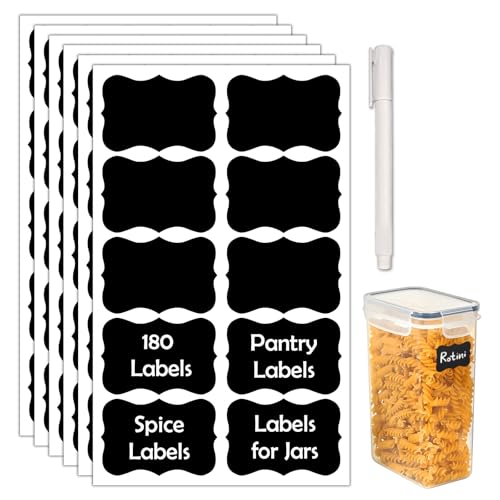
JIEHENG 180Pcs Chalkboard Labels for Jars, Waterproof Reusable Blackboard Stickers with 1 Liquid Chalk Markers, Organization Labels Removable (Black, Wavy)
COMPLETE SET: 180 pieces of reusable chalkboard labels with 1 liquid chalk markers for organizing jars, containers, and…
As an affiliate, we earn on qualifying purchases.
As an affiliate, we earn on qualifying purchases.
Creative Ways to Upcycle Old Items Into Shelves
You can transform old wooden crates into charming, functional shelves that add rustic character to any space. Vintage suitcases also make stylish, portable storage options when mounted on the wall. These upcycled treasures not only save money but also create unique, conversation-starting decor. Incorporating small space solutions like these helps maximize storage without sacrificing style. Additionally, exploring DIY home improvement ideas can inspire you to create even more personalized and innovative storage solutions. Using workshop tools such as saws and drills can make your DIY projects safer and more efficient. Incorporating smart home devices into your storage solutions can further enhance functionality and convenience.
Repurposed Wooden Crates
Repurposing wooden crates into shelves offers a charming and budget-friendly way to add storage and character to your space. These crates bring a touch of vintage charm and rustic appeal, transforming ordinary storage into decorative statement pieces. You can stack them for a unique display or mount them on the wall for an eye-catching shelf. To enhance their rustic look, consider leaving the wood raw or adding a weathered paint finish. Personalize your crates with labels, stencils, or small decorative accents. Imagine a cozy nook with crates filled with books, plants, or vintage finds. The versatility makes it easy to adapt to any room, from living rooms to kitchens, creating a warm, inviting atmosphere with minimal effort.
- Stacked crates as a display table
- Wall-mounted crates for extra shelving
- Painted or distressed finishes for character
- Filled with potted plants for freshness
- Decorated with vintage accessories
Vintage Suitcase Shelves
Vintage suitcases aren’t just for travel—they make stylish, functional shelves that add character to any room. With their vintage charm, suitcase decor instantly brings a nostalgic, eclectic vibe to your space. To create a suitcase shelf, choose a sturdy vintage suitcase and secure it to the wall with brackets or mount it open for display. You can stack multiple suitcases for a layered, eye-catching look or hang them individually as unique wall shelves. These upcycled pieces offer plenty of storage and a touch of personality. Plus, they’re easy to customize with paint, fabric lining, or decorative hardware. When selecting floor cleaning equipment, consider the size and weight of the suitcase to ensure it can support your items securely. It’s also helpful to think about upcycling techniques to personalize each piece further. Whether used in a bedroom, living room, or hallway, vintage suitcase shelves blend practicality with creative charm, making your decor truly one-of-a-kind.
How to Paint and Finish Your Shelves for a Professional Look

Achieving a professional finish on your shelves starts with proper preparation and quality materials. Start by sanding the surface smoothly, removing any rough spots. Use a primer to create a uniform base, especially if you’re working with bold or dark colors. When painting, focus on color blending to achieve seamless progressions between shades, and apply finish techniques like brushing, rolling, or spraying for an even coat. To enhance durability, consider applying a clear topcoat or sealant. Proper drying time between coats guarantees a flawless look. Think about your desired style—matte, satin, or glossy—and select your finish accordingly. These steps will help your shelves look polished, professional, and ready to showcase your style.
Designing Shelves to Match Your Room’s Style and Space

Once your shelves have a sleek, professional finish, the next step is ensuring they complement your room’s overall style and layout. Consider your room’s color schemes and choose shelves that blend seamlessly or add contrast for visual interest. For modern spaces, opt for minimalistic designs with neutral tones, while vintage rooms may benefit from distressed finishes and warm colors. Lighting options also play a key role—use warm lighting for cozy atmospheres or bright LEDs for functional areas. Arrange your items thoughtfully, balancing height and spacing. Use this table as a quick guide:
| Style | Color Schemes | Lighting Options |
|---|---|---|
| Modern | Neutral, monochrome | Bright, LED |
| Rustic | Earth tones, distressed | Warm, ambient lighting |
| Vintage | Soft pastels, muted | Soft, warm lamps |
| Industrial | Dark, metallic finishes | Edison bulbs, spotlight |
| Eclectic | Bold, mixed colors | Layered, varied lighting |
How to Install Shelves Safely and Securely
To install shelves safely, you need to choose the right wall anchors for your wall type and load capacity. Make sure you use the correct tools and follow the instructions carefully. Always double-check that your shelf is level before securing it completely.
Choose Appropriate Wall Anchors
Choosing the right wall anchors is vital for guaranteeing your shelves stay secure and safe. Selecting the proper mounting hardware depends on your wall type and the weight you plan to hold. Here are some options to contemplate:
- Plastic expansion anchors for lightweight items on drywall
- Toggle bolts for heavier loads in hollow walls
- Masonry anchors for brick or concrete walls
- Threaded anchors for thicker drywall or plaster
- Specialty anchors for uneven or textured surfaces
Using the correct wall anchors ensures your shelf won’t pull away or cause damage. Always match your wall type with the appropriate mounting hardware, and double-check weight ratings. Proper anchors distribute weight evenly, providing stability and safety. Choosing the right wall anchors is a vital step in creating a sturdy, handmade shelf that lasts.
Use Correct Installation Tools
Using the right installation tools is vital for mounting your shelves securely and safely. Proper tools guarantee you can accurately drill into the wall and attach brackets that support the intended weight capacity. A level helps keep shelves straight, preventing tilting or uneven mounting. A drill with the correct drill bits makes wall mounting easier and reduces the risk of damaging your wall. Wall anchors and screws suited for your wall type are essential for holding heavier items and preventing accidents. Using the appropriate tools also minimizes frustration and guarantees your shelves stay secure over time. Always double-check the weight capacity of your brackets and anchors before installation to avoid overloading. With the right tools, you’ll achieve a sturdy, professional-looking result that lasts.
Double-Check Shelf Level
Before you start securing your shelves, it’s essential to double-check that they’re perfectly level. Proper level alignment guarantees shelf stability and prevents items from sliding off over time. Use a bubble level or a laser level to verify the shelf’s position from multiple angles. Check for any tilts or unevenness before drilling or fixing brackets. Remember, a slight misalignment can compromise the entire shelf’s integrity. Keep these points in mind:
- Place the level on the shelf surface to check flatness
- Adjust brackets before tightening screws
- Confirm the level from both ends and center
- Recheck after initial securing to catch any shifts
- Make sure wall anchors are firmly in place for added stability
Achieving precise level alignment guarantees your handmade shelf is secure and visually appealing.
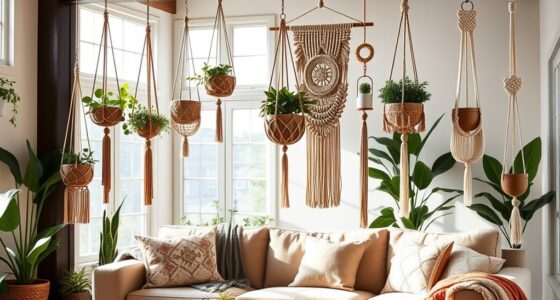
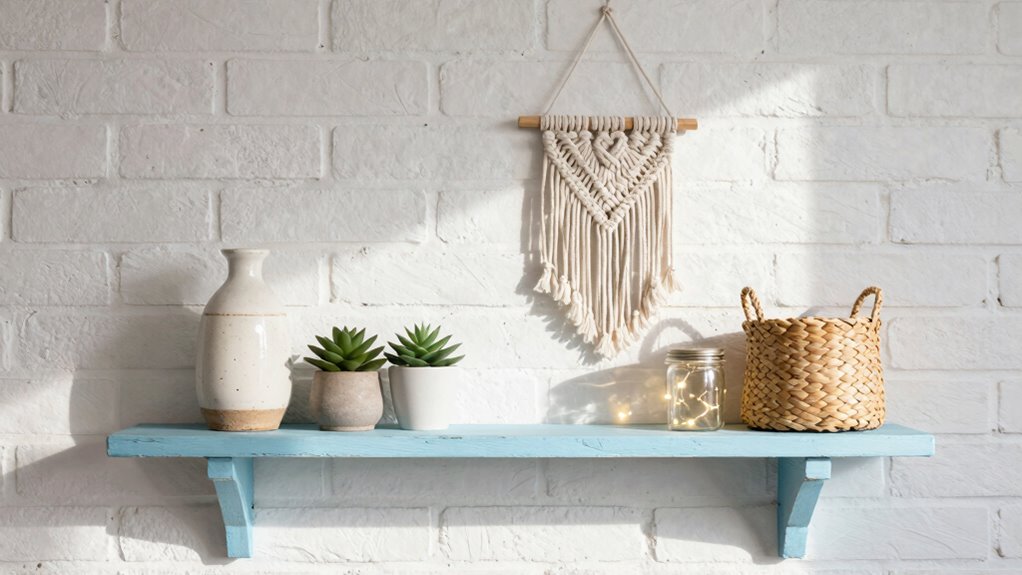
Using Rope or Macramé to Create Floating Shelf Supports
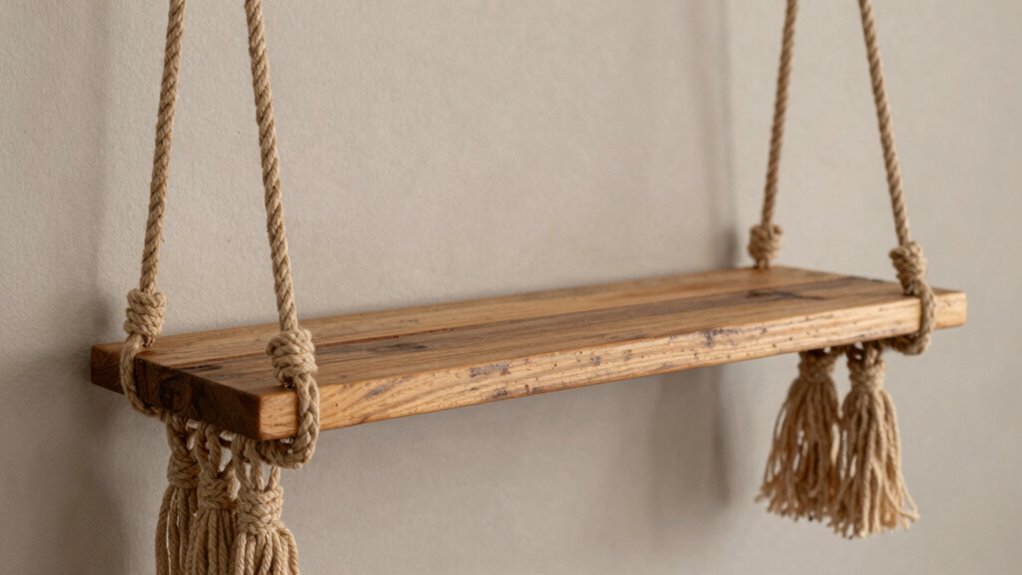
Rope and macramé offer a stylish and versatile way to create floating shelf supports that add texture and visual interest to any space. Using rope aesthetics, you can choose from rustic jute or sleek nylon for different looks. To make supports, knot or braid the rope into strong loops or patterns that securely hold your shelves. Macramé patterns, with their intricate designs, bring a handcrafted charm and can be customized to suit your style. Wrap the support cords around sturdy anchors or hooks on the wall, ensuring they’re tight and even. This DIY approach not only saves money but also adds a personal touch to your decor. With a little practice, you’ll create eye-catching shelves that combine function and artistic flair seamlessly.
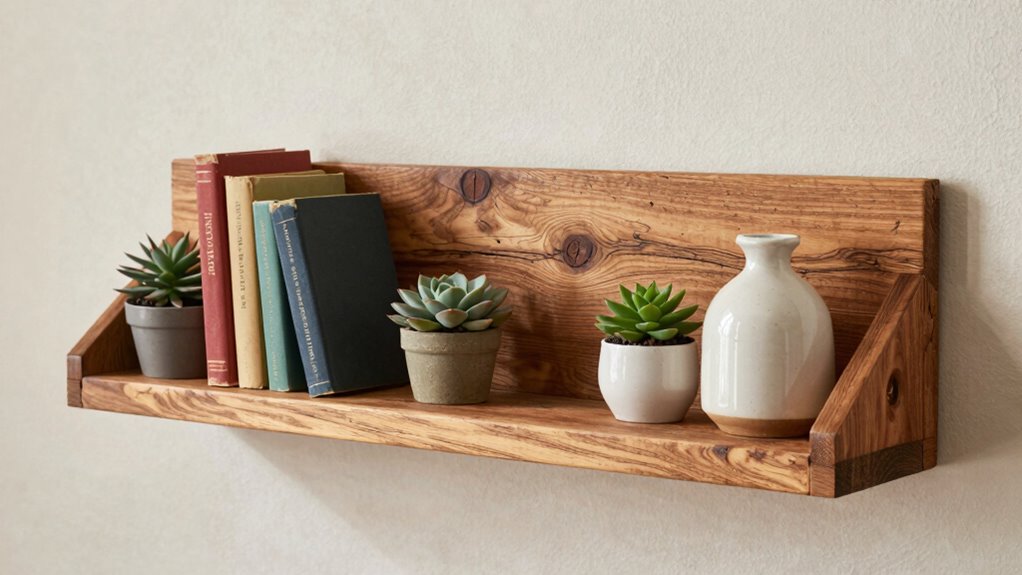
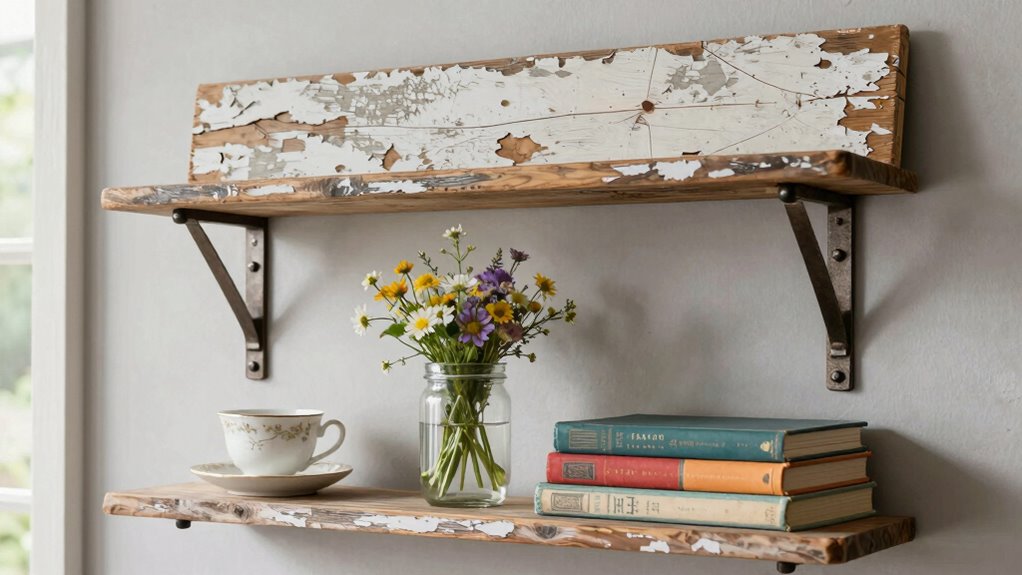
Style Your Shelves With Vintage Finds for Character

Adding vintage finds to your shelves instantly injects character and charm into any space. These pieces add a sense of history and personality, elevating your decor with vintage charm and character enhancement. Think beyond just old books; consider unique artifacts, antique glassware, retro trinkets, vintage photo frames, or weathered ceramics. These items create visual interest and tell a story, making your shelves more inviting and personalized. Mix textures and finishes to keep the display lively. Remember, less is often more—select a few standout pieces rather than cluttering the space. With vintage finds, your shelves become a curated showcase that reflects your style and history, adding warmth and personality that feels both timeless and authentic.
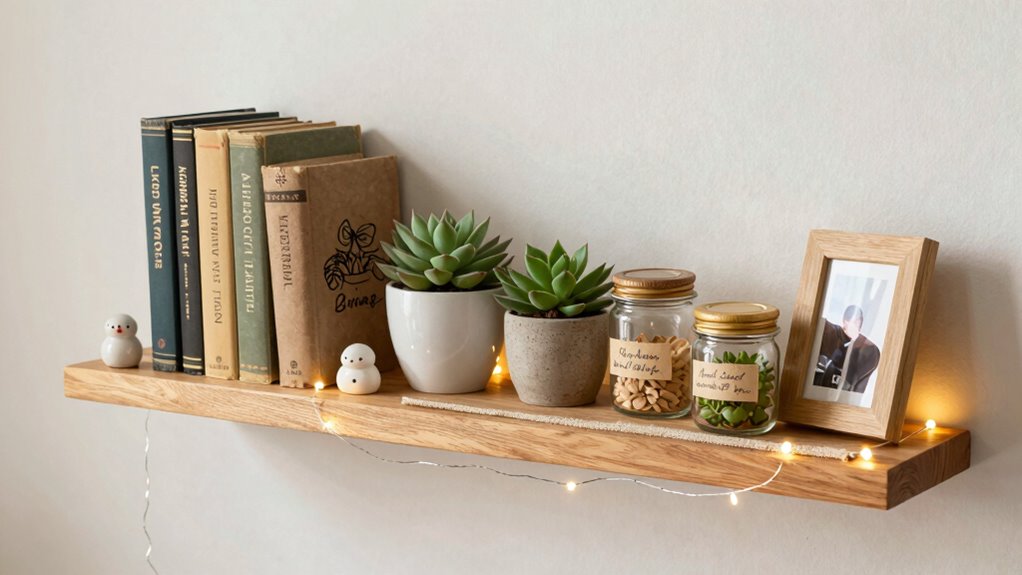
Incorporate Plants Into Your Shelves for a Natural Touch
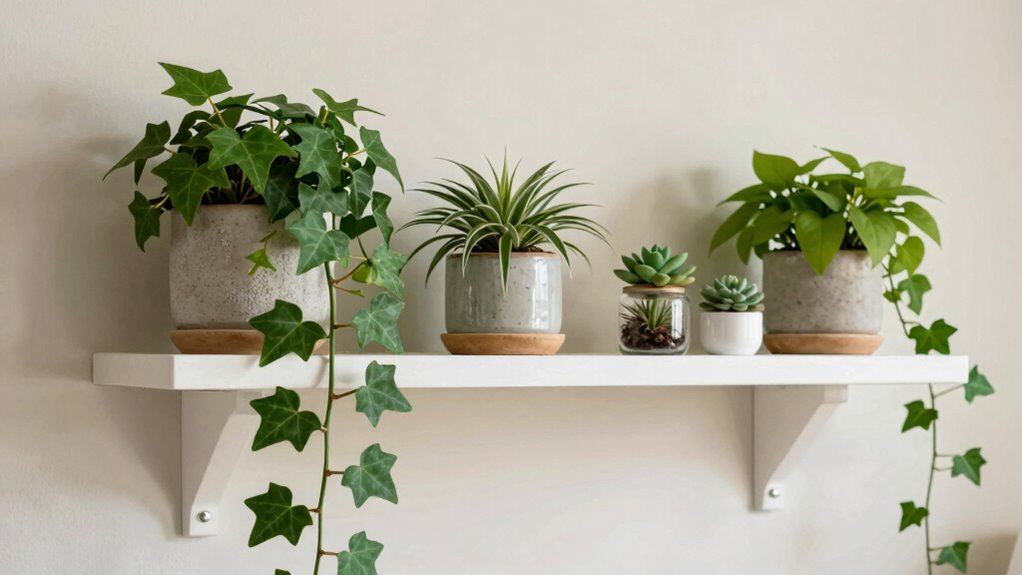
Adding plants to your shelves brings a fresh, natural vibe, but choosing the right types is key. Get creative with your arrangements to add visual interest and balance, and make sure to care for your plants so they stay healthy. With the right approach, your shelves will become a lively, green focal point.
Selecting Suitable Plant Types
Ever wondered which plants work best for your shelves? Choosing the right plants enhances color coordination and supports shelf durability. Opt for plants with manageable growth habits to prevent overcrowding or damage. Consider the lighting conditions—succulents thrive in bright spots, while ferns prefer shade. Think about size; small to medium plants fit better without overwhelming your space. Select plants with sturdy stems or leaves that won’t bend or break easily. Incorporate a mix of textures and shades to create visual interest. Use trailing plants like pothos for a flowing effect, or compact options like aloe vera for a modern look. Remember, well-chosen plants add natural beauty and won’t compromise your shelf’s stability or style.
Arranging Plants Creatively
Once you’ve selected the perfect plants for your shelves, the next step is to arrange them in a way that highlights their natural beauty. Think of your plants as living wall art, adding visual interest and texture to your space. Mix different heights, shapes, and leaf textures to create a dynamic display. Place taller plants at the back or corners to add depth, while smaller ones can cascade or spill over the edges. Incorporate decorative pots that complement your garden decor style for a cohesive look. Don’t be afraid to experiment by grouping plants in clusters or spacing them out for a more airy feel. The goal is to craft a natural, eye-catching arrangement that enhances your shelves and makes your space feel fresh and inviting.
Maintaining Plant Health
How can you keep your plants thriving while integrating them into your shelves? The key is to guarantee they get enough light and proper care. Use DIY lighting solutions like small LED grow lights to boost natural light, especially if your shelves are in low-light areas. Keep your shelf organization tidy to prevent overcrowding, which can restrict airflow and cause issues like mold or pests. Regularly check soil moisture; most plants prefer slightly dry soil between watering. Rotate plants periodically for even growth. Use well-draining pots to prevent root rot. Consider humidity levels—grouping plants together can help maintain humidity naturally. With thoughtful shelf organization and DIY lighting, you’ll create a healthy environment that keeps your plants happy and vibrant.
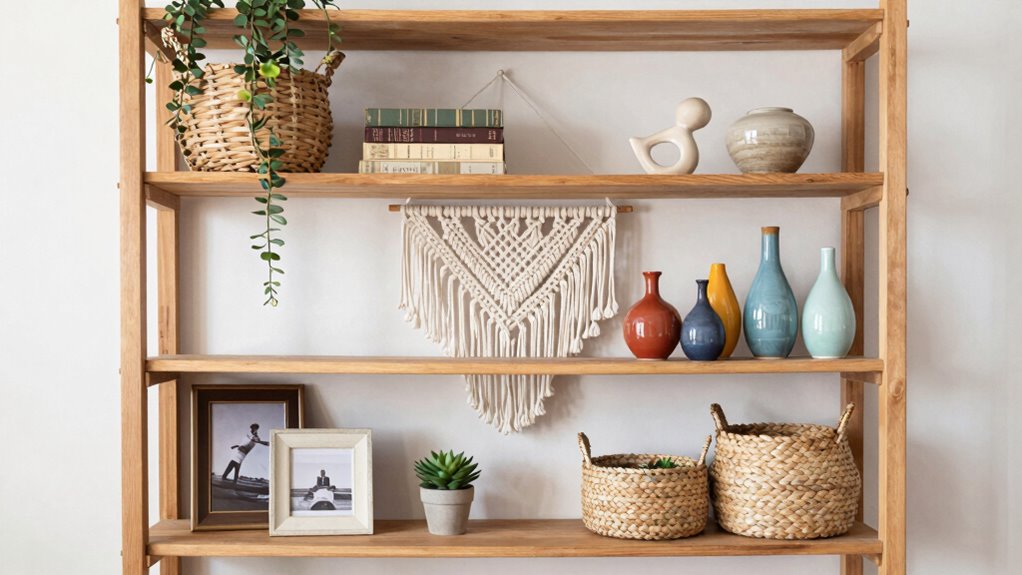
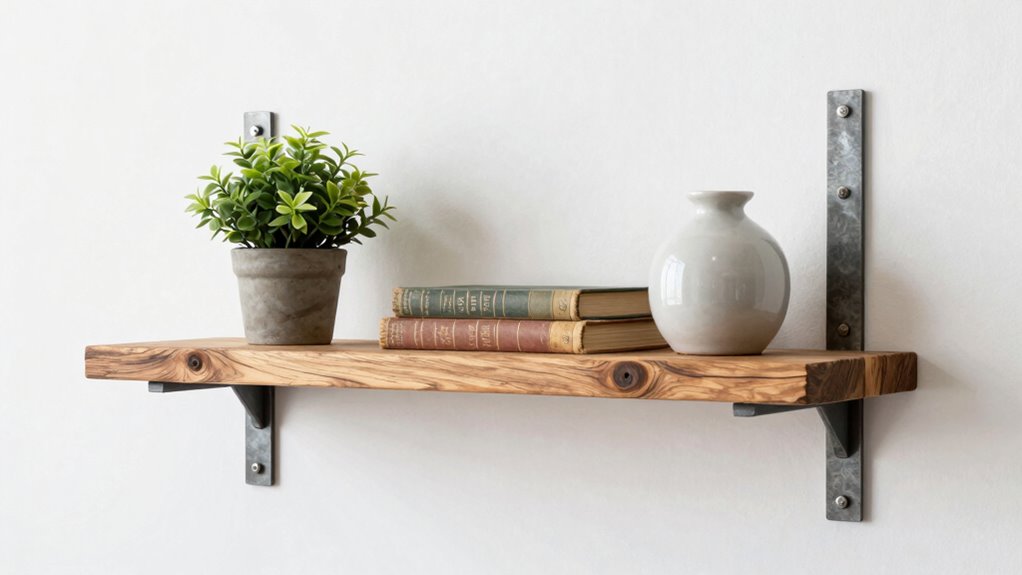
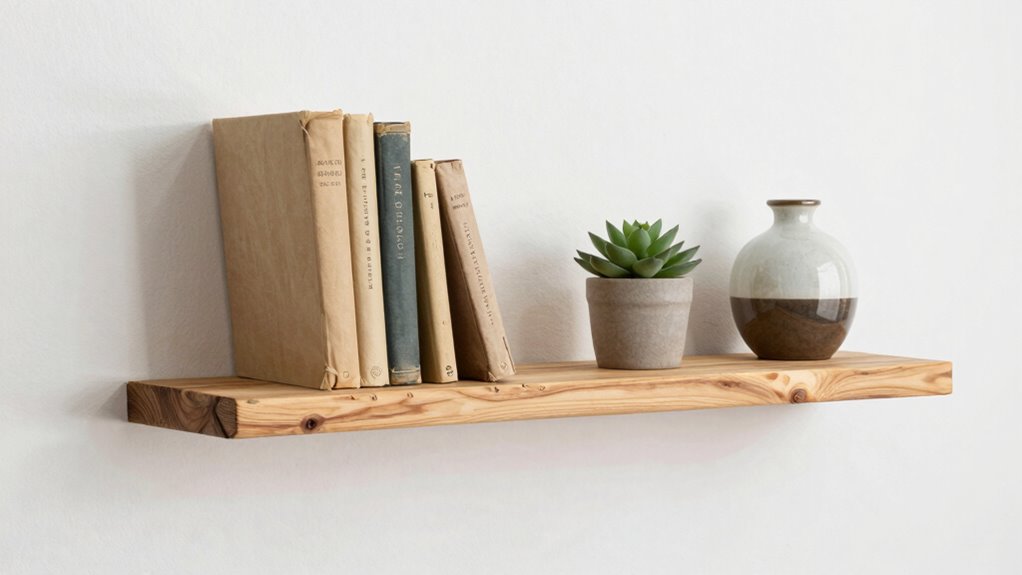
Arranging Books and Decor for an Inviting Shelf Display
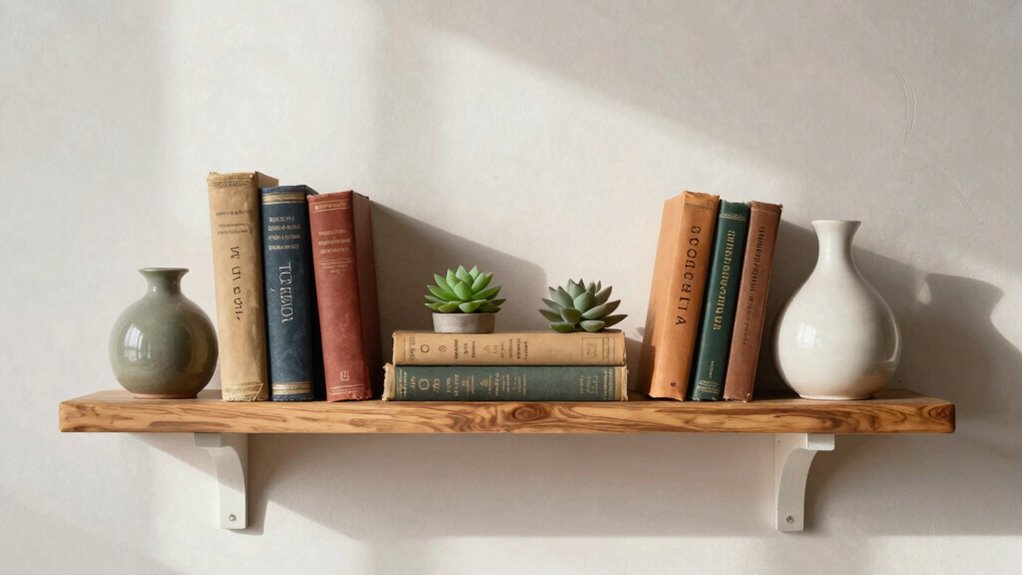
Arranging books and decor on your shelf is an art that combines practicality with visual appeal. To create an inviting display, start with a seasonal color palette to keep things fresh and cohesive. Mix books with decorative objects, like vintage-inspired displays, to add charm and personality. Group similar items together and vary the heights to create visual interest. Use stacks of books as platforms for small decor pieces, such as candles or framed photos. Balance is key—distribute colors and textures evenly across the shelf. Don’t be afraid to leave some open space, which prevents the display from feeling cluttered. With thoughtful placement, your shelf will become both functional and a welcoming focal point in your space.
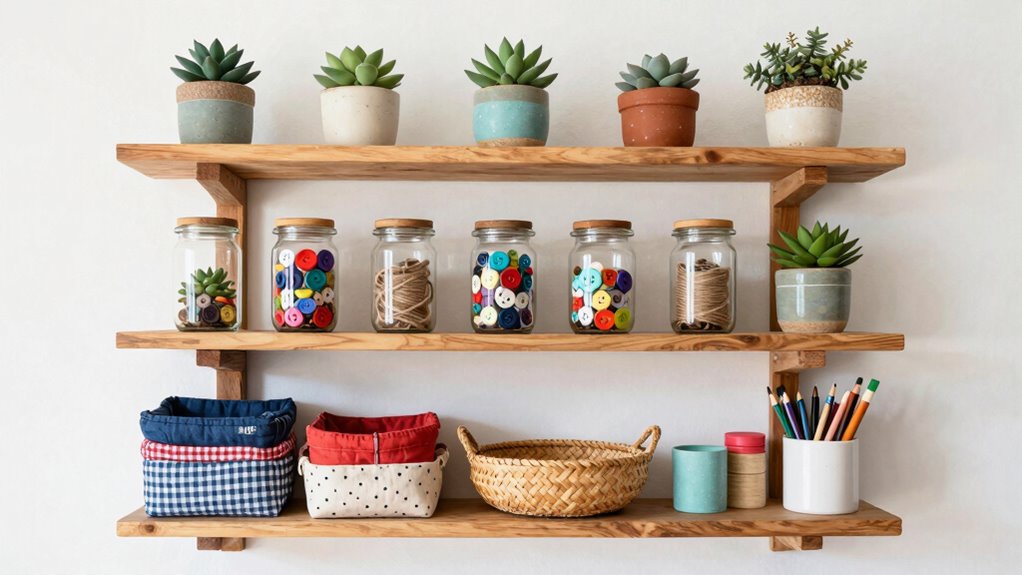
Personalize Your Shelves With Labels and Decorative Details
Adding custom label designs can instantly give your shelves a unique touch and help organize your items effortlessly. Decorative accents, like small trinkets or framed art, make your display more lively and personal. Together, these details turn a simple shelf into a true reflection of your style.
Custom Label Designs
Personalizing your shelves with custom labels and decorative details instantly elevates their appearance and makes organizing more enjoyable. With custom label designs, you can create personalized shelf tags that reflect your style and help you organize efficiently. These labels can be crafted from various materials like chalkboard paper, washi tape, or hand-painted signs. Think about using labels for spice jars, book categories, or storage bins. You might add playful fonts, elegant calligraphy, or quirky illustrations to make each label stand out. Consider incorporating color themes that match your decor for a cohesive look. Custom labels not only streamline your organization but also add a charming, handcrafted touch to your shelves. They’re easy to make and truly make your space feel uniquely yours.
Adding Decorative Accents
To truly make your shelves stand out, incorporate decorative accents that complement your overall decor. Personalize your shelves with labels, tags, or small decorative objects that add personality. Focus on color coordination by choosing accents that match or contrast intentionally with your surrounding decor. This creates visual harmony and draws attention to your display. Additionally, use texture contrast—pair smooth, shiny items with rougher, matte surfaces to add depth and interest. Incorporate small sculptures, vintage trinkets, or woven elements to break up uniformity and add tactile appeal. These accents not only enhance style but also make your shelves more inviting and unique. With thoughtful color choices and varied textures, your shelves will become a curated focal point in your space.
Create Multi-Tiered Shelves for Extra Storage and Visual Impact
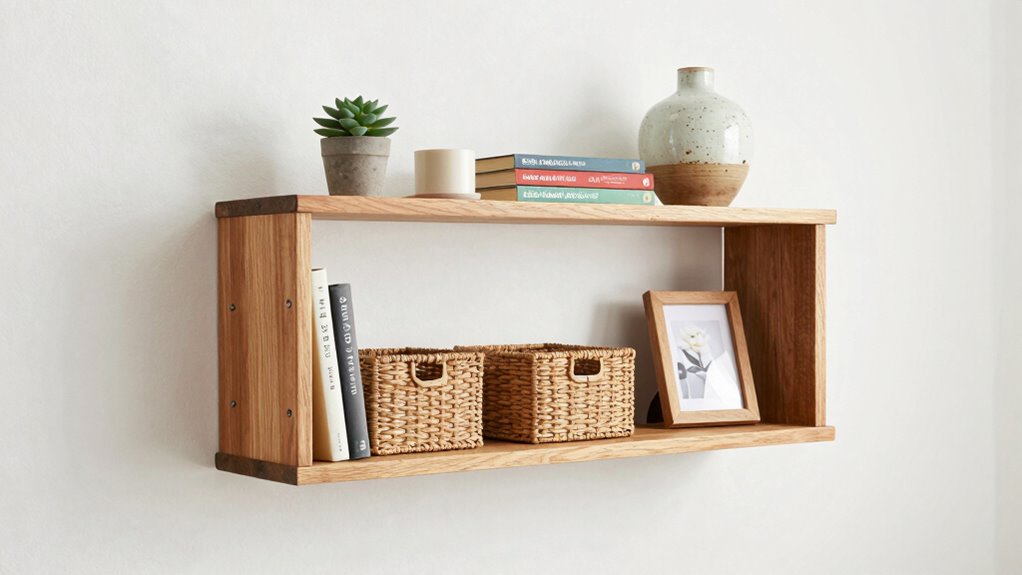
Creating multi-tiered shelves not only boosts your storage space but also adds a striking visual element to your room. By stacking shelves at different heights, you create depth and dimension, making your space more dynamic. Use color coordination to unify the look, such as matching the hues of decorative items or artwork across tiers. Incorporate texture contrast by mixing smooth surfaces with rustic wood or woven baskets to add tactile interest. Consider arranging books, plants, and trinkets thoughtfully to balance visual weight. This setup invites the eye to explore each level, making your room feel curated yet functional. A well-designed multi-tiered shelf transforms clutter into a stylish feature, maximizing storage while elevating your decor.
How to Make Minimalist Shelves for a Modern Look
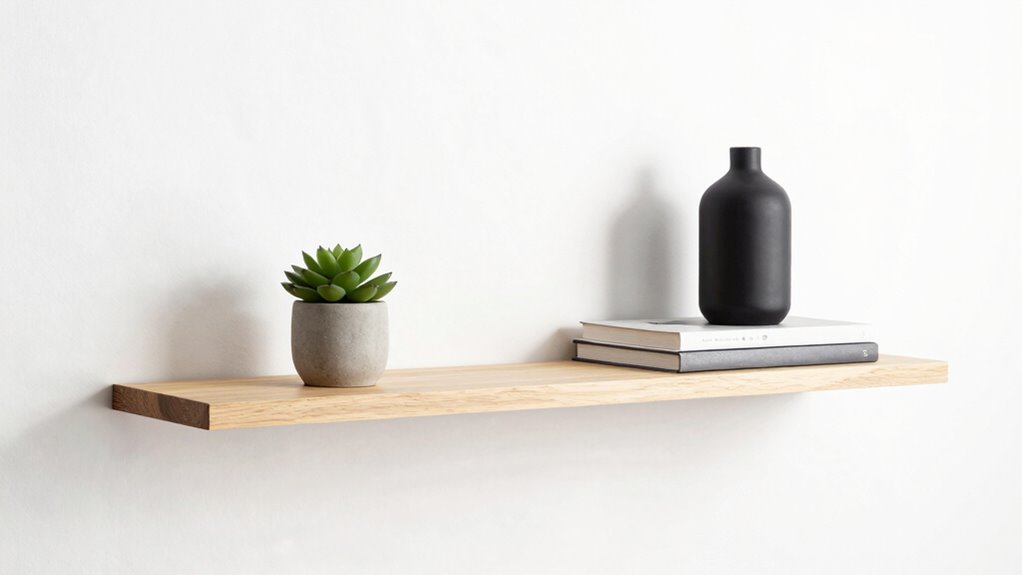
To create minimalist shelves with a modern vibe, start by choosing slim, streamlined materials that blend seamlessly into your space. Focus on clean, simple lines to keep the design sleek and uncluttered. Make sure to install them with precision for a polished, professional look that highlights their minimalist appeal.
Choosing Slim Materials
Have you ever noticed how slim materials instantly give shelves a sleek, modern vibe? Choosing the right materials is key to achieving that minimalist look. Opt for thin, lightweight options like plywood, metal, or glass, which contribute to a clean, airy feel. Pay attention to color coordination—stick to neutral tones or subtle shades to maintain simplicity and visual harmony. Material durability also matters; select sturdy options that won’t warp or break easily.
- Thin plywood with a matte finish
- Sleek glass panels
- Slim metal brackets or supports
- Lightweight composite boards
- Minimalist floating shelf designs
These choices create a streamlined aesthetic while ensuring your shelves remain functional and durable. Keep it simple, and your modern shelves will stand out effortlessly.
Emphasizing Clean Lines
Achieving a modern look with minimalist shelves hinges on emphasizing clean, straight lines that evoke simplicity and order. Use neutral color palettes like whites, grays, or muted tones to maintain a sleek appearance. Incorporate lighting options such as recessed or strip lighting to highlight the clean edges and create a subtle glow. Keep shelf designs simple—avoid ornate details or excessive hardware. Focus on seamless joins and smooth surfaces to enhance the minimalist vibe. Here’s a quick guide:
| Aspect | Tips | Impact |
|---|---|---|
| Color Palettes | Stick with monochromes or muted tones | Creates calm, cohesive look |
| Lighting Options | Use hidden or integrated lighting | Adds depth without clutter |
| Shelf Material | Opt for sleek, flat surfaces | Maintains straight lines |
| Hardware | Minimize or hide hardware | Keeps lines clean |
| Arrangement | Keep objects spaced evenly | Preserves order and simplicity |
Installing With Precision
Installing your minimalist shelves with precision guarantees they not only look sleek but also stay secure over time. To guarantee perfect alignment, use a level and measuring tape before drilling. Focus on color coordination by choosing hardware that complements your wall color and shelf finish for a seamless look. Prioritize shelf durability by selecting sturdy brackets and anchors suited for your wall type. Mark your drill points carefully, double-checking measurements to prevent uneven placement. Keep your workspace tidy to avoid slipping or misalignment. Use appropriate tools like a drill, screwdriver, and pencil for accuracy. This attention to detail results in a modern, minimalist aesthetic that’s both functional and visually appealing, with lasting shelf durability and cohesive color coordination.
Add Hooks or Baskets to Your Shelves for Extra Functionality
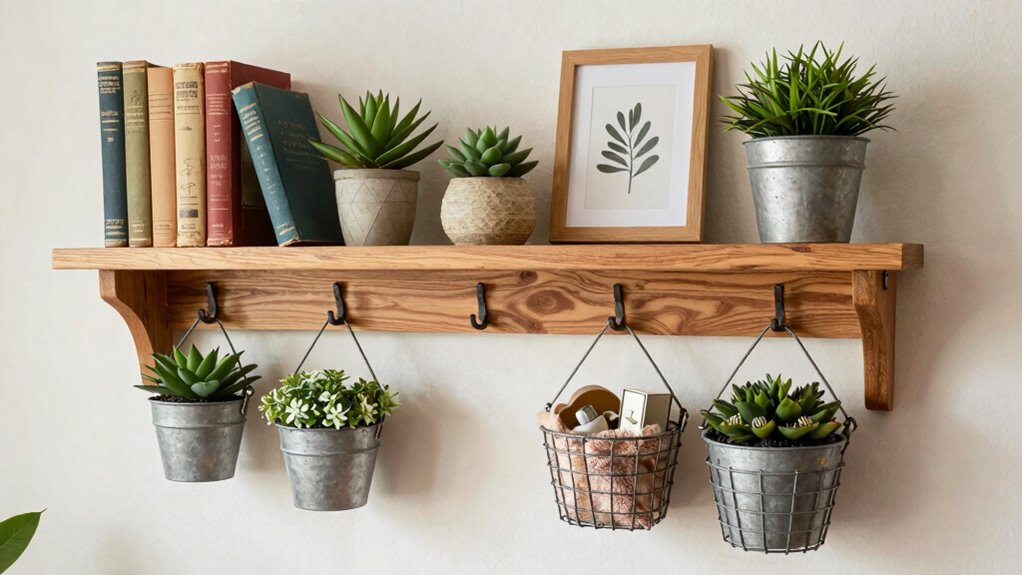
Adding hooks or baskets to your shelves instantly boosts their functionality and organization. These shelf accessories aren’t just practical; they also serve as decorative accents that enhance your space’s style. Hang hooks beneath shelves to hold keys, mugs, or small tools, freeing up surface area. Baskets are perfect for storing magazines, toys, or craft supplies while adding texture and warmth. Choose baskets made from woven materials or painted wood to match your decor. Incorporate hooks or baskets at different heights to create visual interest and maximize storage. This simple upgrade keeps clutter at bay and makes your shelves more versatile. Plus, it’s easy to customize with DIY touches, ensuring your shelf setup reflects your personal style while staying highly functional.
Use Paint Stencils or Decals to Make Your Shelves Stand Out

Enhancing your shelves with paint stencils or decals transforms their appearance from plain to eye-catching. You can create stunning visual effects by playing with color contrast and pattern effects that complement your decor. Choose bold, contrasting hues for a striking look or subtle shades for a more refined feel. Use stencils to add geometric shapes, floral motifs, or abstract designs that catch the eye. Decals allow for quick updates and intricate details without the mess. Incorporate these ideas:
- Bright, contrasting colors for bold pattern effects
- Metallic or matte finishes for added texture
- Repeating geometric shapes for modern flair
- Nature-inspired decals for a calming vibe
- Customized stencils with personal motifs
These techniques make your shelves uniquely yours, drawing attention and adding style effortlessly.
Craft Corner Shelves to Maximize Small Spaces
When space is limited, crafting corner shelves is a smart way to make the most of every inch. You can install small, DIY corner shelves that fit snugly into tight spots, like between furniture or in unused corners. To enhance their impact, use creative lighting—like LED strips or small puck lights—to highlight your displayed items and add warmth. Your wall color choices also matter; light, neutral shades can make the space feel larger and more open, while bold colors create a striking backdrop. Keep your shelves simple and clutter-free to maximize visual space. With these tips, your corner shelves won’t just save space—they’ll become a stylish focal point that showcases your personality and clever design sense.
How to Incorporate Lighting Into Your Shelf Design
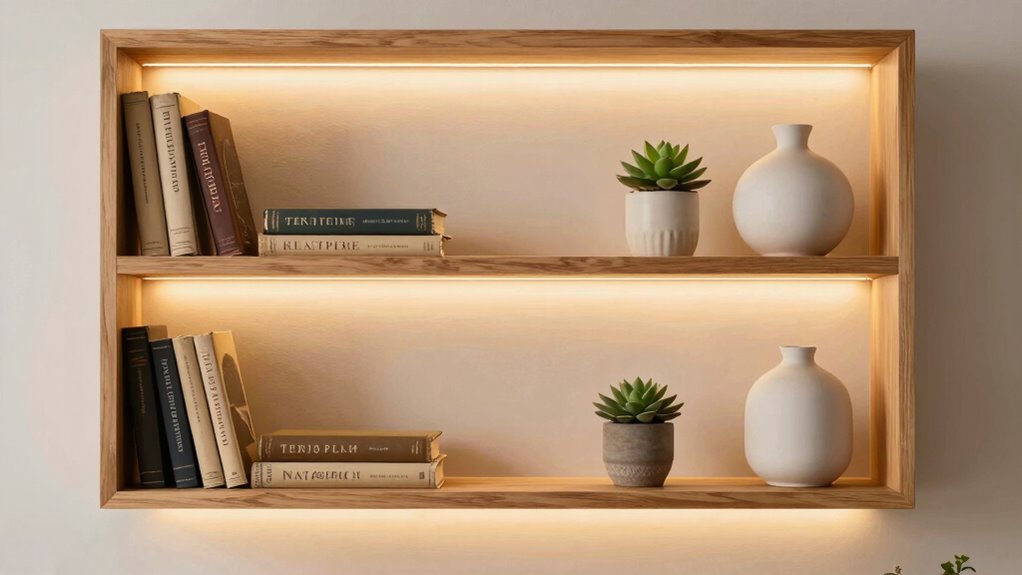
Incorporating lighting into your shelf design instantly elevates both the functionality and aesthetic appeal of your space. It highlights your favorite items, creates ambiance, and adds depth. To achieve effective shelf illumination, consider these lighting ideas:
Adding lighting to shelves enhances style, highlights decor, and creates a warm, inviting atmosphere.
- Install LED strip lights beneath each shelf for a sleek, modern look.
- Use small puck lights to spotlight decorative pieces.
- Incorporate battery-operated fairy lights for a whimsical touch.
- Place a mini table lamp or decorative light fixture nearby for soft, ambient lighting.
- Use warm-colored bulbs to create a cozy, inviting atmosphere.
These lighting ideas make your shelves more than just storage—they become eye-catching focal points, blending style with practicality. Thoughtful shelf illumination transforms your space into a warm, inviting environment that showcases your personality.
Budget-Friendly DIY Shelf Styling Ideas
Adding lighting can elevate your shelf’s look, but you don’t have to spend a lot to achieve a stylish display. Budget-friendly ideas include using vintage accessories, like old books or antique jars, to add character. Wall color choices also matter; painting your wall a bold or contrasting color makes your shelf stand out without extra cost. Arrange items in an intentional, balanced way to maximize visual interest without clutter.
| Tip | Example |
|---|---|
| Use vintage accessories | Old cameras, vintage vases |
| Play with wall colors | Bold accent wall or soft pastel hues |
| Keep it simple and balanced | Mix height and size of objects |
How to Maintain and Clean Your Handmade Shelves

To keep your handmade shelves looking their best, regular maintenance and cleaning are vital. Proper care preserves their decorative finishes and keeps shelf organization intact. Dust your shelves weekly with a soft cloth to prevent buildup that can dull finishes. Use a gentle cleaner suited for the material—wood, metal, or paint—to wipe down surfaces without damaging the decorative finishes. Check for loose screws or nails and tighten them to maintain stability. When arranging items, avoid overcrowding to keep shelf organization neat and accessible. Consider applying a fresh coat of protective wax or sealant periodically to enhance durability. Keep clutter minimal to prevent scratches and maintain an attractive appearance. Regular upkeep ensures your shelves remain functional and visually appealing for years to come.
Troubleshoot Common DIY Shelf Building and Styling Problems
Building and styling your DIY shelves can sometimes lead to common issues like wobbling, uneven surfaces, or unstable arrangements. To fix wobbling, double-check your wall anchors and guarantee brackets are securely fastened. For uneven surfaces, use a level to adjust shelves before securing them fully. Incorporate creative lighting to distract from minor imperfections and highlight your shelf organization. When shelves feel unstable, distribute weight evenly and avoid overcrowding. If items slide or tip, add non-slip pads or small brackets for extra support. Properly balancing your decorations and tools helps prevent wobbling and instability. Regularly inspect your setup and make adjustments as needed. With these tips, you’ll troubleshoot common problems efficiently and create a sturdy, visually appealing display.
Before-and-After Shelf Transformations to Inspire Your Creativity
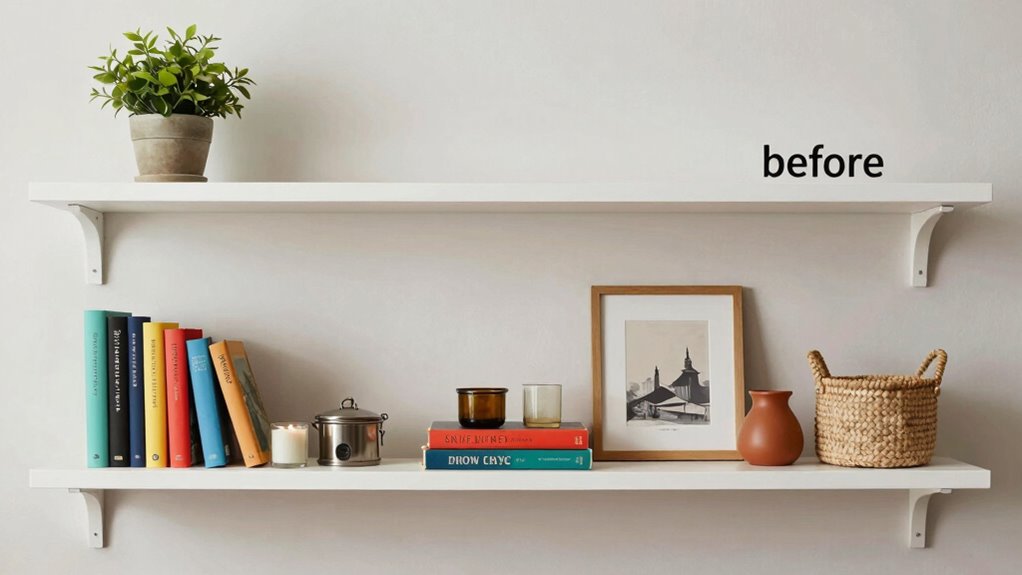
Transforming a plain shelf into a stunning focal point can dramatically change your space, and before-and-after comparisons showcase just how much impact a few simple updates can make. You’ll see how adding vintage decor pieces instantly elevates the style, turning a cluttered shelf into a curated display. By optimizing space with clever arrangements, you free up room and create a balanced look. Fresh paint or a new backing transforms the background, making your items pop. Incorporating plants or unique accents adds personality. These transformations highlight the power of small changes, inspiring you to experiment with DIY techniques for a personalized, functional, and stylish shelf.
- Replacing clutter with vintage decor accents
- Using paint to refresh and define space
- Rearranging items for better space optimization
- Adding plants for freshness and texture
- Incorporating unique, DIY-crafted pieces
Frequently Asked Questions
How Do I Prevent My Shelves From Sagging Over Time?
To prevent your shelves from sagging over time, guarantee proper shelf maintenance by choosing sturdy materials and supporting heavier items with brackets or cleats. Incorporate decorative accents strategically to distribute weight evenly and avoid cluttering the edges. Regularly check the brackets and screws, tightening or replacing them as needed. Properly spaced supports and mindful styling help maintain your shelves’ shape while adding aesthetic appeal.
What Are the Best Hidden Fasteners for a Seamless Look?
In a world where every detail matters, hidden mounting brackets are your best bet for a seamless look. Opt for decorative brackets that blend into your wall, or choose hidden mounting brackets for a truly clean aesthetic. These fasteners stay concealed behind the shelf, giving you a minimalist, clutter-free appearance. You’ll love how effortlessly stylish your space looks when you prioritize these discreet hardware options.
How Can I Customize Shelves for Specific Weight Capacities?
To customize shelves for specific weight capacities, start with careful material selection, choosing sturdy options like solid wood or metal for heavier loads. Reinforce shelves with supports or brackets suited to your weight needs. Consider aesthetic customization by painting or staining the shelves to match your decor, all while ensuring the structural integrity isn’t compromised. Properly anchored brackets and quality fasteners also help maintain safety and durability under different weights.
What Safety Precautions Should I Follow During Installation?
Did you know that over 60% of DIY home accidents happen during installation? To stay safe, always wear protective gear and confirm your wall anchors can support the weight of your decorative accents and lighting options. Double-check measurements before drilling, and use a level for precision. Secure shelves firmly to studs or anchors, and keep your workspace clear to prevent falls or mishaps during installation.
How Do I Choose the Right Shelf Depth for Different Items?
You choose the right shelf depth by considering the material and aesthetic balance. For lightweight décor or small items, opt for a shallower shelf, around 4-6 inches deep. For books or larger objects, go for a deeper shelf, 8-12 inches. Material selection influences durability and weight capacity, so pick sturdy materials like wood or metal. Balance functionality with style to guarantee your shelves suit your space and items perfectly.
Conclusion
With your newfound skills and creative spirit, you’re now ready to turn plain walls into stories of craftsmanship and style. Like an artist adding finishing touches to a masterpiece, your handmade shelves will transform your space into a gallery of your personality. Embrace the journey of upcycling and customizing, knowing each shelf is a chapter in your home’s unique narrative. Let your imagination soar—your perfect shelves are just a craft away.