
To organize your craft room efficiently, start by evaluating your space and categorizing supplies like paints, fabrics, and tools. Declutter by discarding or donating items you haven’t used in over a year. Designate specific zones for activities such as sewing or painting and invest in storage solutions like labeled bins and shelves. Keep everything accessible and regularly maintain your system. Continue exploring how to optimize your space for a more creative and clutter-free environment.
Key Takeaways
- Assess your space and categorize supplies to maximize organization and workflow.
- Declutter regularly by discarding or donating unused or broken items to reduce clutter.
- Use clear, labeled storage containers to keep similar supplies organized and easily accessible.
- Designate specific zones for different craft activities to improve efficiency and focus.
- Maintain your system with routine tidying, label updates, and periodic reassessment of supplies.

NoCry Clear Safety Glasses for Men and Women with Anti-Fog and Scratch Resistant Wrap Around Lenses, Adjustable Temples and Nose Pads — ANSI Z87 Certified Protective Eyewear with 100% UV Shielding
- Durable Polycarbonate Wraparound Design: Offers superior protection from threats
- Adjustable, Comfortable Fit: Extendable arms and soft nose pad
- Non-slip Rubber Grips: Ensures glasses stay securely in place
As an affiliate, we earn on qualifying purchases.
Assess Your Space and Categorize Your Supplies
Before you begin organizing, take a close look at your craft room to understand its layout and what supplies you already have. Walk around and note the different areas, identifying where you do most of your work. Incorporate vertical storage solutions to maximize space and keep your supplies accessible. Gather all your supplies and start sorting them into categories like paints, fabrics, paper, tools, and embellishments. This helps you see what you own and prevents duplicates. As you categorize, consider how often you use each item and whether it belongs with similar supplies. Keep in mind the flow of your workspace—placing frequently used items within easy reach. Additionally, understanding entertainment and parks hours can be helpful when planning visits to craft-related events or workshops. Recognizing celestial influences on personal traits can also inspire creative organization ideas that resonate with your style. This initial assessment gives you a clear picture of your inventory and how to best arrange everything for efficiency and ease of access. Focusing on emotional alignment can also help you maintain a positive mindset during your organizing process, making it more enjoyable and effective. Incorporating ergonomic principles can further enhance comfort and productivity while working in your craft space.
Declutter and Purge Unused Items
Start by identifying items you no longer use or need, and decide whether to discard, donate, or recycle them. Clearing out unused supplies makes space and reduces clutter. Incorporate home decor organization into your shopping habits to avoid purchasing unnecessary items that contribute to clutter. Once you’ve removed the extras, organize what’s left for easy access and efficiency. Additionally, researching trending organizing techniques can help you implement innovative solutions tailored to your space. Paying attention to contrast ratio in your storage solutions can also improve visibility and accessibility of your supplies.
Identify Items to Discard
To create a more functional craft space, you need to identify which items are no longer useful or taking up unnecessary space. Start by sorting through your supplies and asking yourself if you’ve used each item in the past year. If something is broken, expired, or simply unused, it’s time to discard it.
Be honest about whether you’ll ever realistically use certain materials again. Keep only the essentials and items that inspire you. Avoid holding onto duplicates or supplies that no longer serve a purpose.
Clear out clutter by setting aside items that don’t fit your current crafting needs. Removing these unnecessary items will free up space and make your craft room more organized and inviting. Incorporating storage solutions such as shelves, bins, and drawers can further enhance your organization and make your craft space more efficient. Considering proper organization techniques can help you maintain a clutter-free environment over time. Additionally, implementing these strategies can also improve your indoor air quality by reducing dust and allergens that accumulate with excess clutter. Regularly evaluating your supplies aligns with best practices in ethical hacking, where continuous assessment of vulnerabilities helps maintain security. Utilizing professional services for customized storage systems can optimize your space even further and ensure long-term organization.
Donate or Recycle Supplies
Once you’ve sorted through your supplies and identified items to discard, the next step is to donate or recycle what you no longer need. Look for local charities, schools, or community centers that accept craft supplies. Donating items in good condition clears space and benefits others. Proper donation procedures ensure your items reach those in need efficiently.
For supplies that are damaged or unusable, recycling is the responsible choice. Check local recycling programs or drop-off centers for appropriate disposal options. Be sure to sort recyclables properly—paper, plastic, and metal—so they’re processed correctly. Familiarizing yourself with recycling guidelines can make this process more efficient and environmentally friendly.
Additionally, being aware of payment security measures can help ensure your donations and recycling efforts are handled safely and securely, especially if you donate or purchase supplies online. Proper organization also helps prevent clutter buildup, making your craft space more functional and enjoyable. Utilizing storage solutions can further streamline your organization process and keep supplies accessible.
Avoid throwing everything in the trash; recycling reduces waste and supports sustainability. Clearing out unused or expired supplies helps you create a more functional, clutter-free craft room, making it easier to find what you need when inspiration strikes.
Organize Remaining Essentials
After donating or recycling unused supplies, it’s time to tackle what’s left. Begin by sorting your remaining items into categories like tools, embellishments, and papers. As you go, ask yourself if you’ve used each item in the past year. If not, consider donating or discarding it. This step helps prevent clutter from creeping back in. To stay organized, group similar items together and store them in clearly labeled containers. Use the table below to identify what to keep, donate, or discard:
| Keep | Donate | Discard |
|---|---|---|
| Frequently used tools | Extra paint bottles | Broken scissors |
| Favorite embellishments | Old craft magazines | Empty glue bottles |
| Essential papers | Unused fabrics | Dried-out markers |
| Staplers, punches | Surplus ribbons | Torn craft supplies |
| Specialty supplies | Duplicate items | Worn-out brushes |
Staying aware of organization strategies can help you maintain a tidy and functional craft room. Additionally, understanding currency fluctuations can help you manage your expenses more effectively when purchasing supplies from different sources. For example, being mindful of self watering plant pots can save you time and effort in plant care.
Designate Zones for Different Craft Activities
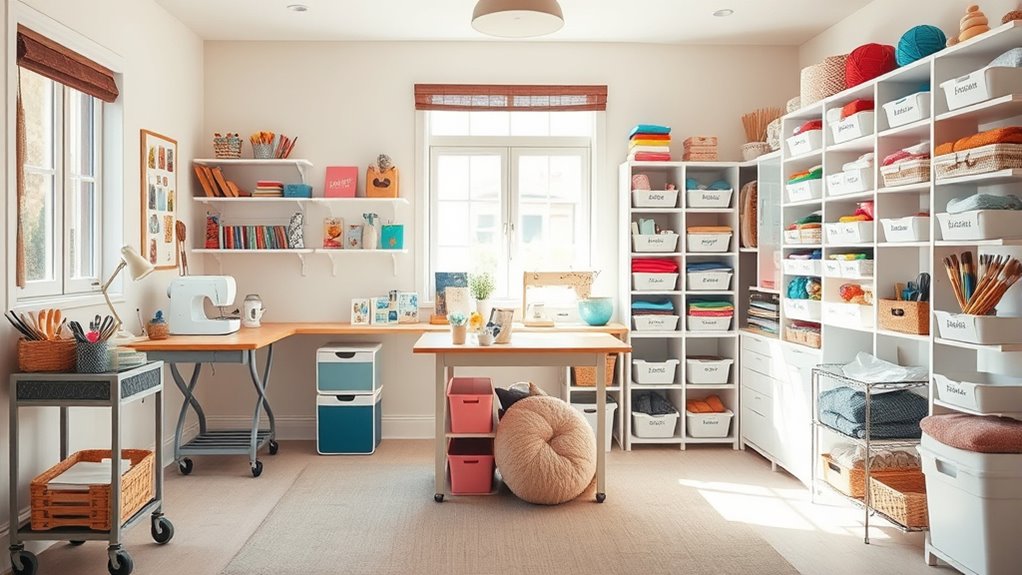
Have you ever noticed how clutter can stifle your creativity? When your craft room is disorganized, it’s hard to focus and get inspired.
To keep things flowing smoothly, designate specific zones for each activity. For example, set up a dedicated space for sewing, another for painting, and a separate area for cutting and assembling. This way, you’ll know exactly where everything belongs, and switching between projects becomes quicker.
Designate zones for each craft activity to stay organized and boost your creativity.
Keep your supplies for each activity close to their designated zones to minimize movement and save time. Clear boundaries help you stay organized and reduce mess.
When you assign zones, your craft room becomes more functional and inviting, making it easier to immerse yourself in projects and stay inspired.
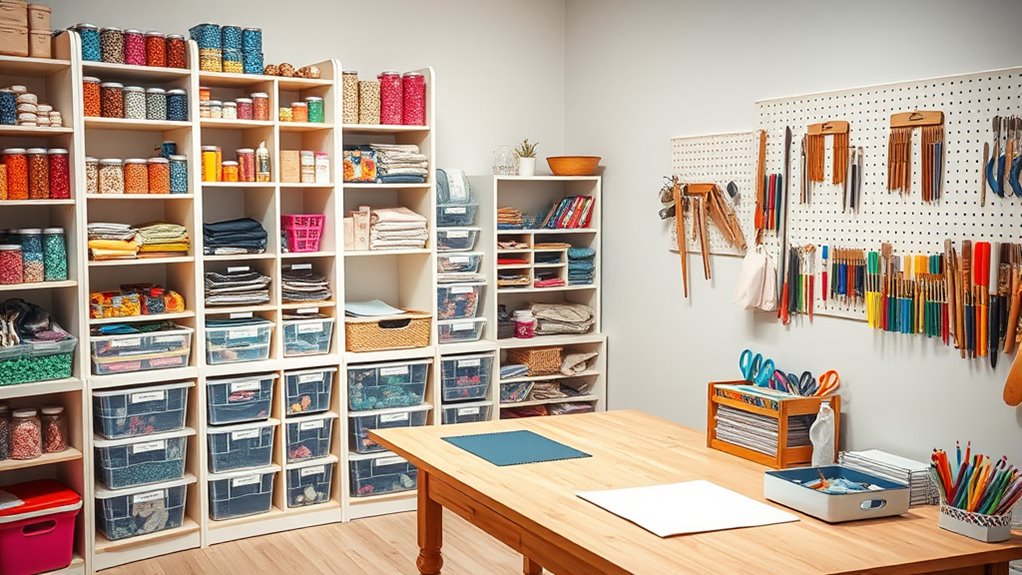
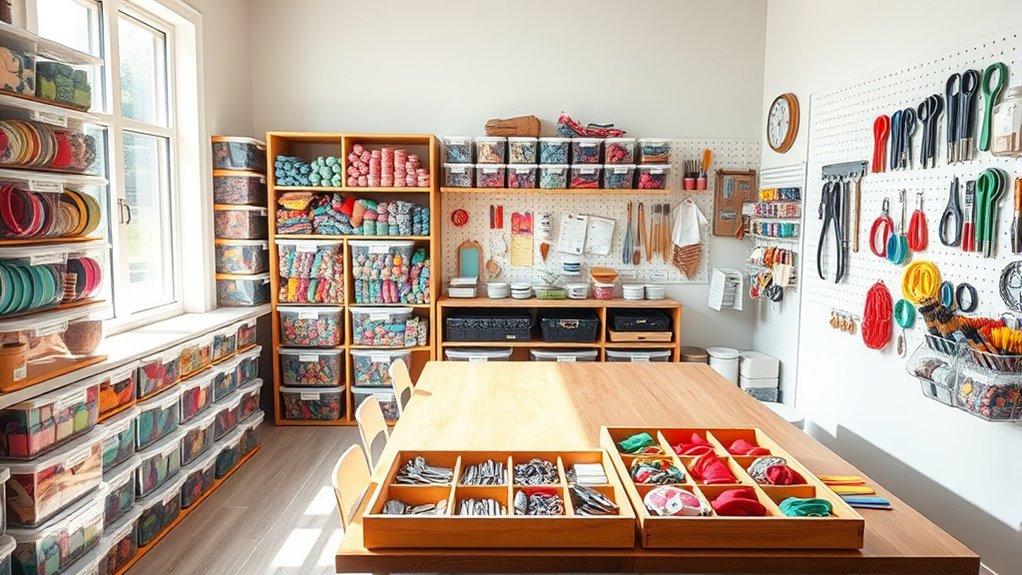
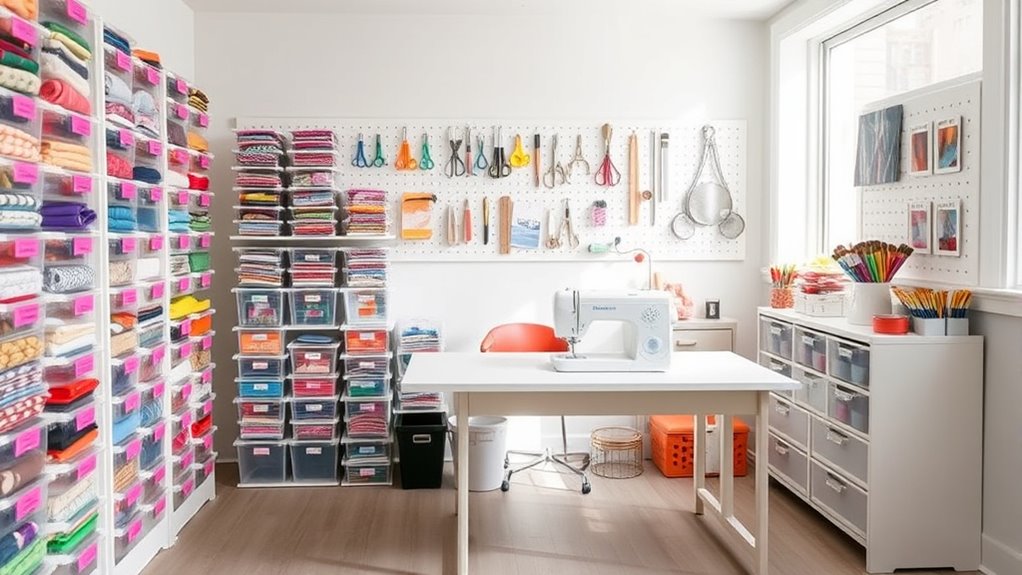
Invest in Storage Solutions for Organization

Investing in the right storage solutions is essential for keeping your craft room organized and efficient. Proper storage helps you access supplies quickly and keeps clutter at bay.
Consider these options to maximize space and functionality:
- Clear plastic bins: Perfect for stacking and seeing contents at a glance.
- Shelving units: Offer ample vertical storage for larger items and display.
- Drawer organizers: Keep small supplies like beads, buttons, and tools sorted.
- Wall-mounted racks: Ideal for hanging scissors, ribbons, or paper rolls, freeing up surface space.
Choosing versatile, durable storage solutions allows you to customize your space and keep everything tidy. Prioritize options that suit your craft habits and room layout to create an organized, inspiring environment.
Label and Maintain Your System

To keep your craft room organized over time, it’s essential to label your storage containers and systems clearly. Use easy-to-read labels with consistent wording, so you can quickly identify what’s inside without opening each container. Consider waterproof or laminated labels for durability.
Regularly review and update labels as your supplies change or new items are added. Maintaining your system involves routine tidying—return items to their designated spots after each project and declutter periodically. Create a schedule to reassess your organization setup, making adjustments where needed.
Proper labeling and consistent upkeep prevent clutter from accumulating and ensure your craft supplies stay accessible. Staying proactive with maintenance keeps your craft room functional, saving you time and frustration whenever inspiration strikes.
Personalize and Optimize Your Craft Room Layout

Personalizing and optimizing your craft room layout guarantees it works best for your creative process. To do this effectively, consider these key steps:
Personalize and optimize your craft space for seamless creativity and comfort.
- Arrange your workspace around your most-used tools and supplies for easy access.
- Create designated zones for different activities like cutting, sewing, or painting.
- Use adjustable furniture to adapt the space as your needs change.
- Incorporate personal touches like inspiring artwork or favorite colors to make the space inviting.
Frequently Asked Questions
How Often Should I Reorganize My Craft Room?
You might wonder how often to reorganize your craft room. It’s best to do it every few months or whenever things start feeling cluttered or disorganized.
Regular reorganization helps you stay productive and find supplies easily. Keep an eye on your workflow and adjust accordingly.
If you notice clutter piling up or supplies misplaced, it’s time to tidy up again. Staying proactive keeps your craft space functional and inspiring.
What Are Budget-Friendly Storage Options?
Looking for budget-friendly storage options? You can repurpose household items like mason jars, shoe boxes, or plastic containers to store your supplies.
Visit dollar stores for inexpensive organizers or use stackable bins and drawer dividers to maximize space.
Thrift shops often carry affordable shelving units or vintage containers that add charm.
With a little creativity, you’ll find practical solutions that keep your craft room tidy without breaking the bank.
How Can I Maximize Small Craft Spaces?
To maximize small craft spaces, you should utilize vertical storage like wall-mounted shelves and pegboards.
Opt for multi-functional furniture, such as fold-out tables or storage ottomans, to save space.
Keep your supplies organized in clear containers or labeled bins, and regularly declutter to maintain an open area.
What Safety Tips Should I Consider?
Think of your craft room as a garden, where safety is the sunlight guiding your growth. Keep sharp tools and chemicals away from curious hands, like weeds hidden from view.
Use proper ventilation to clear the air, preventing harmful fumes from building up.
Always unplug electrical devices when not in use, like closing gates to prevent accidents.
With these safety seeds planted, your creative sanctuary remains both inspiring and secure.
How Do I Handle Sentimental Craft Supplies?
Handling sentimental craft supplies can be tricky, but you can start by sorting through them carefully.
Keep the items that truly inspire you or hold special memories, and consider creating a dedicated display or memory box.
For supplies that no longer serve a purpose, think about donating, recycling, or repurposing them.
This way, you honor their significance without cluttering your space, making your craft room both functional and meaningful.
Conclusion
By organizing your craft room, you’re planting seeds of creativity that will bloom with every project. Clear space symbolizes an open mind, ready to explore new ideas. As you maintain your system, you nurture this garden of inspiration, letting your passion flourish freely. Remember, an organized craft room isn’t just a space—it’s a sanctuary where your imagination can grow wild and beautiful, turning every craft into a masterpiece rooted in harmony and purpose.