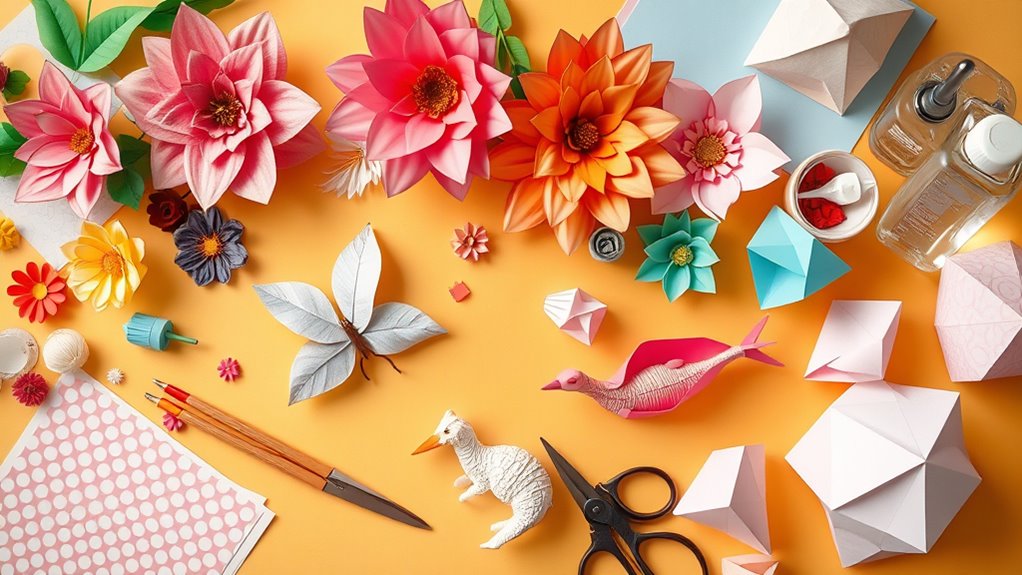
Looking for simple craft ideas using only paper and glue? You can make paper flower bouquets, greeting cards, quilling art, lanterns, or origami animals easily. Try creating paper heart garlands for celebrations, stylish silhouettes, or fridge magnets to decorate your space. With just these two materials, you can craft beautiful, personalized decor and gifts. Keep exploring, and you’ll find plenty of creative projects to try that will keep your hands busy and your space lively.
Key Takeaways
- Create paper flower bouquets, garlands, and silhouettes using simple cutting, folding, and layering techniques with just paper and glue.
- Make decorative wall art, paper stars, and mobiles by arranging cut shapes on surfaces for personalized home decor.
- Craft functional items like gift boxes, bookmarks, and paperclip holders with basic folding and gluing methods for practical use.
- Design paper heart garlands, wall hangings, and dimensional silhouettes for celebrations and festive decorations.
- Use a variety of colorful, patterned, or textured paper to enhance your projects without needing additional materials.

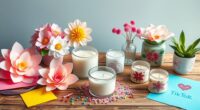
Lifelines FlowCrafts, Paper Flower Bouquet – Create a 5-Flower Bouquet with 80+ Petals, 2 Leafy Sprigs & Elegant Vase – Sensory Arts & Crafts Kit for Teens & Adults – Paper Decorations
- Calming Paper Flower Craft Kit: Create beautiful bouquets with mindfulness
- Complete Kit Included: 80+ petals, greenery, vase, and paint
- Easy Step-by-Step Assembly: Build flowers and arrange your bouquet
As an affiliate, we earn on qualifying purchases.
As an affiliate, we earn on qualifying purchases.
Paper Flower Bouquets
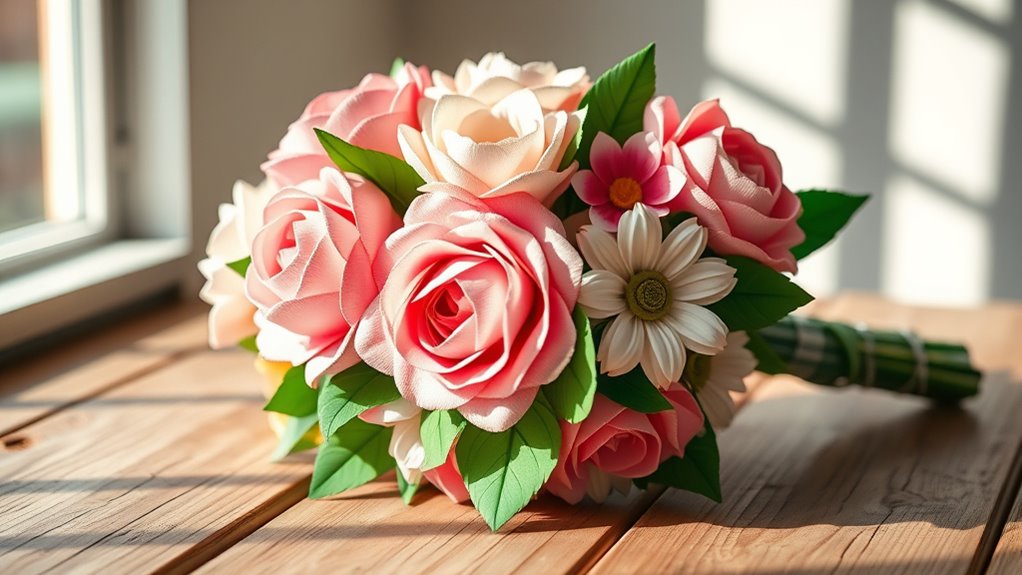
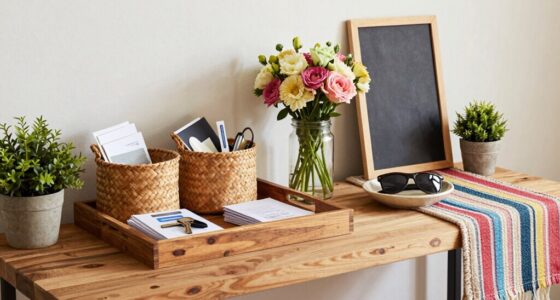
Creating paper flower bouquets is a fun and budget-friendly way to add lasting beauty to your space. You can craft vibrant, realistic-looking blooms using simple paper and glue. Start by choosing your favorite colors and types of paper—crepe, tissue, or cardstock work well. Cut out petal and leaf shapes, then assemble them carefully to mimic real flowers. Layering and curling the petals give your bouquet a three-dimensional look. Use floral wire or sturdy paper stems to hold everything together. Proper technique can make a significant difference in the final appearance of your flowers. To ensure your flowers look authentic, pay attention to the curving and shaping of each petal and leaf during assembly. Arrange your finished flowers in a jar or vase, and you’ve got a stunning, everlasting bouquet. These paper flowers require minimal materials and time, making them perfect for brightening up any room or creating personalized gifts. Creating beautiful arrangements can also be a thrilling way to explore different styles and techniques in DIY crafts.
Handmade Paper Greeting Cards
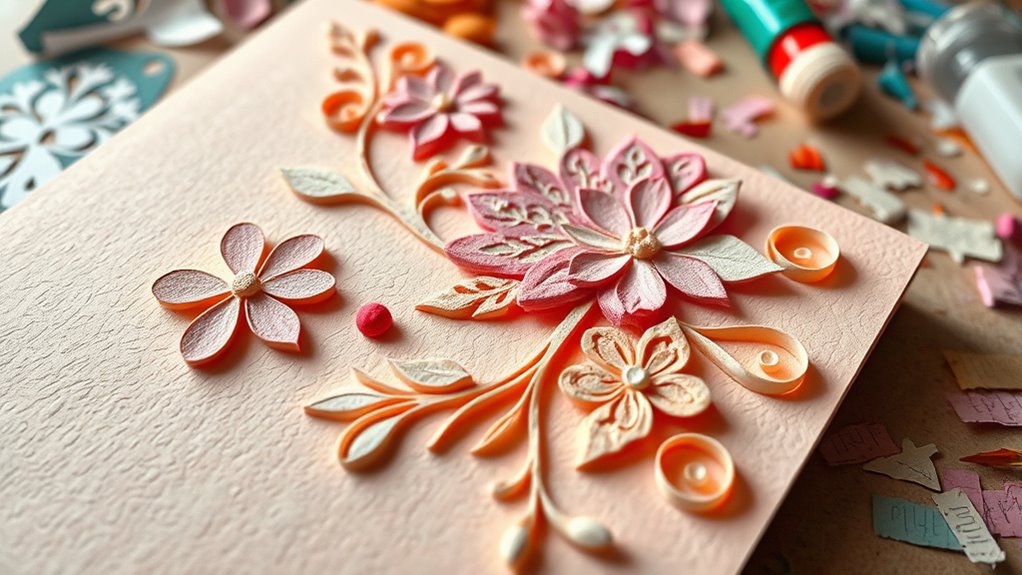
Handmade paper greeting cards offer a personal touch that store-bought cards can’t match. When you craft your own, you choose the colors, designs, and messages, making each card unique and meaningful. Start by folding your paper into a card shape, then add decorations like cut-out shapes, layered paper, or simple drawings. Use glue to attach embellishments securely. You can personalize your message inside, making it heartfelt and specific to the occasion. Experiment with different textures and techniques to create depth and interest. Handmade cards are perfect for birthdays, holidays, or just to brighten someone’s day. They’re quick to make and cost-effective, allowing you to truly customize your gift. Incorporating sound vibrations into your crafting process can inspire new creative ideas and enhance your overall experience. Understanding optimal angles for different techniques can help you achieve better results and improve your craftsmanship. Paying attention to exfoliation and skin preparation can also improve how your finished project looks and feels, just like in skincare. Additionally, practicing patience and paying close attention to detail work will result in more polished and professional-looking cards. Being mindful of adhesive types ensures your decorations stay securely in place, increasing the longevity of your cards. Your effort will be appreciated, and your card will stand out as a heartfelt gesture.
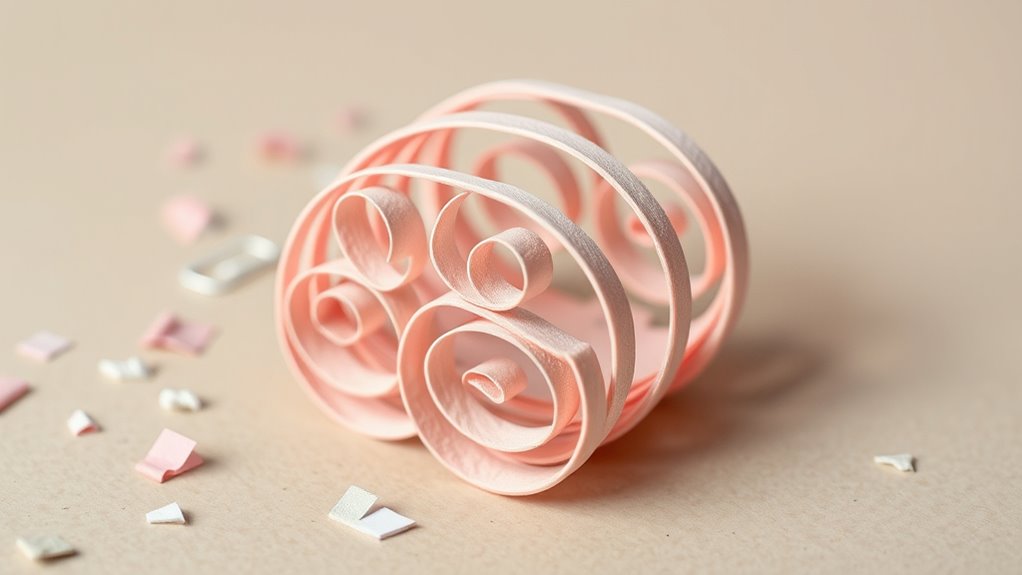
Paper Quilling Art
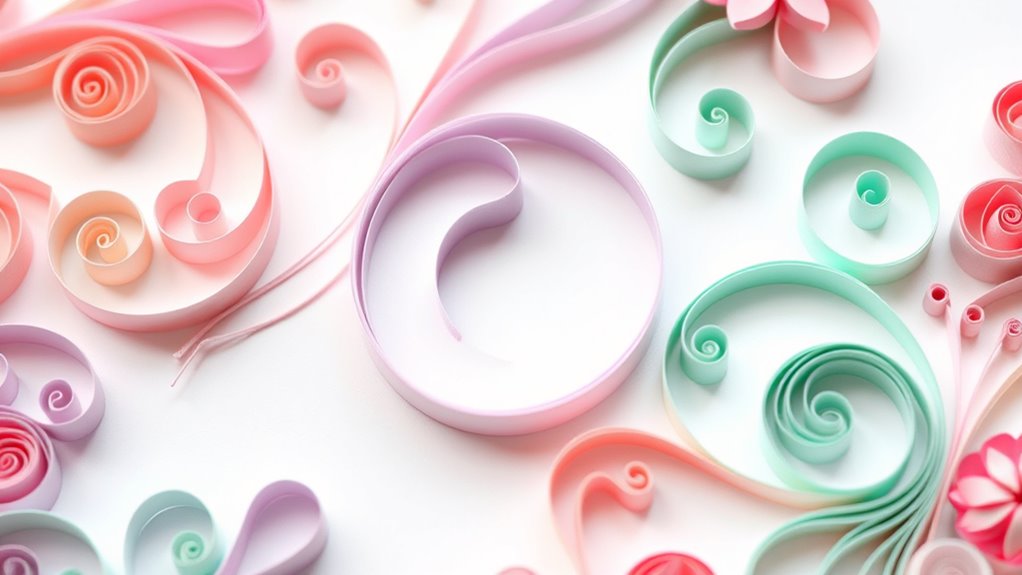
With paper quilling, you can create stunning designs using intricate curves and shapes. Bright colors come together to form eye-catching patterns and designs. It’s a fun way to turn simple strips of paper into detailed, colorful artwork. Incorporating mixed media techniques can also add texture and depth to your quilling projects, making them even more captivating. Additionally, understanding payment data security is essential when sharing or selling your artwork online to protect your personal information. Choosing eco-friendly materials for your supplies can further enhance the sustainability of your craft projects. Practicing mindful space and organization strategies can help you keep your craft area tidy and inspiring.
Intricate Curves and Shapes
Intricate curves and shapes are the hallmark of paper quilling art, transforming simple strips of paper into stunning, three-dimensional designs. You can create delicate spirals, teardrops, and tight coils that bring depth and elegance to your projects. Mastering these shapes involves carefully rolling, pinching, and shaping paper strips with your fingers or tools. Experimenting with different sizes and angles adds variety and complexity to your artwork. Here’s a quick guide to some common shapes:
| Shape | Technique | Use |
|---|---|---|
| Tight Coil | Roll paper tightly and glue end | Flowers, centers |
| Loose Coil | Allow coil to loosen naturally | Background elements |
| Teardrop | Pinch opposite sides after rolling | Petals, leaves |
| Marquise | Pinch at both ends of a coil | Decorative borders |
Practicing these forms enhances your ability to craft detailed, engrossing paper art. Additionally, understanding the holistic approach to design can help you create more balanced and harmonious compositions. Incorporating variety in shapes can further elevate the visual interest of your work, just as selecting the right projector technology can improve home cinema experiences. Exploring different materials such as textured or recycled paper can also add unique effects to your designs. Paying attention to vacuum cleaner performance can help you maintain a clean workspace, making your crafting process more enjoyable.
Colorful Patterns and Designs
Colorful patterns and designs are the key to making your paper quilling projects stand out. By choosing vibrant paper strips, you can create eye-catching swirls, floral motifs, or geometric shapes. Mix and match different colors to add depth and dimension, ensuring each piece is unique. Layering tightly rolled coils with loose, open designs creates contrast, making your artwork more dynamic. Use contrasting colors to highlight specific areas or to form intricate patterns. Don’t be afraid to experiment with color combinations; bold contrasts or harmonious palettes can completely change the mood of your project. Additionally, exploring cultural influences can inspire innovative patterns and add richness to your designs. Incorporating color theory principles can help you select harmonious or striking color combinations that enhance your overall design. Understanding visual balance can further improve the harmony of your patterns and make your artwork more visually appealing.
DIY Paper Lanterns

Creating your own paper lanterns is a fun and easy way to add a warm, festive glow to any space. With just paper and glue, you can craft beautiful, customized lanterns perfect for parties or cozy nights. Start by cutting your paper into a circle or square, then fold or cut to create patterns or designs. Glue the edges together to form a sphere or cylinder, and add a handle or decorative touches for flair. These lanterns can be hung indoors or outdoors, instantly transforming your environment. To ensure your lanterns are sturdy and safe, consider adhesion techniques that improve the durability of your craft. Use patterned or colored paper for unique effects, incorporate cut-out designs for interesting shadows, and experiment with different shapes and sizes for variety. Additionally, choosing the right glue type can significantly enhance the strength and longevity of your lanterns.
Origami Animal Figures
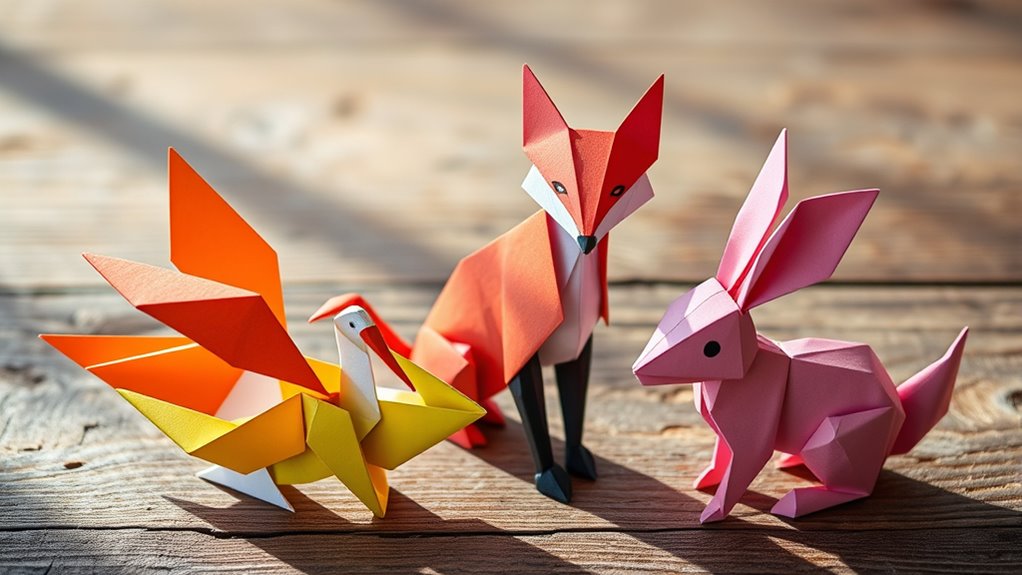
To create impressive origami animal figures, you’ll start with basic folding techniques that form the foundation. Once you master those, you can explore various animal shape options to make your designs more diverse. It’s helpful to study different furniture styles and design themes to inspire your creations. Finally, learn how to display and preserve your figures so they stay beautiful over time.
Basic Folding Techniques
Have you ever wondered how a simple fold can transform a flat sheet of paper into a lifelike animal figure? The key lies in mastering basic folding techniques. These foundational skills build the backbone for more complex origami creations.
With just a few precise folds, you can create detailed animal shapes that stand out.
Here’s what you’ll learn:
- Valley and mountain folds for structure and dimension
- Squash and petal folds for shaping animal features
- Creasing techniques to add realistic details
Animal Shape Variations
Ever wondered how to transform a simple paper fold into a variety of lifelike animal figures? With origami, you can create a diverse range of animals by adjusting your folds and angles. Start with easy designs like cranes and frogs, then move on to more complex shapes such as foxes, elephants, or butterflies.
Each animal variation relies on specific fold techniques that mimic natural features—like ears, wings, or tails. Experiment with different paper sizes and colors to add uniqueness and personality to your creations.
Display and Preservation
Once you’ve crafted your origami animal figures, displaying and preserving them properly guarantees they remain beautiful over time. To showcase your creations, consider placing them in a shadow box or on a clean, flat surface away from direct sunlight.
Using a clear adhesive or mounting putty helps keep delicate figures stable without damage. Keeping them in a stable environment with low humidity prevents warping and deterioration.
You can also frame your favorite pieces as mini art displays or store them in a dedicated box to protect from dust. Regularly dusting your figures with a soft brush maintains their appearance.
Remember, proper display and careful storage ensure your paper animals stay vibrant and intact for years to come.
- Use shadow boxes or display cases for protection
- Mount figures with gentle adhesive or putty
- Store in a cool, dry place away from sunlight
Decorative Paper Wall Art

Decorative paper wall art offers a simple yet impactful way to personalize your space using only paper and basic crafting supplies. You can create eye-catching designs by cutting various shapes, such as flowers, geometric patterns, or abstract forms, from colorful or patterned paper.
Arrange these shapes on a blank canvas or directly on the wall for a stunning effect. Layering different sizes and textures adds depth and visual interest. To keep everything in place, use glue to secure each piece carefully.
Feel free to experiment with symmetry or asymmetry to match your style. This project is quick, inexpensive, and highly customizable, making it perfect for adding a creative touch to any room without the need for special tools or expensive materials.
Paper Mosaic Coasters

Building on your skills with decorative paper wall art, creating paper mosaic coasters is a fun way to craft functional and artistic tabletop accessories. You’ll start by gathering colorful paper scraps and a sturdy base coaster.
Cut the paper into small, irregular shapes, then arrange them in eye-catching patterns or abstract designs. Use glue to secure each piece, overlapping slightly for texture.
Once dry, you’ll have a vibrant, unique coaster that protects surfaces and showcases your creativity.
Here are some ideas to inspire your design:
- Mix bright colors for a lively, energetic look
- Use patterned papers for a more intricate mosaic
- Incorporate metallic or textured paper for added dimension
Custom Bookmarks With Paper and Glue

Start by choosing fun, decorative paper that reflects your style. Then get creative with designing shapes that suit your taste.
Once your design is ready, attach the pieces securely with glue. Finish with a protective coating or embellishments.
This simple process lets you create personalized bookmarks that make reading even more enjoyable.
Selecting Decorative Paper
Have you ever wondered how the right choice of paper can transform a simple bookmark into a work of art? Selecting decorative paper is key to making your craft stand out. Look for patterns, textures, and colors that match your style or the theme you want to convey.
Consider using scrapbook paper, origami paper, or even magazine pages for a unique look. Thicker paper adds durability, while thinner paper allows for more intricate folding. Always check if the paper is easy to cut and glue without tearing.
Remember, the right paper can turn a basic project into a personalized masterpiece.
- Choose paper with bold patterns or subtle textures for visual interest
- Opt for high-quality, sturdy paper to ensure longevity
- Mix different patterns and colors for a vibrant, eye-catching design
Designing Unique Shapes
Creating unique shapes for your bookmarks allows you to add a personal touch that makes your craft stand out. Start by sketching your design on paper or directly cutting shapes from your chosen material. Think outside the standard rectangle—try hearts, stars, or even intricate patterns. Use scissors or craft knives carefully to achieve clean, sharp edges.
Layer different pieces to create depth or combine various shapes for a more complex look. Don’t be afraid to experiment with angles and curves to make your design more dynamic. Remember, the goal is to reflect your personality and style through your shape choices.
Once you’re satisfied, glue the pieces securely, ensuring all edges are sealed. Unique shapes turn ordinary bookmarks into memorable keepsakes or personalized gifts.
Attaching & Finishing
Once you’ve designed your shape, the next essential step is attaching and finishing your bookmark to make sure it’s durable and polished. First, use a strong glue to secure any overlapping edges or layered pieces, ensuring everything stays in place.
Then, consider adding a protective coating like a clear glue or sealant to prevent wear and tear. To give your bookmark a professional look, trim any rough edges and smooth the surface with a fine sandpaper or nail file.
You can also add decorative touches, such as a ribbon or a small paper charm, to enhance its appearance.
- Seal with a clear spray or glue for durability
- Smooth edges for a clean, finished look
- Add embellishments like ribbons or charms
Paper Paperclip Holders
A paperclip holder made from paper is a simple and practical craft that keeps your workspace tidy. To create one, start with a sturdy sheet of paper and fold it into a small box or container shape. Use glue to secure the sides, making sure it’s sturdy enough to hold your clips.
You can personalize it by decorating the outside with colorful patterns or designs. Once dry, place your paperclip holder on your desk, ready to organize your clips efficiently.
This project is quick, inexpensive, and perfect for repurposing scrap paper. Plus, it adds a charming handmade touch to your workspace, showing that even simple materials like paper and glue can make a functional accessory.
3D Paper Star Decorations
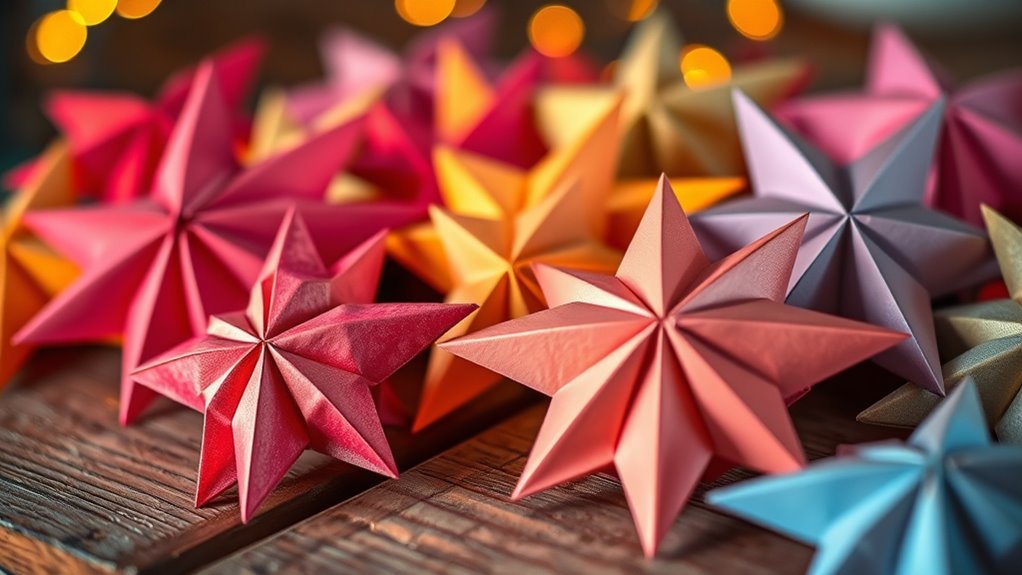
Have you ever wanted to add a touch of sparkle to your decorations? Paper star decorations are a simple yet stunning way to do just that. You can create beautiful stars in various sizes and colors to match any theme or occasion.
These stars are easy to fold and assemble using just paper and glue, making them perfect for quick DIY projects. Hang them on walls, from the ceiling, or incorporate them into centerpieces for a festive look.
To make your stars stand out, try using shiny or metallic paper, or add glitter for extra sparkle. With a little patience, you’ll craft eye-catching decorations that add charm and elegance to any space.
- Choose colorful or metallic paper for a striking effect
- Experiment with different star sizes for a dynamic display
- Attach a string or thread to hang your stars creatively
Paper Chain Garlands
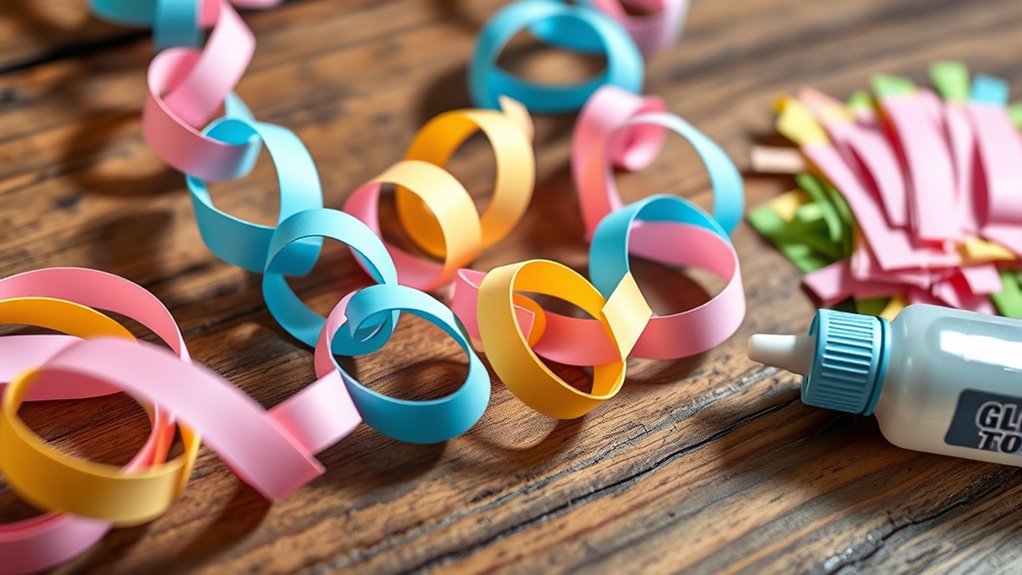
Start by selecting a color scheme that matches your event or décor, as this sets the tone for your garland.
Next, carefully cut your paper into strips and link them together to create a continuous chain.
With these steps, you’ll have a vibrant, personalized decoration in no time.
Subheading 1: Choosing Color Schemes
Ever wondered how to make your paper chain garlands look eye-catching? Choosing the right color scheme is key. Decide whether you want a vibrant, lively look or a more subdued, elegant vibe.
Consider the occasion or setting—bright colors work well for parties, while pastels suit more refined spaces. Mixing complementary colors creates visual interest, while monochrome schemes give a sleek, cohesive feel.
Think about contrast and harmony to make your garland pop. To keep things exciting, try combining patterns or textures within your chosen palette.
Subheading 2: Cutting and Linking
After choosing your color scheme, the next step is to cut and link your paper strips to form the garland. Measure and cut strips of paper, about 1 to 2 inches wide and 6 to 8 inches long, depending on your desired length. You can use scissors or a paper cutter for clean, straight edges.
To link the strips, fold each one into an oval or circle, then thread the next strip through the opening before securing it. Keep linking strips until your garland reaches the length you want.
For added stability, you can glue the ends of each strip together before linking. This simple technique creates a colorful, festive paper chain perfect for decorating your space effortlessly.
Miniature Paper Gift Boxes
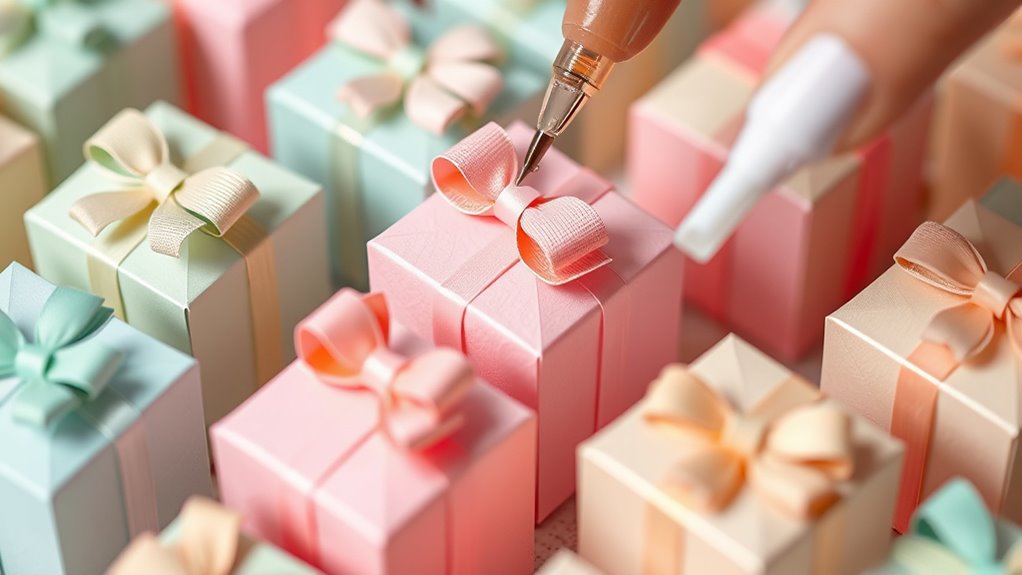
Have you ever wanted to create charming, personalized gift boxes that add a special touch to your presents? Making miniature paper gift boxes is simple and rewarding.
You can customize colors, patterns, and sizes to suit any occasion. These tiny boxes are perfect for jewelry, notes, or small surprises.
To get started, you’ll need sturdy paper, scissors, and glue. Once you fold and assemble, you can embellish them with tiny decorations or labels.
They’re versatile and fun to craft, especially when you want a thoughtful, handmade gift presentation. Plus, their small size makes them easy to store and reuse.
Whether for birthdays, holidays, or just because, these miniature paper gift boxes bring a personal and creative flair to your gift-giving.
Paper Feather Wall Hangings
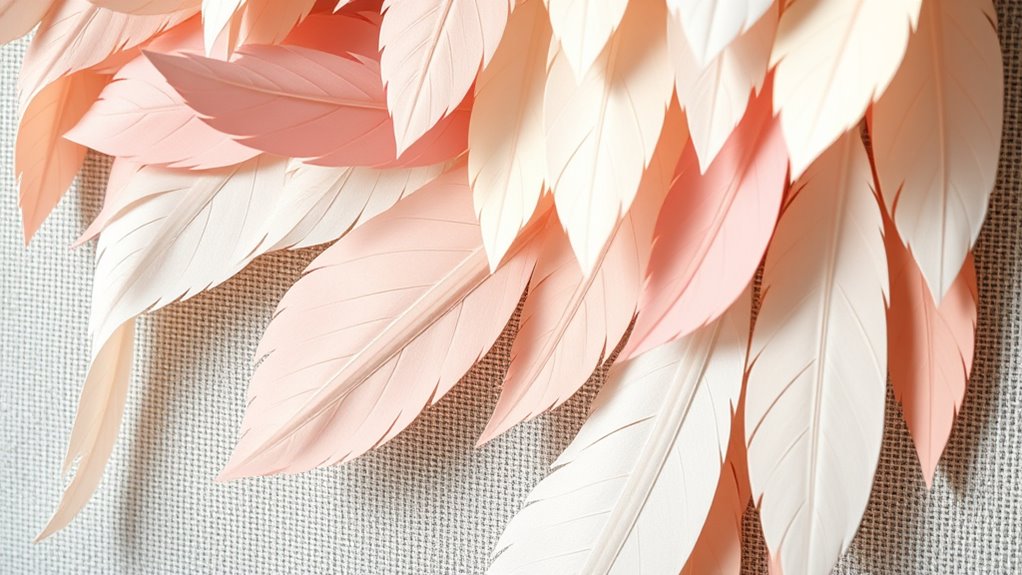
A paper feather wall hanging is a stylish and lightweight decoration that instantly adds texture and elegance to any space. You can create a stunning display by cutting paper into feather shapes using simple templates or freehand designs.
Choose your favorite colors or stick to a neutral palette for a sophisticated look. To assemble, layer the feathers slightly overlapping each other and attach them with glue, forming a fan or cascading pattern.
Use a sturdy piece of string or twine to hang your arrangement, securing the feathers in place. This craft is perfect for personalizing your room or making a thoughtful gift.
With just paper and glue, you craft a beautiful, eye-catching piece that elevates any wall effortlessly.
DIY Paper Mobiles
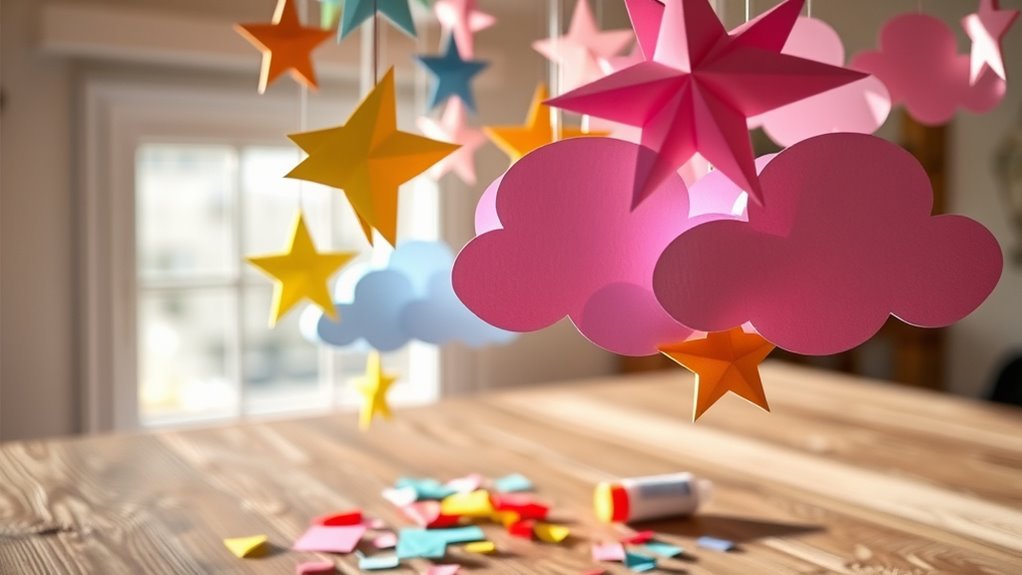
There are many creative designs you can try for your paper mobile, from simple geometric shapes to intricate layered patterns. Choosing the right materials, like lightweight cardstock or colored tissue paper, makes your mobile easy to hang and durable.
Consider how different design styles and materials can add unique charm to your space.
Types of Mobile Designs
Are you curious about the different styles of DIY paper mobiles you can create? There are plenty of designs to inspire your creativity.
You might enjoy making a geometric mobile with sharp, angular shapes that add a modern touch. Alternatively, a whimsical, nature-inspired mobile featuring paper animals and plants can bring a playful vibe to any space.
Or, you could craft a layered, paper-fringe mobile for a textured, dynamic look that captures attention. Each style offers a unique way to express your personality and enhance your decor.
Whether you prefer sleek, minimalistic designs or elaborate, colorful arrangements, these options make your project both fun and personalized. Explore these styles and find the perfect mobile to match your space and mood.
Material Choices
Choosing the right materials is essential for creating a sturdy and visually appealing paper mobile. Start with high-quality, lightweight paper like cardstock or construction paper; these hold their shape well without adding bulk.
Use strong glue, such as craft glue or a glue gun, to guarantee your pieces stay secure. For added durability, consider laminating your paper or using foil paper for accents.
String or thin fishing line works best for hanging, as they’re nearly invisible and won’t weigh down your mobile. You can also incorporate small beads or decorative elements if you want extra flair.
Always select materials that are easy to cut and manipulate, so your design stays neat and balanced. The right choices make your mobile both beautiful and long-lasting.
Collage Art Using Recycled Paper
Creating collage art with recycled paper is an eco-friendly way to express your creativity while helping the environment. You can transform old magazines, scrap paper, or packaging into stunning artwork.
Start by gathering colorful scraps and sorting them by shades or textures. Experiment with layering different pieces to create depth and visual interest. Use glue to secure each piece, paying attention to how colors and shapes interact.
This method not only reduces waste but also sparks your imagination.
Here are some ideas to get you inspired:
- Create abstract designs by overlapping various paper textures
- Make themed scenes or collage portraits
- Design personalized greeting cards or wall art
Paper Pinwheels for Decor
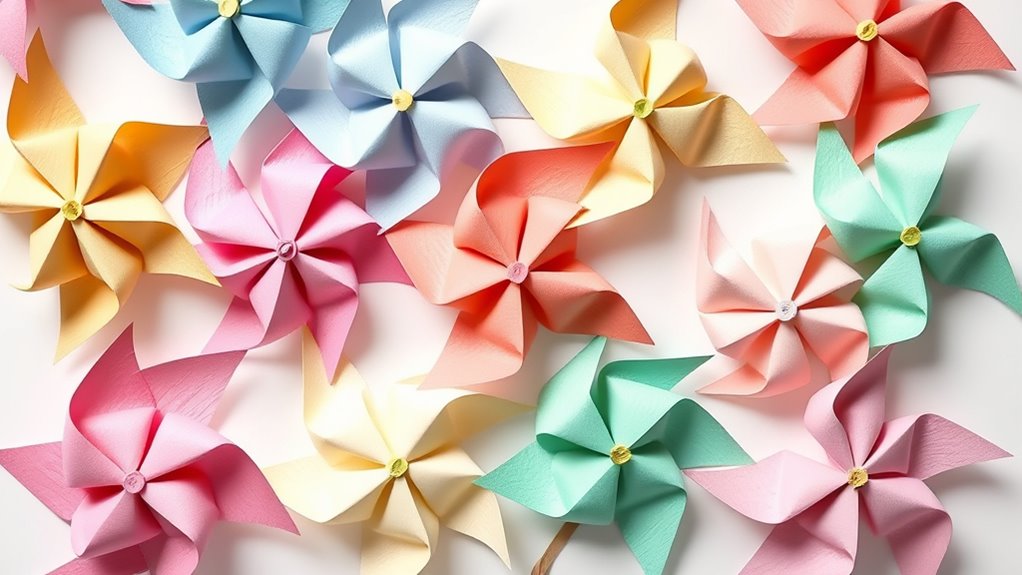
Recycled paper scraps from your collage projects can be transformed into charming paper pinwheels that add a whimsical touch to any space. To create them, cut your paper into squares, then fold and glue the corners to form the pinwheel shape. You can customize colors and patterns to match your decor or theme. Once assembled, attach a toothpick or stick to serve as a handle. These pinwheels are perfect for decorating parties, windows, or shelves.
| Feature | Benefit |
|---|---|
| Recyclable Material | Eco-friendly and cost-effective |
| Easy to Make | Suitable for all skill levels |
| Customizable | Matches any color scheme or style |
Handmade Paper Flowers for Potpourri
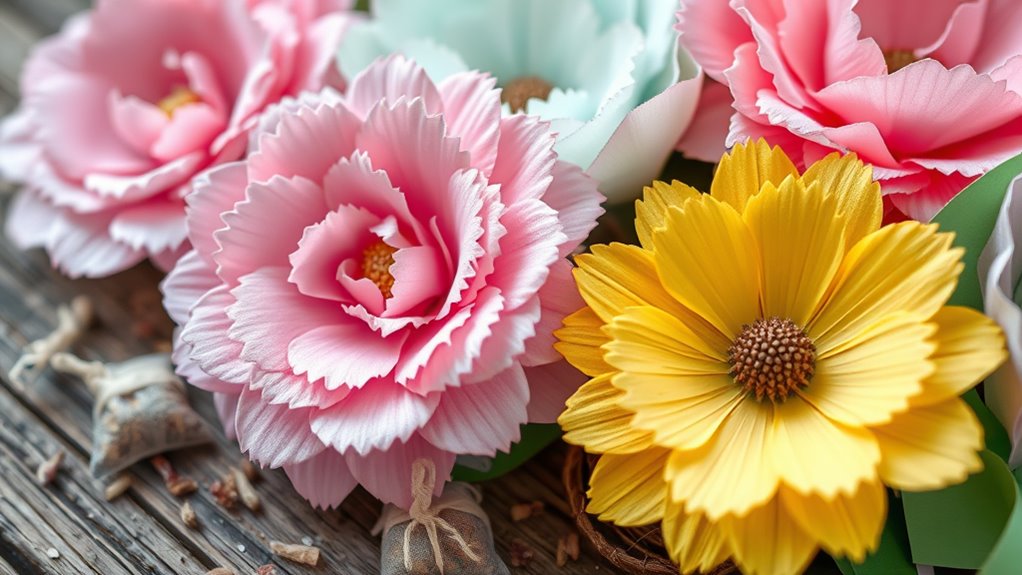
Handmade paper flowers make a beautiful and natural-looking addition to potpourri displays. You can craft delicate blooms that add color and texture, enhancing your room’s ambiance. These flowers are easy to make with just paper and glue, making them perfect for a quick, charming project. Shape your petals in different sizes and colors to create realistic or whimsical flowers.
Create charming, realistic paper flowers to enhance your potpourri display with color and texture.
Once assembled, place them among your potpourri to brighten the arrangement and infuse it with a handmade touch. You can also customize the flowers to match your decor or seasonal themes. The best part? They won’t wilt or fade over time, keeping your display fresh and lively.
Elevate your potpourri with these charming, handcrafted paper flowers for a personalized, natural look.
- Tips for shaping realistic petals
- Creative color combinations
- Ways to arrange your paper flowers with potpourri
Paper Heart Garlands for Celebrations

Have you ever wanted to add a personal touch to your celebration decor? Paper heart garlands are a simple, charming way to do just that.
Start by cutting out multiple heart shapes from colorful paper using scissors or even your hands for a more organic look. Arrange the hearts in pairs or patterns, then punch small holes at the top of each heart.
Thread a thin piece of string or twine through the holes, spacing the hearts evenly. Secure the ends of the string, and you’re ready to hang your garland across walls, doorways, or tables.
These garlands are perfect for birthdays, weddings, or Valentine’s Day, and they’re easy to customize with different paper colors or textures for a truly unique celebration touch.
Artistic Paper Silhouettes
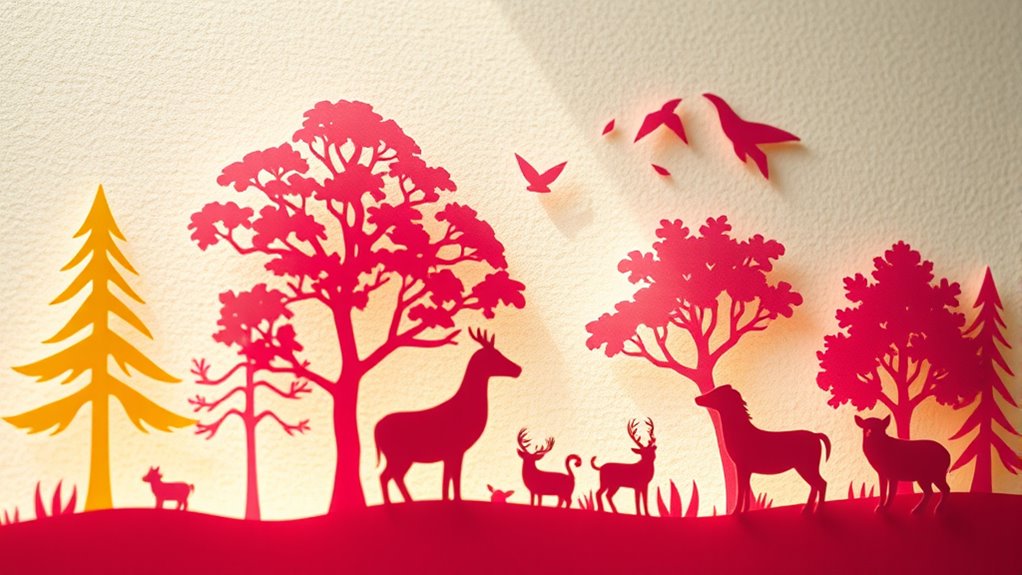
Once you’ve mastered creating paper garlands, you can elevate your decorations by crafting artistic paper silhouettes. These striking designs transform simple shapes into mesmerizing art pieces. Start by choosing a theme or scene—like trees, animals, or cityscapes—and cut out your shapes with precision.
Use contrasting colors or layered paper to add depth and dimension. You can create silhouettes to frame windows, decorate walls, or serve as unique centerpieces. Experiment with different sizes and arrangements for a dynamic display.
To make your silhouettes stand out, consider attaching them to a background or mounting them on foam board. With just paper and glue, you can craft impressive, personalized art that adds a creative touch to any space.
- Explore various themes for your silhouettes
- Use layered paper for a 3D effect
- Create custom backgrounds for added flair
Crafting Paper Fridge Magnets
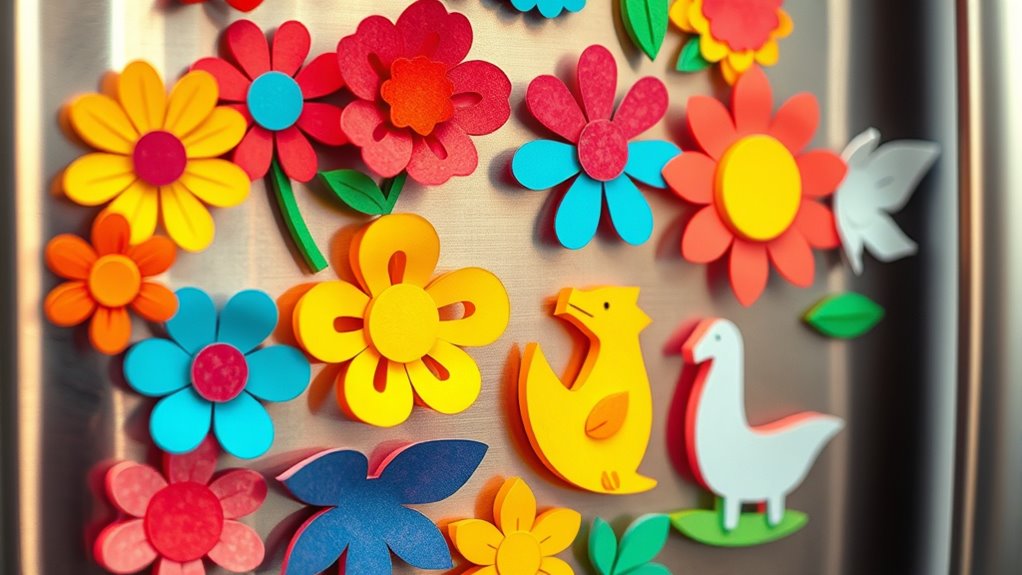
Creating paper fridge magnets is a fun and easy way to add a personal touch to your kitchen decor. Start by cutting colorful paper into fun shapes like hearts, stars, or flowers.
Use glue to attach small magnets to the back of each shape, ensuring they’re secure. You can also layer different paper pieces to create unique designs or add details with markers for extra flair.
Once the glue dries, place your magnets on the fridge to display your creativity. These DIY magnets not only brighten up your space but also make great personalized gifts.
Keep experimenting with different patterns, colors, and shapes to develop your own collection of charming paper magnets. It’s a simple project that transforms everyday paper into functional art.
Frequently Asked Questions
How Can I Make My Paper Crafts More Durable?
To make your paper crafts more durable, you should start by choosing high-quality, thicker paper.
Use a strong adhesive like PVA glue or a glue gun for better bonding.
Consider sealing your finished project with a clear acrylic spray or laminate to protect it from moisture and wear.
Additionally, reinforce edges and corners with extra glue or tape for added strength, ensuring your craft lasts longer.
What Types of Glue Work Best for Intricate Paper Projects?
For intricate paper projects, you want a glue that offers precision and strong adhesion. PVA glue works well because it dries clear and is easy to control, making it perfect for detailed work.
You might also consider a fine-tip liquid glue or a glue pen for accuracy. Avoid bulky glues that can cause mess or warp delicate paper.
Test your glue first to confirm it doesn’t damage or warp your craft.
How Do I Prevent Paper From Tearing During Assembly?
Oh, the thrill of delicate paper tearing—truly an art form, isn’t it? To prevent this tragedy, handle your paper gently, use a thin layer of glue, and avoid over-saturating.
Fold edges carefully and press under a weight to set. Remember, patience is your best friend; rushing only invites tears. Keep a steady hand, and your paper will stay intact, ready to showcase your skill.
Can Recycled Paper Be Used for All Craft Projects?
You can definitely use recycled paper for most craft projects, but keep in mind it might be thinner or more fragile than new paper. You should reinforce it by layering or using extra glue to prevent tearing.
For projects requiring sturdy paper, like card-making or origami, choose thicker recycled options or combine recycled paper with other materials.
Always test a small piece first to guarantee it works well for your design.
What Safety Precautions Should I Take When Working With Glue and Scissors?
Think of working with glue and scissors like maneuvering a busy street—you need to stay alert. Always work in a well-ventilated area, and keep glue away from your face and children.
Use scissors carefully, cutting away from your body, and store them safely when not in use. Wear protective gloves if needed, and wash your hands afterward.
Staying cautious ensures your craft time stays fun and safe.
Conclusion
With just paper and glue, you can transform simple materials into stunning crafts that brighten any space. Whether you’re making flowers, lanterns, or greeting cards, these projects let your creativity shine. Remember, “A picture is worth a thousand words,” but your handmade paper creations say so much more. So immerse yourself, experiment, and enjoy the process—because sometimes, the best ideas are hidden in plain sight, waiting for your hands to bring them to life.