
When choosing between carving linoleum or rubber for DIY stamps, consider ease of use, durability, and detail. Rubber is softer, making it ideal for beginners, as it’s easier to carve and modify. Linoleum offers sharper lines and longer-lasting stamps but requires more skill. Both materials have their advantages and challenges. To create the best stamps for your project, understanding these differences will help you decide which material suits your skill level and design goals better.
Key Takeaways
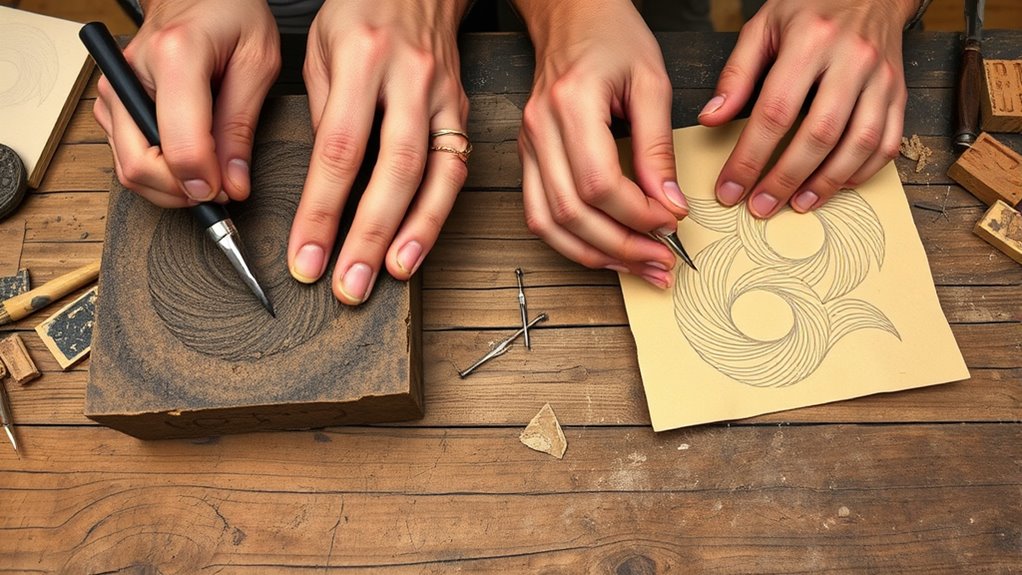
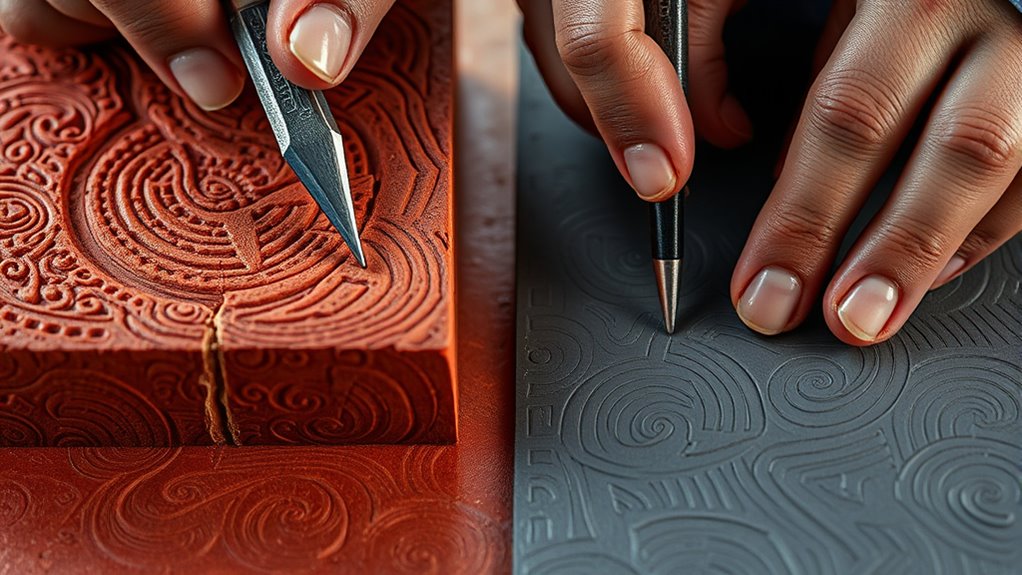
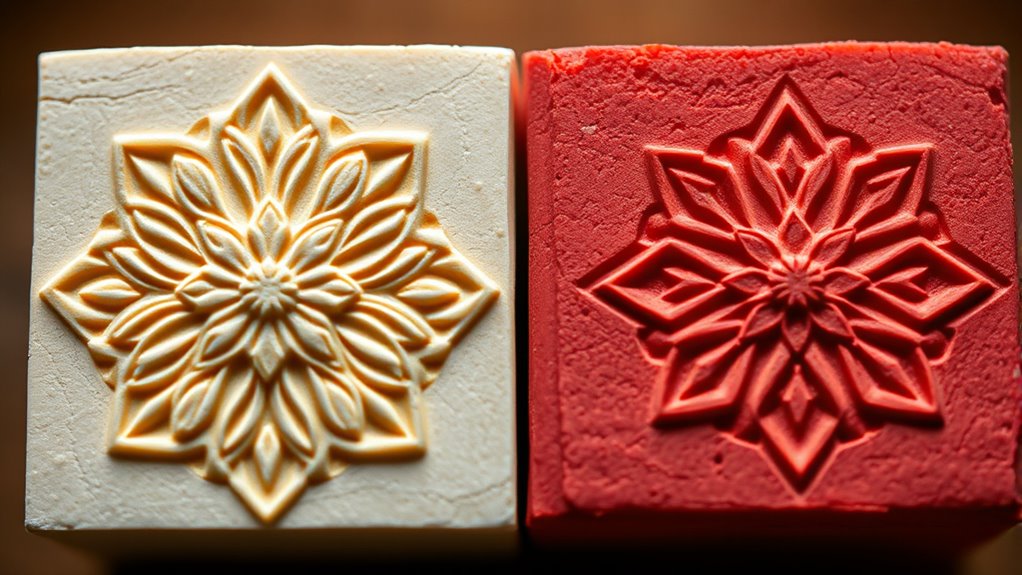
- Rubber is softer and easier for beginners, allowing smoother carving and modifications; linoleum is firmer, offering sharper, more durable results.
- Linoleum tends to be more durable and longer-lasting than rubber stamps, making it suitable for frequent use.
- Rubber carving tools are generally more affordable and accessible, ideal for hobbyists and newcomers.
- Linoleum requires more pressure and skill to carve but provides textured effects and cleaner lines for detailed designs.
- Rubber stamps are widely available and cost-effective, while sourcing linoleum may involve specialty suppliers or higher costs.
Understanding the Basics of Stamp Carving Materials
When you’re starting out with stamp carving, understanding the materials is vital because they determine how easily you can carve and the quality of your final design. Material flexibility affects how much you can manipulate the surface without cracking or tearing. Softer materials like rubber are more flexible, making them forgiving for detailed designs. In contrast, stiffer materials like linoleum offer less flexibility but hold sharp lines better. The surface texture also plays a significant role; a smoother surface allows for cleaner cuts and finer details, while a rougher texture can make carving more challenging, increasing the risk of mistakes. Knowing these characteristics helps you choose the right material for your project, ensuring smoother carving and a more polished finished stamp. Additionally, understanding the material’s durability can influence how long your stamp will last with repeated use. For example, natural materials used in Waldorf toys are often chosen for their sustainability and ability to withstand frequent handling, which is a consideration also relevant when selecting carving materials. Considering the security and quality of the materials can further enhance your carving experience and the longevity of your stamps. Furthermore, selecting appropriate tools can significantly impact the precision and ease of your carving process.
Comparing Ease of Use: Linoleum Vs Rubber

Choosing between linoleum and rubber for your stamp carving projects depends largely on how easy they are to work with. Linoleum generally offers a firmer surface, which can create a more textured stamp texture, but it also makes carving slightly more challenging. Its density means you need to apply more pressure, increasing carving difficulty, especially for intricate details. Rubber, on the other hand, tends to be softer and more forgiving. Its flexible nature allows for easier carving and smoother lines, making it ideal for beginners. You’ll likely find rubber stamps easier to shape and modify, reducing carving difficulty. Overall, if you prefer a softer material that’s quicker to carve, rubber is the better choice. If you want a more textured stamp texture and don’t mind the challenge, linoleum could suit your needs.
Examining the Durability and Longevity of Carved Stamps

The durability and longevity of your carved stamps depend largely on the material you choose and how well you care for them. Proper storage and preservation prevent cracking and deformation over time. Consider your stamp’s compatibility with various stamp inks; some materials resist certain inks better, extending lifespan. Linoleum tends to be more resilient than rubber, but both benefit from gentle cleaning after use. To help you compare, here’s a quick overview:
| Material | Typical Durability | Best Storage Tips |
|---|---|---|
| Linoleum | Long-lasting | Keep in a cool, dry place |
| Rubber | Moderate | Store flat, avoid heat |
| Composition | Varies | Use protective covers |
| Ink Compatibility | Affects wear | Clean thoroughly after use |
| Preservation | Extends lifespan | Prevent exposure to sunlight |
Additionally, understanding the material composition can help you choose the best option for your projects. Proper care ensures your carved stamps stay vivid and functional longer, especially when considering stamp ink resistance, which plays a crucial role in durability. Regular inspection and gentle handling can further prolong your stamps’ lifespan. Incorporating proper cleaning techniques can also significantly enhance the longevity of your carved stamps. Moreover, selecting appropriate storage methods can make a noticeable difference in maintaining the integrity of your stamps over time.
Safety Considerations During the Carving Process

Carving stamps involves tools that can easily cause injury if not handled carefully. To stay safe, always wear proper safety gear, including cut-resistant gloves and eye protection. Use correct carving techniques: carve away from your body, keep your hands steady, and avoid rushing. Keep your workspace well-lit and organized to prevent accidents. Regularly check your tools for damage, and replace dull blades promptly to reduce slips. Be mindful of your posture to avoid strain. Additionally, avoiding sharp tools when fatigued can help prevent accidents. Proper tool maintenance ensures your equipment stays safe and effective. Incorporating safety protocols can further enhance your protection during the carving process. Here are some safety tips:
- Wear safety gear at all times
- Use carving techniques that prioritize control
- Keep blades sharp and well-maintained
- Work in a well-lit, clutter-free area
- Take breaks to prevent fatigue
Following these precautions keeps your carving experience safe and enjoyable.
Cost and Accessibility of Materials
You’ll find that material costs vary depending on what you choose, making some options more budget-friendly than others. Supplies are generally easy to find at local stores or online, but availability can differ based on your location. Additionally, tools range from simple household items to specialized equipment, affecting how easily you can start creating your own stamps. Using the right paint sprayer accessories can also streamline your process and improve the quality of your finished project. For those interested in tuning their vehicles, selecting appropriate performance parts can also influence your overall costs and ease of assembly. When working with carving materials like linoleum, the material flexibility can impact the ease of carving and the detail achievable in your stamps, especially considering the potential security vulnerabilities in new tools or software that might be used in your project setup. Furthermore, choosing the right crafting materials can significantly affect the durability and detail of your final stamped designs.
Material Cost Differences
Materials for DIY stamps vary widely in cost and accessibility, making it important to choose options that fit your budget and resources. When considering a material cost comparison, rubber tends to be more affordable initially, especially if you find recycled or inexpensive supplies. Linoleum, however, can be more costly but offers durability. Supply affordability also depends on where you shop; local craft stores may have higher prices than online options. Keep in mind:
- Rubber sheets are generally cheaper and easier to find
- Linoleum tiles or blocks may cost more upfront
- Cutting tools for rubber are often less expensive
- Specialized carving tools for linoleum can add to costs
- Reusing scraps reduces overall expenses
Balancing these factors helps you select the material that best fits your budget and project needs.
Availability of Supplies
Are the supplies you need for DIY stamps easy to find and affordable? The material variety influences how accessible and cost-effective your options are. Rubber stamps are widely available at craft stores and online, making sourcing relatively simple. Linoleum blocks, on the other hand, can be harder to find locally, leading to sourcing challenges, especially if you prefer specific sizes or types. While rubber materials tend to be cheaper and easier to purchase in bulk, linoleum may require ordering from specialty suppliers, increasing costs and wait times. Overall, rubber offers better availability and affordability, while linoleum’s material variety can limit access, especially for beginners or those on a tight budget. Your choice depends on how easily you can source your preferred materials and how much you’re willing to invest.
Tool Accessibility and Use
The cost and accessibility of tools considerably impact your ability to create DIY stamps, especially if you’re just starting out. Affordable options like basic carving tools, spare kitchen knives, or inexpensive rubber erasers can be effective. Keep in mind, choosing the right materials affects stamp ink compatibility, ensuring your designs print clearly. Proper storage and preservation of your stamps and tools extend their lifespan and maintain quality. Here are some tips:
- Use readily available tools like craft knives or linoleum cutters
- Opt for versatile materials that suit different ink types
- Store stamps in a cool, dry place to prevent deterioration
- Clean tools thoroughly after use for longevity
- Select ink compatible with your stamp material for best results
Accessibility and careful management help you craft professional-looking DIY stamps without breaking the bank.
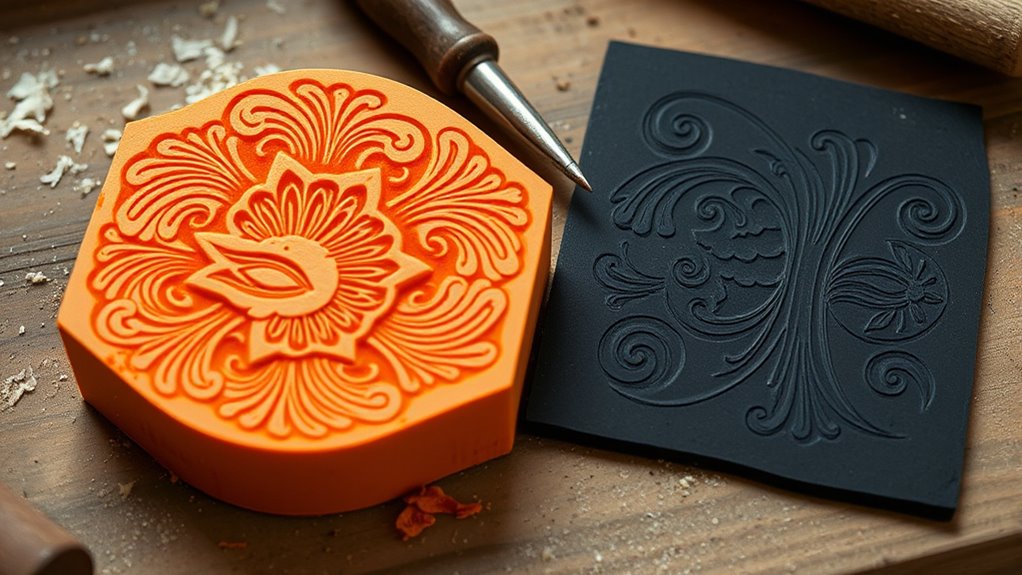
Techniques and Tools for Carving Linoleum and Rubber
To create clean, precise designs, you’ll want to start with the right carving tools, like gouges and craft knives. Preparing your surface properly guarantees smooth cuts and reduces mistakes, so take the time to clean and flatten your material. With the right tools and preparation, your carving process becomes much easier and more enjoyable. Additionally, understanding emotional support strategies can help you stay patient and resilient throughout your creative process. For example, knowing how different dog breeds respond to stress can inform your approach to patience and encouragement during detailed carving tasks. Being aware of AI safety considerations can also help you implement best practices for digital design tools used in your craft.
Essential Carving Tools
Carving linoleum and rubber stamps requires precise tools that can handle detailed cuts and clean lines. The essential carving tools include a variety of blades, gouges, and V-shaped cutters, which help you achieve intricate designs. When choosing your tools, consider the thickness of your material and the level of detail you want. Good tools will make carving easier and more accurate. Also, keep in mind your stamp ink selection—using the right ink ensures crisp, vibrant impressions. Proper stamp storage tips, like storing your carved stamps flat and in a dry place, help preserve their quality. To get started, you’ll need:
- Precision carving knives
- U-shaped gouges
- Detail blades
- Transfer tools
- Storage cases for your carved stamps
Surface Preparation Techniques
Preparing your surface properly guarantees clean cuts and detailed designs when working with linoleum or rubber stamps. Start by inspecting the surface textures; a smooth, even surface guarantees consistent carving and prevents accidental slips. If the material feels rough or uneven, lightly sand it to create a more uniform texture. Clean the surface thoroughly to remove dust, oils, or debris that could interfere with ink absorption. Proper preparation enhances ink absorption, resulting in sharper, clearer prints. For rubber stamps, a gentle wipe with a damp cloth often suffices, while linoleum may require light sanding. Always dry the surface completely before carving or inking. Taking these steps ensures your carved stamp produces precise images with crisp lines and vibrant impressions.
Achieving Detail and Precision in Your Designs
Ever wondered how to make your stamps capture intricate details? Achieving precision starts with careful carving and choosing the right ink pad. Select an ink pad that complements your design’s complexity; a finely textured pad helps capture tiny lines. Use sharp tools to carve clean, precise edges, and take your time to refine details. Keep your stamps well-organized with proper stamp storage tips—store them flat and in a dry, dark place to prevent damage and maintain detail quality. When stamping, press evenly to transfer fine lines clearly. Practice makes perfect, so experiment with small designs before tackling complex images. Remember, detailed designs require patience and attention to detail, but with the right tools and handling, your stamps will produce crisp, professional-looking prints.
Maintenance and Care of Your Handmade Stamps
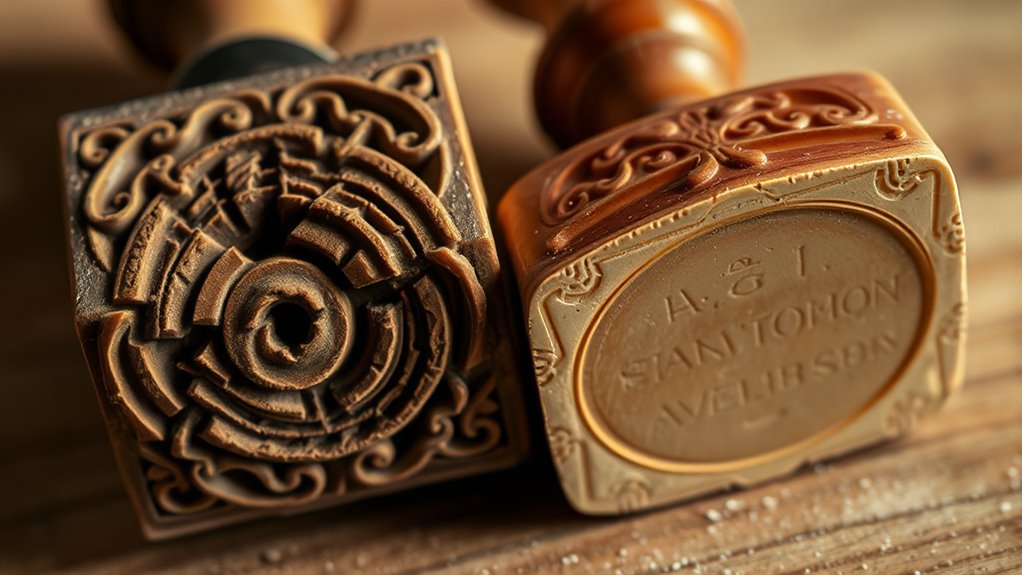
Proper maintenance and care are essential to keep your handmade stamps in top condition and guarantee they produce clear, consistent prints over time. Store your stamps in a cool, dry place, ideally in a designated box or container to prevent damage. Proper stamp storage prevents warping, cracking, and dirt buildup that can affect print quality. Always consider ink compatibility; use inks suited for your stamp material to avoid deterioration. Clean your stamps promptly after use with a gentle solvent or mild soap and water, depending on the ink type. Avoid harsh scrubbing to preserve the carving details. Regularly inspect your stamps for signs of wear or damage. Proper care ensures your stamps last longer and continue to deliver sharp, vibrant prints for countless projects.
Creative Projects and Applications for Your Carved Stamps
Have you considered all the creative ways to use your carved stamps beyond basic paper projects? Your stamps can add a personalized touch to many items with the right stamp ink and a good design transfer. You can create custom greeting cards, decorate gift wrap, or personalize notebooks. Use your stamps on fabric to make unique tote bags or clothing designs. Add stamped patterns to home decor items like coasters or placemats. You can also craft custom stationery or scrapbook embellishments. To get crisp designs, guarantee proper design transfer and choose the right ink for each surface. Experimenting with different colors and textures opens up endless possibilities, turning simple carved stamps into versatile tools for your creative projects.
Frequently Asked Questions
Can I Reuse Carved Stamps for Multiple Projects?
You can reuse carved stamps for multiple projects if you consider stamp durability and proper carving techniques. To guarantee longevity, carve clean, precise designs and avoid excessive pressure during use. Seal the surface with a suitable fixative if needed. Proper cleaning after each use keeps the stamp in good shape. With careful carving and maintenance, your stamps can last through many projects, making them a versatile and sustainable craft tool.
Which Material Offers Better Flexibility for Intricate Designs?
Imagine your detailed design coming to life smoothly; now consider which material offers better flexibility comparison for intricate designs. Rubber typically bends more easily, allowing you to carve fine details without cracking, making it ideal for complex patterns. Linoleum, while durable, is stiffer and less forgiving. If your focus is on delicate, intricate designs, rubber provides the flexibility you need for precise carving and vibrant results.
Are There Eco-Friendly Options for Carving Materials?
You’re wondering if eco-friendly options exist for carving materials. Good news—there are biodegradable alternatives and plant-based carving kits that minimize environmental impact. These materials are made from renewable resources, reducing plastic waste and chemical use. By choosing plant-based carving kits, you can create your stamps confidently, knowing you’re supporting sustainability. Switching to these eco-friendly options helps protect the environment while allowing you to enjoy crafting with natural, safe materials.
How Do I Fix Mistakes or Damages on My Carved Stamp?
Think of fixing your carved stamp like patching a small tear in fabric. If you make a mistake, carefully carve away the damaged area, then re-carve or add details to blend it in. To improve ink absorption and stamp longevity, guarantee your repairs are smooth and even. Use a fine tool for precision, and test on scrap material first. With patience, you’ll restore your stamp’s quality and keep it working beautifully.
What Are the Best Storage Methods to Prevent Stamp Deterioration?
To prevent stamp deterioration, focus on proper storage methods. You should use sturdy storage containers that protect your stamps from dust, moisture, and sunlight. Keep them in a cool, dry place, and avoid stacking heavy objects on top. Consider wrapping delicate stamps in acid-free paper or placing them in individual sleeves. These steps guarantee better stamp preservation, keeping your carved stamps in good condition for years to come.
Conclusion
So, whether you choose the soft, forgiving rubber or the sturdy linoleum, remember—your stamp-making journey is all about patience, practice, and maybe a few scraped fingers. Pick the material that suits your style, and don’t be surprised if your masterpieces turn out more abstract than planned. After all, in the world of DIY stamps, imperfection is just another form of artistic genius—so go ahead, carve away and embrace the chaos!