To improve your foamboard diorama’s stability, choose high-density, thicker foam for strength and cut carefully with a sharp blade and scoring. Reinforce walls by layering sheets and adding internal supports like toothpicks or straws. Use strong adhesives such as hot glue or spray for even bonding and secure parts with clamping. Distribute weight evenly and add internal braces to prevent collapse. Keep these tips in mind to build durable structures and learn even more techniques.
Key Takeaways
- Use high-density, thicker foamboard for enhanced support and stability of larger structures.
- Reinforce walls with layering, internal supports, or surface textures to prevent flexing.
- Apply adhesives evenly and consider clamping to ensure strong, warp-free bonds.
- Incorporate internal bracing like dowels or foam strips to distribute loads and prevent collapse.
- Distribute weight evenly, placing heavier elements low and centered for better balance and durability.

BESPORTBLE Blue XPS Foam Boards – 6Pcs 12x4x0.8 Inch High Density Extruded Polystyrene Sheets – Rigid Base for DIY Craft Diorama Railway Modeling Terrain Sculpting
Precision Terrain Building: These high density blue xps foam boards offer a fine cell structure that allows for…
As an affiliate, we earn on qualifying purchases.
As an affiliate, we earn on qualifying purchases.
Choosing the Right Foamboard for Structural Integrity
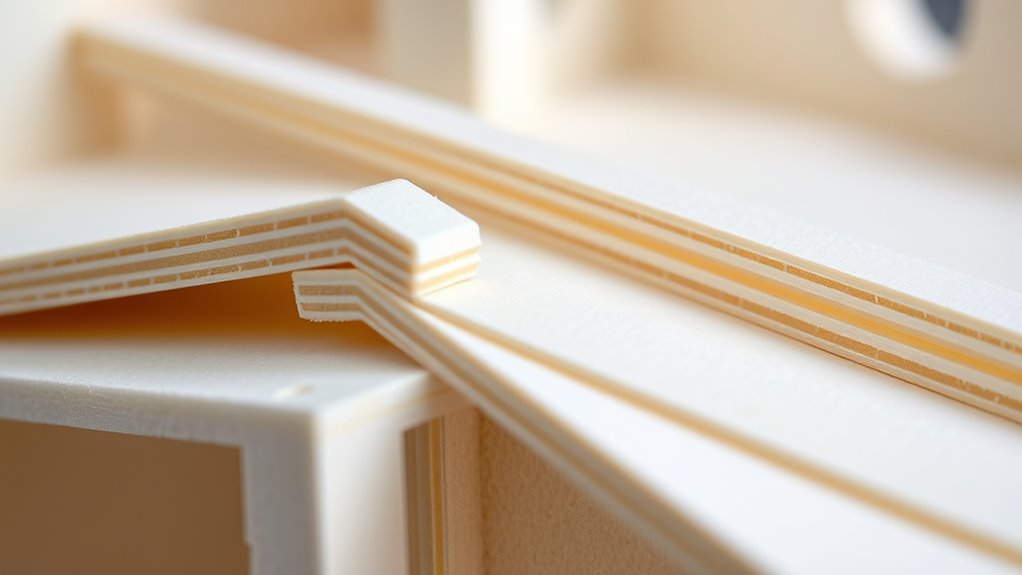
When selecting foamboard for structural purposes, it’s essential to prioritize its strength and stability. Foam density plays a crucial role here—higher-density foam offers better support and durability, making it ideal for supporting weight and resisting deformation. To ensure clean, precise cuts, using proper cutting techniques is vital; sharp blades and steady pressure help prevent tearing or jagged edges. Consider scoring the foam lightly before cutting through to reduce stress and improve accuracy. Thicker foamboards with higher densities provide more stability, especially for larger structures. Avoid cheap, low-density options that may buckle or crumble under pressure. By choosing foam with the appropriate density and mastering effective cutting techniques, you set a solid foundation for a sturdy, long-lasting project. Additionally, understanding the material quality can help you select foam that maintains its integrity over time and under stress. Proper storage methods are also important to prevent warping or damage, and using appropriate storage conditions can help maintain the foam’s structural integrity, which can be further enhanced by using reinforced edges to prevent breakage during handling.

Foam Cutter Electric Hot Wire Cutter Pen 10CM Foam Board Cutting with Stand 18W Hot Knife Styrofoam Cutting Pen with Adaptor Foam Cutting Tool for White Safe Styrofoam,Arts,Handcraft
This electric foam cutting pen is equipped with a special adapter for low-density foam.input voltage100-240V output voltage 7.5V,…
As an affiliate, we earn on qualifying purchases.
As an affiliate, we earn on qualifying purchases.
Reinforcing Walls and Supports
Are your foamboard walls strong enough to hold up under pressure? Reinforcing them is essential for stability. Use layering techniques to add strength—glue multiple sheets together to create thicker, sturdier walls. You can also incorporate powerful motor systems to simulate real structural supports in more advanced diorama projects. Vary surface textures by scoring or adding embossed patterns to improve support and prevent flexing. You can also insert internal supports like straws or toothpicks to further bolster weak spots. Incorporating supportive design elements can significantly enhance the overall durability of your diorama. Additionally, understanding Gold IRA rules can help you plan for future investments that may fund your hobby projects. Consider this table for reinforcement ideas:
| Reinforcement Method | Best Use Case |
|---|---|
| Layering Techniques | Walls needing extra thickness |
| Surface Textures | Preventing flex and adding grip |
| Internal Supports | Supporting larger spans |
Implement these strategies to ensure your diorama walls stay firm under pressure, making your project more durable and realistic. For additional insight, reviewing retail hours can help plan your shopping for supplies efficiently.

3M Super 77 Multi-Surface Spray Adhesive, 7.35 oz., Low VOC, Quick Bond, Fast Drying, Clear Finish for Foil, Foam, Paper, Metal, Plastic, Fabric, and Cardboard (77-10-NAT)
FAST DRYING
As an affiliate, we earn on qualifying purchases.
As an affiliate, we earn on qualifying purchases.
Proper Adhesive Application and Bonding Techniques
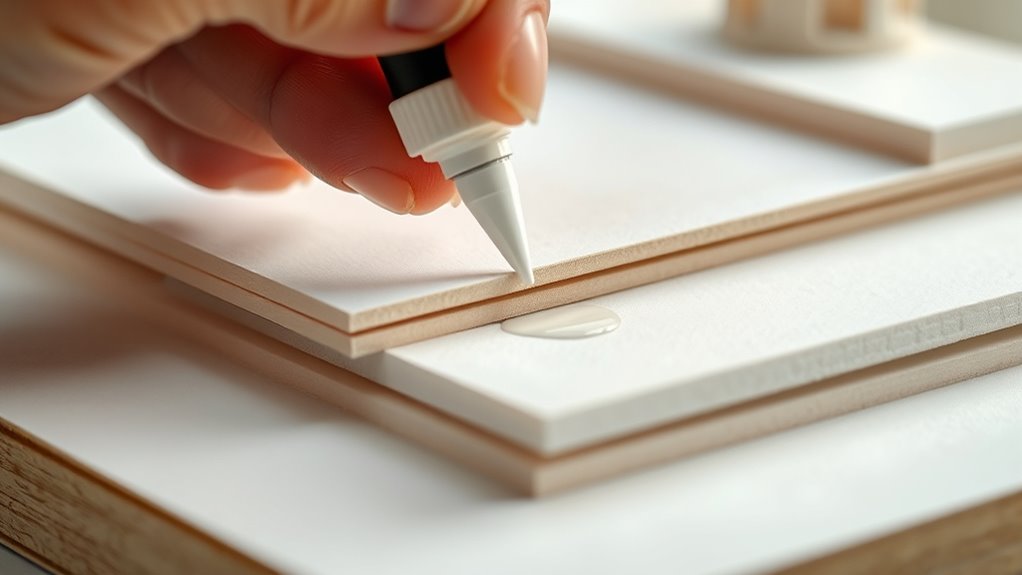
After reinforcing your foamboard walls with layering, textures, or internal supports, applying the right adhesive correctly becomes essential to guarantee a strong bond. Choose from adhesive types like hot glue, spray adhesive, or PVA glue, depending on your project’s needs. Hot glue offers quick drying and strong initial bonds, ideal for lightweight components. Spray adhesives provide even coverage for larger surfaces, ensuring a seamless bond. PVA glue works well for precise, clean applications on flat surfaces. When bonding, use techniques like applying adhesive evenly with a brush or roller, avoiding excess that can cause warping. Press parts firmly together, and clamp if necessary, to maximize adhesion. Proper application and appropriate adhesive choices are key to creating durable, professional-looking dioramas. Additionally, understanding the importance of art theory in creativity can inform your design choices, making your dioramas more engaging and conceptually strong. Using the correct adhesive application techniques ensures your structure remains stable over time, and considering the effects of adhesives on materials can help prevent damage or deterioration.
internal supports for foam dioramas
As an affiliate, we earn on qualifying purchases.
As an affiliate, we earn on qualifying purchases.
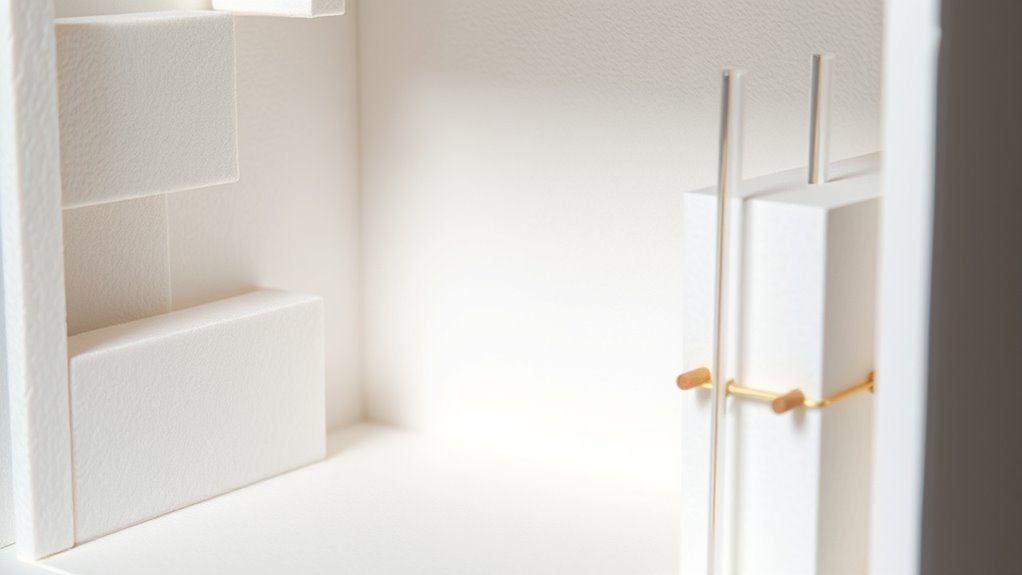
Incorporating Internal Supports for Stability
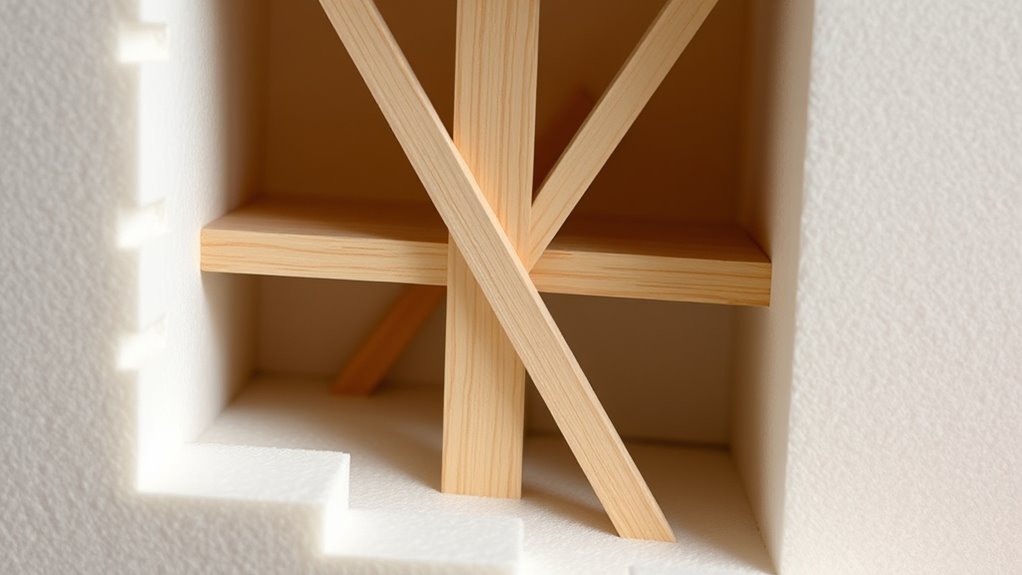
How can you guarantee your foamboard structures remain stable over time? The key is incorporating internal supports like internal bracing. These supports help distribute load more evenly across your structure, preventing weak points that could lead to collapse. Use thin strips of foamboard or wooden dowels placed strategically inside walls and bases to reinforce critical areas. Proper internal bracing ensures that weight is shared, reducing stress on any single point. This technique is especially important for larger or more complex dioramas, where external appearance alone won’t suffice. By strengthening your design with internal supports, you improve overall stability and durability, making your creation resilient against handling, transportation, or environmental factors. Incorporating internal supports is essential for a sturdy, professional-looking project.
Tips for Managing Weight and Balance

Effective weight management is essential to keep your foamboard structures stable and intact over time. To do this, focus on proper weight distribution across your diorama. Place heavier elements low and close to the center of gravity to prevent tipping or collapse. Balance your structure by evenly spreading weight, avoiding concentrated loads that can shift the center of gravity and cause instability. Use internal supports strategically to counterbalance heavy sections, ensuring the structure remains upright. Regularly check the center of gravity as you build, adjusting placement of elements as needed. Incorporating proper weight distribution can help distribute weight more evenly and enhance overall stability. Additionally, using internal bracing or supports can further reinforce the structure against shifting or tipping. Being aware of weight placement techniques can significantly improve your diorama’s durability, helping it withstand handling and environmental factors over time. Applying knowledge of structural principles can further optimize your design for both stability and aesthetic appeal. By managing weight thoughtfully, you’ll create a durable, stable foamboard diorama that stands the test of time without compromising your design.
Frequently Asked Questions
How Can I Prevent Foamboard From Warping Over Time?
To prevent foamboard from warping over time, you should focus on environmental protection and proper storage. Keep your diorama display in a stable environment with consistent temperature and humidity, avoiding direct sunlight and moisture. Use sealing spray or a clear acrylic coating to add a protective layer. Additionally, reinforce the foamboard with backing materials and handle it carefully to maintain its shape and durability long-term.
What Tools Are Best for Precise Foamboard Cuts?
Imagine slicing through a delicate sheet of ice; your tools should glide smoothly and precisely. For accurate foamboard cuts, use a sharp craft knife or a dedicated utility blade, which are ideal for precision cutting. A metal ruler guarantees straight, clean lines, while a cutting mat protects your surface and enhances control. These tools combined give you the confidence to achieve crisp, professional edges every time with proper blade selection.
How Do Temperature and Humidity Affect Foamboard Stability?
You should consider how temperature fluctuations and humidity control impact foamboard stability. When temperatures change rapidly or humidity levels are high, the foamboard may warp or swell, compromising your structure. To prevent this, keep your workspace climate-controlled, avoiding direct sunlight and damp environments. Consistent temperature and humidity levels help maintain the foamboard’s integrity, ensuring your diorama stays solid and true to your design over time.
Can Foamboard Be Recycled or Reused After Project Completion?
Ever wonder if foamboard can be recycled or reused after your project? You might find that recycling options are limited since foamboard isn’t widely accepted in curbside programs. However, reuse strategies work well—you can repurpose leftover pieces for future dioramas or craft projects. With a little creativity, you turn waste into new art, reducing environmental impact and stretching your materials further. Recycling may be tricky, but reuse is definitely your best bet.
What Safety Precautions Should I Take When Working With Adhesives?
When working with adhesives, prioritize safety by always reading the labels for proper usage. Use protective gear like gloves and masks to prevent skin contact and inhalation of fumes. Work in a well-ventilated area to reduce inhalation risks. Keep adhesives away from children and pets, and store them securely after use. Taking these precautions guarantees your workspace remains safe and your health safeguarded during your diorama projects.
Conclusion
Don’t let concerns about foamboard’s durability prevent you from proceeding. With the right materials and techniques, you can build sturdy, professional-looking dioramas that last. Reinforce walls, use strong adhesives, and add internal supports to keep everything stable. Even if you think weight might be an issue, careful planning ensures your project stays balanced. Trust in these tips, and you’ll create impressive displays that stand the test of time without feeling overly complicated.