
To etch glass without cream, you can try sandblasting with household items like salt or sandmedia and masking areas with tape or adhesive films for clean designs. Alternatively, use chemical solutions like vinegar and salt, lemon juice, or nail polish remover for frosted effects. Hand-engraving with rotary tools offers detailed customization, while DIY techniques with salt or sandblasting media provide different textures. Exploring these options helps you achieve professional results without cream, with more tips ahead.
Key Takeaways
- Use household items like vinegar and salt for chemical etching as a safe, cream-free alternative.
- Employ DIY sandblasting with masking tape, stencils, or abrasive media for textured designs without cream.
- Apply frosted glass spray paints to create opaque, etched-like effects without traditional creams.
- Utilize nail polish remover or lemon juice-based solutions for localized etching and surface texturing.
- Combine chemical etching with hand-engraving or sandblasting for layered, detailed designs without cream-based products.
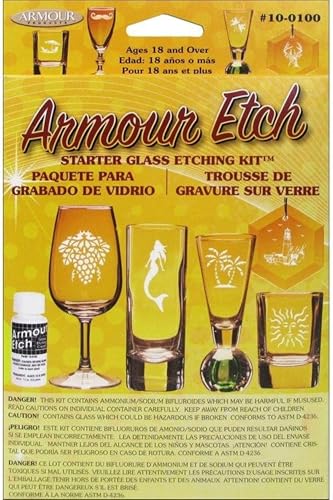
Armour Etch Glass Etching Starter Kit 14 To Adult
Comprehensive Armour Etch glass etching cream kit designed for effortless glass etching at home, tailored for beginners and…
As an affiliate, we earn on qualifying purchases.
As an affiliate, we earn on qualifying purchases.
Using Acid Etching Solutions for Glass Design

Using acid etching solutions is an effective way to create intricate designs on glass surfaces. However, you must prioritize glass safety, as acids can be hazardous if mishandled. Always wear protective gear like gloves and goggles to prevent skin and eye contact. It’s also essential to work in a well-ventilated area to avoid inhaling fumes. When considering environmental impact, choose eco-friendly acids or neutralize waste properly to minimize pollution. Proper disposal of used solutions prevents contamination of water sources and reduces ecological harm. Additionally, understanding the different types of etching techniques can help you select the most suitable method for your project. Using appropriate protective equipment further safeguards your health during the process. Incorporating environmentally friendly acids reduces ecological risks and aligns with sustainable practices. Being aware of glass safety measures ensures you can work confidently without risking damage to the glass or harm to yourself. Employing knowledge about project safety protocols is crucial to avoid accidents and ensure successful results.

Rust-Oleum 342600 Frosted Glass Spray Paint, 11 oz, Frosted Glass
Ideal for adding privacy or creating a decorative look on interior windows, mirrors, shower doors and more
As an affiliate, we earn on qualifying purchases.
As an affiliate, we earn on qualifying purchases.
Applying Vinyl Stencils for Precise Patterns

Choosing the right vinyl is key to ensuring your stencil stays in place during etching. You want a durable type that won’t lift or tear easily, especially around the edges. When applying the stencil, press firmly to get clean, crisp lines, and smooth out any air bubbles for the best results. Opting for professional-grade vinyl can provide better longevity and adhesion, ensuring your design remains intact throughout the etching process. Additionally, selecting a vinyl with high adhesive strength can help prevent lifting during the sandblasting or etching steps. Understanding the properties of adhesive materials can help you choose the most effective vinyl for your project. For example, some electric bikes feature high-quality adhesive vinyl designed for demanding conditions, which can be especially useful in outdoor applications. Using vinyl with excellent moisture resistance can also improve durability when working in humid or outdoor environments.
Selecting Durable Vinyl Types
Selecting the right vinyl type is essential for achieving clean, precise patterns when applying stencils to glass. You want vinyl with high durability to withstand the etching process without tearing or lifting. Look for vinyl with excellent vinyl durability, ensuring it stays intact during handling and sandblasting. Adhesive strength is equally important; a strong adhesive keeps the stencil securely in place, preventing shifting that could ruin your design. However, it shouldn’t be so aggressive that it damages the glass or leaves residue. Consider brands known for their reliable adhesive strength, especially if you’ll be working on complex or detailed patterns. By choosing a vinyl with the right balance of durability and adhesive strength, you’ll get sharp edges and professional results every time.
Achieving Clean Edges
Achieving clean edges starts with applying the vinyl stencil carefully and precisely. To guarantee sharp, defined lines, press down firmly to prevent any gaps or liftings, which can cause uneven edge refinement. Smooth out air bubbles and wrinkles to maintain surface smoothing around the design. Use a squeegee or similar tool to secure the vinyl tightly against the glass, especially at the edges. Proper application helps prevent paint or sandblast particles from bleeding underneath, resulting in crisp, professional-looking patterns. Take your time, double-check alignment, and work steadily to avoid imperfections. Precise stencil placement and surface smoothing are vital for clean edges that enhance your etched design’s overall appearance and detail.
Proper Application Techniques
To guarantee your vinyl stencil adheres accurately and produces crisp patterns, you need to apply it carefully and methodically. Start with proper surface preparation by cleaning the glass thoroughly to remove dirt, oil, and residues. Ensure the surface is dry before applying the stencil. Follow these safety precautions: wear gloves and work in a well-ventilated area to avoid fumes or irritation. When applying, peel the backing slowly and smooth the stencil from the center outward to prevent air bubbles. Use a squeegee or a credit card to press firmly, ensuring full contact. This table summarizes key steps:
| Step | Action |
|---|---|
| Surface Prep | Clean and dry the glass thoroughly |
| Safety Precautions | Wear gloves and work in ventilated space |
| Positioning | Align stencil carefully |
| Application | Smooth from center outward |
| Final Check | Remove air bubbles and secure edges |

VViViD Blue Stencil Vinyl Masking Film with Anti-Bleed Technology (12" x 6ft)
Low-tack adhesive backing is easy to place and remove. Applies easily to any smooth, non-porous surface such as…
As an affiliate, we earn on qualifying purchases.
As an affiliate, we earn on qualifying purchases.
Crafting With Etching Cream Substitutes
You can create etched glass designs without commercial etching cream by trying DIY sandblasting techniques or using common household items. These methods offer a cost-effective and creative alternative for customizing your glass projects. Exploring these options broadens your crafting possibilities and helps you achieve professional-looking results at home. Additionally, understanding sound vibrations can inspire innovative techniques that incorporate gentle resonances for unique effects. Incorporating family background insights can also help tailor your design themes to personal or cultural narratives, fostering a deeper connection to your work and personal expression. Recognizing the importance of safety precautions ensures that these DIY methods remain as safe as they are creative. Awareness of material properties can further enhance your control over etching outcomes and durability.
DIY Sandblasting Techniques
If you’re looking for an effective alternative to etching cream, DIY sandblasting offers a practical solution that delivers professional-looking results. With this method, you can achieve intricate designs on glass surfaces while maintaining control. Start by protecting areas you want to remain clear with painter’s tape or stencils. Use a handheld or small sandblaster with fine abrasive media like aluminum oxide or baking soda. Carefully direct the blast to etch the glass surface, creating a frosted design. This technique not only provides sharp, precise patterns but also enhances glass’s appearance through polishing effects, which can improve clarity and gloss. Additionally, sandblasting can boost color enhancement by creating textured surfaces that reflect light differently, adding depth and vibrancy to your glass projects.
Using Household Items
While sandblasting provides a powerful way to etch glass, not everyone has access to specialized equipment. Luckily, you can use household items as glass decoration tools. For example, vinegar and salt can create a frosted effect when applied with a sponge, while nail polish remover can be used as a resist for intricate designs. Always follow safety precautions: wear gloves and work in a well-ventilated area. Here’s a quick idea table:
| Household Item | Use for | Safety Precautions |
|---|---|---|
| Vinegar & Salt | Create frosted glass effects | Avoid skin contact, ventilation |
| Nail Polish Remover | Resist areas for etching | Use gloves, avoid inhalation |
| Toothbrush | Textured designs | Handle carefully, avoid splashes |
| Rubber Bands | Mask areas during etching | Secure tightly, keep away from eyes |
| Tape | Create clean lines | Remove carefully to avoid damage |
These options allow you to craft unique glass decorations safely at home.

HARDELL Mini Cordless Rotary Tool, 5-Speed and USB Charging Rotary Tool Kit with 69 Accessories, Multi-Purpose 3.7V Power Rotary Tool for Sanding, Polishing, Drilling, Etching, Engraving, DIY Crafts
【Versatile Rotary Tool Set】This rotary tool set includes a high-performance and low-noise rotary tool with 69 of the…
As an affiliate, we earn on qualifying purchases.
As an affiliate, we earn on qualifying purchases.
Employing Laser Engraving Techniques

Laser engraving offers a precise and efficient way to etch intricate designs onto glass surfaces without the need for traditional creams or chemicals. With laser precision, you can achieve highly detailed images or text. This method allows for engraving customization, tailoring each piece to your exact specifications. Imagine your design being: 1. Carefully focused by the laser beam, carving smooth, clean lines 2. Precisely altered in depth to create textured effects 3. Rapidly executed, saving you time and effort 4. Easily adjusted for different glass thicknesses or designs Additionally, laser engraving adheres to privacy policies and ensures that your personal data remains secure during the process. Using laser engraving, you control every detail, ensuring a professional finish. It’s ideal for personalized gifts, branding, or artistic projects. This technique combines accuracy with flexibility, making it a top choice for modern glass etching without creams. Laser engraving also benefits from advanced technology, allowing for consistent results and innovative design possibilities. Incorporating techniques like laser beam control further enhances the precision and quality of your engravings, especially when working with vetted materials that ensure durability and quality.
Hand-Engraving With Rotary Tools and Bits

Choosing the right rotary bits is essential for clean, precise glass engraving. You’ll want to select bits that match your design complexity and glass thickness. Mastering the proper techniques guarantees your work remains accurate and professional-looking. Incorporating digital tools can further enhance your engraving precision and efficiency.
Choosing the Right Rotary Bits
Selecting the right rotary bits is essential for achieving clean, precise glass etching results. Your choice impacts clarity and detail. Imagine:
- A fine, needle-like bit carving delicate lines into smooth glass.
- A rounded, slightly larger bit shaping broader areas with ease.
- A carbide bit designed for stubborn spots and deep engraving.
- A polishing bit that smooths edges and enhances glass clarity.
Using the correct rotary bits ensures clean lines and smooth surfaces, especially when aiming for professional glass polishing. For detailed work, choose finer bits, while sturdier bits handle heavier etching. Proper selection minimizes chipping and maximizes control, making your project look polished and refined. Mastering the right rotary bits is your key to expert glass etching without cream.
Techniques for Precise Engraving
Mastering precise engraving with rotary tools requires careful hand control and technique. To achieve clean, detailed designs, you should work slowly, maintaining steady pressure and consistent speed. Use fine bits suited for glass, which allow for intricate detail, especially when adding glass coloring or creating delicate patterns. As you engrave, frequently check your progress to prevent over-etching. Once the design is complete, surface polishing helps smooth rough edges and enhances clarity. This step guarantees your glass surface remains smooth and free of burrs, improving the overall appearance. Precise hand-engraving lets you create detailed artwork, custom patterns, or personalized touches without the need for cream or other chemicals. With patience and practice, you can produce professional-quality results that highlight your craftsmanship.
Utilizing Frosted Glass Spray Paints

Frosted glass spray paints offer an easy and effective way to create etched glass effects without the mess of traditional cream etching. With spray paint techniques, you can transform clear glass into a frosted masterpiece in minutes. Imagine:
- Covering your glass with a stencil, creating sharp, clean lines.
- Spraying a light, even coat for a soft, matte finish.
- Building layers for deeper opacity and texture.
- Removing the stencil to reveal clear, frosted designs.
Using frosted glass spray, you can customize patterns, add privacy, or give glass a modern look—all without abrasive tools. The key is to apply spray paint evenly and let each coat dry thoroughly. This method offers a quick, mess-free alternative to traditional etching, with versatile spray paint techniques to suit any project.
Creating DIY Etching With Salt or Sandblasting Media
For a more hands-on approach to etching, you can create your designs using salt or sandblasting media. These materials effectively alter the glass texture by eroding the surface in targeted areas. Before starting, guarantee proper surface preparation by cleaning the glass thoroughly to remove dust and oils. Applying a stencil or tape helps protect areas you want to keep clear. When using salt, sprinkle it onto the surface and gently press to create a textured effect. For sandblasting media, use a controlled stream of abrasive particles to etch the glass. Both methods require careful handling to achieve clean, precise patterns. Remember, consistent surface preparation and technique are key to producing professional-looking, durable etchings without the need for creams or chemicals.
Making Use of Adhesive Films for Masking

Using adhesive films for masking is an effective way to create clean, precise glass etchings. These films serve as a barrier, protecting areas you want to remain clear. When applying adhesive films, you’ll first cut your design from the film, ensuring sharp masking techniques. Next, carefully peel the backing and smooth the film onto the glass, avoiding bubbles. Imagine:
- Aligning the film precisely along your desired pattern.
- Pressing out air pockets to ensure a seamless bond.
- Using a squeegee to secure the edges firmly.
- Removing the excess film around your design for crisp lines.
This process allows you to achieve detailed etchings without cream or harsh chemicals. Adhesive films provide a versatile, reusable masking solution that enhances control and accuracy during your glass etching projects.
Exploring Chemical Etchings With Household Items
Exploring chemical etchings with household items offers an accessible way to create frosted glass effects without specialized kits. You can achieve a unique glass texture and enhance design intricacy using common household products. For example, vinegar and baking soda can produce subtle frosted finishes when applied with a brush or sponge. Lemon juice or hydrogen peroxide mixed with salt can also create etched patterns, especially when combined with stencils. These DIY methods allow you to experiment with different textures and detail levels, giving you control over the final look. Keep in mind that chemical reactions vary, so testing on scrap glass first is wise. This approach offers a simple, affordable way to add personalized designs to your glass surfaces without needing commercial etching creams.
Combining Multiple Methods for Unique Effects

Combining multiple etching methods can produce truly unique and striking glass effects that single techniques might not achieve alone. By blending different approaches, you can create intricate glass textures and layered designs. For example, you might:
- Use traditional etching tools for fine lines and detailed textures.
- Apply sandblasting for bold, matte backgrounds.
- Incorporate chemical etching to add subtle shading or patterns.
- Finish with hand-polished accents to highlight specific areas.
This combination allows you to play with contrast, depth, and surface variation, making your glass artwork stand out. Experimenting with these methods broadens your creative possibilities, giving your designs a dynamic, multi-dimensional look that’s both complex and enthralling.
Frequently Asked Questions
Can Homemade Abrasives Safely Replace Commercial Sandblasting Media?
You wonder if homemade abrasives can safely replace commercial sandblasting media. While it’s tempting to try, homemade abrasives may lack sandblast safety standards, potentially causing uneven etching or injury. You should know that commercial media are tested for safety and consistency, unlike homemade options. For your protection and the best results, stick with proven sandblast media, ensuring safe, effective glass etching without risking damage or hazards.
What Are Eco-Friendly Alternatives to Chemical Etching Solutions?
You’re looking for eco-friendly alternatives to chemical etching solutions, so consider using natural abrasives like pumice or crushed walnut shells. Recyclable materials, such as recycled glass or aluminum oxide, also work well and reduce environmental impact. These options avoid harsh chemicals, are safer for you, and can be reused or recycled, making them sustainable choices for etching projects while still delivering precise, clean results.
How Do I Prevent Damage When Using Household Items for Etching?
When using household items for etching, you want to prevent damage by always wearing protective gear like gloves and goggles. Proper surface preparation is key—clean your glass thoroughly to remove oils or dirt that could cause uneven etching. Test your method on a small area first, and handle tools carefully to avoid scratches or cracks. Taking these steps helps you achieve a clean etch without damaging your glass.
Are There Any Risks Involved With DIY Glass Etching Techniques?
You might find yourself curious about the risks of DIY glass etching, and safety concerns are real. Material hazards like sharp tools, abrasive materials, or chemicals can cause injuries or damage if not handled properly. Always wear protective gear, work in well-ventilated areas, and follow instructions carefully. Being cautious and aware of potential dangers helps you avoid accidents, making your creative project both fun and safe.
Which Methods Produce the Most Durable Etched Designs?
You want durable etched designs, so look for methods that enhance chemical resistance and surface durability. Sandblasting creates deep, long-lasting marks, making it highly resistant to wear and cleaning. Laser etching also produces strong, permanent designs with excellent resistance. Avoid gentle techniques like chemical etching with creams, which may fade over time. By choosing sandblasting or laser etching, you guarantee your designs withstand daily use and cleaning, maintaining their clarity and detail longer.
Conclusion
So there you have it—endless ways to etch glass without turning to that trusty, yet boring, cream. Whether you’re wielding a laser, sandblasting, or just using household spices, who needs a fancy kit? Embrace the chaos, get creative, and turn your glass projects into masterpieces—or at least some mildly impressive DIY experiments. Just remember: if all else fails, blame the sandblast media. Cheers to your etching adventures!