To create a vintage-style memory jar label set, start by choosing textured or vintage-inspired paper and select fonts that evoke history and elegance. Use design tools to arrange your labels with subtle embellishments like borders or floral motifs in muted, earthy colors. Carefully print and cut the labels, ensuring clean edges, then attach them with twine, wax seals, or adhesive for an authentic look. Add personal touches inside the jars for a truly nostalgic touch—keep exploring to discover more tips.
Key Takeaways
- Select textured, vintage-inspired paper and print labels with ornate fonts and muted colors for an authentic look.
- Use design embellishments like borders and floral motifs to enhance the nostalgic aesthetic.
- Carefully cut and distress label edges with ink or sanding tools for a weathered, vintage effect.
- Attach labels securely with twine, wax seals, or adhesive, ensuring neat alignment on jars.
- Personalize jars by adding photos, notes, or keepsakes to create meaningful, timeless decorations.
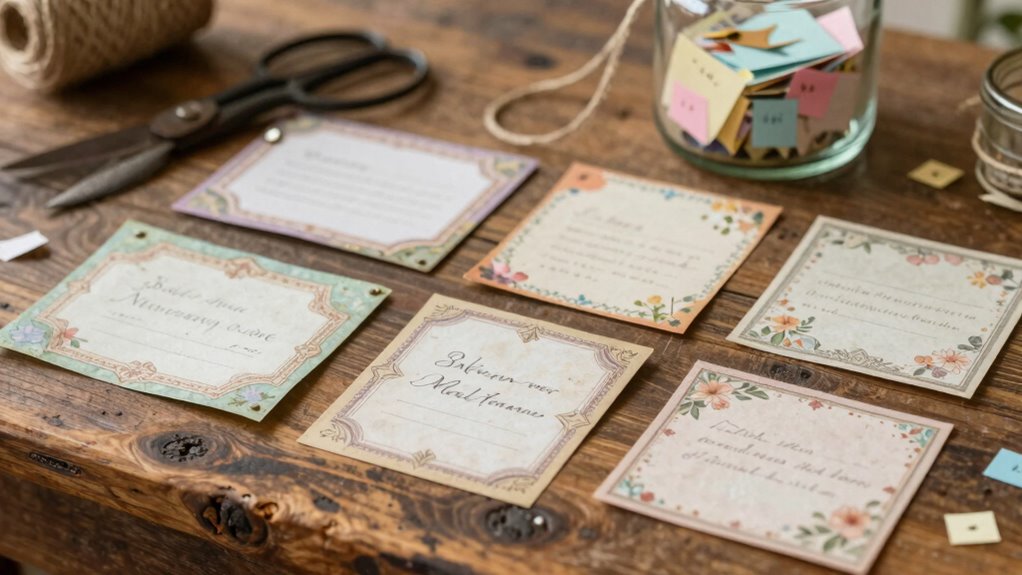
Creating a vintage-style memory jar label set is a charming way to add a personalized touch to your keepsake collection. To start, gather your materials—thick, textured paper or vintage-style sticker labels work best for that authentic feel. When it comes to decorative label printing, choose a method that enhances the nostalgic vibe, like using a vintage-inspired font or printing directly onto your chosen paper with a printer that can handle detailed designs. This step guarantees your labels look professional and cohesive, setting the tone for the overall aesthetic.
Next, focus on the antique font selection. Opt for fonts that evoke a sense of history and elegance, like serif fonts with ornate details or script styles that mimic handwriting from a bygone era. These fonts immediately give your labels that vintage charm and make each label feel more personalized. Remember, legibility is key, so pick fonts that are decorative yet easy to read at a glance. Mix and match fonts sparingly—perhaps a bold serif for the main title and a delicate script for the date or small notes—to create visual interest without overwhelming the design.
Once you’ve settled on your font choices, you can move on to designing your labels. Use a design program or even simple word processing software to layout your text. Incorporate subtle embellishments, like borders, floral motifs, or distressed textures, to reinforce the vintage theme. Keep your color palette muted and earthy—think sepia, faded gold, or soft pastel shades—to mimic the aged look of antique items. When printing, run test sheets to ensure colors and fonts look just right, and adjust settings if needed to achieve the desired antiqued effect.
When it’s time to cut and assemble, use a craft knife or scissors for clean edges. If you’re sticking with stickers, carefully peel and adhere them to your jars, making sure they’re straight and smooth. For printed paper labels, consider using a wax seal or twine to attach them, adding an extra layer of vintage authenticity. You can also distress the edges slightly with ink or a sanding tool to give the labels a weathered appearance, enhancing the antique feel. Incorporating antique fonts and textured elements helps to solidify the vintage aesthetic and make your jars truly unique.
Finally, fill your jars with your treasured memories—photos, notes, small keepsakes—and affix your beautifully crafted labels. With thoughtful decorative label printing and carefully selected antique fonts, your vintage-style memory jars will not only preserve your memories but also serve as timeless decorative pieces that reflect your personal style.
As an affiliate, we earn on qualifying purchases.
Frequently Asked Questions
What Materials Are Best for Vintage-Style Labels?
You should choose antique paper for that authentic vintage feel, as its aged look adds charm. Botanical illustrations are perfect for decorating your labels, giving them a classic, timeless appeal. Use sturdy cardstock or textured paper to guarantee durability. Combining antique paper with botanical illustrations creates a beautiful, vintage-style label set that looks charming and nostalgic, perfect for personalizing your memory jars with an elegant, old-fashioned touch.
How Do I Customize Labels for Different Occasions?
You can customize labels for different occasions by choosing seasonal themes and adding personalized touches. For a wedding, use elegant fonts and floral designs, while for holidays, incorporate festive colors and icons. Include names, dates, or special messages to make each label unique. This approach creates personalized gifts that reflect the occasion, making your vintage-style memory jars more meaningful and charming for any celebration or seasonal event.
Can I Reuse the Memory Jar Labels?
Ever wonder if those charming vintage-style memory jar labels can be reused? Absolutely! Reusable labels, made from eco-friendly materials, are designed for multiple uses, saving you money and reducing waste. Gently clean and store them properly after each use, and they’ll keep their vintage charm. Isn’t it satisfying to preserve the beauty and nostalgia of your memories while being eco-conscious? Reusable labels make that possible!
What Sizes Should the Labels Be?
You should choose label sizes that fit your vintage fonts and the jar’s space, typically around 2-3 inches wide for main labels and smaller for details. Use vintage fonts that complement the size, ensuring readability. When applying, use label adhesives suitable for glass and paper to keep your labels secure. Adjust sizes based on your jar’s dimensions and your design preference, creating a charming, cohesive vintage look.
How Long Does It Take to Complete the Project?
You can complete the vintage-style memory jar label set in about 1 to 2 hours, depending on your crafting pace. As you add decorative embellishments, take your time to guarantee each label looks perfect. Use label adhesive options that suit your paper and embellishments, like glue sticks or double-sided tape, to secure everything firmly. Rushing can compromise the look, so enjoy the process and customize your labels to match your style.
Conclusion
Creating your vintage-style memory jar label set is more than just a craft—it’s a gentle way to hold onto life’s sweetest moments. Each label becomes a tender reminder of the beautiful memories you cherish, softly echoing the stories of days gone by. As you decorate and personalize, you’re weaving a quiet tapestry of nostalgia and love. Let your memory jar be a heartfelt keepsake, a delicate treasure that whispers of joy, longing, and the timeless beauty of cherished memories.