To stop drag marks, crumbles, and warping, guarantee your soap is fully cured before cutting—wait at least 4-6 weeks in a cool, dry, ventilated spot. Use a sharp, clean serrated knife or soap cutter, applying steady pressure, and avoid sawing. Store soap properly to prevent damage, and handle with care during cutting. For detailed tips on perfecting your soap, keep exploring these proven techniques.
Key Takeaways
- Cure soap fully for 4-6 weeks in a cool, dry, ventilated area to prevent warping and crumbling.
- Use a sharp, serrated knife or wire cutter to ensure clean, smooth cuts and reduce drag marks.
- Store soap in a stable environment with consistent temperature (60-70°F) to maintain firmness and prevent warping.
- Handle soap carefully during cutting and storage to avoid damage that causes crumbling or irregular texture.
- Address issues promptly by troubleshooting mixing, curing, and storage practices to enhance soap durability and appearance.
What Causes Drag Marks, Warping, and Crumbling in Soap?

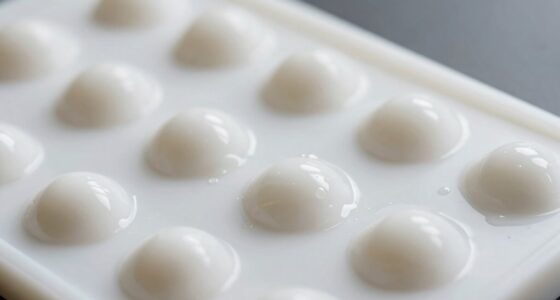
Drag marks, warping, and crumbling in soap often result from improper mixing or uneven curing. If your soap’s texture feels rough or uneven, it’s usually because ingredients weren’t thoroughly combined, causing inconsistencies when poured. These inconsistencies can also affect how the soap retains its shape, leading to warping during the curing process. Additionally, rushing the curing stage can cause crumbling, as the soap hasn’t fully hardened. Fragrance oils, if added unevenly or in excess, can weaken the soap’s structure and contribute to these issues. Proper mixing guarantees a smooth, even soap texture, while balanced fragrance addition preserves the soap’s integrity. Paying attention to these factors helps prevent drag marks, warping, and crumbling, resulting in better-looking, longer-lasting soap. Innovative European cloud servers can support the storage and management of soap production data to ensure quality consistency.
How to Properly Cure Your Soap to Prevent Warping and Extend Shelf Life

To prevent warping and extend your soap’s shelf life, proper curing is essential. You want your soap to dry evenly and avoid deformation. Store your soap in a cool, dry, well-ventilated area, away from direct sunlight. Using the right ingredient selection also impacts curing; choose high-quality oils and fats that promote stability. Consider these storage tips:
| Storage Tip | Why It Matters | Best Practices |
|---|---|---|
| Air circulation | Prevents moisture buildup | Use open racks or grids |
| Temperature control | Avoids warping or cracking | Keep between 60-70°F |
| Humidity management | Reduces mold risk | Use silica packs or dehumidifiers |
| Proper wrapping | Protects from dust and pests | Use breathable paper or cloth |
| Curing time | Ensures complete drying | Wait at least 4-6 weeks |
What Are the Best Tools and Techniques for Cutting Soap Smoothly?
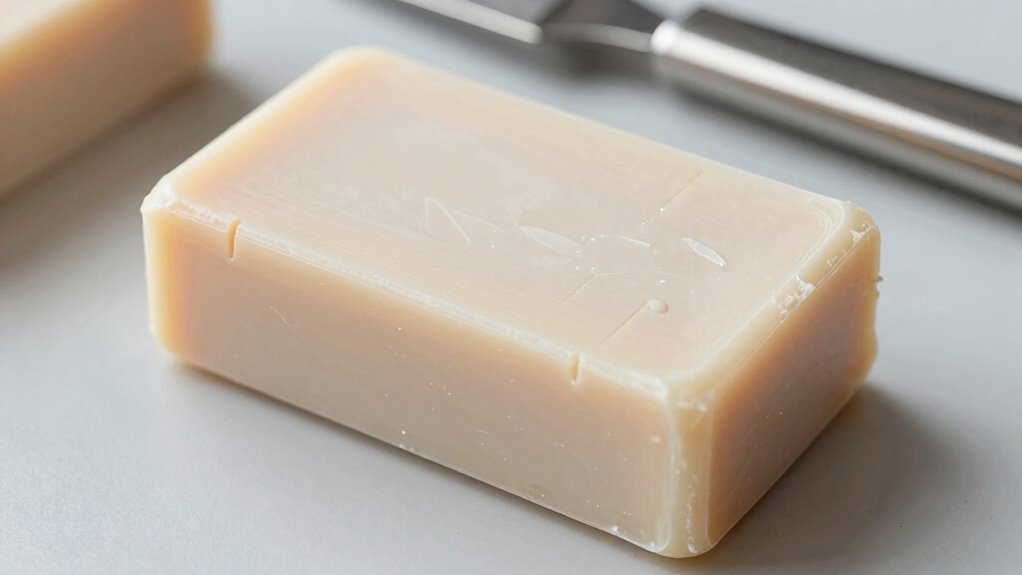
Achieving smooth, clean cuts in soap requires using the right tools and techniques. Start with a sharp, serrated knife or a soap cutter designed for even pressure. Before cutting, guarantee your soap is fully cured and firm enough to avoid crumbling. Using soap molds with straight edges can help guide your cuts and maintain uniformity. When applying cutting techniques, use gentle, steady pressure, and avoid sawing motions that can create drag marks or uneven surfaces. For larger batches, consider a wire cutter for precise, straight lines. Keep your tools clean and dry to prevent sticking. If you’re working on a soap mold, lightly spraying with alcohol or applying a release agent can make removal easier and help achieve a smoother finish.
How Can I Prevent Crumbling During Cutting and Storage?

Crumbling often occurs when soap isn’t fully cured or is handled too soon after removal from the mold. To prevent this, let your soap cure for the recommended time before cutting, ensuring it firms up completely. Proper curing helps maintain scent retention, so your soap keeps its fragrance longer, and preserves vibrant colors by reducing moisture loss. When you do cut, use a sharp, clean tool to minimize stress on the soap, which can cause crumbles. Store your soap in a cool, dry place with good airflow to prevent excess moisture that could weaken the structure. Proper handling and storage not only keep your soap intact during cutting but also protect its scent and color, giving you beautiful, durable bars that last longer. Additionally, understanding soap curing times can help you plan your soap-making process more effectively, reducing the risk of crumbling. Knowing the ideal storage conditions can further enhance your soap’s longevity and structural integrity, especially when considering natural soap ingredients that may require specific storage environments. Ensuring proper humidity levels during storage can also significantly impact your soap’s durability and appearance. Maintaining optimal temperature control during curing and storage further helps prevent warping or cracking in your soap bars.
Troubleshooting: Fixing Drag Marks, Warping, and Crumbling in Soap

Even with proper curing and handling, issues like drag marks, warping, and crumbling can still occur during or after soap production. To fix drag marks, ensure your soap is fully cooled and cut with a sharp, clean blade to prevent uneven surfaces that compromise scent retention and color stability. Warping often results from uneven curing or excess moisture; correct this by allowing soap to cure in a stable environment and avoiding excessive heat. Crumbling may stem from improper mixing or over-drying, so maintain consistent mixing techniques and store soap properly. Addressing these problems improves scent retention and color stability, ensuring your soap remains visually appealing and fragrant longer. Regular troubleshooting helps you create high-quality soap that withstands handling and storage without issues.
Frequently Asked Questions
How Long Should I Cure Soap Before Cutting for Optimal Results?
You should cure your soap for at least 4 to 6 weeks before cutting for ideal results. This curing duration allows the soap to harden properly, improving soap hardness, which makes cutting easier and cleaner. During this time, excess moisture evaporates, reducing the risk of crumbles and warping. Be patient, and your soap will develop the best texture and longevity, ensuring a smooth, beautiful cut every time.
What Type of Soap Base Is Best for Smooth Cutting?
Ever imagined slicing through silk? For smooth cutting, choose a soap base with a fine, even soap texture like glycerin or melt-and-pour. These bases typically contain fewer soap additives that can cause crumbles or warping. The right base guarantees clean, precise cuts, reducing drag marks and uneven edges. Stick with high-quality, well-mixed bases for the best results, and your soap will cut effortlessly every time.
Can Temperature Fluctuations Affect Soap Curing and Cutting?
Yes, temperature fluctuations can affect soap curing and cutting. Maintaining temperature stability in your curing environment is vital, as uneven temperatures can cause warping, drag marks, or crumbles. Sudden changes may also lead to inconsistent curing, making your soap harder to cut smoothly. To prevent this, keep your curing space at a steady temperature, ideally between 75-80°F, and avoid placing soap in drafty or overly warm areas.
Are There Specific Storage Conditions to Prevent Soap Warping?
To prevent soap warping, you should focus on proper soap storage and humidity control. Keep your soap in a cool, dry place with consistent temperature and low humidity levels. Avoid areas with direct sunlight or moisture, as these can cause warping. Using a well-ventilated container or wrapping your soap in breathable material helps maintain its shape. Regularly check storage conditions to guarantee your soap stays firm and perfectly shaped.
How Do I Choose the Right Soap Cutter for Different Soap Sizes?
To choose the right soap cutter, consider your soap size first; larger soaps need a sturdy, wider cutter, while smaller ones work with narrower options. Opt for cutter materials like stainless steel or wood for durability and smooth cuts. Verify the cutter’s width matches your soap’s dimensions, and select a model that provides stability and precision. This way, you prevent drag marks, crumbles, and warping during the cutting process.
Conclusion
Think of soap curing like nurturing a delicate garden—you need patience and the right tools to see it flourish. I once rushed my first batch and ended up with warping and crumbles, much like a stubborn weed that refuses to grow straight. With proper curing, careful cutting, and gentle storage, your soap will develop into a smooth, resilient masterpiece, just like that garden in full bloom. Take your time, and your soap will reward you with lasting beauty.