
When making soap, always handle lye with care by wearing gloves, goggles, and working in a well-ventilated area, adding lye to water slowly to prevent splashes. Recognize trace by its custard-like thickness and distinct trail, signaling it’s time to pour into molds. Cure your soap for 4–6 weeks on a well-ventilated rack, turning it occasionally to guarantee it dries evenly and safely. If you continue, you’ll discover how mastering these steps creates safe, high-quality soap.
Key Takeaways
- Always wear gloves, goggles, and long sleeves when handling lye, and add lye slowly to water in a well-ventilated area.
- Recognize trace by its custard-like texture and visible trail, indicating saponification has begun.
- Pour soap mixture into molds immediately after reaching trace to ensure proper patterning and ease of adding additives.
- Cure soap for 4–6 weeks with air circulation, turning regularly to improve quality and reduce alkalinity.
- Work efficiently after trace to prevent the mixture from thickening beyond pourability and ensure even molding.

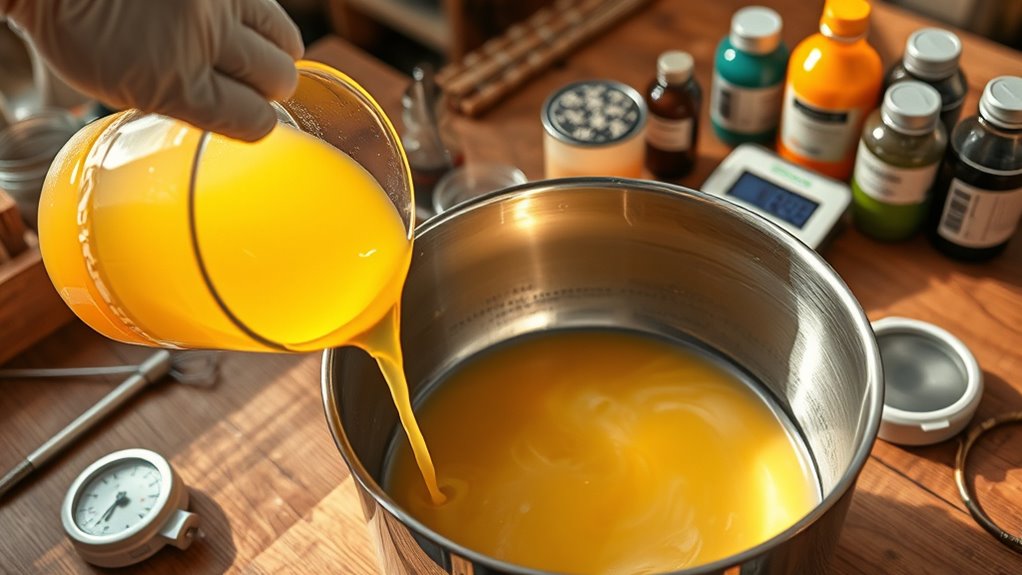
If you’re interested in creating your own soap, understanding the basics is vital. One of the most significant aspects is safe lye handling. Lye, or sodium hydroxide, is a powerful chemical used to turn oils into soap through a process called saponification. Because lye is caustic, you must always prioritize safety. Wear gloves, goggles, and long sleeves whenever working with lye to prevent burns. Work in a well-ventilated area, and never add water directly to lye; instead, slowly add lye to water while stirring carefully. This prevents dangerous splashes or eruptions. Keep a dedicated container for lye solutions, and always label it clearly. Proper handling also means keeping children and pets away from your workspace. Once you’ve mixed your lye and oils, you’ll notice the mixture begins to thicken—a stage called trace. Trace indicates the soap mixture has reached the right consistency for pouring into molds. It’s characterized by a custard-like texture that leaves a visible trail when drizzled over the surface. Achieving trace is vital because it signifies that saponification is underway and your soap is ready to set. The thickness at trace determines how you might add swirls, colors, or other additives. When you reach trace, you should work quickly but carefully to pour your soap into molds, ensuring even distribution and patterns if desired.
After pouring, your soap needs curing to become firm, mild, and long-lasting. Curing techniques involve allowing the soap to sit undisturbed for several weeks—usually four to six—so excess water can evaporate. During this time, the soap undergoes a chemical process that reduces its alkalinity, making it safer and gentler on skin. Proper curing also enhances the soap’s texture and longevity. To cure your soap properly, place it in a well-ventilated area, ideally on a rack or a surface that allows air circulation underneath. Covering the soap lightly with a cloth can help keep dust away but avoid sealing it in airtight containers, which can trap moisture and lead to sweating or spoilage. Turn the soap regularly during curing to ensure even drying. This patience pays off, as well-cured soap will lather better, last longer, and be gentler on your skin. Remember, rushing through curing or neglecting proper lye handling can compromise your soap’s quality and safety. Mastering these basics forms the foundation for creating beautiful, safe, and effective homemade soap.

Wood Carving Kit Whittling Kit: Deluxe Wood Carving Tools Knife Set with Leather Case - Woodworking Hobby Kit for Beginners Adults Kids - DIY Art Craft Gift for Men Teens
[Wood Carving Kit Deluxe Edition] Everything you need to start carving: 4 knives, 4 chisels, 7 basswood blocks,...
As an affiliate, we earn on qualifying purchases.
Frequently Asked Questions
How Long Does Soap Curing Typically Take?
Soap curing typically takes about 4 to 6 weeks, depending on the recipe and environment. During this curing duration, you should leave your soap in a cool, dry place to allow excess moisture to evaporate. This process helps develop the soap’s hardness, lather, and longevity. Patience is key, as properly cured soap guarantees safer, milder, and more effective use. Avoid using the soap until the curing process is complete.
Can I Use Alternative Lye Sources?
Using alternative lye sources isn’t just feasible, it’s like discovering a secret portal to soapmaking magic! You can absolutely explore natural alternatives and lye substitutes, such as potassium hydroxide or homemade ash lye, to craft your soap. Just remember, each substitute has unique properties, so do your research. While it’s an exciting adventure, always prioritize safety and precise measurements to guarantee your soap turns out beautifully and safely.
What Are Common Signs of Lye Miscalculations?
When you miscalculate lye, you’ll notice signs like a lye spill or a soap that doesn’t trace properly. Incorrect measurement can cause the soap to separate, crack, or become overly soft. If you see a lye spill during mixing, stop immediately and clean it up carefully. Always double-check your measurements to prevent these issues, ensuring your soap turns out safe and well-textured.
How Do I Store Leftover Lye Safely?
A stitch in time saves nine, so always store leftover lye safely. You should use a clearly labeled, airtight, and non-reactive container like a plastic or glass jar for lye storage. Keep it in a cool, dry, well-ventilated area, away from children and pets. Proper safe container selection prevents accidents and preserves the lye’s quality. Remember, safety first—never underestimate the power of proper storage.
Is It Safe to Make Soap in a Small Apartment?
Making soap in a small apartment can be safe if you prioritize apartment safety and handle lye carefully. Always work in a well-ventilated area, wear protective gear, and keep lye away from children and pets. Use proper storage for lye and clean up spills immediately. By following these safety tips, you can enjoy soapmaking without risking your health or safety in your apartment.

30 Gallon Flammable Storage Cabinet 35"x21"x21", Galvanized Steel, Flammable Safety Cabinet with Adjustable Shelf for Industrial and Home Use
✅Flammable Storage Cabinet-The flammable liquid storage cabinet is a hazardous storage cabinet with adjustable Shelf. It can store...
As an affiliate, we earn on qualifying purchases.
Conclusion
As you finish your soap, remember that patience and safety are your guiding stars. Like tending a delicate garden, each step—handling lye carefully, watching for trace, and curing slowly—shapes your masterpiece. Your soap is more than just a bar; it’s a symbol of your skill and care, blooming into something pure and nourishing. Trust in the process, and soon you’ll reveal a creation that’s as beautiful and resilient as a sunrise after a storm.

EliteEdge 45 Gal Flammable Safety Cabinet, 43" x 18" x 65" Galvanized Steel Industrial Flammable Liquid Storage Cabinet with Adjustable Shelves, Fireproof Double-Wall Design, Manual Close Doors
Fireproof Double-Wall Steel Design: This flammable cabinet features a 1.5" air gap between cold-rolled steel walls for maximum...
As an affiliate, we earn on qualifying purchases.
WETOXL 55 Gallon Flammable Cabinet, Galvanized Steel Flammable Storage Cabinet, Adjustable Shelf for Commercial Industrial Home Use 35H x 23W x 23D
🔒【FIREPROOF STRUCTURE】The flammable cabinet is made of 2mm double-layer cold-rolled steel plate, and the interior is filled with...
As an affiliate, we earn on qualifying purchases.