To get the best results, start with skiving because it thins and smooths the edges, making assembly easier and ensuring a polished look. Next, use splitting if you need to reduce the overall thickness of your leather or create uniform layers. Finally, press your project to flatten and set the shape, giving it a professional finish. Understanding the correct sequence helps take your leatherwork to the next level—stay tuned to explore each step in detail.
Key Takeaways
- Skiving should be performed first to thin edges and prepare leather for assembly.
- Splitting typically comes after skiving to reduce thickness of large or uneven pieces.
- Pressing is the final step, used after skiving and splitting to flatten and set the leather.
- Proper sequence: skiving, then splitting, followed by pressing for optimal results.
- Following this order ensures smooth, even, and professional-looking leather projects.
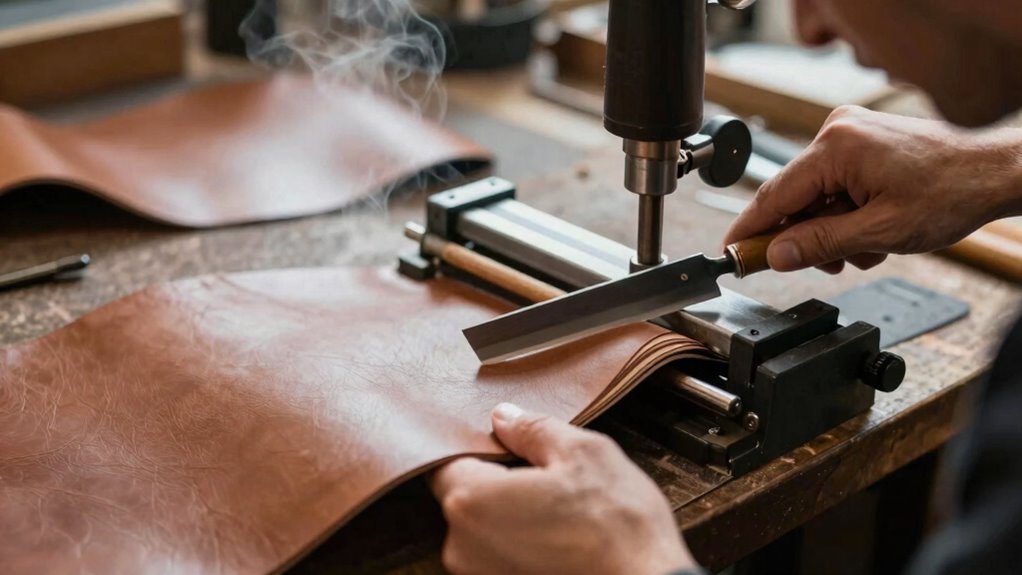
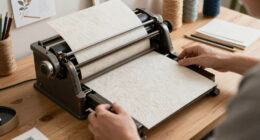
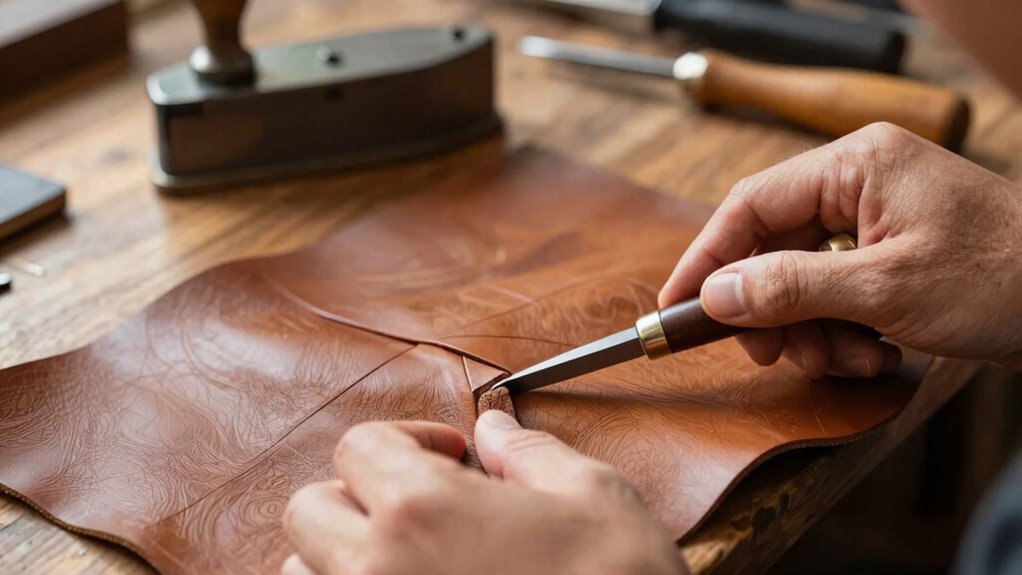
When working with leather, mastering techniques like skiving, splitting, and pressing can considerably elevate the quality of your projects. These skills are indispensable for refining the thickness, texture, and appearance of your leather pieces, making your finished products look professional and durable. Before diving into applying leather dyeing or antique finishing, it’s essential to understand which technique to tackle first, as each step builds on the previous one to produce a seamless, high-quality result. Skiving is often the first step because it allows you to thin out leather edges, making it easier to assemble and finish. When you skive, you’re removing excess leather to create smooth, even edges that are less bulky. This process is especially important if you plan to add decorative details, stitch tight seams, or incorporate contrasting colors. Skiving also helps prepare the leather for finishing processes like dyeing or antique finishing, making sure the surface remains even and receptive to color treatments. If you’re aiming for a polished look, starting with skiving ensures your edges won’t distract from the overall aesthetic. Properly managing leather thickness can also improve how the dye or finish penetrates the surface, resulting in a more consistent appearance. Additionally, understanding leather grain can help you decide how to best orient your pieces for optimal finishing results. Splitting comes next, especially when you need to reduce the thickness of a larger piece or create a more uniform surface. Splitting involves cutting the leather into layers, often with a splitting machine or a sharp blade, to achieve a consistent thickness throughout. This technique is essential if you want to dye or antique finish the entire piece evenly, as thicker sections can absorb dye unevenly or develop inconsistent aging effects. Splitting also allows you to create thinner layers for projects like wallets or small accessories, where flexibility and finesse are key. By splitting the leather first, you ensure a smooth, even surface that takes dye and antique finishes uniformly, resulting in a more refined appearance. Additionally, properly managing leather thickness can help prevent warping or uneven drying during finishing. Achieving a consistent thickness throughout your project can also aid in maintaining dimensional stability, which is critical for professional results. Pressing is generally the final step after skiving and splitting, and it’s indispensable for achieving a crisp, professional look. When pressing, you flatten the leather to remove wrinkles and set the shape, especially after dyeing or applying antique finishing. Pressing also helps to bond layers if you’re gluing or assembling multiple pieces, and it gives the leather a smooth, consistent surface. If you’re planning to dye the leather, pressing can help you achieve a more uniform color distribution by eliminating surface imperfections. Similarly, in antique finishing, pressing reduces surface irregularities, highlighting the aged, distressed effect you want to achieve. Properly preparing the leather throughout these steps can make a significant difference in the quality and appearance of your final product.

Skiving Knife, Metal Leather Skiver, Leather Craft Tools Skiver, Heavy Duty Hand Skiver for Leather, 6 Pieces Skiver Blades for Leather Craft DIY and Leather Making
Safety Skiver Color: Silver + Black, daily basic color, lasting color, satisfy your daily handmade leather life.
As an affiliate, we earn on qualifying purchases.
As an affiliate, we earn on qualifying purchases.
Frequently Asked Questions
How Do I Choose the Right Leather Upgrade for My Project?
To choose the right leather upgrade, start by considering your project’s needs, focusing on leather thickness and how it impacts flexibility and durability. Think about your tools’ compatibility—some upgrades require specific tools or techniques. If you need thinner, more flexible leather, skiving might be your first step. For increased strength, splitting could be better. Always select an upgrade that aligns with your project’s goals and your existing toolkit.
Are There Safety Precautions for Using Skiving and Splitting Tools?
When you use skiving and splitting tools, safety precautions are essential. Think of leather thickness as your guide—thinner leather requires less force, but safety gear like gloves and eye protection keeps you secure against accidental slips. Always work in a well-lit, stable environment, and follow manufacturer instructions carefully. By respecting these safety measures, you protect yourself while achieving perfect results, making your leather projects both safe and satisfying.
Can Pressing Be Done on All Types of Leather?
Pressing can’t be carried out on all types of leather, as it depends on the leather’s texture and surface finish. Softer, more pliable leathers like lamb or goat are ideal for pressing, giving you a smooth, crisp surface. However, stiffer or heavily finished leathers may not respond well, risking damage or uneven results. Always test a small area first to verify your pressing technique works well with your specific leather type.
How Long Does Each Leather Upgrade Process Typically Take?
In the delicate dance of leather upgrades, each step has its own rhythm. Typically, pressing takes just a few minutes, especially with proper tools. Splitting can stretch to about 20-30 minutes, while skiving might require 15-30 minutes depending on the thickness. When you combine these with leather dyeing and edge finishing, plan for extra time to guarantee quality. Patience and precision will bring out the best in your leather project.
What Maintenance Is Required After Performing These Upgrades?
After performing these upgrades, you should regularly maintain your leather by conditioning it to keep it supple and prevent drying or cracking. Additionally, you’ll need to keep your tools sharp through proper sharpening to guarantee clean cuts and consistent results. These steps help preserve the quality of your upgrades, extend their lifespan, and make future work easier. Consistent maintenance is key to keeping your leather projects looking professional and lasting longer.

BAYSTMAM Leather Skiver Leather Splitter with Pulling Handle
Leather Gripping Handle: Compared to finger pulling, the unique Leather Gripping Handle allows you to do balanced pulling,…
As an affiliate, we earn on qualifying purchases.
As an affiliate, we earn on qualifying purchases.
Conclusion
Mastering skiving, splitting, and pressing transforms your leather projects, ensuring a professional finish every time. Did you know that properly skived edges can reduce sewing time by up to 30%? Starting with the right upgrade depends on your project’s needs, but prioritizing skiving often makes the biggest impact on quality. Once you get these techniques down, you’ll notice your craftsmanship improving quickly—making your leatherwork not just better, but truly exceptional.
leather pressing clamshell
As an affiliate, we earn on qualifying purchases.
As an affiliate, we earn on qualifying purchases.

XILEWHZF Leather Edge Skiving Beveler Tool Set,French Beveler,Wide Mouth Leathercraft Edge Skiving Beveler Leather Edge Trimmer with Wooden Handle Four Sizes(4mm,6mm,8mm and 10mm)
The leathercraft edge skiving beveler tool is made of high Made of high quality steel and has a…
As an affiliate, we earn on qualifying purchases.
As an affiliate, we earn on qualifying purchases.