To make DIY candy corn soap bars, gather your soap bases, colorants, and fragrance oils, then melt the base safely using a double boiler or microwave. Divide the melted soap into separate bowls and add colors for each layer, pouring them carefully into molds—bottom white, orange, then yellow. Let each layer set before adding the next to keep the clean, vibrantly layered look. Once fully hardened, cut and finish your soap bars. Keep watching to learn more tips for perfecting your craft.
Key Takeaways
- Use layered pouring techniques with vibrant colors, waiting briefly between layers for sharp, clean separation.
- Melt and color soap bases carefully, adding pigments gradually for bright, consistent hues.
- Incorporate white or neutral layers at the bottom to mimic classic candy corn appearance.
- Allow each layer to set slightly before adding the next for defined, professional-looking stripes.
- Cure and trim soap bars carefully, then package or decorate for an attractive, finished look.

12 Wire Wooden Soap Cutter, Loaf Soap Cutter, Multi Soap Cutter, Color Beige (10 Wires : 1 1/4'' = 31,75mm)
Firm Birch Plywood
As an affiliate, we earn on qualifying purchases.
Gathering Your Supplies and Ingredients
Before you start making your candy corn soap bars, it’s important to gather all the necessary supplies and ingredients. Check your list to confirm you have soap bases, colorants, and fragrance oils. When selecting ingredients, consider ingredient substitutions if certain items are unavailable or if you prefer specific scents or colors. Always prioritize safety precautions—wear gloves, work in a well-ventilated area, and keep ingredients away from children. If you have allergies or sensitivities, review ingredient labels carefully. Prepare your workspace with clean tools and containers to prevent contamination. Having everything ready before you begin streamlines the process and helps avoid last-minute trips to the store. Proper preparation ensures a smooth, enjoyable soap-making experience. Additionally, understanding projector specifications can help you choose the right tools and setup for optimal results. To enhance your craft, consider fostering creativity by experimenting with different color patterns and designs. Incorporating knowledge about home heating solutions, such as proper insulation and ventilation, can also inspire innovative ways to create more comfortable and energy-efficient craft spaces. Being aware of essential oil safety guidelines can help you avoid adverse reactions if you decide to add scents to your soap. Moreover, using the right paint sprayer accessories can improve your application process and achieve a more professional finish.

Wooden Soap Cutter, Wire Soap Cutters Adjustable Stainless Steel Cutting Tool for Handmade Soap Loaf Candles Cheese DIY Making Tool
Supper Features: easy to assemble, easy to use and easy to clean, made of high-hardness thick wooden board...
As an affiliate, we earn on qualifying purchases.
Preparing the Soap Base
Start by melting your soap base carefully, either in short bursts in the microwave or using a double boiler. As it melts, add your chosen colors using proper techniques to guarantee even distribution without streaks. Make sure to mix thoroughly to achieve a smooth, vibrant base ready for pouring into your molds. Incorporating color mixing techniques can help ensure the soap’s appearance is consistent and visually appealing. Additionally, maintaining proper soap temperature during the melting process helps prevent issues like separation or uneven coloring. To ensure a professional look, monitor the soap consistency throughout melting and coloring to avoid settling or clumping. Being aware of AI-driven solutions in the industry can inspire innovative approaches to your soap crafting process.
Melting the Soap Base
To melt the soap base, cut it into small, even chunks to guarantee it melts evenly and quickly. Use a microwave or double boiler, stirring gently until fully liquefied. As you melt, consider your soap mold selection—whether you prefer classic silicone or novelty shapes—and your fragrance options, like vanilla or citrus. These choices influence your finished soap’s look and scent. Visualize your workspace with this table:
| Soap Mold Type | Fragrance Options |
|---|---|
| Classic silicone | Vanilla, lavender |
| Novelty shapes | Citrus, peppermint |
| Mini molds | Eucalyptus, berry |
| Large molds | Coconut, almond |
Ensuring even melting helps avoid bubbles and uneven textures, setting the stage for beautiful, fragrant soap bars.
Color Integration Techniques
Adding color to your soap base enhances its visual appeal and allows for creative expression. To achieve vibrant hues, start by selecting your soap colorants and adding them gradually. Use gentle stirring to blend the color thoroughly, creating smooth color blending without streaks. For a striking visual effect, consider using hue contrast—pairing warm and cool tones that make each color pop. When working with multiple colors, keep each separate until you’re ready to layer or swirl them into the soap base. This approach ensures colors stay vibrant and distinct. Remember, the key to successful color integration is patience—adding small amounts incrementally and mixing well to prevent uneven coloration. This careful preparation sets the stage for beautiful, colorful soap bars.
Proper Mixing Methods
Before mixing your soap base, verify it is properly prepared to achieve a smooth and uniform final product. Ensure you follow soap safety guidelines by working in a well-ventilated area and wearing gloves. Gently melt the soap base using short bursts in the microwave or a double boiler, stirring frequently to prevent overheating. If you need to make ingredient substitution, choose compatible bases to maintain consistency and safety. Proper mixing involves stirring thoroughly but not vigorously, so the color and additives distribute evenly without trapping air bubbles. Once your base is fully melted and smooth, you can add color, fragrance, or other ingredients. Consistent mixing helps you avoid streaks or uneven textures, resulting in beautiful, professional-looking soap bars.

18 Wire Wooden Soap Cutter, Loaf Soap Cutter, Multi Soap Cutter, Color Beige (1''=2.5cm)
Firm Birch Plywood
As an affiliate, we earn on qualifying purchases.
Creating the Colored Layers
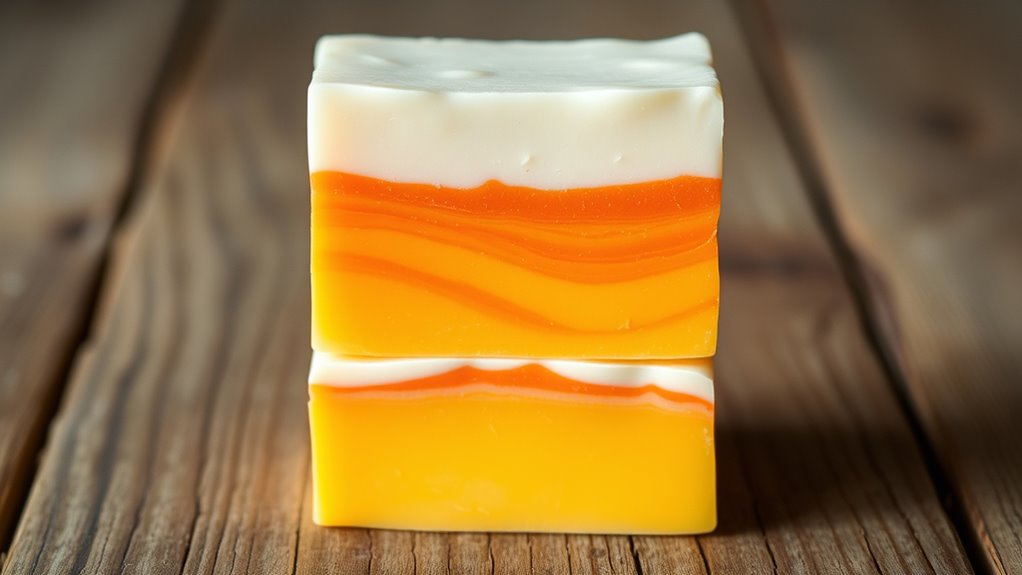
To create vibrant, eye-catching layers, pour your soap in bright colors, one at a time. Be patient and wait for each layer to set slightly before adding the next to prevent mixing. This way, you’ll achieve clean separation and a beautiful, candy corn-inspired look. Incorporating color theory principles can also help you choose harmonious shades that enhance the visual appeal of your soap. Waiting for each layer to reach the optimal setting point ensures sharp, well-defined lines between colors, elevating your soap’s appearance. Additionally, understanding visual balance can help you create more aesthetically pleasing designs by distributing colors evenly across your layers. Practicing mindful timing during the layering process can further improve your results by reducing the chances of unintended blending and maintaining the integrity of each color. Paying attention to layer thickness can also influence the overall look, giving your soap a more professional finish.
Layering With Bright Colors
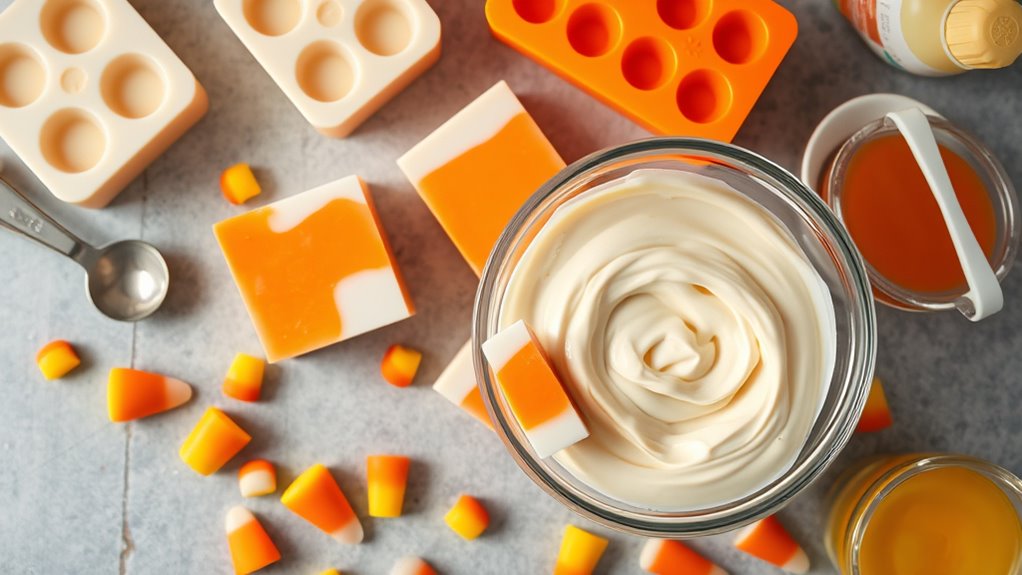
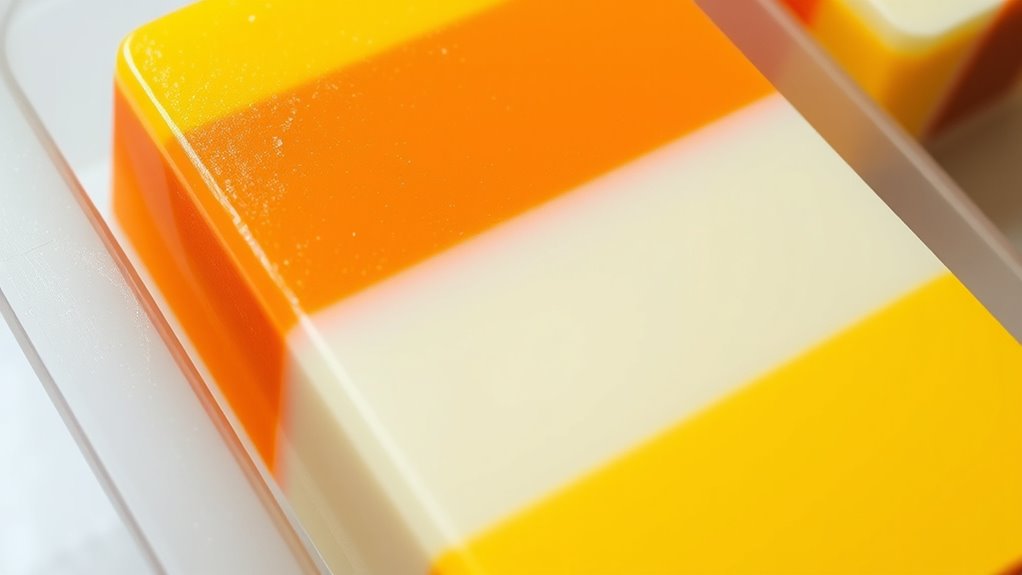
Creating vibrant, distinct layers is the key to achieving the classic candy corn look. To do this, focus on color mixing to create bright, bold hues for each layer. Use high-quality, pigmented soap dyes or mica powders, adding small amounts gradually until you reach your desired shade. When selecting scents, opt for complementary fragrances that enhance the visual appeal without overpowering the soap. Keep in mind that vibrant colors may require slightly thicker soap mixtures to hold their shape during pouring. Pour each color in order—white, orange, and yellow—allowing each layer to set slightly before adding the next. This technique guarantees the layers stay separated and vivid, giving your soap a professional, candy corn-inspired finish.
Achieving Clean Color Separation
Achieving clean color separation requires careful attention during the pouring process. To prevent colors from blending, pour each layer slowly and steadily, allowing it to set slightly before adding the next. Use a fragrance that complements the layers without disrupting their appearance. Proper mold maintenance is essential—clean and dry your mold thoroughly to avoid residue that could cause colors to bleed. Visualize the process with this imagery:
| Stage | Action | Result |
|---|---|---|
| Pouring Layer | Gently pour the first color | Sharp, defined edge |
| Let Set | Wait a few minutes | Slight firmness, no blending |
| Add Next Color | Carefully pour without disturbing | Crisp separation |
| Final Touch | Smooth the top, clean mold | Perfect, clean layers |
This technique ensures vibrant, distinct candy corn layers every time.

Kartols Wooden Soap Cutter,Adjustable Handmade Soap Making Supplies, Perfect for Soap Making Loaf Slicer, Essential Tool for Crafting Enthusiasts
Premium Quality & Durability: The Kartols Wooden Soap Cutter is made from high-quality wood and stainless steel, ensuring...
As an affiliate, we earn on qualifying purchases.
Pouring and Layering the Soap
Once your colored soap layers are prepared and slightly cooled, it’s time to pour them into your soap mold. To achieve clean color separation, pour each layer carefully, starting with the bottom white section. When pouring, aim for a gentle flow to prevent disturbing the underlying layer and to minimize color blending. Use a small spout or a funnel if needed for precision. Allow each layer to set slightly before adding the next to maintain distinct boundaries. Pouring slowly helps preserve the sharp, clean lines characteristic of candy corn. Keep your soap mold steady and level during pouring. If any color starts to blend unintentionally, don’t worry—just pour the next layer smoothly, and it will still look fantastic once fully hardened. Incorporating layering techniques can further enhance the visual appeal of your soap bars. Additionally, maintaining a consistent pouring speed can help improve the overall soap appearance and ensure crisp, vibrant layers. Proper temperature control during pouring can also prevent layers from merging and improve the clarity of each section.
Letting the Soap Set and Harden
After pouring each layer carefully, it’s important to give the soap enough time to set and harden properly. The right soap mold selection helps ensure your soap maintains its shape during curing. Choose a mold made from silicone or plastic that is flexible enough to release the soap easily once hardened. Place the mold in a stable curing environment with a consistent temperature and low humidity, ideally in a quiet, dust-free area. Avoid moving the mold during this period, as any disturbance can cause imperfections. Allow your soap to harden for at least 4-6 hours, or preferably overnight, to ensure it’s fully set. Proper curing helps prevent deformation and guarantees your candy corn soap bars will be solid, smooth, and easy to handle when you’re ready to finish them. Additionally, ensuring the environment is free from dust and particles helps maintain the quality of the soap, resulting in a cleaner finish. Selecting a suitable molding material that complements the soap’s shape and design can also improve the final appearance.
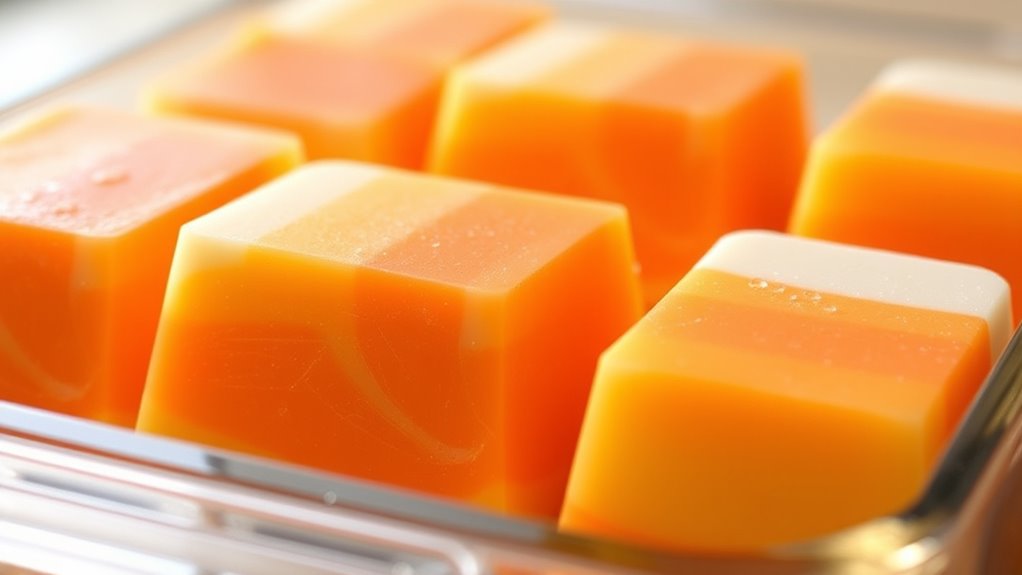
Cutting and Finishing Your Candy Corn Bars

Now that your soap has fully hardened, you can carefully remove it from the mold. Use a gentle pressure to avoid cracking the soap. Choose your soap mold based on the shape and size you want, or experiment with different options for variety. When cutting, a sharp knife works best—wipe it clean between cuts for smooth edges. Consider your scent options; if you used multiple scents, you might want to cut the soap into smaller pieces to showcase the layers.
| Step | Tip |
|---|---|
| Remove from mold | Gently flex or tap the mold to loosen the soap. |
| Cutting | Use a sharp knife for clean edges. |
| Scent options | Experiment with different fragrance layers. |
| Finishing | Smooth edges with a warm knife if needed. |
Tips for Customizing and Storing Your Soap
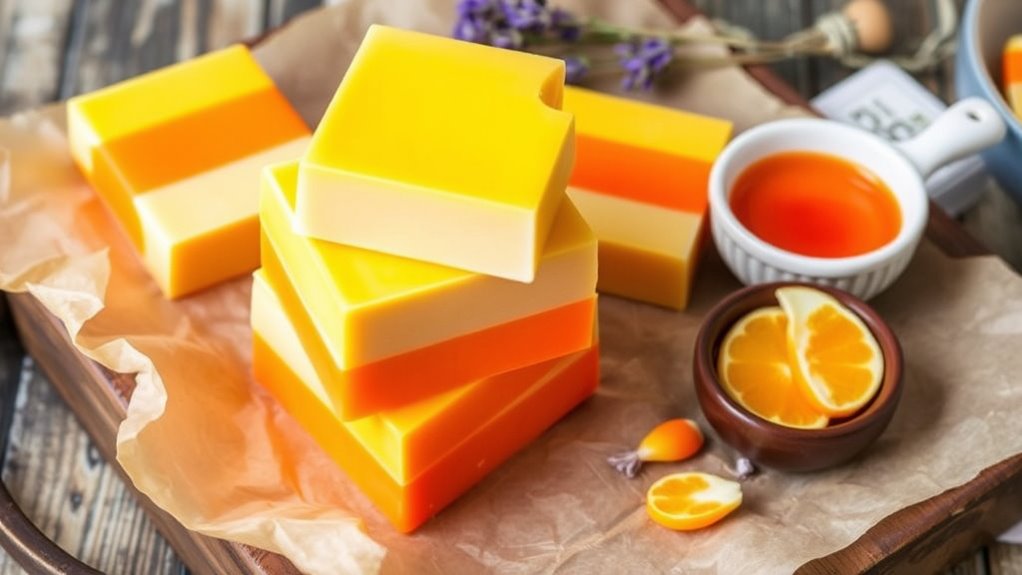
To make your soap truly unique, consider customizing it with additional touches such as color accents, decorative tops, or personalized labels. These details add a professional touch and make your soap perfect for gifting or display. When it comes to storage, choose appropriate storage containers that keep your soap dry and prevent it from melting or absorbing moisture. Airtight containers or soap dishes with drainage work well. Packaging options are also key; opt for clear wrap, boxes, or custom labels to showcase your design and add a personal flair. Store your soap in a cool, dry place away from direct sunlight to maintain its color and scent. Proper customization and storage guarantee your handmade soap stays fresh, attractive, and ready for use or gifting.
Frequently Asked Questions
Can I Modify the Soap Recipe for Sensitive Skin?
You can definitely modify the soap recipe for sensitive skin by focusing on soap base modifications and skin sensitivity considerations. Use gentle, hypoallergenic ingredients like shea butter or glycerin, and avoid fragrance or dyes that might irritate your skin. Adding soothing agents like oatmeal or aloe vera can also help. Always test a small patch first to make sure your customized soap suits your skin, and consult a dermatologist if needed.
What Are the Best Natural Colorants for Candy Corn Soap?
Imagine transforming plain soap into vibrant, eye-catching candy corn. You’ll want to use natural colorants that promise safety and brilliance. Think about bright turmeric for that golden hue, or vibrant annatto for rich orange tones. Safe dyes like spirulina for green or beetroot powder for deep reds can add depth. These natural colorants not only create stunning visuals but also guarantee your soap remains gentle, making every bar a delightful, safe treat.
How Long Does Homemade Soap Typically Last?
You wonder how long homemade soap lasts, and it usually has a shelf life of about 1 year if stored properly. To maximize its longevity, keep your soap in a cool, dry place away from direct sunlight. Use airtight containers or wrapping to prevent moisture and air exposure. Proper storage tips help your soap stay fresh longer, ensuring you enjoy its quality and benefits throughout its shelf life.
Is It Safe to Add Fragrances or Essential Oils?
Think of adding fragrances or essential oils as walking a tightrope—you want to enhance your soap without risking safety. Fragrance safety depends on proper essential oil dilution; undiluted oils can cause skin irritation or allergic reactions. Always research each essential oil’s safety guidelines and use the correct dilution ratios. When done carefully, you create beautifully scented soaps that are both delightful and safe for your skin, just like a well-balanced masterpiece.
Can I Make Soap Bars in Different Shapes or Sizes?
You can definitely make soap bars in different shapes or sizes by experimenting with shaping techniques and mold selections. Use silicone molds or custom molds to create unique forms, and consider cutting larger soap blocks into smaller pieces for variety. Be gentle when removing soap from molds to prevent breakage, and guarantee your molds are heat-resistant if you’re pouring hot soap. This allows you to personalize your soap with fun shapes and sizes.
Conclusion
Now, imagine holding your vibrant candy corn soap bars, their cheerful stripes gleaming like autumn’s sunshine. As you run your fingers over the smooth, layered surface, you can almost smell the sweet scent of fall. With each use, these handcrafted treats bring a splash of color and joy to your daily routine. Enjoy your creation—beautiful, bubbly, and uniquely yours—ready to brighten your bathroom and remind you of cozy autumn days.