
To make DIY jewelry storage solutions, gather recycled or household items like cardboard, fabric, or wood. You can craft custom trays from cardboard, create hanging organizers with mason jars, or design jewelry frames with wire and clips. Wooden branches make rustic stands, while perforated boards offer flexible, modular options. For travel, a fabric jewelry roll works great. Keep exploring for detailed ideas to organize your jewelry stylishly and efficiently.
Key Takeaways
- Repurpose cardboard, frames, or fabric to create customized trays, displays, and travel jewelry rolls.
- Incorporate natural elements like branches or rustic materials for unique, eco-friendly jewelry stands.
- Use perforated boards, hooks, and small containers to design flexible, space-saving modular organization systems.
- Enhance DIY solutions with decorative touches such as paint, washi tape, or embellishments for personalized style.
- Secure jewelry items with magnets, clips, or adjustable compartments for easy access and efficient storage.
Repurposing Cardboard for Custom Jewelry Trays

If you’re looking for an affordable and customizable way to organize your jewelry, repurposing cardboard is a simple solution. Start by collecting sturdy cardboard boxes or sheets, then cut them into the desired tray shapes. You can create compartments by layering or folding smaller pieces of cardboard inside the main tray. Use a ruler and pencil to measure and mark divisions for necklaces, rings, or earrings. To make your trays more durable, cover them with decorative paper, fabric, or washi tape. You can also add small dividers or padding for delicate pieces. This method lets you tailor the size and compartments to fit your jewelry collection perfectly, all while keeping costs low and using materials you already have. Incorporating wicks or other candle-making materials can inspire creative design elements for your trays, such as adding small candle-inspired accents or decorative touches. Additionally, utilizing upcycled materials aligns with eco-friendly practices and enhances the uniqueness of your storage solutions. Using self-watering plant pot concepts as inspiration, you can create compartments that are moisture-resistant or incorporate small water reservoirs for added durability. Moreover, adding non-slip liners can help keep your jewelry in place and prevent damage during daily use. Incorporating recycled cardboard not only supports sustainability but also provides a sturdy base for your custom storage.
Using Wooden Perforated Boards for Easy Access
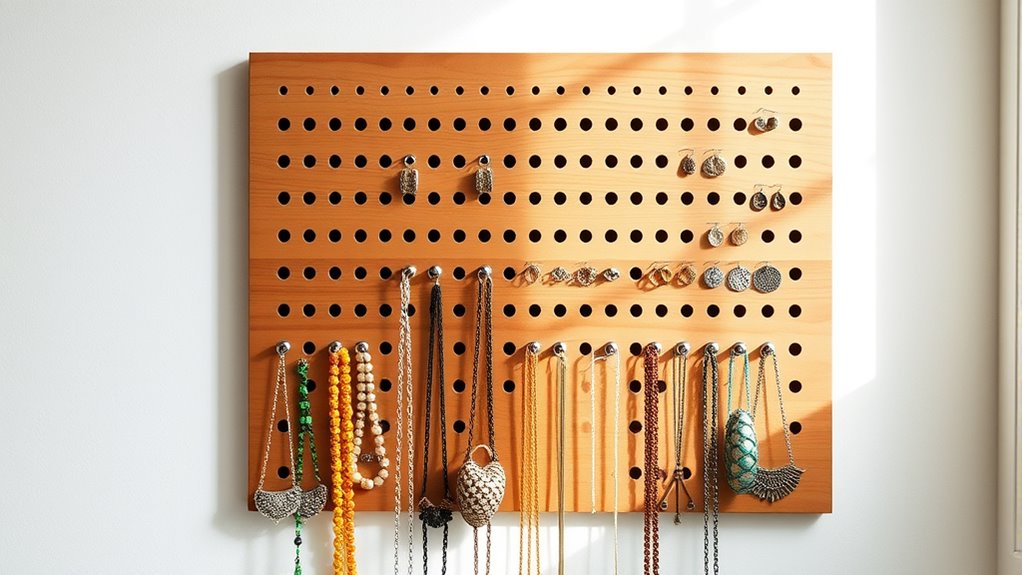
Wooden perforated boards let you customize your jewelry storage to fit your collection perfectly. They make grabbing your pieces quick and simple, saving you time and effort. Plus, their space-efficient design helps you make the most of your storage area. Incorporating specialized attachments can further enhance organization and accessibility. Additionally, choosing the right filtration system ensures your storage remains dust-free and clean. To preserve the quality of your jewelry, it’s also important to consider humidity control options to prevent tarnishing and damage. Understanding dream symbols related to protection, such as shields or safe spaces, can inspire you to incorporate protective features into your storage solutions.
Customizable Design Options
Using perforated boards made of wood allows you to customize your jewelry storage with ease. You can adapt the layout to fit your collection and style preferences. Here are some ideas:
- Add hooks or pegs for necklaces, bracelets, or earrings, making it simple to grab what you need.
- Install small shelves or containers to hold rings, earrings, or tiny accessories, keeping everything organized.
- Paint or stain the board in your favorite color or finish to match your decor, giving it a personalized touch.
- Incorporate community engagement by sharing your design ideas with other jewelry enthusiasts to inspire new configurations and foster creativity.
This flexibility lets you design a storage solution that’s both functional and stylish, tailored specifically to your jewelry collection. The perforated design makes it easy to rearrange and update as your collection grows.
Easy Jewelry Accessibility
Perforated boards make jewelry access quick and effortless by keeping your pieces visible and within reach. With hooks or pegs inserted into the holes, you can customize your display to suit your collection. This setup reduces the time spent searching for specific items and prevents clutter. To maximize efficiency, organize your jewelry by type or frequency of use. Here’s an example of an effective arrangement:
| Earrings | Necklaces | Bracelets |
|---|---|---|
| Daily wear | Special pieces | Seasonal items |
| Small hooks | Longer hooks | Adjustable hooks |
| Easy to reach | Visible display | Secure storage |
Using perforated boards keeps your jewelry organized, accessible, and visually appealing, making your jewelry organization smoother and more enjoyable. Additionally, selecting suitable hooks for different jewelry types can enhance durability and ease of use. Incorporating proper placement techniques can further improve accessibility and prevent tangling. Implementing innovative storage solutions can optimize your space and keep your collection looking neat. Leveraging automation in business can also help streamline inventory management for jewelry collections.
Space-Saving Features
A wooden perforated board offers an efficient way to save space while keeping your jewelry easily accessible. By mounting it on a wall or inside a closet, you maximize vertical storage and reduce clutter. The perforations allow you to insert hooks or pegs, making it simple to hang necklaces, bracelets, and earrings. This setup keeps jewelry visible and within reach, saving drawer space for other items. To enhance functionality, consider customizing the layout to fit your collection. Regularly assessing and rotating your jewelry can also help prevent clutter buildup and promote mindful decluttering. Additionally, understanding how to organize your jewelry can be influenced by resources and tools available for DIY solutions. For example, exploring different storage methods can help you find the most suitable approach for your collection. Embracing the creative practice of DIY organization can lead to innovative and personalized storage ideas. For example, incorporating essential oils like lavender or eucalyptus in your space can create a calming atmosphere that makes jewelry organization more enjoyable. Here are three ways to optimize your wooden perforated board:
- Use different hook sizes for various jewelry types.
- Add small baskets or containers for rings and pins.
- Install a mirror nearby for quick styling checks.
Creating a Hanging Organizer With Mason Jars
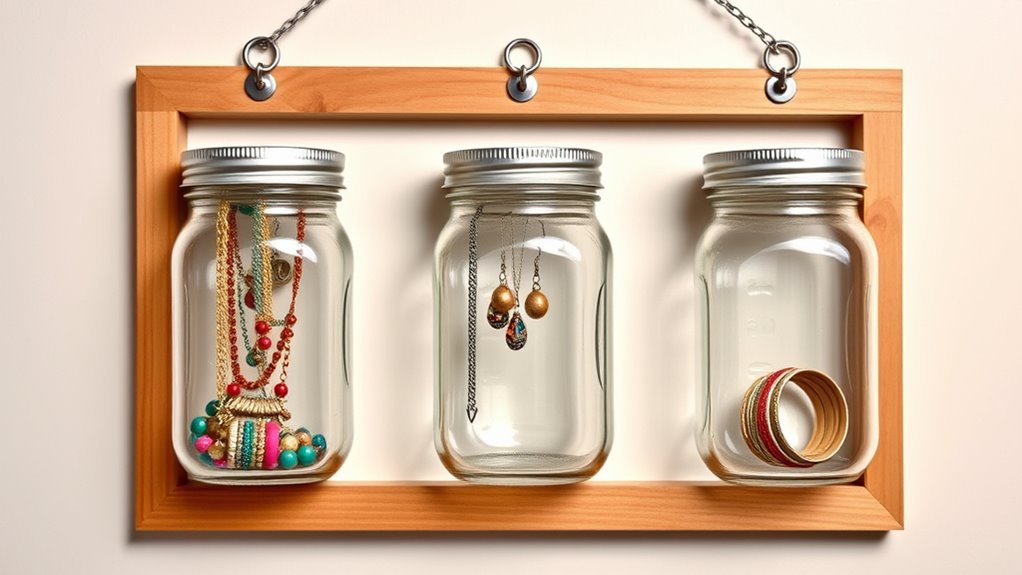
Creating a hanging organizer with mason jars is a simple and stylish way to keep your jewelry accessible and organized. First, gather mason jars, a sturdy wooden board or frame, and hooks or brackets. Attach the jars to the board using metal rings or clamps, ensuring they hang freely. You can also screw hooks into the lids for additional hanging space. Arrange the jars so you can see and reach your jewelry easily. This setup works well for necklaces, rings, and earrings. Customize the jars with paint, labels, or decorative touches to match your decor. Here’s a quick overview:
| Step | Materials | Tips |
|---|---|---|
| Attach jars | Mason jars, hooks | Secure firmly for safety |
| Arrange jars | Wooden board or frame | Keep accessible and balanced |
| Decorate | Paint, labels | Personalize for style |
Additionally, incorporating automation’s role in business intelligence can help streamline your organization process, especially if you decide to expand or create a more complex storage system.
Crafting a Jewelry Frame With Wire and Clips
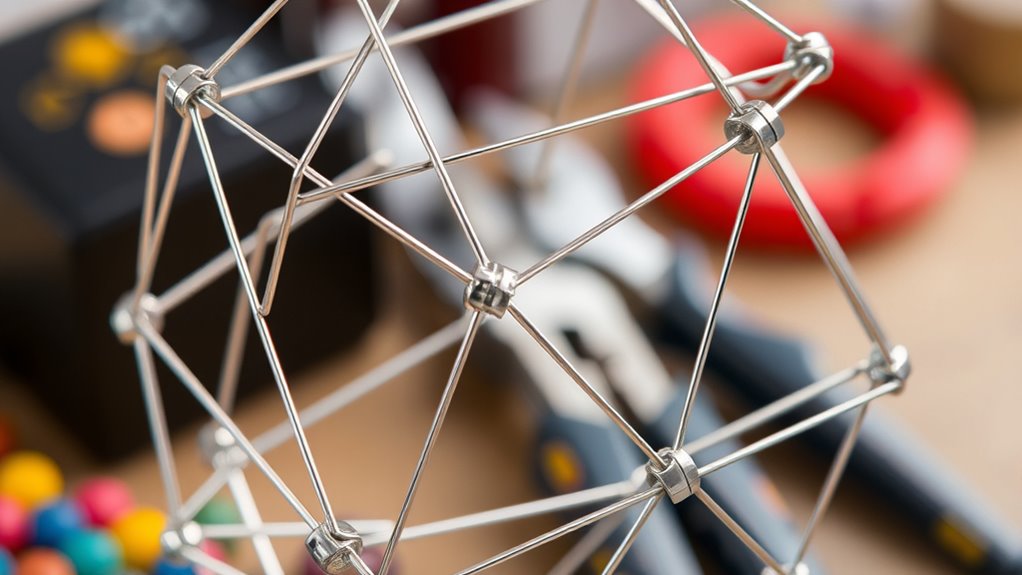
If you want an easy and customizable way to display your jewelry, crafting a jewelry frame with wire and clips is an excellent option. This project lets you organize your accessories while adding a decorative touch to your space. To start, select a sturdy frame or create one with a wooden or metal backing. Then, stretch wire across the frame, securing it tightly. Use small clips or clothespins to hold your jewelry in place. Here are three tips to make it perfect:
- Choose corrosion-resistant wire for durability.
- Vary clip sizes to accommodate different jewelry types.
- Decorate the frame with paint or embellishments for a personalized look.
This simple craft keeps your jewelry accessible and stylish.
Building a Rustic Jewelry Stand With Branches
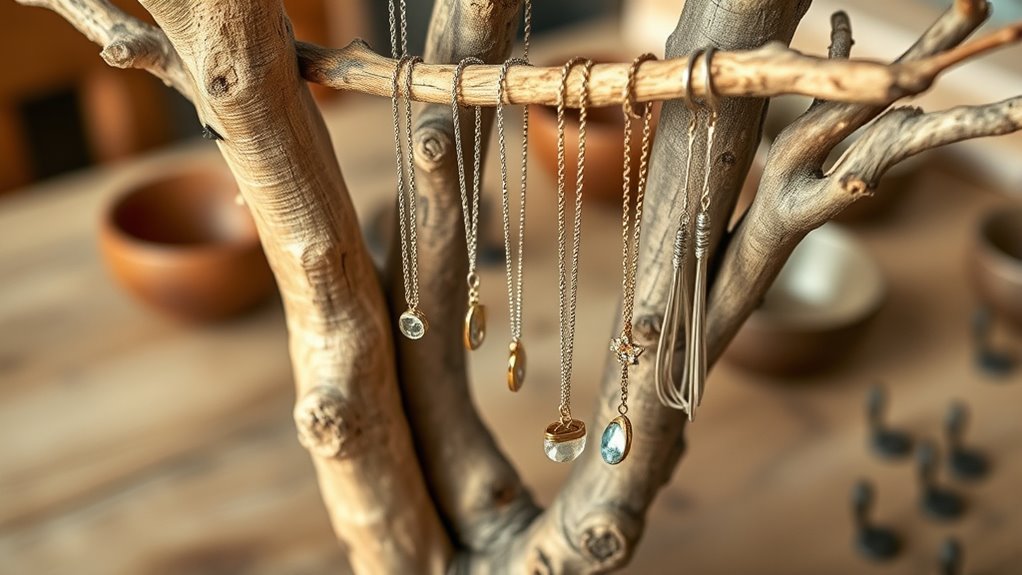
Building a rustic jewelry stand with branches offers a natural and charming way to display your accessories. Start by selecting sturdy, healthy branches from outside—preferably ones with multiple smaller offshoots for hanging jewelry. Clean them thoroughly and let them dry completely. Next, arrange the branches in a vessel like a sturdy pot or a wide jar filled with stones or sand for stability. If needed, secure the branches with hot glue or wire to keep them upright. Place your stand on a flat surface in your bedroom or closet. This simple setup keeps your jewelry organized and easily accessible while adding a rustic, organic touch to your decor. It’s a functional and attractive way to showcase necklaces, bracelets, and earrings without clutter.
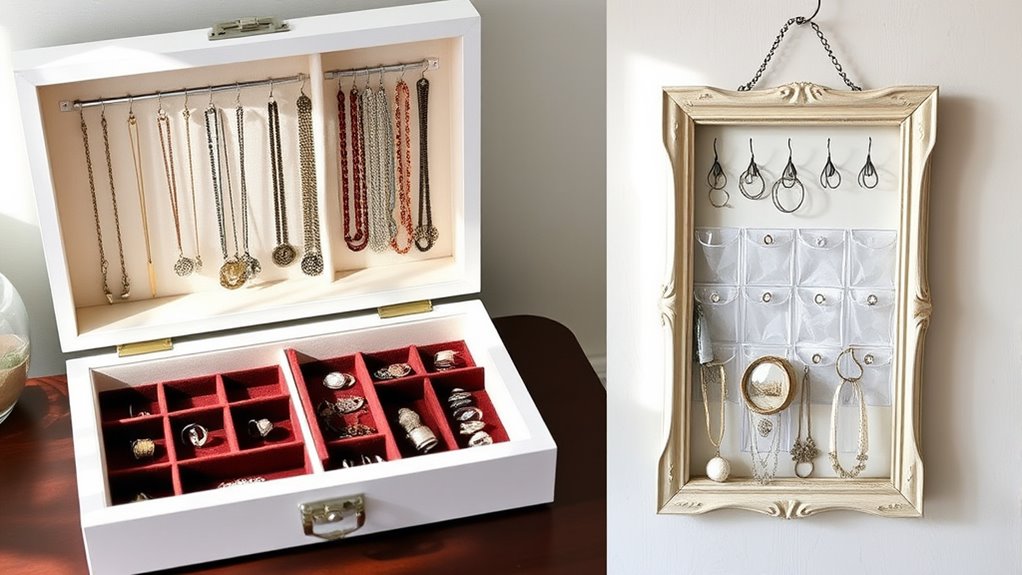
Transforming a Picture Frame Into a Jewelry Display
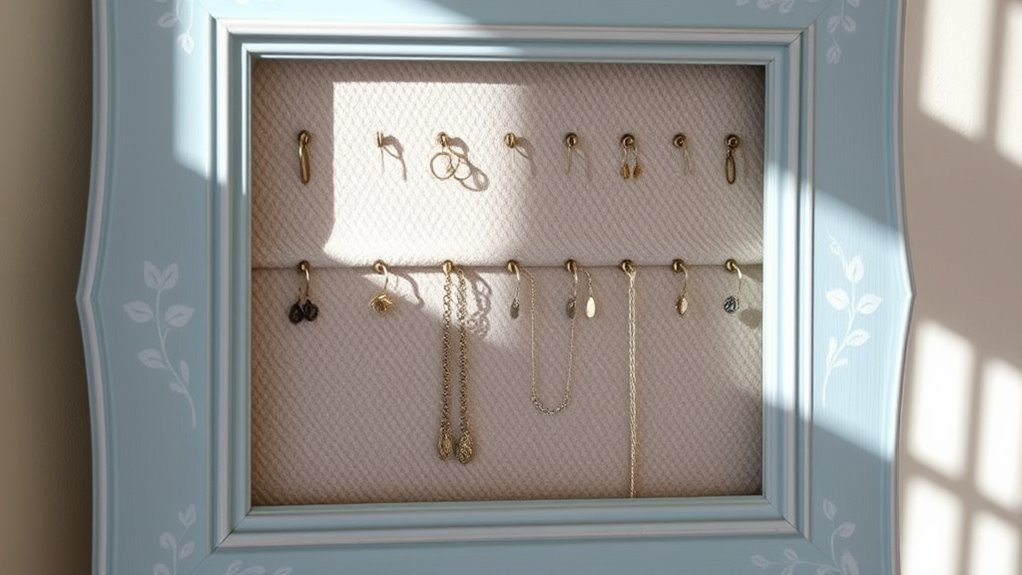
Choosing the right picture frame is key to creating an attractive jewelry display, so pick one that complements your decor and has enough surface area. Then, add functional hooks or wire to hold necklaces and earrings securely. With these simple steps, you’ll turn a plain frame into a stylish storage solution in no time.
Choosing the Right Frame
Selecting the right picture frame is essential for creating an effective jewelry display that complements your space. Consider these factors to choose the best one:
- Size: Pick a frame large enough to hold your jewelry without looking overcrowded or sparse.
- Material: Wooden frames add warmth, while metal or sleek plastic offers a modern touch.
- Style: Match the frame’s design to your decor—vintage, minimalist, or eclectic—to ensure it blends seamlessly.
Avoid frames with busy patterns or overly ornate borders that distract from your jewelry. Also, ensure the frame’s glass is clear and free of scratches. By choosing a suitable frame, you set a sturdy and attractive foundation for your jewelry display.
Adding Functional Hooks
Transforming a picture frame into a functional jewelry display is simple and effective when you add hooks. First, choose small hooks or hooks with adhesive backing that can be easily attached to the frame’s border or inside edges. Space them evenly to maximize hanging space for necklaces, bracelets, or earrings. To guarantee they stay secure, consider using a drill to screw in metal hooks or strong double-sided adhesive hooks for a no-drill option. Once your hooks are in place, organize your jewelry by type or color for quick access. This method keeps your jewelry visible and tangle-free, while also adding a decorative touch to your space. With just a few hooks, you turn a plain frame into a practical and stylish display.
Making a DIY Jewelry Roll for Travel
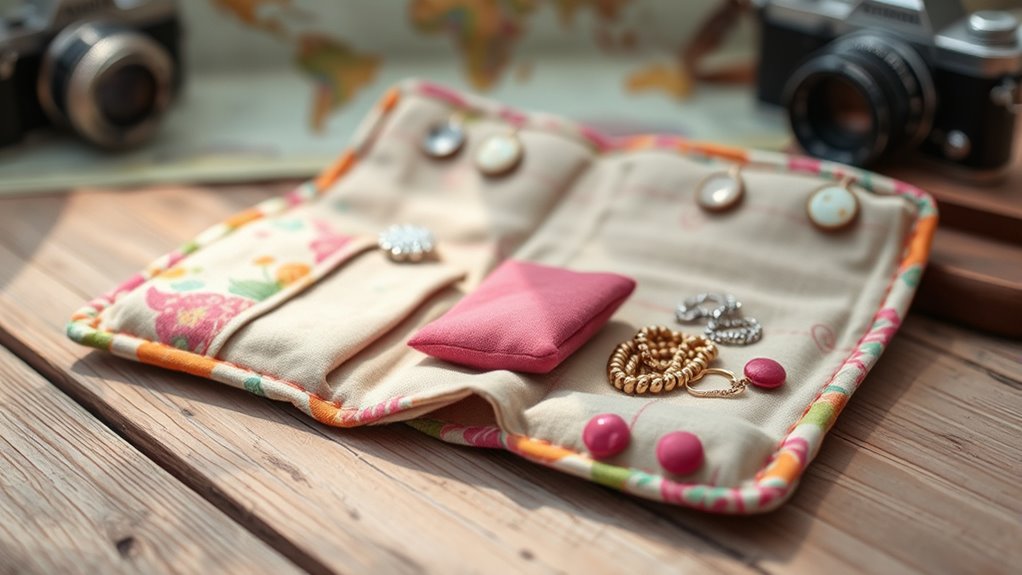
Creating a DIY jewelry roll for travel is a practical way to keep your accessories organized and protected on the go. It’s simple to customize and lightweight enough to fit in your luggage. To start, gather these essentials:
A simple, customizable solution to keep your jewelry organized and tangle-free while traveling.
- A sturdy fabric or old scarf, cut into a rectangle size that suits your jewelry.
- Small zippered pouches or fabric pockets for delicate pieces.
- A ribbon or elastic band to secure the roll when rolled up.
Lay out your fabric, attach pockets or pouches, and sew or glue the edges. Add the ribbon or elastic at the opening to keep everything snug. This DIY jewelry roll keeps your necklaces, earrings, and rings tangle-free and easy to access during your travels.
Designing a Magnetic Strip for Earrings
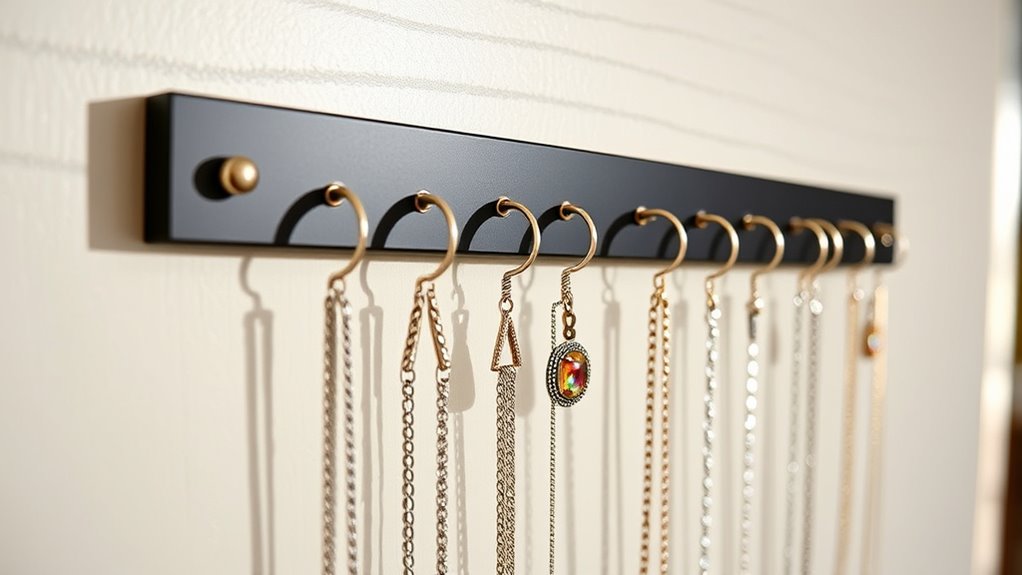
A magnetic strip offers a simple yet effective way to keep your earrings organized and easily accessible. To design one, start with a sturdy base like wood or foam board. Cut it to your preferred length, depending on how many earrings you want to store. Attach a strong magnetic strip, available at craft stores, to the surface using adhesive or small nails. Make sure the magnet is securely fixed so it can hold the weight of your earrings. Arrange your earrings on the magnetic strip with hooks or directly on the magnet if they’re lightweight. Keep pairs together for easy selection. Customize the design with paint or decorative paper to match your space. This DIY project is quick, affordable, and keeps your jewelry tidy.
Assembling a Tiered Jewelry Organizer From Dollar Store Items

You can easily assemble a tiered jewelry organizer using inexpensive items from the dollar store. Start by gathering these three essentials:
- Small plastic or metal trays
- A sturdy cake or jewelry stand with tiers
- Adhesive or hot glue
First, stack the trays on top of the stand, securing them with glue for stability. Make sure each tray is level and firmly attached. The tiers will create separate sections for necklaces, bracelets, and rings. Adjust the size and number of trays based on your jewelry collection. Once assembled, you’ll have a functional, space-efficient organizer that’s easy to customize. This simple project transforms dollar store finds into a practical storage solution, keeping your jewelry organized and accessible.
Decorating a Vintage Box for Elegant Storage
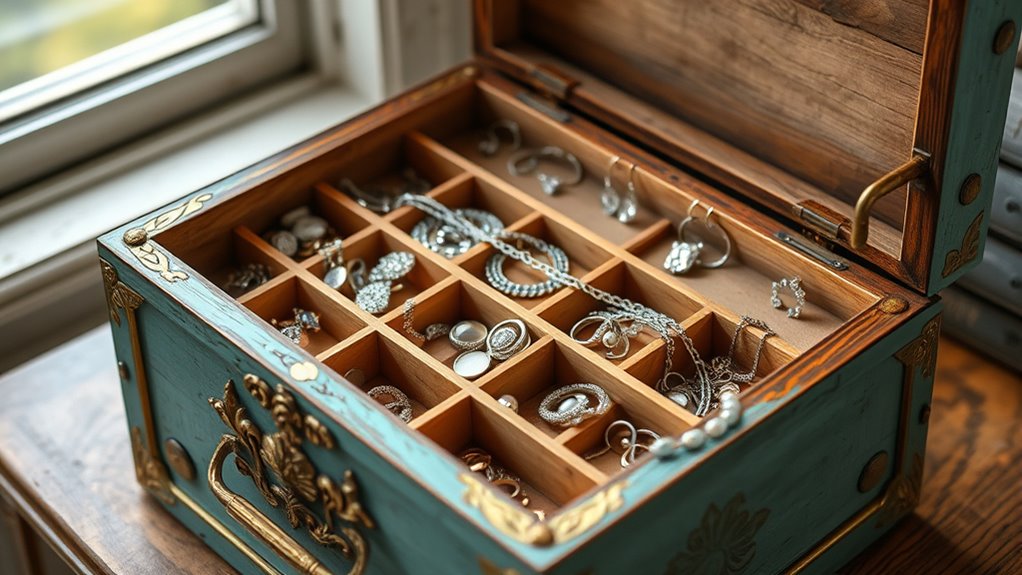
Transforming a vintage box into an elegant jewelry storage piece is a simple way to add charm and sophistication to your space. Start by cleaning the box thoroughly, removing dust and dirt. Then, decide on a color scheme or pattern that complements your decor. You can paint the exterior with chalk paint for a vintage look or spray it with a metallic finish for a touch of glamour. Consider lining the interior with luxurious fabric like velvet or silk—this protects your jewelry and adds a refined feel. Add decorative details such as lace, washi tape, or decoupage with vintage-inspired paper. Finish with a clear sealant to protect your design. This personalized touch makes your jewelry storage both functional and beautifully unique.
Frequently Asked Questions
What Are the Best Materials for DIY Jewelry Storage Projects?
You’re wondering about the best materials for DIY jewelry storage projects. You’ll want to choose options that are durable, lightweight, and easy to work with. Wood and acrylic are popular for their sturdiness and sleek look. Repurposed items like vintage frames or cardboard can add charm and are budget-friendly. Additionally, foam or felt lining helps keep jewelry safe from scratches. Consider your style and space to select the perfect materials.
How Can I Customize Storage Solutions to Fit Small Spaces?
To customize storage solutions for small spaces, you can maximize vertical areas by adding wall-mounted hooks or shelves. Use multi-functional pieces like a mirror with built-in compartments or a compact jewelry stand that fits snugly on your dresser. Consider adjustable or modular units to adapt as your collection grows. By tailoring these solutions, you’ll optimize your space efficiently while keeping your jewelry organized and easily accessible.
What Safety Precautions Should I Take When Using Power Tools?
Imagine the power tool as a lightning bolt—powerful but dangerous if mishandled. You should always wear safety gear like goggles and gloves to shield yourself from sparks and debris. Keep your workspace clean and free of distractions, and never rush. Disconnect tools when not in use, and follow the manufacturer’s instructions carefully. By respecting the tool’s strength, you guarantee your safety while creating your jewelry storage masterpieces.
How Do I Clean and Maintain Homemade Jewelry Organizers?
To keep your homemade jewelry organizer in top shape, regularly dust it with a soft cloth to prevent buildup. For deeper cleaning, use a damp cloth with mild soap, then dry thoroughly. Avoid harsh chemicals that could damage materials. Check for loose or broken parts and repair them promptly. By maintaining your organizer, you guarantee your jewelry stays organized, protected, and looking great for years to come.
Can These DIY Solutions Accommodate All Types of Jewelry?
You might wonder if your DIY jewelry storage can handle all your jewelry types. It’s possible if you customize your solutions with different compartments, hooks, and padding. For delicate necklaces or earrings, add soft fabric or foam. For chunky pieces, use sturdy containers or compartments. By tailoring your storage to each jewelry type, you guarantee everything stays organized and protected, making your DIY solution both versatile and functional.
Conclusion
Just like Pandora’s box, your jewelry deserves a special place—one that keeps your treasures safe yet within reach. With these DIY solutions, you can create a storage system as unique as your collection. Whether you repurpose, craft, or decorate, each project transforms chaos into order. Embrace your inner artisan and turn everyday items into a personal jewelry haven—because a well-organized collection is the key to liberating your style’s full potential.