
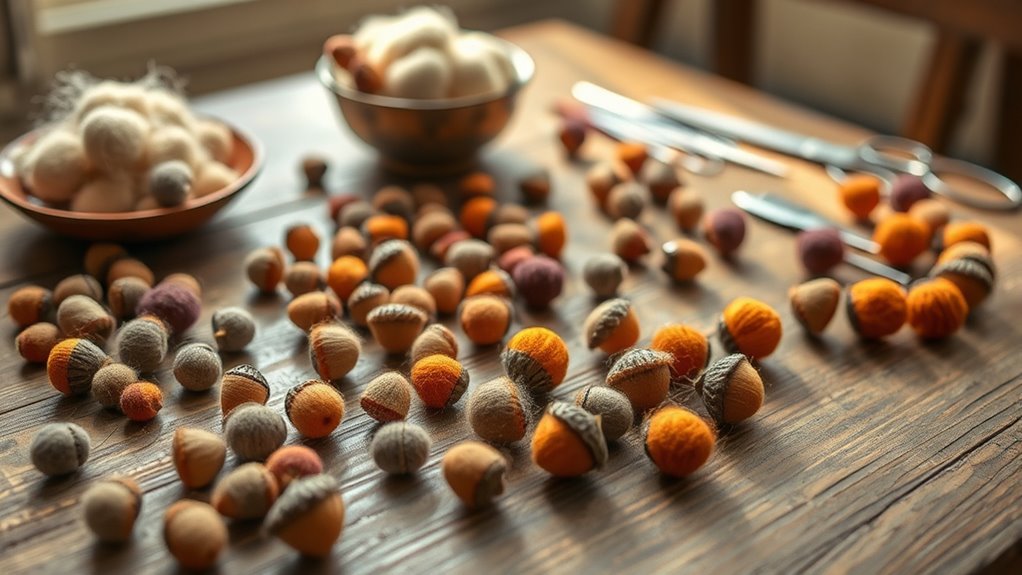
To make a felted acorn garland, gather wool roving, felting needles, sturdy twine, scissors, and small tools. Shape wool into tiny acorn-sized ovals for the nuts and felt textured caps separately, then attach them together. String the finished acorns onto the twine, spacing them evenly and securing with knots or loops. For a polished look, customize with paint or natural accents. Keep exploring for detailed steps to create a beautiful seasonal decoration.
Key Takeaways
- Gather wool roving, felting needles, twine, and tools, then set up a clean workspace with proper lighting and surface protection.
- Shape small wool balls into acorn-sized ovals and felt textured caps separately, then attach the caps to the nuts securely.
- Use natural materials like twigs or dried leaves to enhance realism and customize each felted acorn.
- String acorns onto sturdy twine or thread, spacing evenly and securing with knots or loops for stability.
- Hang the garland in prominent spots, avoid direct sunlight, and store properly to maintain its appearance and longevity.
Gathering Materials and Preparing Your Workspace
Before you begin crafting your felted acorn garland, it’s important to gather all the necessary materials and set up a clean, organized workspace. This ensures your project flows smoothly and reduces the risk of accidents. Use high-quality wool roving, felting needles, and twine for a sturdy, charming seasonal decoration. Keep scissors, needles, and small tools safely stored when not in use to maintain craft safety. Organize your workspace with a mat or foam pad to protect surfaces and make felting easier. Preparing everything beforehand helps you stay focused and prevents interruptions. Additionally, incorporating proper color accuracy in your workspace lighting can help you see true wool colors and ensure your felting matches your desired palette. Creating a comfortable and well-lit environment can also enhance your focus, making the felting process more enjoyable and precise. Using ergonomic tools can further reduce strain during detailed work. Paying attention to AI-driven solutions in crafting techniques may inspire innovative approaches and improve your results. Moreover, staying informed about tech trends can introduce you to new tools and methods that enhance your craft experience. With materials ready and workspace set, you’ll be able to craft your felted acorn garland confidently.
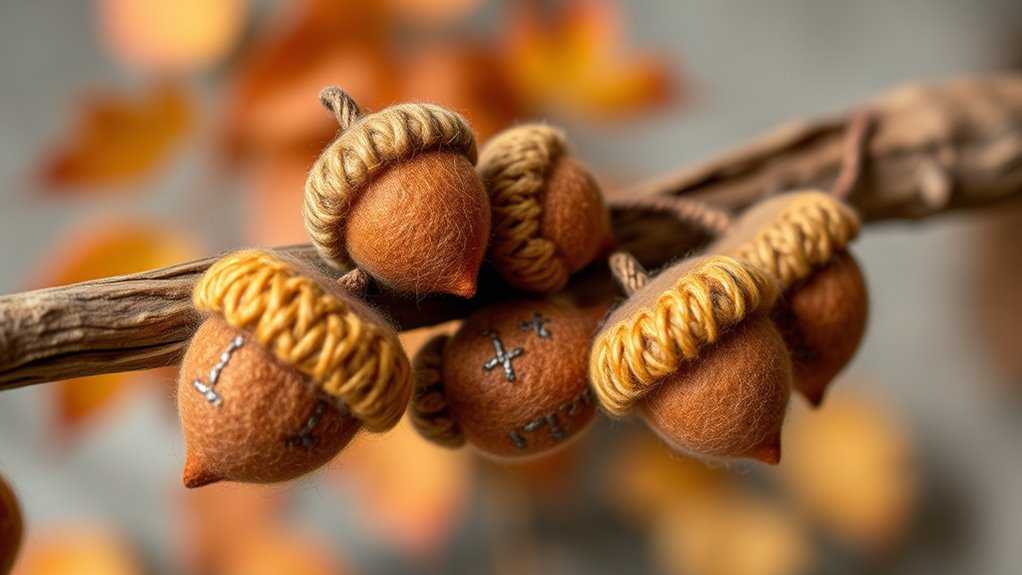
Crafting the Felted Acorns Step-by-Step
Now that your workspace is set, it’s time to start shaping your felted acorns. Begin by creating small wool balls, roughly the size of a real acorn’s nut. Use felting needles and wool roving, poking the wool repeatedly until it firmens, smooths, and takes on an oval shape. To mimic the acorn’s cap, felt a smaller, textured piece separately, then attach it to the top of the nut using more felting. For faux acorns, you can use these felted nuts as decorative accents, adding a natural touch to your garland. Keep shaping and attaching small details until each acorn looks realistic. This step allows you to customize your felted acorns, making each one unique and perfect for your decorative project. Additionally, you can incorporate natural materials such as small twigs or dried leaves to enhance the authenticity of your felted acorns and create a more realistic appearance.
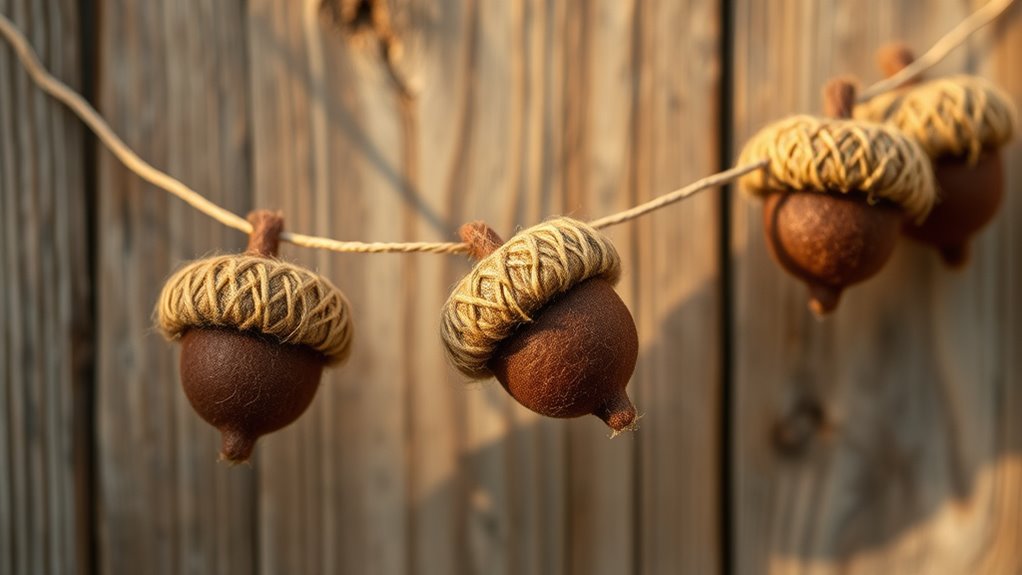
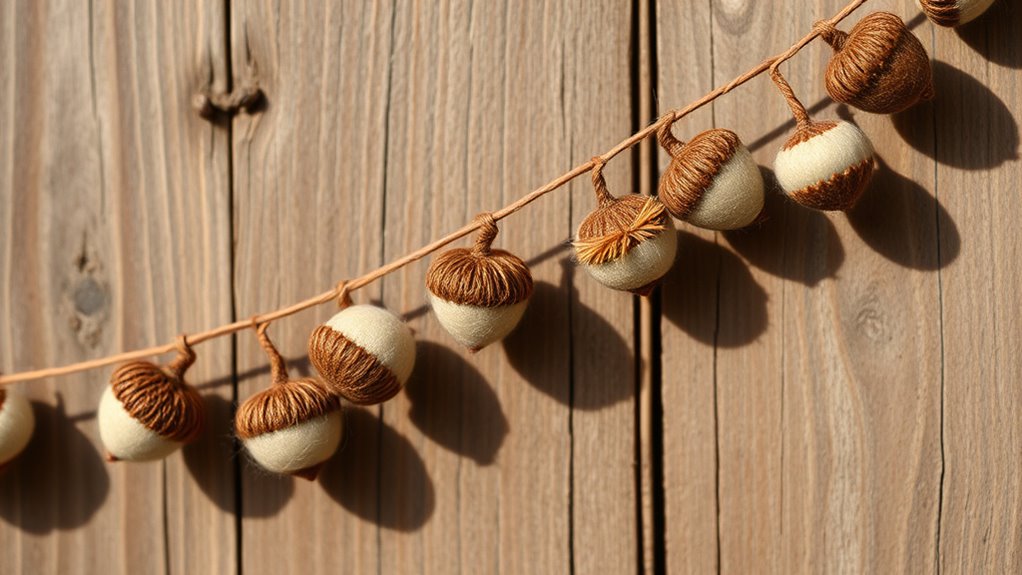
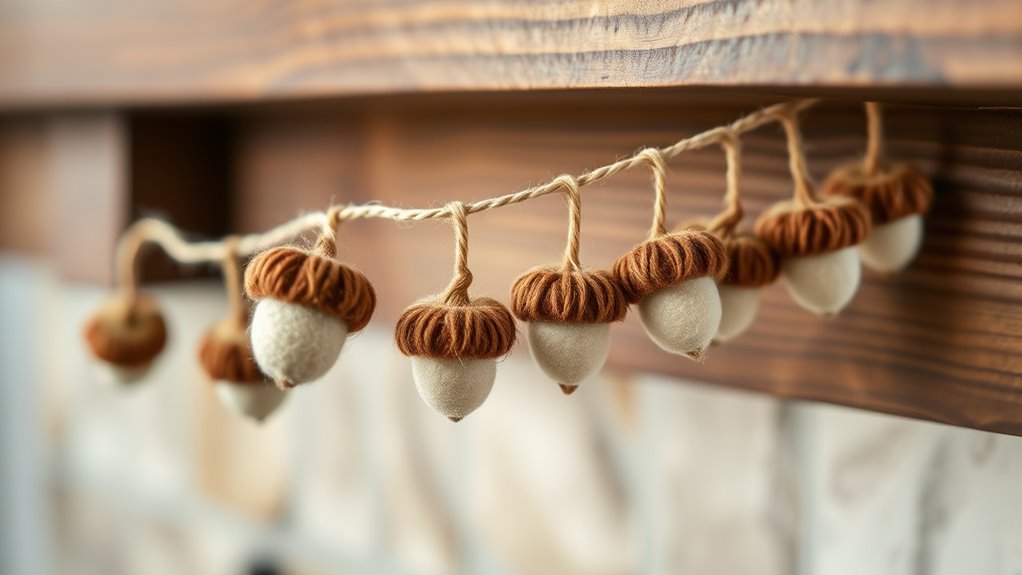
Assembling and Stringing Your Garland
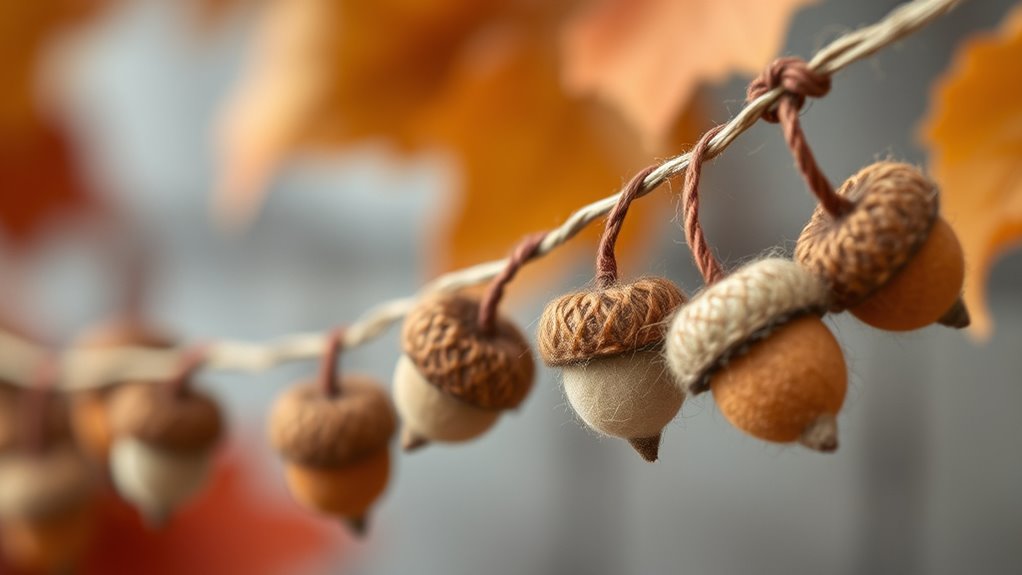
Once your felted acorns are ready, it’s time to assemble your garland by carefully stringing them together. Choose a sturdy, thin thread or twine that complements your seasonal decorating style. Space the acorns evenly to create a balanced, attractive look. As you string, keep the garland taut but not tight, allowing it to hang naturally. Consider adding knots or small loops between acorns to prevent movement and maintain spacing. To enhance the overall aesthetic, think about incorporating preppy dog names that inspire a refined and stylish vibe into your seasonal decor. Incorporating remote hackathons into your creative process can inspire innovative decorating ideas and bring a modern touch to traditional crafts. Additionally, using a secure attachment method ensures your garland remains intact and beautifully displayed. Proper storage and gentle handling will help preserve your craftsmanship, preventing damage and maintaining its beauty over time. Incorporating proper hybrid bicycle storage solutions can also help keep your craft supplies organized and easily accessible. After assembly, store your finished garland in craft storage containers to protect it from dust and damage. Proper storage guarantees your decorative piece stays in good condition for future seasons. Carefully handling and storing your garland preserves its charm, making it a delightful, reusable addition to your seasonal decorating.
Tips for Customizing Your Acorns and Arrangement
To make your acorn garland truly unique, experiment with different ways to customize each acorn and arrange your overall design. Try painting or adding tiny details with markers to give each acorn a personal touch, enhancing your DIY decoration. Incorporate various sizes and shades of felted acorns for a more dynamic look, perfect for seasonal crafting. You can also mix in natural elements like small leaves or berries to create a textured, layered effect. Play around with spacing and length to match your space’s vibe—tighter for a dense look or more spread out for a delicate feel. Remember, customizing your garland allows you to showcase your style and creativity, making it a special centerpiece for any seasonal decor. Utilizing fabric decorating markers can help you easily personalize your acorns with intricate designs or lettering, adding an extra touch of uniqueness. Additionally, considering the rustic aesthetic can help your garland blend seamlessly into a farmhouse-themed space. Incorporating space-saving techniques can also help you arrange your garland in a way that maximizes visual impact without cluttering your area. Moreover, understanding payment processing concepts can inspire you to find efficient ways to manage your craft supplies and materials.
Displaying and Caring for Your Felted Acorn Garland
After customizing and arranging your felted acorn garland, it’s important to contemplate how to display and care for it to keep it looking its best. For seasonal decor, choose a prominent spot like a mantel, staircase, or window to showcase your garland’s charm. To preserve its quality, avoid direct sunlight, which can fade the colors over time. When not in use, store your garland carefully using suitable storage solutions like a breathable storage box or a soft cloth bag to prevent crushing or damage. Keep it in a cool, dry place to prevent moisture and dust buildup. Regularly inspect your garland for loose or damaged acorns and make necessary repairs. Proper display and storage will ensure your felted acorn garland remains a delightful seasonal accent for years to come. Additionally, proper maintenance can help prolong its lifespan and keep it looking beautiful season after season. Incorporating storage techniques that protect against environmental factors can further enhance its longevity, much like ensuring soil moisture is properly managed for healthy plants.
Frequently Asked Questions
Can I Use Synthetic Materials Instead of Wool for Felting?
You might wonder if synthetic alternatives can replace wool for felting. While some synthetic fibers, like polyester roving, can be used, they often lack the material durability and felting qualities of natural wool. Wool naturally felts and shrinks, creating a cohesive, sturdy finished piece. Synthetic options may not produce the same texture or durability, so if you want a long-lasting felted item, sticking with wool is usually your best choice.
How Long Does It Take to Complete the Garland?
The project timeline for creating a felted acorn garland varies based on your skill level and the complexity of your design. If you’re a beginner, it might take several hours to a few days, including felting, assembling, and adding details. More experienced crafters can complete it faster, often within a day. Keep in mind that patience and practice can shorten the overall time, making the process more enjoyable.
What Are Alternative Uses for Felted Acorns Besides Garlands?
While felted acorns are perfect for holiday decorations, you can also turn them into charming decorative accents around your home. Use them as table scatter for a cozy, natural touch or glue them onto frames and wreaths for added texture. Their versatility makes them ideal for fall-themed centerpieces or as gift embellishments. These acorns bring warmth and rustic charm, transforming simple crafts into meaningful, decorative elements beyond just garlands.
Is There a Way to Make the Acorns More Weather-Resistant?
To make your felted acorns more weather-resistant, you can apply a weatherproof coating like clear acrylic spray or outdoor sealant. This creates a protective layer against moisture and UV rays, helping them last longer outdoors. Always dry and clean the acorns thoroughly before sealing, and consider storing them indoors during harsh weather to prevent damage. This way, your felted acorns stay beautiful and durable over time.
Can Children Safely Participate in Felting This Project?
A stitch in time saves nine, and safety always comes first. When it comes to children participating in felting, you should always supervise them closely and follow safety precautions. Felting involves sharp needles that can cause injury, so adult supervision is essential. Use child-friendly tools and guarantee they understand proper handling. With careful oversight, children can enjoy felting safely and creatively, making the project a fun learning experience.
Conclusion
Now that you’ve created your felted acorn garland, you’ve gently woven a little piece of nature into your space. With a bit of care and a touch of your personal flair, it’ll brighten up any corner and bring cozy charm to your home. Remember, each time you look at it, you’re softly reminding yourself of the simple joys of crafting — a small, delightful reminder that beauty often comes from the tiniest details.