
To create a folded book pumpkin centerpiece, start by selecting books with similar spine widths and attractive covers. Prepare your workspace with rulers, clips, and glue, and choose a pumpkin shape that fits your style. Carefully fold pages to form ridges, then shape the top and stem. Secure everything with glue and add decorative touches like ribbons, faux berries, or lights. If you want detailed steps, continue exploring.
Key Takeaways
- Select books with uniform spine widths and complementary cover colors for a cohesive folded book pumpkin.
- Follow precise folding techniques to create realistic ridges and shapes, using sturdy pages for durability.
- Incorporate decorative details like faux berries, ribbons, or fairy lights to enhance visual appeal.
- Secure folded pages with strong adhesive and clips until fully dried for a stable centerpiece.
- Display the finished pumpkin on a prominent surface, paired with seasonal decor for an inviting fall look.
Gathering Your Supplies and Choosing the Perfect Books

To create a stunning folded book pumpkin centerpiece, start by gathering the supplies you’ll need and selecting the right books. Pay attention to book thickness; choose books with similar spine widths to guarantee a smooth, uniform fold. Thinner books are easier to fold neatly, but thicker ones give a more substantial look. Next, consider color coordination—select books whose cover colors complement your decor or fit a seasonal palette. You might opt for warm tones for fall or neutral shades for a versatile centerpiece. Mixing different shades can add visual interest, but keeping a cohesive color scheme assures your pumpkin looks polished. Take your time choosing books that balance both thickness and color, as these elements directly influence the final appearance and stability of your folded book pumpkin. Additionally, understanding bookbinding techniques can help you assess the durability and quality of the books you select, ensuring your centerpiece remains attractive over time. Exploring skincare product certifications can also guide you in choosing high-quality books, as reputable sources often provide detailed information about their materials and manufacturing processes. Being mindful of book age and condition can further ensure the integrity and longevity of your decorative books. Considering book preservation methods can also help maintain the books’ appearance and structural integrity over time.
Preparing Your Workspace and Books for Folding

Before you start folding your books into a pumpkin shape, setting up a clean and organized workspace makes the process much easier. Proper workspace organization helps prevent damage to your books and ensures smooth folding. Here are four steps to prepare effectively:
- Clear your surface, removing clutter and distractions.
- Use gloves if needed to protect book covers and pages during handling.
- Choose a well-lit area to see folds clearly and avoid mistakes.
- Gather tools like a ruler, pencil, and clips to assist with precise folding and book preservation.
Planning Your Pumpkin Shape and Design

Start by choosing a pumpkin outline that fits your space and style, whether it’s a classic round shape or a more unique form. Next, select folding patterns that complement your design, balancing complexity with your comfort level. Incorporating mindful decluttering into your planning can help you focus on the most important design elements and prevent unnecessary complexity. Additionally, considering the materials used for your folds can enhance the overall appearance and durability of your centerpiece. Exploring sound healing science can inspire calming patterns or textures that promote relaxation as you craft your arrangement. Recognizing the diverse beach experiences available at various destinations can also inform your creative process, inspiring motifs and textures that evoke the calming or energetic qualities of the ocean.
Choosing the Pumpkin Outline
Choosing the right pumpkin outline sets the foundation for your centerpiece, so take time to plan a shape that reflects your style and skill level. Consider how your book themes inspire your design, whether you prefer spooky, whimsical, or elegant motifs. Select a pumpkin shape that complements your chosen color palettes, ensuring harmony in your overall display. To help you decide, think about these options:
- Classic round pumpkin with simple carvings
- Tall, slender pumpkin for a sleek look
- Wide, squat pumpkin for a bold statement
- Custom shapes inspired by book themes, like haunted houses or fairy tales
Selecting Folding Patterns
Selecting folding patterns is a essential step in planning your pumpkin’s shape and design, as it determines how your book pages will transform into the desired form. To achieve this, consider different bookbinding techniques that influence the flexibility and stability of your folds. For example, some techniques create sharper creases, while others allow for softer curves. Your paper selection plays a critical role too; thicker pages hold shapes better, but thinner pages are easier to fold precisely. Think about how the folds will develop and how much detail you want in your finished pumpkin. Experiment with small sections first to see how different patterns behave. By choosing the right folding pattern and paper, you set the foundation for a beautifully crafted and sturdy centerpiece.
Designing for Visual Impact
Designing your pumpkin for maximum visual impact involves carefully planning its shape and details to create an eye-catching centerpiece. To achieve this, consider these key steps:
- Choose a bold color contrast, such as deep orange with black accents, to make your pumpkin stand out.
- Guarantee visual harmony by balancing intricate folded patterns with simple, clean lines.
- Incorporate varied textures—smooth surfaces paired with textured folds—to add depth.
- Focus on symmetry and proportion to create a cohesive, pleasing look.
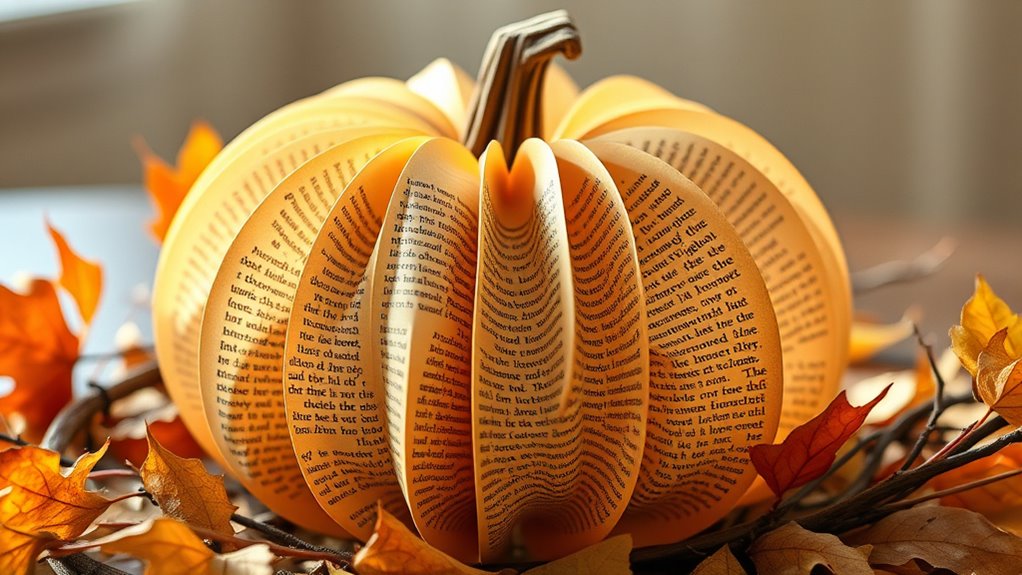
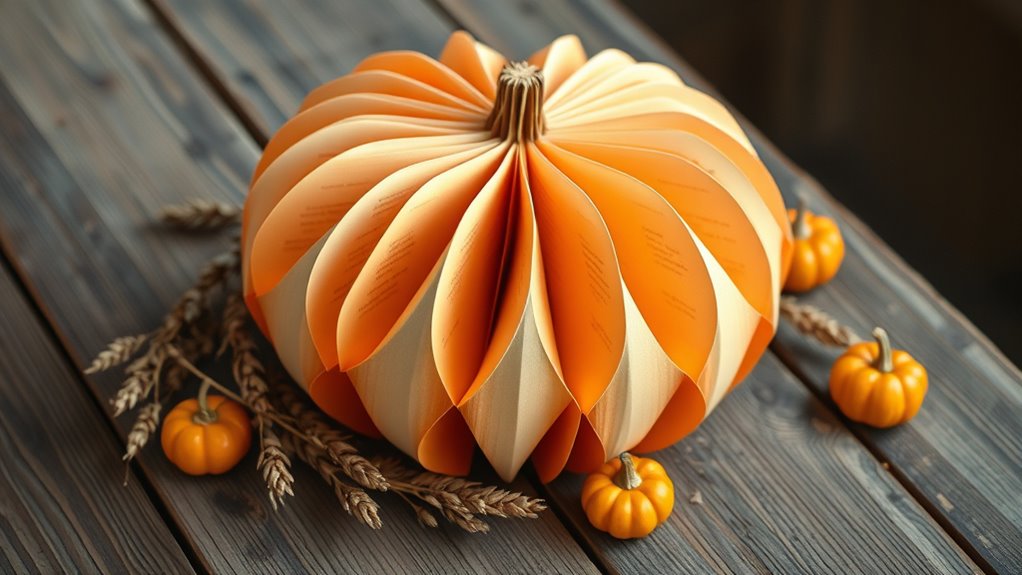
Folding the Pages to Form the Pumpkin’s Ridges

To create realistic pumpkin ridges, start folding each page inward along the predetermined lines, pressing firmly to hold the shape. This step relies on your understanding of bookbinding techniques and the paper quality. Use crisp, sturdy pages to guarantee the ridges stay defined and durable. As you fold, keep the lines precise to mimic natural pumpkin grooves. Visualize the effect with this chart:
| Page Position | Fold Direction | Ridge Effect |
|---|---|---|
| Top page | Inward | Sharp ridge |
| Middle pages | Slightly inward | Gentle ridges |
| Bottom pages | Deep inward | Pronounced ridges |
| Outer edges | Firm fold | Defined outline |
Folding carefully enhances the pumpkin’s realistic appearance and showcases your craftsmanship. Additionally, choosing the right paper quality can significantly improve the overall durability and appearance of your finished centerpiece. Using visualization techniques while folding can also help you achieve a more symmetrical and appealing design. Applying proper folding methods ensures that every ridge is consistent and professional-looking. Engaging in techniques for securing textiles can help prevent the folds from loosening over time and maintain the structure’s integrity.
Creating the Pumpkin Top and Stem
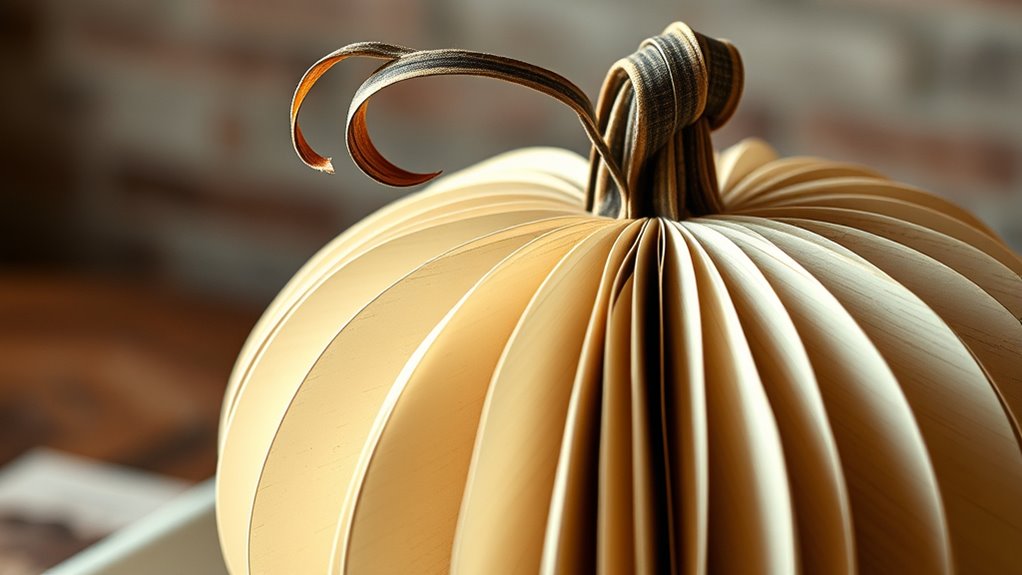
Begin by shaping the pumpkin’s top and stem to give your centerpiece a realistic finish. To create the stem, select a sturdy piece of paper with a textured surface to mimic real pumpkin stems. Follow these steps:
- Roll the paper tightly, securing it with a bit of glue.
- Pinch one end to form a tapered tip, resembling a stem’s natural shape.
- Wrap additional paper strips around the base for added thickness.
- Use book binding techniques to reinforce the structure and ensure durability.
- Incorporating proper materials can enhance the stem’s strength and appearance. Using mindfulness techniques during crafting can help you focus and achieve a more refined result. Paying attention to the paper’s texture to add visual interest, and gently curve the stem for a natural look, can also help evoke a realistic pumpkin appearance. Understanding the value of craftsmanship can inspire patience and precision throughout the process. Additionally, considering building codes and materials ensures your project is both durable and safe, especially if displayed in a prominent area. This approach guarantees your pumpkin has a convincing and refined top, completing your folded book pumpkin centerpiece.
Assembling and Securing the Pieces
Once you have all the components prepared, it’s time to assemble and secure the pieces to form your pumpkin centerpiece. Use your bookbinding techniques to carefully align the folded pages, ensuring the paper texture creates a realistic pumpkin surface. To keep everything in place, apply a strong adhesive along the edges of each section, pressing firmly to secure the folds. If needed, use small clips or weights to hold the pieces until the glue dries completely. Be mindful of the paper texture, as it adds depth and authenticity to your finished pumpkin. Incorporating attention to detail into your process can help you evaluate the stability of your craft and make adjustments as needed. Additionally, considering material compatibility can ensure the adhesive bonds effectively with the paper and other materials used. Recognizing the importance of structural integrity can guide you in reinforcing your craft for long-lasting display. Take your time during this step to ensure each piece is firmly attached and properly aligned, resulting in a sturdy, visually appealing centerpiece that showcases your folded book craft skills.
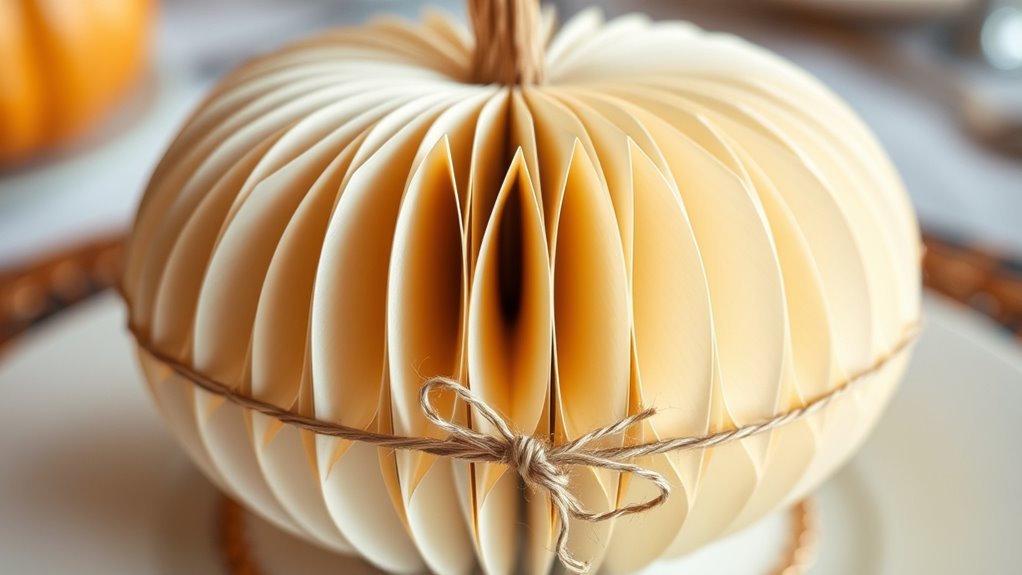
Adding Decorative Touches for a Finishing Look
After securing the main structure, you can enhance your pumpkin centerpiece with decorative touches that add charm and realism. Focus on incorporating seasonal color to evoke the fall spirit, like warm oranges, deep reds, or earthy browns. To create visual interest, play with texture contrast by adding smooth faux berries, rough burlap ribbons, or delicate lace accents. Consider these finishing touches:
- Add a sprig of dried foliage or small pinecones for natural texture.
- Incorporate metallic or matte paint accents for shimmer or subtlety.
- Wrap a twine or ribbon around the pumpkin for a rustic feel.
- Place small LED fairy lights for a soft, glowing effect.
These elements tie everything together, making your centerpiece more vibrant and inviting.
Displaying Your Handmade Fall Centerpiece

Think about where you want your centerpiece to catch everyone’s eye and make sure it’s placed where it’s easily seen. Consider pairing it with other fall decorations to enhance its charm and create a cohesive look. By choosing the right spot and complementary pieces, your handmade centerpiece will truly shine this season.
Placement and Visibility
Choosing the right spot for your folded book pumpkin centerpiece guarantees it captures attention and complements your fall decor. To maximize visibility, consider these options:
- Shelf placement – Display it on a prominent shelf where it can be easily seen and appreciated.
- Table centerpiece – Place it in the center of your dining or coffee table for a seasonal focal point.
- Book storage area – Incorporate it into a bookshelf by replacing a book to create a subtle, decorative accent.
- Entryway table – Position it on an entry table to welcome guests with a festive touch.
Complementary Decor Ideas
To enhance the visual impact of your folded book pumpkin centerpiece, pair it with complementary fall decor items that highlight its rustic charm. Incorporate seasonal floral arrangements featuring warm hues like deep oranges, rich reds, and golden yellows to create a cohesive autumn look. Use small pumpkins, gourds, or acorns to add texture and depth around your centerpiece. Incorporate autumn color palettes through table runners, candles, and placemats that match or complement the colors in your folded book pumpkin. Incorporating natural elements like pinecones or dried leaves can also enhance the cozy, seasonal feel. Keep the display balanced, ensuring each element complements the others without overwhelming your handmade centerpiece. This creates a warm, inviting atmosphere perfect for fall gatherings.
Frequently Asked Questions
How Long Does It Typically Take to Complete the Centerpiece?
The time estimate to complete a project depends on your skill level and the complexity involved. If you’re experienced, you might finish faster, perhaps in an hour or two. Beginners could take longer as they learn the steps. Generally, you should set aside about 2-3 hours for a folded book pumpkin centerpiece, allowing time for gathering supplies, folding, and decorating. Adjust based on your comfort and pace.
Can This Project Be Customized for Different Holidays or Themes?
This project can be easily transformed into a festive masterpiece that’ll wow everyone! With a little creativity, you can incorporate holiday variations and theme customization to match any celebration or season. You could add vibrant colors for summer, spooky elements for Halloween, or elegant accents for weddings. The possibilities are endless, and this craft’s versatility makes it perfect for customizing to any holiday or theme you’re celebrating.
What Are Some Alternative Materials if Books Aren’T Available?
If books aren’t available, you can try alternative materials like thick cardstock or decorative paper for book stacking and paper folding. These materials hold their shape well and can be easily manipulated into the desired forms. You might also consider using cardboard or foam boards, which are sturdy and versatile. With these options, you can still create a beautiful centerpiece by mimicking the layered effect of traditional book stacking and paper folding techniques.
Is This Craft Suitable for Children or Beginner Crafters?
This craft is child-friendly and beginner appropriate, making it a great project for kids or those new to crafting. You’ll find it simple and fun to fold and shape the materials, requiring minimal tools and skills. With some guidance, children can enjoy creating their own decorative centerpiece. Just guarantee supervision for safety, and you’ll both have a delightful time making a charming, personalized pumpkin display together.
How Should I Store the Centerpiece to Prevent Damage?
To prevent damage, you should store your centerpiece carefully, focusing on book preservation. Use acid-free tissue paper or a soft cloth to wrap it gently, avoiding direct sunlight and moisture. Keep it in a cool, dry place, preferably in a sturdy box with padding to prevent crushing. Follow these storage tips to maintain the integrity of your craft, ensuring it stays beautiful and undamaged over time.
Conclusion
Once your folded book pumpkin comes to life, it transforms your space into a warm harvest embrace. Each carefully pressed page whispers fall’s cozy secrets, turning your creation into a heartfelt centerpiece that sparks joy and nostalgia. As sunlight dances on its ridges, your handmade masterpiece becomes a symbol of seasonal beauty and creativity, inviting everyone to gather ’round and share in the simple magic of autumn’s glow.