To prevent ink smearing when sealing your stickers, make sure the ink is completely dry before applying any sealer. Use compatible paper and avoid handling wet ink. Apply the sealant evenly with a soft brush or spray, and work in a dust-free environment. Allow each coat to dry thoroughly to avoid cloudiness. If issues persist, choosing the right sealer and testing on small areas can help guarantee a clear, durable finish. Keep going to discover more tips for perfect sticker sealing.
Key Takeaways
- Ensure ink is completely dry and cured before sealing to prevent smudging.
- Use compatible, fast-drying inks and apply sealant in thin, even layers.
- Work in a dust-free environment and maintain proper distance during application.
- Choose the right sealer (e.g., acrylic or polyurethane) suitable for your ink type for clarity.
- Allow each coat to dry fully before adding additional layers to avoid cloudiness.
Mod Podge Spray Acrylic Sealer that is Specifically Formulated to Seal Craft Projects, Dries Crystal Clear is Non-Yellowing No-Run and Quick Drying, 12 ounce, Gloss
CONVENIENT SIZE – This 12 oz clear acrylic sealer is a must-have to your art supplies
As an affiliate, we earn on qualifying purchases.
As an affiliate, we earn on qualifying purchases.
Why Does Ink Smear When Sealing Stickers? Causes and Solutions

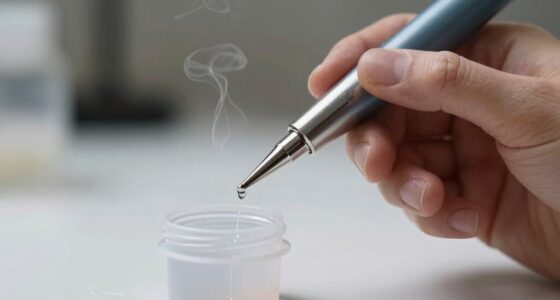
Ink smears when sealing stickers because the ink hasn’t fully dried or cured before the sealant is applied. This can lead to ink transfer, where the ink smudges or lifts when touched or sealed. One common cause is using incompatible paper that doesn’t absorb ink properly, making it prone to smearing. If the paper isn’t suitable for ink, the ink may stay wet longer, increasing the chance of smearing during sealing. To prevent this, choose paper specifically designed for inkjet or laser printing, ensuring better ink adhesion and faster drying times. Additionally, allowing ample drying time before applying sealant helps reduce ink transfer. By paying attention to paper compatibility and drying times, you can considerably minimize smearing and achieve a clean, professional finish.

KOALA PAPER Waterproof Paper for Inkjet Printer, 8.5×11 Inch 30 Sheets, Matte White Tear-Resistant Printable Paper, Durable and Quick-Drying
Koala Inkjet waterproof paper is a matte white vinyl based sheet that resembles paper in appearance. 8.5”x11”, about…
As an affiliate, we earn on qualifying purchases.
As an affiliate, we earn on qualifying purchases.
How to Prepare Your Stickers for a Clear, Smudge-Free Seal
Preparing your stickers properly before sealing guarantees a clear and smudge-free finish. To enhance sticker durability and reduce ink absorption, start by ensuring the ink is completely dry. Next, carefully smooth out any surface dust or grease that could interfere with the seal. Then, consider lightly sanding the sticker’s surface to improve adhesion and prevent ink smearing. Additionally, using a proper sealing technique can further improve your results and ensure a flawless finish. Incorporating a consistent application process helps maintain even coverage and prevents streaks or bubbles. Applying a compatible sealant designed for the type of sticker material can also significantly improve the final appearance. Finally, test your sealing method on a small area to see how your stickers respond. This preparation helps prevent ink smearing and cloudy finishes, ensuring your stickers stay vibrant and crisp. Properly prepped stickers also resist peeling and damage, extending their lifespan. Taking these steps guarantees a professional, clear seal that preserves your design’s quality and keeps your stickers looking their best longer.
Mod Podge Spray Acrylic Sealer that is Specifically Formulated to Seal Craft Projects, Dries Crystal Clear is Non-Yellowing No-Run and Quick Drying, 12 ounce, Gloss
CONVENIENT SIZE – This 12 oz clear acrylic sealer is a must-have to your art supplies
As an affiliate, we earn on qualifying purchases.
As an affiliate, we earn on qualifying purchases.
How to Choose the Right Sealer to Keep Your Stickers Bright

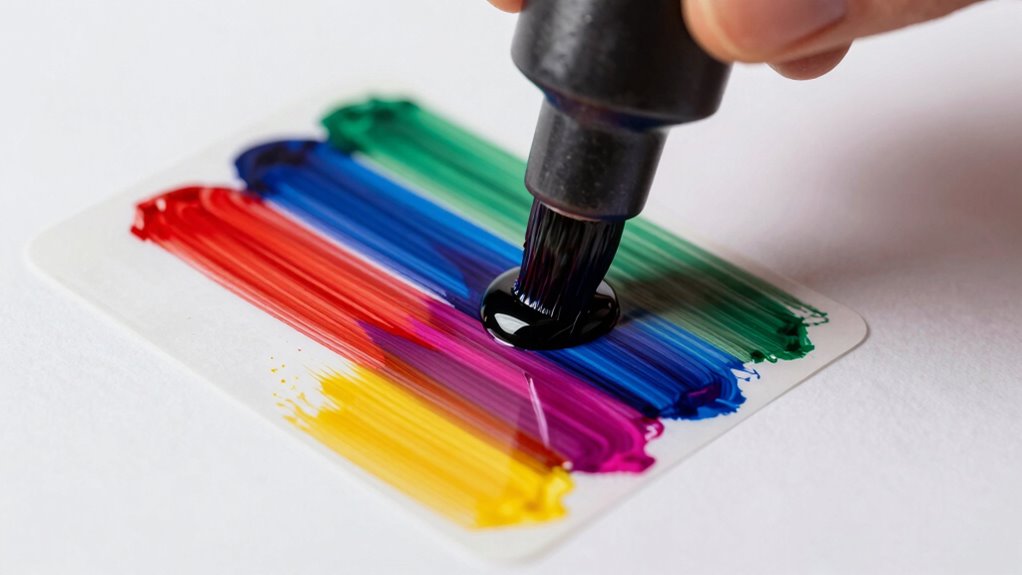
Choosing the right sealer is essential to keep your stickers bright and vibrant over time. To maximize sticker durability, consider sealer types that offer a clear, glossy, or matte finish, depending on your preference. Polyurethane, acrylic sprays, and clear acrylic coatings are popular options, each providing a protective barrier that prevents ink smearing and fading. If you want a high-gloss look, opt for a spray or brush-on gloss sealer; for a more subdued appearance, a matte sealer works well. Think about your sticker’s environment—outdoor use requires a more durable, weatherproof sealer. Additionally, understanding waterproof coatings can help you select the most suitable sealer for outdoor or humid conditions. Selecting the right sealer also involves considering its compatibility with different inks, ensuring it won’t cause any smudging or discoloration. Using a sealer that offers UV protection can further prevent your stickers from fading due to sun exposure. By selecting the appropriate sealer type, you’ll ensure your stickers stay bright, crisp, and protected against wear and tear for years to come.

VViViD Shield Vinyl Wrap Protective Sealant Spray – 16 oz (473ml) Gloss, Scratch & UV Protection
TOTAL PROTECTION: Guards vinyl wraps and plastic coatings against harmful UV rays, scratches, abrasions, and corrosive chemicals, ensuring…
As an affiliate, we earn on qualifying purchases.
As an affiliate, we earn on qualifying purchases.
Step-by-Step: Sealing Stickers Without Smudges or Cloudiness
Once you’ve selected the right sealer for your stickers, the next step is to apply it carefully to avoid smudges or cloudiness. Start by understanding your stickers’ adhesive types, as some require gentler sealing techniques. Here’s how to do it:
Choose the right sealer and apply gently for vibrant, smudge-free stickers.
- Use a soft brush or spray to apply the sealer evenly, avoiding excess buildup.
- Work in a dust-free environment to prevent particles from settling on the surface.
- Keep the sealer at a consistent distance from the sticker to prevent uneven coverage.
- Allow the first coat to dry completely before applying a second, if needed, to achieve a clear, glossy finish.
- Pay attention to sealer compatibility to ensure the best results without damaging your stickers.
- Proper sealing techniques can also help prevent issues related to cloudy finishes and maintain the vibrancy of your stickers.
- Additionally, selecting the right sealing method can contribute to outdoor durability, especially if your stickers are exposed to the elements.
Follow these sealing techniques to keep your stickers vibrant and smudge-free.
Troubleshooting Common Sealing Problems: Fix Smudges, Cloudiness, and Peeling
When you notice smudges, cloudiness, or peeling after sealing your stickers, it’s important to identify the cause and act quickly to rectify the problem. These issues often stem from poor sticker durability or incompatible ink. To improve sticker durability, ensure your ink is suitable for sealing—using waterproof or solvent-based inks helps reduce smudging and peeling. If cloudiness appears, it may be due to the wrong sealant type or applying too thick a layer. To fix this, gently clean the surface and reapply a thin, even coat of the correct sealant. Always test your sealing method on a small section first to confirm ink compatibility. Proper preparation and choosing compatible materials are key to preventing future problems and achieving a professional, long-lasting finish. Additionally, understanding the types of sealants and their interactions with different inks can help you select the best option for your project. Using the right sealing techniques can also enhance the overall durability and appearance of your stickers, especially when considering ink compatibility for optimal results. Incorporating knowledge of different personality assessments can further improve your approach by tailoring your techniques to specific project needs and outcomes.
Frequently Asked Questions
Can Using a Hairdryer Help Seal Stickers Without Smudges?
Yes, using a hairdryer can help seal stickers without smudges if you follow proper hairdryer techniques. Keep the sealing temperature on a low or cool setting to prevent heat damage and smudging. Hold the hairdryer at a safe distance, moving it evenly across the sticker to smooth out ink and seal it properly. This method speeds up drying and reduces the risk of ink smears or cloudy finishes.
What Types of Inks Are Best for Smudge-Proof Sealing?
You should use pigment inks for smudge-proof sealing because they’re water-resistant and more durable than inkjet inks, which tend to smudge easily. Pigment inks sit on the surface of your stickers, providing a crisp, long-lasting finish. Inkjet inks are more prone to smearing, especially when sealed. To guarantee your stickers stay pristine, opt for pigment inks, and consider sealing them with a clear, protective spray for extra durability.
Is It Better to Seal Stickers Before or After Cutting?
You should seal your stickers after cutting for the best results. Applying the sealant before cutting can cause smudging or uneven edges, disrupting the clean finish. Use proper application techniques, like a gentle, even coat, to prevent ink smearing and achieve a smooth, glossy look. Sealing after cutting guarantees the ink stays intact, and your stickers look professional with a durable, clear finish that resists smudging and cloudiness.
How Long Should I Wait Before Handling Sealed Stickers?
You should wait at least 24 hours before handling sealed stickers to guarantee proper drying time. This handling delay allows the sealant to cure fully, preventing smudges or smearing. Rushing the process can cause ink to smudge or stick to surfaces, ruining your stickers. Be patient and give the sealant ample drying time so your stickers stay crisp and professional-looking.
Do Different Sealing Methods Affect Sticker Durability?
Like a knight choosing armor, your sealing method impacts sticker durability. Different techniques, such as varnish application or lamination, enhance adhesive strength and protect against wear. Spray sealants might offer quick coverage, but brush-on varnish provides a more durable, long-lasting finish. Consider your usage; for outdoor or frequent handling, a robust sealing method guarantees your stickers stay vibrant and intact longer. Choose wisely to keep your stickers looking sharp!
Conclusion
By sealing your stickers correctly, you preserve their vibrant colors and sharp details, turning each one into a glossy masterpiece. Imagine a once-dull sticker now shining like a jewel, free from smudges and cloudiness. Neglect proper sealing, and your stickers risk fading or smearing like a blurry photograph. With the right techniques, you’ll create stickers that stand out—bright and clear—transforming simple designs into eye-catching finishes that last.