TL;DR

Get business pricing on tools and workshop supplies
- Business-only prices and quantity discounts
- Tax-exempt purchasing
- Multiple users, one account, clear invoices
Hunker has outlined a DIY lantern made by covering a glass jar with colored tissue paper, adding painted outlines and placing fairy lights inside. The inexpensive craft creates a stained-glass-inspired glow, but its tissue-paper covering can be damaged by rain, so it is better suited to indoor use or dry conditions.
Hunker has shared instructions for turning a reused glass jar into a lantern with a stained-glass look, using colored tissue paper, glue, black paint and small string lights. The project offers a low-cost decorative alternative to authentic stained-glass lanterns, which the report says can cost more than $100, but the paper covering is vulnerable to rain.
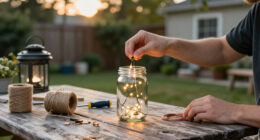
The craft uses a jar large enough to hold the lights, colored tissue paper, glue such as Mod Podge, black paint and a small paintbrush. Small battery-powered fairy lights are one suggested option. String can be added around the jar’s mouth if the finished lantern is to be hung. The report attributes the design to PaulinesRainbowCraft, a content creator and Etsy shop owner who shared a video of the idea.
To make the lantern, apply glue to the outside of the jar and cover it with squares of tissue paper, varying the colors and overlapping pieces to avoid gaps. The instructions suggest brushing another layer of glue over the paper to flatten it. After the coating dries, draw a pattern on the jar and paint over the lines in black to create a leaded-glass effect. Put the lights inside once the decoration is dry.
The result is decorative lighting rather than real stained glass: tissue paper colors the light but does not have the same durability as glasswork. Hunker notes that commenters warned the paper may come off if wet. The article recommends keeping the lantern indoors or using it outside only in dry weather; it does not provide testing or a weather-resistance rating.
A Low-Cost Decorative Lighting Option
The project gives readers a way to reuse a jar and make a soft, colored light without buying an authentic stained-glass fixture. That makes it relevant to people seeking an inexpensive craft or a small decorative change for a room, patio or gathering. The materials are ordinary craft supplies, and the jar’s pattern and color can be customized.
Its practical limits matter as much as its appearance. Because the suggested design relies on tissue paper and glue, it is not presented as a weatherproof outdoor lantern. Anyone planning to use it outside should account for rain and protect both the paper decoration and the lights. The source does not specify whether the lights are battery-operated or designed for outdoor use, so readers should check the product instructions rather than assume they can be exposed to moisture.
Popular right now

Sony WH-1000XM5 Premium Noise Cancelling Wireless Headphones – Midnight Blue

De'Longhi Rivelia Automatic Espresso Machine with Grinder and Milk Frother, Beige

Philips 3300 Series Fully Automatic Espresso Machine with Milk Frother, Grinder, Hot and Iced Coffee Presets, SilentBrew, 15-Bar Pressure (E
As an affiliate, we earn on qualifying purchases.
How the Jar Design Gets Its Color
Stained-glass fixtures are valued for the colored light they cast, but the source says authentic lanterns can cost more than $100. The jar project imitates that visual effect by placing translucent, colored tissue paper around a glass container and putting small lights inside. Black painted lines suggest the divisions between pieces of glass, though the materials and construction differ from genuine stained glass.
The source also describes variations. One commenter on the original social media post suggested drawing the outlines first and placing tissue paper or glass paint between them, which may create a more defined pattern. Another approach, described as a related craft by Artsy Karma, uses liquid leading or puffy paint for outlines and alcohol markers for color. A simpler version can leave out the black lines and let the tissue-paper colors show on their own.
For a potentially more durable outdoor design, Hunker suggests using transparent mosaic tiles instead of tissue paper and putting a lid on the jar to help keep rain away from the lights. That is a separate variation, not a tested feature of the tissue-paper craft; the source does not report how well either version withstands outdoor conditions.
Rain Resistance and Light Safety
The source does not give a publication date, the price of the craft supplies, or a measured comparison between the finished lantern and a commercial fixture. It also does not report testing for how long the tissue paper stays attached, how the glue behaves over time, or whether the jar can be used outdoors safely. Comments cited in the article warn that rain can damage or loosen the tissue paper, but no specific test conditions are provided.
The instructions do not specify a particular type of fairy light or explain whether any option is rated for outdoor use. They also do not say whether the jar should be left open or closed in the basic version. Readers should follow the lighting product’s directions and keep the tissue-paper lantern away from water and any heat source; the source describes string lights, not a flame or candle.
Choose Materials for Where It Will Go
There is no announced follow-up or product launch attached to the report. The next steps are practical ones for anyone making the craft: choose a jar that fits the lights, decide whether to use an outlined or more free-form design, and let the glue dry before adding the lights. For indoor display, the tissue-paper version follows the instructions in the report. For outdoor placement, readers would need to protect the lantern from rain or consider the suggested mosaic-tile alternative, while checking that the lights and jar arrangement suit the location.
Further information on the craft’s long-term durability, material costs and outdoor performance is not included in the source. Until such details are available, the paper-covered version is best treated as a decorative project for dry settings rather than a weatherproof lighting product.
Key Questions
What supplies are needed for the jar lantern?
The report lists a glass jar, colored tissue paper, glue such as Mod Podge, black paint, a small paintbrush and small string lights. String is optional if you want to hang the lantern.
Can the tissue-paper lantern be left outside?
Hunker says rain can damage or loosen the tissue paper and recommends indoor use or outdoor placement only in dry weather. The source does not describe the basic design as weatherproof.
How does the project create a stained-glass effect?
Colored tissue paper covers the outside of the jar, and black painted lines can outline a pattern. Lights inside shine through the colored covering, creating a stained-glass-inspired appearance; it is not actual stained glass.
Are candles suitable for lighting the jar?
The instructions specify small string lights, not candles. The source does not provide guidance for using an open flame, so readers should follow the described method and avoid assuming the jar-and-paper craft is safe for candle use.
Source: hunker.com