
Creating a DIY leather cord organizer makes a stylish, practical back-to-school gift. Start by gathering durable leather, quality tools, and accessories like fasteners and decorative accents. Measure, cut, and assemble your pieces, then add personalized touches like stamping or dyeing. Finish with protective coatings for durability, and package it thoughtfully for a polished look. If you want detailed steps and creative ideas, keep going—this project can be customized to suit any style.
Key Takeaways
- Craft a personalized leather cord organizer using durable leather, stamping, dyeing, and secure fasteners for a stylish, functional back-to-school gift.
- Measure and cut leather precisely, then assemble compartments and loops to hold cords, cables, and small accessories effectively.
- Decorate with embossing, stamping, or painted accents to add a unique, personalized touch suitable for students.
- Finish with protective treatments and durable stitching to ensure longevity and withstand daily school use.
- Package in eco-friendly wrapping with ribbons or tissue for an attractive, memorable presentation perfect for back-to-school gifting.
Gathering Your Supplies and Tools
Before you begin your DIY leather cord organizer, it’s important to gather all the necessary supplies and tools. You’ll need quality leather, which serves as your primary material for creating a durable storage solution. A selection of leather care products, like conditioners and cleaners, will help keep your organizer looking new over time. Basic tools such as scissors, a ruler, a cutting mat, and a hole punch are essential for precise cuts and adding compartments. Adhesives or stitching supplies will help secure parts together. Don’t forget to have a pencil or marker for marking measurements. Gathering everything beforehand guarantees a smooth crafting process and helps you focus on designing a stylish, functional organizer that will last. Proper preparation makes all the difference.
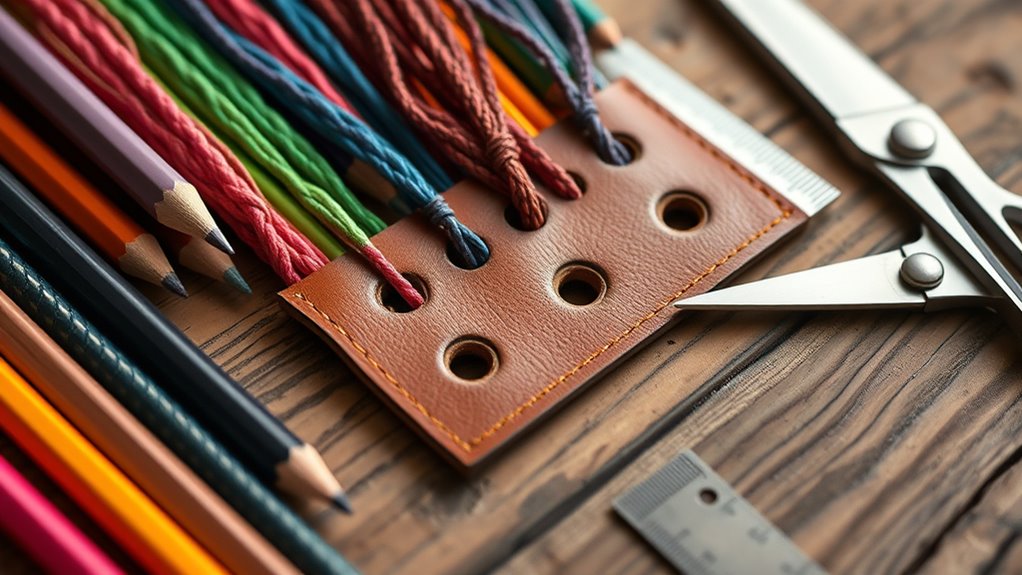
Cutting and Preparing the Leather Piece
Start by carefully measuring the dimensions of your leather piece to fit your desired organizer size. Use a sharp cutting tool and a straight edge to make precise cuts. Ensuring accuracy now will make assembling your cord organizer much easier later on.
Measure Leather Dimensions
To guarantee your leather cord organizer fits perfectly, measure and cut your leather piece to the desired dimensions. Use a ruler or measuring tape to determine the length and width based on your needs. Keep in mind that the size may vary depending on how many cords you plan to store. Once measured, mark these dimensions clearly with a pen. When selecting your leather dye, consider a color that complements the hardware you’ve chosen. A well-chosen hardware selection, like snaps or clasps, will enhance both function and aesthetic. Be sure to account for any seam allowances or overlaps during measurement. Precise measurements now will make the assembly smoother later, ensuring your final product looks professional and functions perfectly.
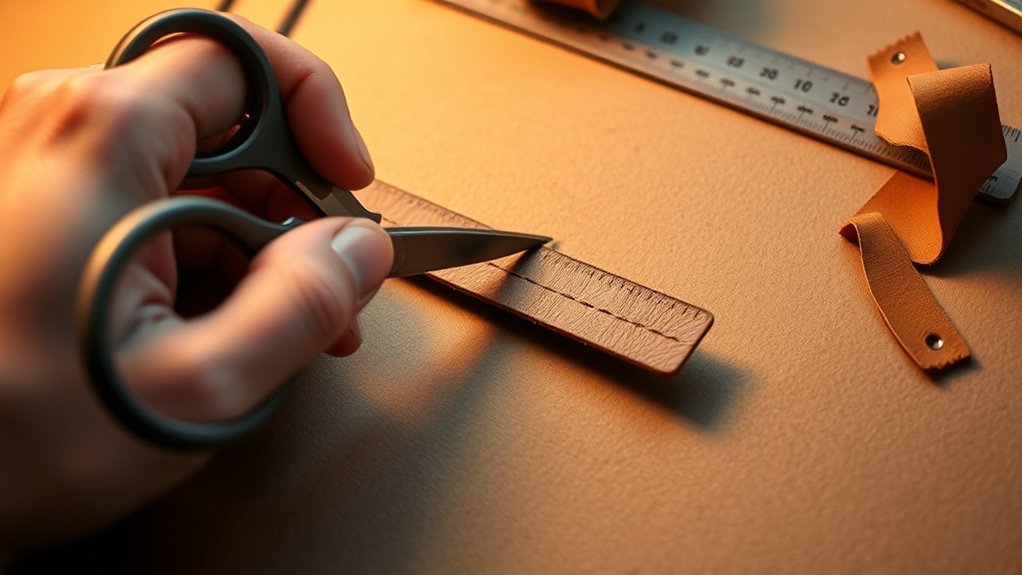
Cut With Precision
Once you’ve marked your dimensions, it’s time to cut your leather piece. Use a sharp utility knife or rotary cutter for clean, precise edges. Keep your cutting straight and steady, following your marked lines closely. If you plan to dye your leather later, cut before applying any leather dyeing to avoid uneven coloration. When preparing for stitching, ensure your edges are smooth to make sewing easier and neater. Pay attention to the thickness of your leather and choose the appropriate stitch spacing to enhance durability. Proper cutting not only improves the appearance of your cord organizer but also guarantees your stitching techniques will hold securely. Take your time with this step—precision now makes the rest of your project smoother and more professional-looking.
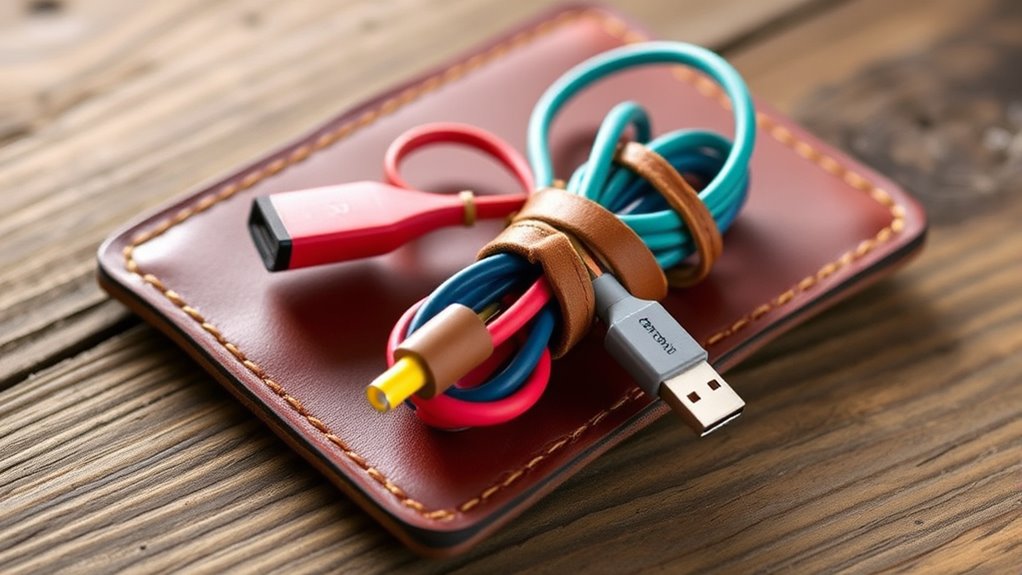
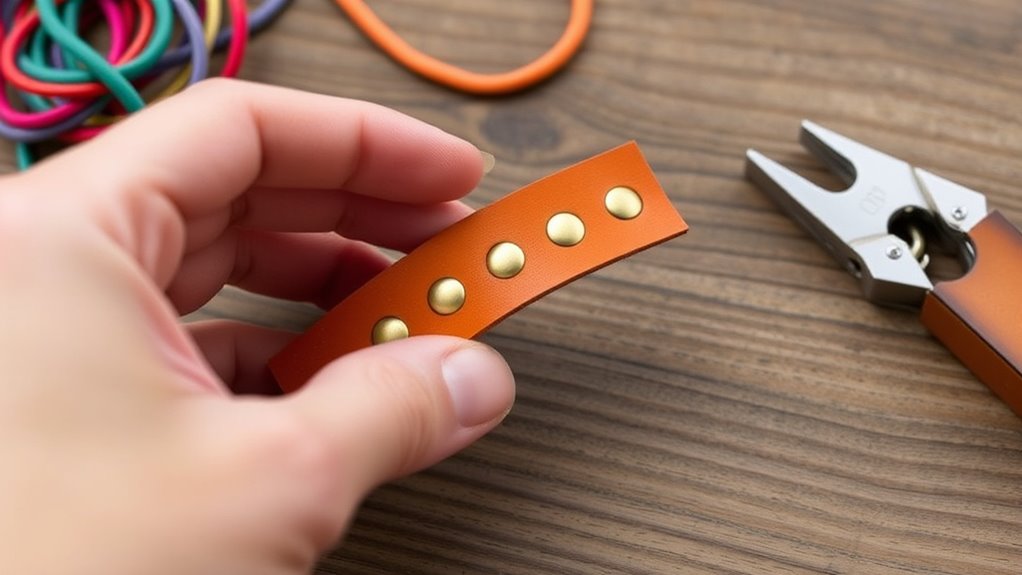
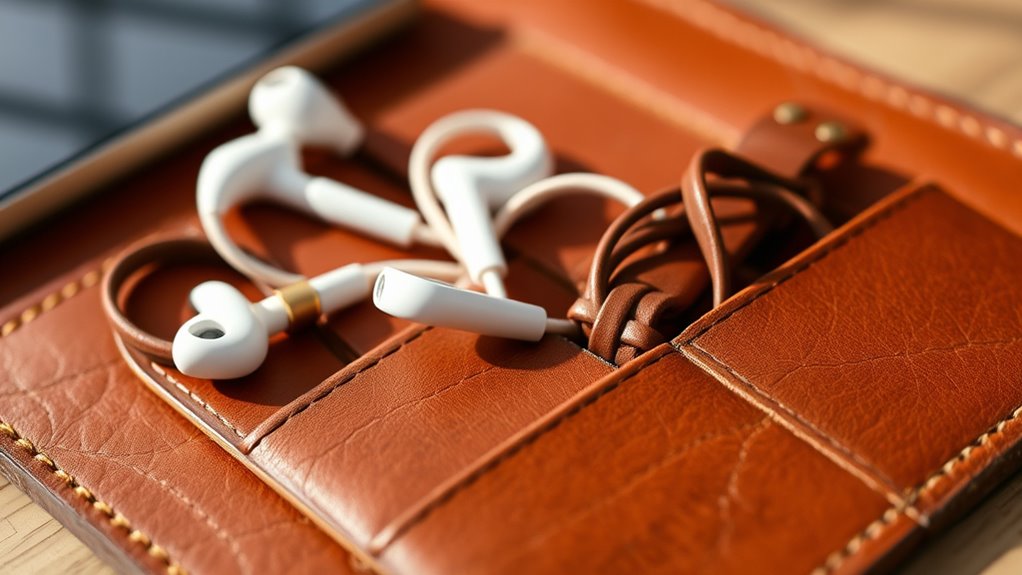
Creating the Cord Loops and Fasteners

Creating the cord loops and fasteners is a crucial step that guarantees your organizer stays secure and functional. Use cord loop techniques to create sturdy, flexible loops that hold your cords neatly. For added durability, choose high-quality materials that can withstand regular use without wear. Selecting materials with durability and strength ensures your organizer maintains its integrity over time. For fastener options, choose between snaps, magnets, or buttons, depending on your style and ease of use. These fasteners keep everything in place and add a polished look. To evoke emotion, consider this:
| Feeling | Why it Matters |
|---|---|
| Confidence | Your organizer keeps cords tidy and accessible. |
| Satisfaction | Completing a handmade gift with care. |
| Excitement | Giving a personalized, thoughtful present. |
| Pride | Showcasing your craft skills to friends and family. |
Focus on precise loops and reliable fasteners to make your organizer functional and beautiful. Also, ensuring your fasteners have a secure attachment enhances durability and usability. Incorporating proper craftsmanship techniques can further ensure your organizer remains durable over time. When selecting fasteners, consider the strength of materials to guarantee long-lasting results.
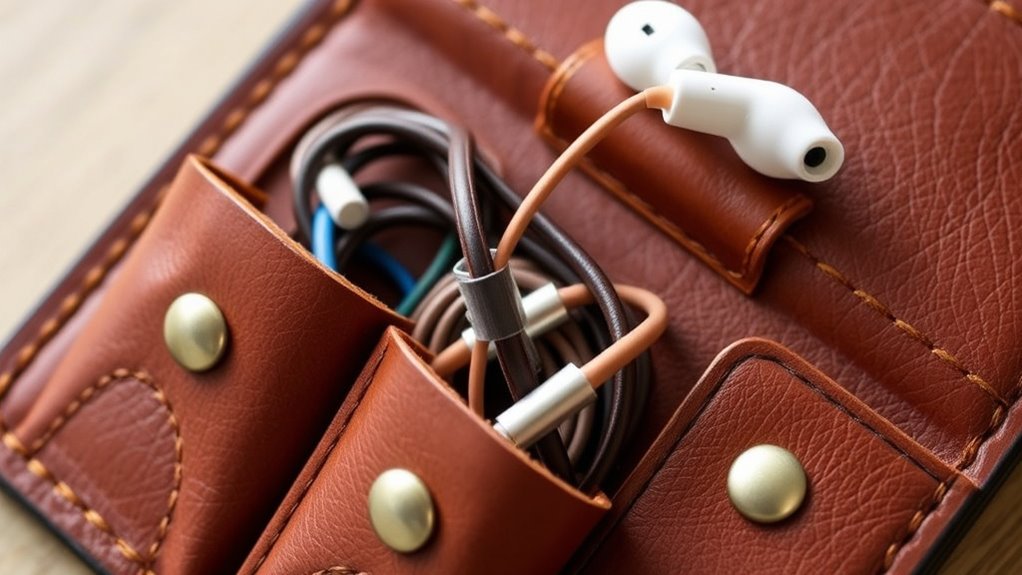
Assembling the Organizer Body
Assembling the organizer body is the foundation that brings your project together and guarantees durability. Begin by aligning your leather pieces, ensuring the color coordination creates a cohesive look. Carefully attach the sides to form the main compartment, keeping in mind how the storage solutions will function for different cords. As you assemble, think about how the final product will serve both form and function. Focus on these key points:
- Make certain even stitching for a polished appearance and long-lasting strength
- Consider color coordination for aesthetics and easy identification of cords
- Design compartments that maximize storage solutions without overcrowding
- Incorporate microprocessor technology into your design to enhance the organizer’s durability and functionality. Additionally, understanding headphone compatibility can help in designing dedicated compartments for audio accessories, ensuring they are protected and easily accessible. Paying attention to material quality can also significantly impact the endurance and overall look of your organizer. Selecting high-quality leather material ensures a more durable and attractive finished product.
This step is vital for creating a sturdy, attractive organizer that’s both practical and personalized. Proper assembly ensures that your project will stand up to daily use.
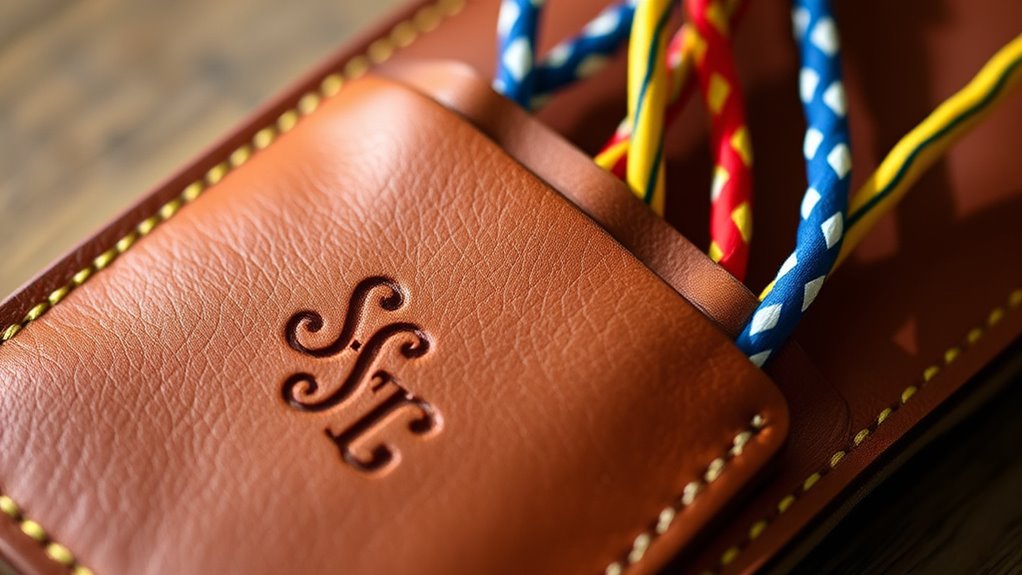
Adding Personal Touches and Decorations
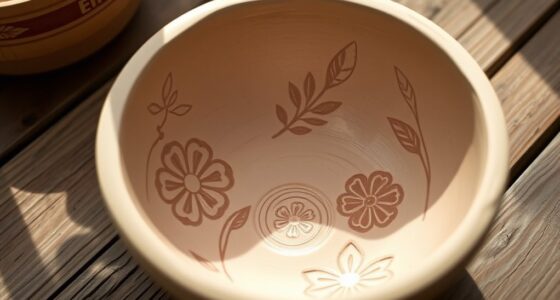
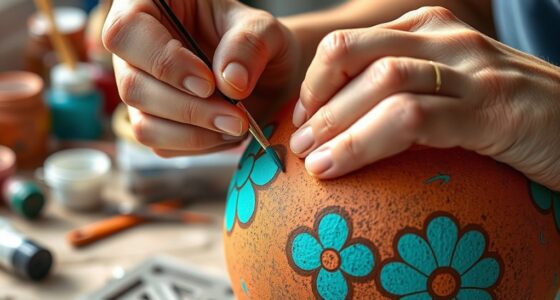
Now’s your chance to make your leather cord organizer uniquely yours by adding personal touches. You can try embellishing it with stamped initials, colorful paints, or decorative stitching. These craft techniques let you customize your organizer and showcase your style. Additionally, incorporating exfoliation techniques like textured paint or layered designs can add a unique dimension to your decorations. Exploring neural network inspired patterns can also enhance the visual appeal of your decorations, giving your organizer a modern touch. Considering community-driven platforms can provide additional inspiration and ideas for your personalized design. Embracing the benefits of curiosity can inspire you to experiment with new decorating methods and discover what truly resonates with your creative spirit.
Personalized Embellishments Ideas
Adding personal touches and decorations to your leather cord organizer can truly make it one-of-a-kind. You can explore leather dyeing to add vibrant colors or subtle shades that match your style. Embellishment techniques like stamping, engraving, or painting allow you to create unique patterns or initials. Consider these ideas for a meaningful design:
- Incorporate custom leather dyeing to match your favorite colors
- Use embossing to add initials or meaningful symbols
- Attach decorative studs or charms for a personalized touch
These embellishments not only enhance the aesthetic but also make your organizer more special. By experimenting with leather dyeing and embellishment techniques, you craft a truly personalized gift that reflects your personality and effort.
Decorative Craft Techniques
Once you’ve explored personalized embellishments like dyeing and stamping, you can enhance your leather cord organizer further by incorporating decorative craft techniques. Leather dyeing allows you to add vibrant colors or subtle hues, giving your organizer a unique look. Use leather dyeing to create gradients, patterns, or solid shades that match your style. Stamping techniques help you add texture and visual interest—try stamping floral or geometric designs onto the leather surface. Pressing stamps firmly creates embossed patterns that stand out. Combining dyeing and stamping lets you craft a one-of-a-kind piece, reflecting your personality. These techniques are simple to learn and customize, making your leather cord organizer not just functional but also a beautiful, personalized accessory perfect for back-to-school gifting.
Finishing Touches for Durability and Style
To guarantee your leather cord organizer lasts and looks polished, applying finishing touches is essential. These steps enhance durability and add style. Consider leather stamping, which creates textured designs for a personalized touch. Dye techniques allow you to add color and depth, giving your organizer a unique look. Sealing the leather with a protective finish prevents stains and wear, ensuring longevity. Additionally, selecting vintage decor elements can complement the rustic charm of your project and enhance its aesthetic appeal. Incorporating leather care practices will help maintain the organizer’s appearance over time. Understanding branding strategies can also inspire creative design details that reflect a refined style. Recognizing trust issues in relationships can influence your choice of design elements, making your project more meaningful and personalized.
Tips for Personalization and Customization
Personalization transforms a simple leather cord organizer into a unique accessory that reflects your style. To do this, choose color schemes that match the recipient’s personality or school colors, making it more meaningful. You can also add initials or a short name using engraving or embossing techniques, which add a professional touch. When customizing, consider the material durability; opt for high-quality leather that withstands daily use without fading or cracking. Adding decorative stitching or painted accents can further enhance its look while maintaining durability. Keep in mind that subtle personalization, like a monogram or a small charm, can make a big impact without compromising the organizer’s functionality. Additionally, selecting creative customization options can help your handmade gift stand out and become a cherished keepsake. For example, incorporating personalized embellishments can elevate the overall design and make it truly one-of-a-kind. With these tips, your handmade gift becomes truly special and tailored to its recipient.
Packaging and Presenting Your Handmade Gift
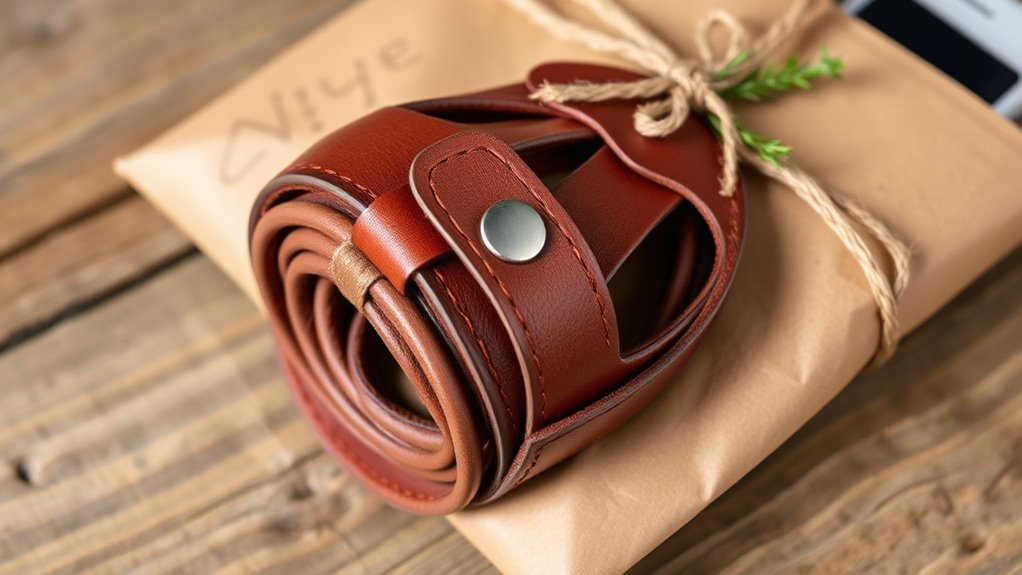
Presenting your handmade leather cord organizer with thoughtful packaging elevates it from a simple gift to a memorable experience. Choosing the right packaging materials and color schemes shows care and enhances its appeal. Opt for eco-friendly boxes or kraft paper wraps for a rustic, personalized touch. Consider coordinating tissue paper or ribbons in colors that match or complement the organizer’s tones to create visual harmony. Proper packaging not only protects your gift but also sets the tone for its unwrapping.
Thoughtful packaging transforms your leather cord organizer into a memorable, beautifully presented gift.
- Reflects your effort and thoughtfulness
- Creates anticipation and excitement
- Reinforces the gift’s personal value
Frequently Asked Questions
What Types of Leather Are Best for This Project?
When choosing leather types, focus on durability and flexibility. Full-grain leather is the best for this project because it’s strong, ages beautifully, and resists wear. Top-grain leather is also a good option if you want something softer yet still durable. Avoid softer, less durable leathers like bonded or faux leather, as they may not hold up well over time. Your choice impacts how long your organizer will last and look great.
Can I Make This Organizer Adjustable?
You can definitely make the organizer adjustable! Imagine adding an adjustable strap with a buckle or sliding mechanism, allowing you to customize the length easily. This way, you guarantee a perfect fit, whether you want a snug wrap or a looser hold. Incorporating length customization makes your project more versatile and user-friendly, giving it a professional touch and ensuring it suits different needs and preferences.
How Do I Prevent the Leather From Cracking?
To prevent your leather from cracking, you should regularly apply leather conditioning. Conditioning keeps the leather supple and moisturized, which is key for crack prevention. Avoid exposing your leather to extreme temperatures or direct sunlight, as these can dry it out. Store it in a cool, dry place and clean it gently with a damp cloth. Consistent care with quality leather conditioner will help maintain your leather’s flexibility and durability.
What Alternative Fasteners Can I Use?
You can use various alternative fasteners like snap fasteners or magnetic closures to secure your leather cord organizer. Snap fasteners are easy to snap on and off, providing a sturdy hold. Magnetic closures offer quick access and a sleek look, making your organizer both functional and stylish. Both options are simple to install and can replace traditional clasps, giving your project a customized touch while ensuring your cords stay neat and secure.
How Do I Clean and Maintain the Leather Organizer?
To keep your leather organizer in top shape, you should regularly do leather cleaning with a soft, damp cloth to remove dirt. Avoid harsh chemicals, and use a leather conditioner every few months to keep the leather supple and moisturized. This routine prevents cracking and maintains its appearance. Remember, gentle care preserves your organizer looking new and ensures its durability over time.
Conclusion
Now that your DIY leather cord organizer is complete, you’ve crafted a gift as practical as it is personal. It’s like giving a little piece of your creativity wrapped in leather’s timeless charm. With this handmade touch, you’re not just organizing cords—you’re weaving thoughtfulness into every knot and stitch. Your effort transforms an everyday item into a treasured keepsake, making back-to-school season brighter and more meaningful for its lucky new owner.