To create stunning paint‑pour abstract pumpkins, start by selecting smooth, blemish-free pumpkins that can handle the pouring medium. Use vibrant acrylic paints thinned with pouring medium to achieve flowing, blendable effects. Pour your colors onto the pumpkin, then tilt and swirl gently for unique designs. Allow the artwork to dry completely, then add final touches like highlights or textures. If you want to master these techniques, continue exploring each step for eye-catching results.
Key Takeaways
- Choose smooth, blemish-free pumpkins and prepare surfaces with cleaning and light sanding for optimal paint adhesion.
- Thin acrylic paints with pouring medium and experiment with tilting, swirling, and layering for abstract effects.
- Use controlled pouring techniques to create flowing, textured, and layered designs on the pumpkin surface.
- Incorporate contrasting colors, metallics, and highlights to add depth and visual interest to the artwork.
- Display finished pumpkins with creative arrangements, lighting, and seasonal decor for an eye-catching seasonal display.
Gathering Your Supplies for Paint‑Pour Pumpkin Art
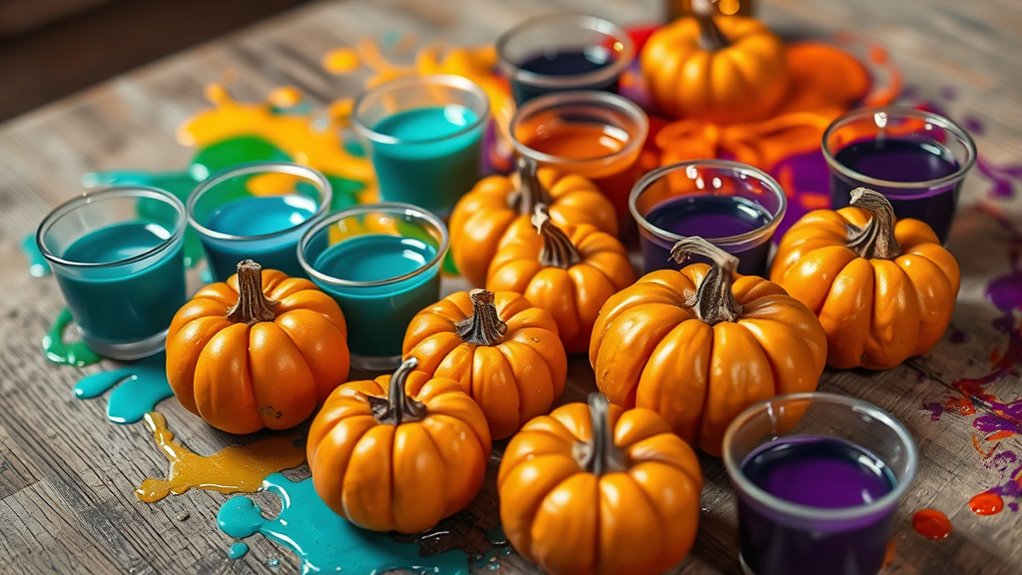
Before you begin your paint‑pour pumpkin project, gather all the necessary supplies to guarantee a smooth process. Start with clean, sturdy pumpkins to serve as your canvas for autumn decorations. Unlike traditional pumpkin carving, which involves knives and scoops, paint pouring lets you create abstract designs without mess or sharp tools. You’ll need acrylic paints in your favorite fall colors, along with pouring medium to achieve smooth, flowing effects. Prepare a set of disposable cups, stir sticks, and gloves to keep things neat. Don’t forget a surface protector, like a plastic sheet or old newspaper, to catch drips. Using paint‑pour techniques, you can even plan your color schemes and designs more effectively. With these supplies ready, you’ll be set to turn ordinary pumpkins into stunning, paint‑pour art pieces perfect for festive decorations.
Preparing Your Pumpkins for Painting

Start by choosing pumpkins that are firm, smooth, and free of blemishes. Next, clean off any dirt and remove the stems, then thoroughly dry the surface to guarantee paint sticks well. Proper preparation creates a perfect canvas for your paint‑pour artwork. Ensuring your pumpkins are well-prepared can also prevent issues like surface imperfections that may affect the final design. Additionally, selecting pumpkins with a smooth surface can make your paint application more even and visually appealing. Considering the cultural and regional preferences for seasonal decor can inspire your pumpkin painting themes. Being aware of surface preparation techniques can further enhance the durability and appearance of your painted pumpkins.
Selecting Perfect Pumpkins
Choosing the right pumpkins is essential for a successful paint-pour project, as their shape and surface quality can greatly influence the final look. When selecting pumpkins, focus on ones with smooth, blemish-free surfaces that will hold paint well. Look for pumpkins with a sturdy stem and a shape that complements your design vision. Consider pumpkin selection carefully, as unique or symmetrical shapes can enhance your abstract artwork. Additionally, think about color coordination—matching or contrasting pumpkin hues with your paint palette will create a cohesive or striking visual effect. Avoid pumpkins with deep ridges or rough textures, which may hinder the pouring process. With thoughtful selection, you’ll set a strong foundation for beautiful, vibrant pumpkin art.
Cleaning and Drying
Once you’ve selected the perfect pumpkins, it’s time to prepare their surfaces for painting. Start by gently washing them with warm water and soap to remove dirt, dust, and any residue from pumpkin carving or harvest decorating. Use a soft brush or cloth to scrub away stubborn spots, ensuring a clean surface. Rinse thoroughly and let them dry completely—preferably air dry or pat dry with a towel. Drying thoroughly prevents paint from peeling or bubbling. If needed, lightly sand the surface to create a smoother area for paint to adhere. Proper cleaning and drying help your paint pour techniques look their best and ensure your pumpkins become vibrant, eye-catching fall decorations. Taking these steps guarantees a flawless finish every time.
Choosing the Right Paints and Colors for Your Design
When selecting paints and colors, think about the mood and style you want to create on your pumpkin. You’ll need to choose a color palette that complements your design and pick paint types with finishes that enhance the overall look. Consider how different finishes, like matte or gloss, can add depth and texture to your artwork. Incorporating rustic decor elements can also help create a cohesive farmhouse-inspired aesthetic for your pumpkins. Additionally, using crochet techniques such as textured or layered painting styles can add unique visual interest to your design.
Color Palette Selection
Selecting the right paint colors is essential to creating a vibrant and cohesive abstract pumpkin design. Focus on establishing color harmony by choosing shades that complement each other, ensuring your artwork feels balanced and unified. Incorporate palette contrast by pairing bold, vivid hues with softer tones to add visual interest and depth. Think about how colors interact; contrasting warm and cool shades can make your design pop. Consider your overall theme and mood—bright colors evoke energy, while muted tones create subtle elegance. Limit your palette to a few carefully chosen colors to maintain harmony and prevent the design from becoming chaotic. With intentional color choices, your abstract pumpkin will stand out beautifully and convey your creative vision effectively.
Paint Types and Finishes
Choosing the right paint types and finishes is essential to bringing your abstract pumpkin design to life. Different paints convey unique textures and visual effects, much like famous artists choose specific mediums to express their style. For vibrant, bold colors, acrylic paints work well—they dry quickly and offer durability. If you want a softer, matte finish, consider chalk or matte acrylics, which add subtlety and depth. Paint symbolism plays a role here; for example, glossy finishes can symbolize clarity and energy, while matte finishes evoke calmness. Experimenting with mixed finishes can create contrast and interest in your design. Ultimately, selecting the appropriate paint types and finishes ensures your abstract pumpkins showcase the intended mood and artistic expression.
Techniques for Creating Abstract Paint‑Pour Effects
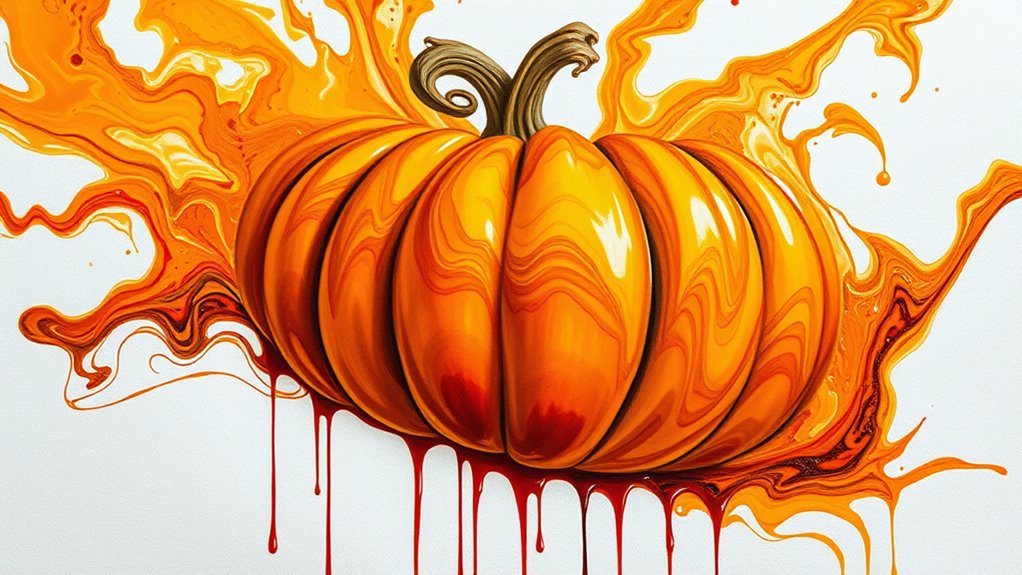
To achieve stunning abstract paint‑pour effects on your pumpkins, you need to understand some key techniques that guide the paint’s flow and blending. Start by choosing the right type of paint, like acrylics, and thinning them with a pouring medium for smooth movement. Use tilt and swirl motions to control the paint’s direction, creating unique patterns. Keep your workspace steady and protected from drips. Experiment with color combinations to enhance visual interest, especially if you’re incorporating seasonal decorating themes. Practice different pouring styles, such as the flip cup or dirty pour, to discover what best suits your design. Remember, patience is key—allow layers to set before adding new effects. These techniques elevate pumpkin carving into an art form, making your seasonal decor truly stand out. Additionally, understanding celebrity transformations can inspire creative ideas for your craft projects. Incorporating well-being tips into your creative process can also help maintain your focus and enjoyment throughout your art-making journey. Recognizing the importance of AI safety measures can also inform how you approach digital designs or online sharing of your artwork. Exploring projector technology insights can inspire innovative presentation methods for your craft displays. Being aware of family photoshoot fails can help you prevent common mistakes when photographing your decorated pumpkins and create more memorable images.
Applying the First Layer of Paint and Achieving the Base Look
Once you’ve practiced your pouring techniques, it’s time to lay down the first layer of paint to establish your pumpkin’s base look. Start by choosing your main color and ensuring the paint has the right consistency—thicker than usual but still pourable—to control blending. Pour the paint onto the pumpkin, allowing it to spread naturally, and tilt the surface to create smooth, even coverage. Focus on achieving a seamless base, where colors blend softly at the edges. Keep your pour steady and controlled to prevent drips or lumps. This initial layer sets the foundation for your abstract design, so don’t rush. Once dry, you’ll be ready to add more layers and build depth, but this first step is essential for a polished final look. Paying attention to active listening and empathy during your process can help you better understand how colors and techniques work together to achieve your desired effect. Practicing mindfulness can also enhance your focus and patience throughout the creative process. Additionally, understanding paint consistency is crucial to mastering control and achieving smooth transitions in your poured design. Incorporating Honda Tuning principles can inspire creative approaches to your art, encouraging experimentation with different techniques and styles.
Adding Depth and Dimension With Additional Color Layers
Adding depth and dimension with additional color layers allows you to enhance your pumpkin’s abstract design by creating visual interest and complexity. By carefully layering different hues, you can achieve smooth color blending that transitions smoothly, giving your pumpkin a more dynamic appearance. Incorporating texture addition through varied paint techniques adds tactile interest, making your design stand out. Use contrasting colors to emphasize certain areas or subtle shades to create a softer depth. This process invites you to experiment with transparency and opacity, building layers that tell a visual story. Understanding the financial impact of entertainment industry giants can inspire bold and creative color choices in your artwork. Exploring layering techniques can further help you achieve a rich, multi-dimensional effect that captivates viewers. Additionally, experimenting with color contrast can significantly enhance the visual appeal of your abstract pumpkins.
Tips for Handling Drips and Overflows in Paint Pouring

Dealing with drips and overflows is a common challenge when paint pouring, but quick action can keep your design clean and professional. To improve drip control and overflow prevention, work steadily and avoid overfilling your cup or container. Use a steady hand and gentle pours to minimize accidental spills. Keep paper towels or a damp cloth nearby to quickly wipe drips before they dry. Place your pumpkins on a protected surface to catch any accidental overflows. Here’s an emotional overview:
| Feelings | Tips to Manage |
|---|---|
| Frustration | Use a steady hand and slow pours |
| Anxiety | Prepare your workspace in advance |
| Satisfaction | Clean as you go for neat results |
| Confidence | Practice drip control with test pours |
| Pride | Achieve a flawless, professional look |
Allowing Your Pumpkins to Dry Properly for the Best Finish

Before you finish, make sure your pumpkin’s surface is properly prepared to guarantee a smooth finish. Find a dry, dust-free environment where it can cure without disturbance. Patience is key—giving it enough time to dry thoroughly will give you the best, professional-looking results.
Proper Surface Preparation
To achieve a smooth and professional-looking paint‑pour abstract pumpkin, you need to give the surface enough time to dry thoroughly. Proper surface prep guarantees paint adheres well and prevents smudging or peeling. Start by cleaning the pumpkin’s surface gently, removing dirt and residue. Pay attention to pumpkin stem care, as a sturdy stem helps with handling and display. Keep pumpkin weight considerations in mind; heavier pumpkins may need extra drying time to avoid cracking or warping. Sand any uneven areas lightly to create a smooth base. Make sure the surface is free of moisture before painting to prevent bubbles or streaks. Taking these steps guarantees a flawless finish and prolongs your pumpkin’s display life.
- Ensures paint adheres properly
- Prevents peeling or cracking
- Enhances overall finish quality
- Protects delicate pumpkin stem
- Considers pumpkin weight for stability
Optimal Drying Environment
Creating the ideal drying environment is vital to achieving a flawless paint‑pour finish on your pumpkin. After your pumpkin carving and paint pouring, it’s essential to let the paint dry completely in a space with good airflow and low humidity. This prevents smudges, streaks, or uneven drying that could ruin your seasonal decorations. Avoid placing your pumpkin in direct sunlight, which can cause paint to crack or bubble. Instead, choose a cool, dry area with consistent temperature to guarantee the paint sets evenly. Proper drying not only enhances the appearance of your art but also prolongs its life. Patience during this step guarantees a professional look, so give your pumpkin enough time to dry thoroughly before handling or displaying it.
Patience for Best Results
Once you’ve finished your paint pour, giving your pumpkin ample time to dry is key to achieving a smooth, professional finish. Patience guarantees the colors blend seamlessly and the surface remains free of smudges or fingerprints. Rushing the process can ruin your efforts, especially when working with seasonal themes that rely on crisp, clean lines. Proper drying allows the paint to set fully, so your color blending stays vibrant and distinct. It also helps prevent smudging or damaging the design when handling the pumpkin later. Remember, good things come to those who wait. Taking your time guarantees a polished look that highlights your artistic intentions and makes your pumpkin stand out.
- Enhances color blending for a cohesive look
- Prevents smudges and fingerprints
- Ensures durability of the finish
- Highlights seasonal themes with clarity
- Achieves a professional, polished appearance
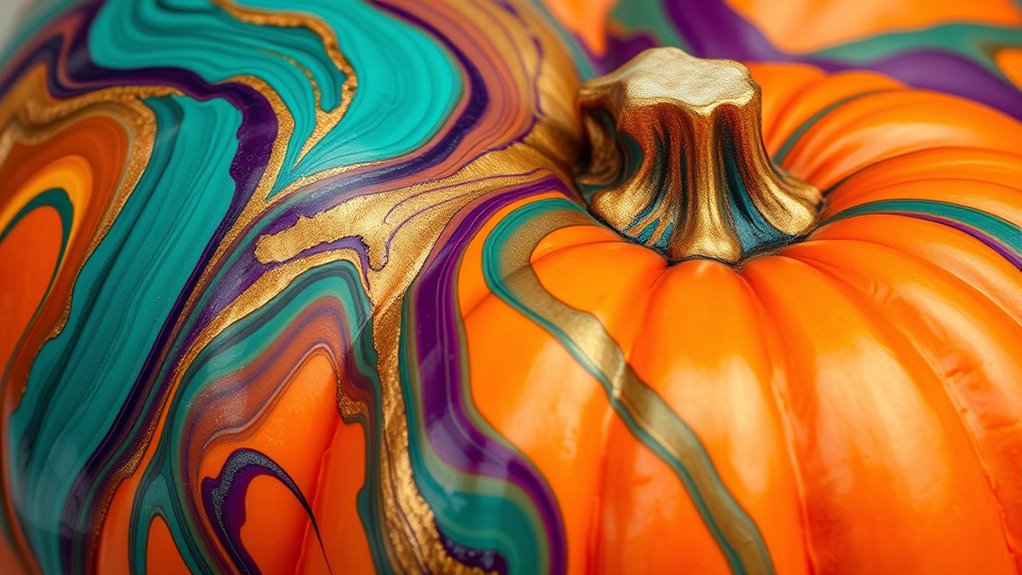
Enhancing Your Abstract Pumpkins With Final Details and Accents

Adding final details and accents can truly bring your abstract pumpkins to life, making them stand out as unique art pieces. You can add delicate brush strokes or textured highlights to emphasize shapes and colors. Consider using contrasting shades or metallic paints for extra depth. This step elevates your pumpkin from simple seasonal decorating to a true work of art. Imagine the impact of small carved details, like lines or patterns, blending seamlessly into your paint pour. Use this table to visualize your options:
| Detail Type | Effect |
|---|---|
| Carved Lines | Adds texture and dimension |
| Metallic Accents | Creates a shimmering effect |
| Highlighting | Enhances color depth |
| Dabbing Details | Adds visual interest |
These final touches make your abstract pumpkins more eye-catching, perfect for pumpkin carving enthusiasts or seasonal decorating.
Display Ideas to Showcase Your Unique Pumpkin Creations

After finishing your abstract pumpkins with final details and accents, it’s time to contemplate how to display these eye-catching pieces. Your goal is to create festive displays that highlight their unique artistry. Think beyond traditional setups and explore creative arrangements that draw attention and spark conversation. Position your pumpkins where they’ll be most appreciated—entryways, mantels, or as table centerpieces. Incorporate complementary decor like string lights, seasonal foliage, or rustic props to enhance visual impact. Consider grouping different sizes and shapes for a dynamic look. These creative arrangements not only showcase your pumpkins but also set a warm, inviting tone for the season. With thoughtful display ideas, your pumpkins become true statement pieces that elevate your entire decor.
Frequently Asked Questions
How Long Does It Take for Painted Pumpkins to Fully Dry?
The drying time for painted pumpkins varies depending on the type of paint used, but generally, you should allow at least 24 hours for the paint to fully dry. During this period, the paint cures and adheres properly, preventing smudges or peeling. To guarantee the best results, avoid handling the pumpkins too soon. If you used thicker coats, give them extra time to dry completely for a durable, finished look.
Can I Reuse the Paint From Previous Projects for Pumpkins?
You can definitely reuse leftover paint from previous projects for pumpkins. Just make sure to store it properly in an airtight container to prevent drying out. Reusing leftover paint is eco-friendly and saves you money. Follow paint recycling tips like stirring the paint before use and checking its consistency. This way, you can easily incorporate recycled paint into your pumpkin decorating projects, ensuring vibrant results and minimal waste.
What Safety Precautions Should I Take During Paint Pouring?
Imagine you’re beginning a creative adventure—safety is your trusty sidekick. Always wear protective gear, like gloves and masks, to guard against fumes and splashes. Make sure good ventilation in your workspace to keep the air fresh and clear. Keep your workspace tidy, and handle paints carefully. These simple precautions let you enjoy your project while staying safe, turning your painting session into a fun, worry-free experience.
How Do I Prevent Colors From Mixing Too Much in Abstract Designs?
To prevent colors from mixing too much in abstract designs, you should focus on color separation and layering techniques. Pour each color carefully, allowing space between them, and avoid overlapping too early. Use a palette knife or tool to gently guide colors apart as they flow. Let each layer dry partially before adding the next, which helps maintain distinct colors and creates a dynamic, visually appealing abstract effect.
Are There Any Alternative Surfaces Suitable for Paint-Pour Pumpkin Art?
You might consider alternative surfaces like wood slices, ceramic gourds, or canvas for paint-pour pumpkin art. When choosing, verify material compatibility with your paints and pour techniques to get the best results. These surfaces can add unique textures and visual interest, but always test a small area first. Proper surface preparation, like sealing, helps prevent paint from soaking in or peeling, ensuring your artwork stays vibrant and durable.
Conclusion
Now that you’ve mastered the art of paint-pour pumpkins, you’re all set to turn heads with your creative flair. Remember, practice makes perfect, so don’t be afraid to experiment and let your imagination run wild. Your pumpkins will stand out like a sore thumb or shine like a diamond—it’s all about showcasing your unique style. So go ahead, pour your heart into it and enjoy every colorful moment!