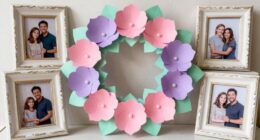
To make a stitched paper greeting card collection, start by choosing textured or smooth cardstock that fits your style and experiment with different textures to add depth. Trace your designs lightly with pencil, then use a sharp needle and embroidery floss to sew decorative stitches like backstitch or zigzag, keeping your stitches neat. Enhance your cards with contrasting thread colors, layered papers, embellishments, and personalized messages. If you continue exploring, you’ll discover even more creative tips to elevate your collection.

Get business pricing on tools and workshop supplies
- Business-only prices and quantity discounts
- Tax-exempt purchasing
- Multiple users, one account, clear invoices
Key Takeaways
- Select sturdy, textured or smooth paper based on your desired aesthetic and stitching needs.
- Plan and lightly sketch your designs onto paper for proper alignment and placement.
- Use a sharp needle and embroidery floss to sew decorative or outlining stitches with consistent tension.
- Incorporate layered papers, embellishments, or hand-lettered messages for personalized touches.
- Finish by securely tying threads, adding final embellishments, and storing the collection carefully.

Creating a stitched paper greeting card collection is a rewarding craft that combines creativity with craftsmanship. When you start, you’ll notice how the paper texture plays an essential role in the overall look and feel of your cards. Smooth, glossy paper offers a sleek appearance, while textured cardstock adds depth and interest. Choosing the right paper texture depends on the style you want to achieve—whether it’s elegant, rustic, or playful. Thicker cardstock provides a sturdy base, making your stitched designs stand out more prominently, whereas thinner paper can lend a delicate touch. Experimenting with different textures helps you discover what best suits your artistic vision.
Exploring various paper textures enhances your stitched card designs, adding depth, elegance, or playfulness to your creative projects.
Once you’ve selected your paper, you’ll focus on the stitching techniques that bring your designs to life. The key is to keep your stitches neat and consistent, which enhances the professional look of your cards. You might start with basic stitches like the running stitch or backstitch, which are simple yet effective for outlining shapes or creating borders. As you gain confidence, you can incorporate decorative stitches such as zigzag or blanket stitch for added flair. Using embroidery floss or thin thread allows you to control the tension and create clean, smooth lines. Remember to secure your thread ends carefully to prevent unraveling, especially since paper can be more delicate than fabric.
To make your stitches stand out, consider contrasting thread colors against your paper background. Bright threads on dark cardstock or metallic threads on lighter paper can add visual interest. When stitching, use a sharp needle designed for paper to prevent tearing or damaging the surface. It’s helpful to mark your designs lightly with a pencil beforehand, so you know exactly where to stitch. This planning step guarantees your stitches align properly and your design remains symmetrical. Additionally, understanding the biodiversity of materials can inspire eco-friendly choices in your craft supplies, making your project more sustainable. Exploring different fiber types and their environmental impact can further enhance your understanding of sustainable crafting practices. Incorporating eco-conscious materials can also elevate the overall quality and appeal of your collection. Being aware of the environmental impact of your supplies can guide you toward more mindful and responsible crafting decisions. Including knowledge about the recyclability of materials can help you select options that are more environmentally friendly.
You can enhance your stitched cards by layering different papers and textures, adding embellishments like stickers or die-cuts, and incorporating hand-lettered messages. As you become more experienced, you might experiment with more complex stitching patterns or incorporate embroidery stitches inside your designs. The process encourages patience and precision, but the result is a collection of beautifully crafted cards that showcase your skill and creativity. Whether you’re making them for friends, family, or personal keepsakes, your stitched paper greeting cards will carry a unique charm that reflects your personal touch.
embroidery floss for paper crafts
As an affiliate, we earn on qualifying purchases.
As an affiliate, we earn on qualifying purchases.
Frequently Asked Questions
What Types of Paper Are Best for Stitched Cards?
You should choose paper with a medium weight, around 80-120 lb, for stitched cards, as it’s sturdy enough to handle sewing without tearing. Look for papers with decorative textures like embossed, linen, or matte finishes to add visual interest. These textures not only enhance the card’s appearance but also make stitching easier and more attractive. Avoid very thin or glossy papers, as they can be difficult to sew and may not hold the stitches well.
How Do I Choose the Right Needle and Thread?
Choose a sharp, lightweight needle suited for paper, like an embroidery or beading needle, for precise stitching. Opt for sturdy, smooth thread such as polyester or silk to prevent tearing and guarantee clean embroidery techniques. Match the needle size to your stitching pattern—smaller needles for detailed embroidery and larger ones for bold stitches. Test different threads and needles on scrap paper to find the perfect combination that gives you neat, professional-looking stitched patterns.
Can I Customize Stitched Patterns for Different Occasions?
Yes, you can definitely customize stitched patterns for different occasions. You’ll want to incorporate personalized motifs that suit the recipient or event, like hearts for anniversaries or stars for celebrations. Seasonal themes, such as snowflakes for winter or flowers for spring, add a festive touch. By experimenting with different stitches and motifs, you create unique, meaningful greeting cards that perfectly match any occasion.
How Do I Prevent Paper Tearing During Stitching?
Imagine you’re stitching a delicate paper card, and it starts to tear. To prevent tearing, use embossing techniques to reinforce the paper edges and choose a suitable paper weight—heavier paper offers more durability. When stitching, go slowly and use a fine needle to avoid stress on the paper. These steps help maintain the integrity of your design and prevent tears during the stitching process.
What Tools Are Essential for Making Stitched Cards?
You’ll need basic tools like a sharp needle, sturdy thread or embroidery floss, and a piercing tool or awl to create precise holes. For embellishment techniques, consider adding decorative elements like stickers, ribbons, or stamps to enhance your cards. Store your tools in a dedicated container or compartment to keep them organized and ready. Using proper tools guarantees neat stitches and makes your card-making process smoother and more enjoyable.
Conclusion
Creating your stitched paper greeting card collection is a rewarding craft that combines creativity with personal touch. Did you know that handmade cards are 75% more likely to be cherished and kept than store-bought ones? By adding stitching, you not only enhance your cards’ durability but also infuse them with unique charm. Keep experimenting with different stitches and designs—your personalized collection will surely stand out and bring joy to everyone who receives them.
Fall Picks
fall essentials
As an affiliate, we earn on qualifying purchases.