To make a DIY wire-wrapped pendant, start by gathering suitable jewelry wire and selecting your favorite gemstone or focal bead. Shape the wire into a supportive base around the stone, wrapping securely to hold it in place. Then, create a bail with additional wire for attaching a chain or cord, finishing by tucking in all ends for a smooth look. With practice, you’ll craft beautiful, personalized jewelry—discover how to master the details and perfect your design.
Key Takeaways
- Gather appropriate jewelry wire, tools, and a suitable gemstone, then select a size that complements your design.
- Create a sturdy base frame around the stone, shaping and wrapping the wire securely to hold the gem in place.
- Add decorative elements like beads or charms, and form a bail by wrapping wire into a loop for attaching a chain.
- Tuck in and trim wire ends neatly using pliers and cutters to prevent snagging and ensure a professional finish.
- Clean and polish the final pendant, then attach it to a chain or cord for wearing.

shynek 10 Pieces Jewelry Pliers Tools Set, Jewelry Making Tools Include 8 Pieces Pliers, Jump Ring Opener, Tweezers for Wire Wrapping, 3D Printing Projects and Other DIY Projects
Jewelry Making Tools: The jewelry making tool kit includes a set of 8 jewelry pliers, a jump ring…
As an affiliate, we earn on qualifying purchases.
As an affiliate, we earn on qualifying purchases.
Gathering Your Materials and Tools

Before you begin your DIY wire wrapped pendant, collecting all the necessary materials and tools is essential. You’ll need some quality jewelry wire, typically silver or copper, in a few different gauges—thicker for the base and thinner for wrapping details. Grab a pair of round-nose pliers, chain nose pliers, and wire cutters; these will help shape and trim your wire precisely. You might also want a ruler or measuring tape to keep your wraps consistent. Additionally, having a bead mat or small tray keeps your small components organized. Don’t forget to choose a sturdy work surface to prevent slipping. Preparing everything beforehand ensures a smooth crafting process and helps you stay focused on creating a beautiful pendant without interruptions. High-quality materials can make a significant difference in your finished piece.

Bruislard Pendant Holder, 8 PCS 4 Styles Rock Jewelry-Making Kit Pendant-Blanks for Jewelry Making Branch Shape Blanks for Irregular Gemstone Cabochons Rhinestones DIY Jewelry Making Silver
【Versatile Branch Shape Blanks for Jewelry Making】These branch shape blanks are crafted as versatile pendant trays and jewelry…
As an affiliate, we earn on qualifying purchases.
As an affiliate, we earn on qualifying purchases.
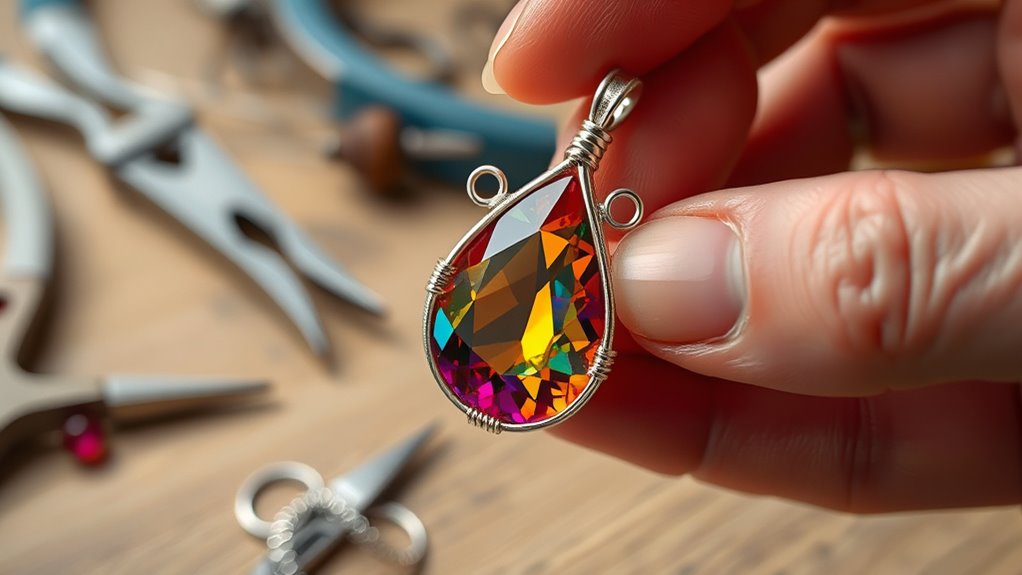
Selecting the Perfect Gem or Centerpiece
Choosing the right gem or centerpiece makes a big difference in your pendant’s look. Think about a striking stone that catches the eye and matches your style. Also, consider the size of the pendant to make sure it fits comfortably and stands out beautifully. Understanding your personal personality traits can help select a gemstone that reflects your character and enhances your overall look. Additionally, opting for versatile ingredients can inspire creative ways to incorporate meaningful symbolism into your design. Incorporating beneficial ingredients like symbols or motifs can add a personalized touch and make your pendant truly unique. Being aware of security considerations can help protect your jewelry from damage or theft, ensuring lasting beauty. Considering home cleaning tips can also help keep your jewelry in pristine condition, ensuring lasting beauty.
Choosing a Striking Gem
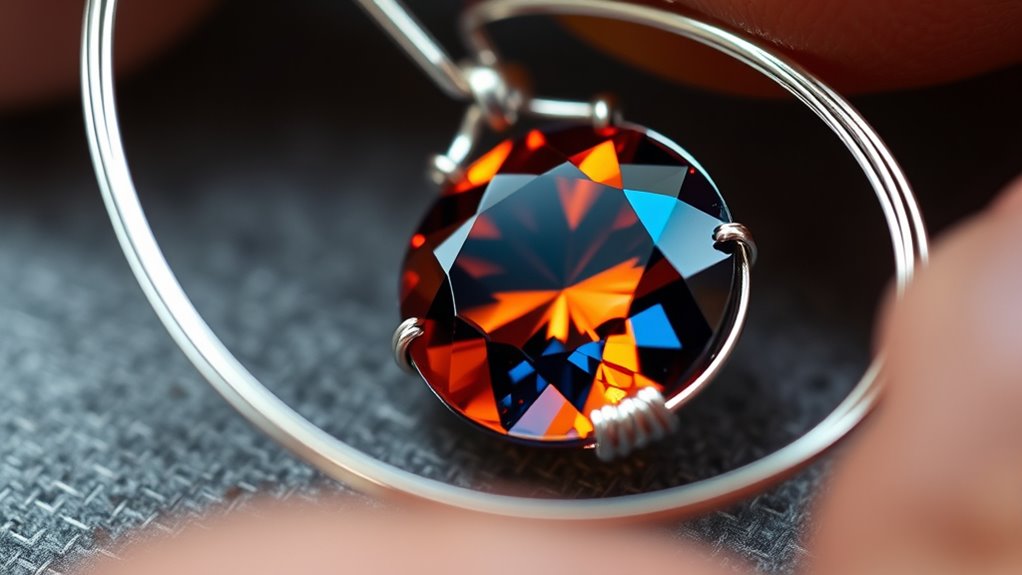
Selecting the perfect gem is an essential step in creating a stunning wire-wrapped pendant, as it sets the tone for the entire piece. You want a gem that captures attention and complements your style. Focus on colors that match your wardrobe or mood, and consider the shape that fits your design idea. A striking gem should have clarity and a mesmerizing presence, drawing eyes instantly. Incorporating a unique gemstone feature such as inclusions or patterns can add character and make your piece truly one-of-a-kind. Here are some tips to help you choose:
- Opt for stones with unique inclusions or patterns for added character.
- Think about the size that balances well with your wire work.
- Consider the gemstone’s symbolism or personal meaning.
- Pick a cut that enhances the gem’s natural beauty.
- Pay attention to the gemstone’s aesthetic appeal to ensure it harmonizes with your design.
- Additionally, evaluating the gemstone’s value and durability can help you select a piece that remains beautiful over time.
- Understanding the quality standards of gemstones can further guide your selection process for a durable and beautiful pendant.
- Being aware of certification and authenticity can also ensure you choose genuine gemstones of high quality.
Considering Pendant Size
How do you determine the right size for your pendant to make sure it becomes the focal point of your design? Start by considering the necklace’s overall style and your personal preference. If you want a bold statement piece, choose a larger gemstone or centerpiece, roughly 1.5 to 2 inches in height. For a more subtle look, opt for smaller stones around half an inch. Keep in mind the scale of your neck and shoulders—larger pendants suit wider necks, while smaller ones complement slender frames. Also, think about how much you want the pendant to stand out versus blend in. Balancing size with your design’s purpose guarantees your pendant remains eye-catching without overwhelming your overall look. Additionally, understanding cybersecurity vulnerabilities during online shopping can help protect your personal information when purchasing materials or jewelry online. Incorporating a mindful approach to self-awareness can further refine your design choices, ensuring your pendant aligns with your personal style and emotional expression. Recognizing size proportions can also assist in creating a harmonious and visually appealing jewelry piece. Moreover, practicing deliberate creative practice when selecting your pendant size can enhance your overall design process, leading to more innovative and satisfying results.

Art3d 20 Gauge Stainless Steel Wire, Bendable Soft Crafting Wire for Jewelry Making Earring Beading DIY Wrapping Sculpting – 120 FT Silver
High-Quality Material – Made from premium stainless steel, this 20 gauge wire is designed to resist rust and…
As an affiliate, we earn on qualifying purchases.
As an affiliate, we earn on qualifying purchases.
Preparing Your Wire for Wrapping
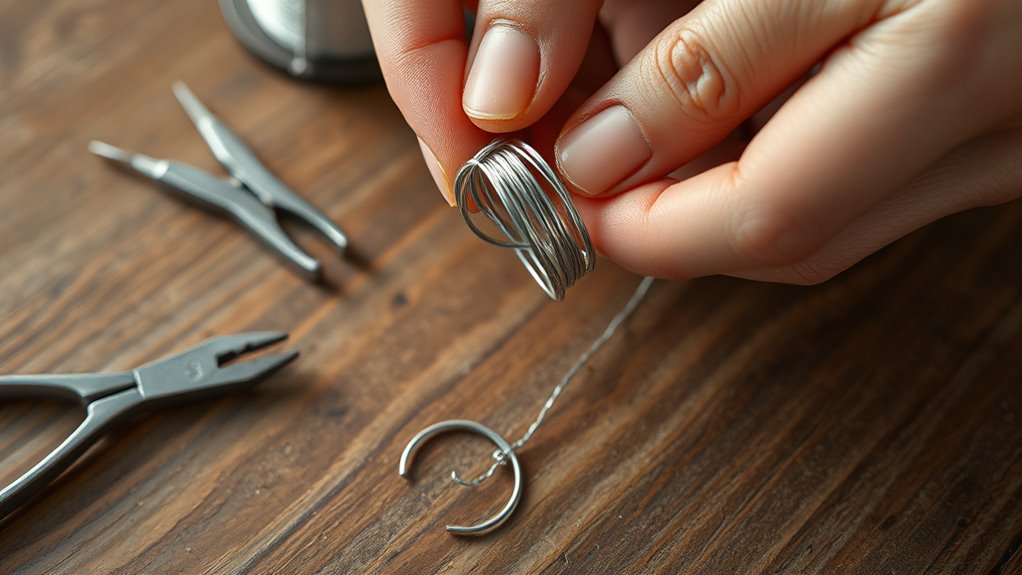
Before you start wrapping your wire, it’s important to prepare it properly to guarantee smooth and secure results. First, straighten the wire to remove any kinks or bends that might make wrapping difficult. Next, cut your wire to the desired length, leaving some extra for looping or shaping. Then, smooth the cut ends with a file or pliers to prevent scratching or injury. Finally, if your wire is tarnished or dull, clean it with a jewelry cleaner or rubbing alcohol to assure a shiny finish. Ensuring your wire has a secure connection will make your wrapping process easier and more durable. Additionally, verifying your wire’s quality and type can help prevent issues during the wrapping process and ensure the longevity of your pendant. Being aware of automation in business can also inform you about the importance of precise and efficient processes, similar to preparing your wire carefully. Incorporating proper preparation techniques aligns with efficient manufacturing processes, ultimately resulting in a more professional-looking finished piece. Moreover, understanding different fabric decorating markers can inspire creative embellishments for your jewelry designs.

BOENFU 6 Inches Wire Cutters Heavy Duty Snips Flush Cut Side Cutters Pliers Metal Cutting Tool for Crafting, Floral, Artificial Flowers, Chicken Wire, Electrical, 1 Pack
Flush-cut Wire Cutter: Extra-long cutting edge can easily snips electrical wire up to 12 AWG. Excellent for zip…
As an affiliate, we earn on qualifying purchases.
As an affiliate, we earn on qualifying purchases.
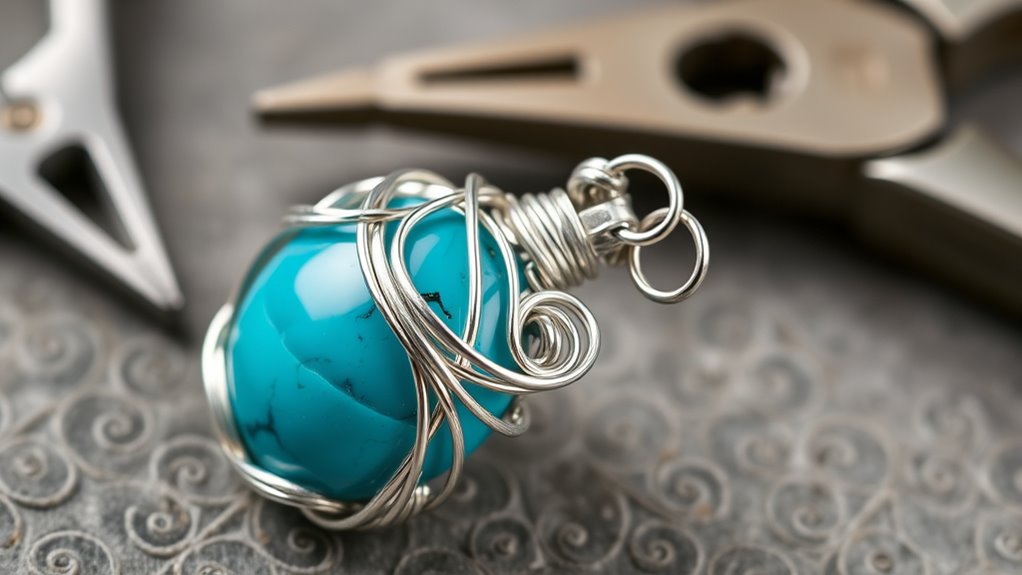
Creating a Base Frame Around the Stone

Once your wire is prepared, start forming a base frame around your stone to hold it securely in place. Begin by positioning the wire around the stone, ensuring it covers enough surface area to provide stability. Use your fingers or pliers to gently shape the wire into a rough outline of the stone’s perimeter. Cross the ends at the top or sides, creating a cradle that will support the stone without slipping. Keep the wire snug but not too tight, so you can adjust as needed. Focus on creating even loops or curves that follow the natural shape of the stone. This base will serve as the foundation for the rest of your wire wrapping, so take your time to ensure it’s secure and well-formed. Additionally, understanding self watering planters can inspire you to incorporate practical design elements into your jewelry, such as drainage or moisture control features.
Wrapping the Stone Securely in the Wire
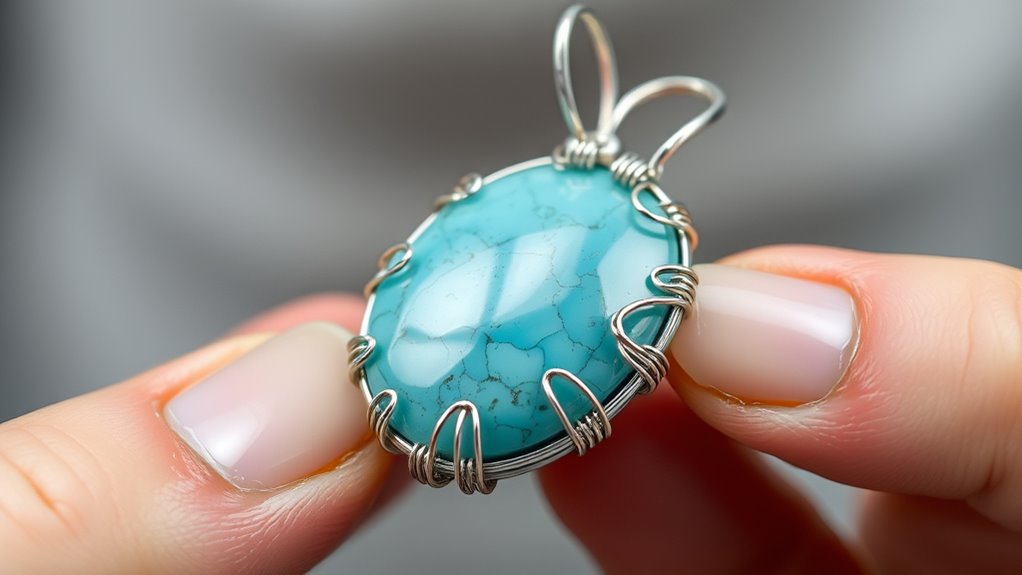
To guarantee your stone stays securely in place, start wrapping the wire tightly around its edges, working from the base upward. Keep the wire snug but not so tight that it cracks the stone. Wrap in a consistent pattern, ensuring each turn overlaps slightly with the previous one for stability. Apply gentle pressure as you go to maintain a secure hold without damaging the stone. Use pliers to tighten any loose sections and keep the wire flat against the surface. Maintain even spacing between wraps to avoid gaps that could cause slipping.
- Keep the wire tension consistent throughout the process
- Use your fingers or pliers to press the wire close to the stone’s surface
- Ensure the wire wraps are tight enough to hold but not crush the stone
- Check regularly for stability as you work
Adding Decorative Elements and Details
Now it’s time to enhance your pendant with decorative elements. You can incorporate beads and charms to add personality, or use textured wire accents for extra visual interest. These touches make your piece unique and truly showcase your creativity.
Incorporate Beads and Charms
Adding beads and charms can instantly elevate your wire-wrapped pendant by introducing color, texture, and personality. They create focal points and add visual interest, making your piece unique. To incorporate them effectively, choose beads that complement your wire color and design theme. Position charms strategically to balance the overall look, ensuring they don’t overpower the wirework. Use different sizes and shapes to add variety and depth. Be mindful of weight to prevent sagging or discomfort when worn. Experiment with layering beads or combining multiple charms for a more dynamic appearance. Remember, less is sometimes more—let each element stand out without cluttering your design.
- Select beads that match your color palette
- Use charms with meaningful symbolism
- Vary bead sizes for visual interest
- Balance placement for harmony
Use Textured Wire Accents
Incorporating textured wire accents into your pendant instantly enhances its visual appeal by adding intricate details and tactile interest. You can achieve this by using wires with patterns like hammered, twisted, or ridged surfaces. These textures catch the light differently, creating depth and dimension in your design. Wrap or weave textured wire around your main elements to emphasize certain areas or create borders. Combining smooth and textured wires also adds contrast, making your piece more dynamic. Don’t be afraid to experiment with different textures or even create your own by hammering or twisting plain wire. Textured accents give your pendant a handcrafted, artistic feel that elevates its overall look, making it unique and eye-catching.
Forming the Pendant Bail
Have you ever wondered how to create a secure and elegant bail for your wire-wrapped pendant? Forming the bail is vital for attaching a chain or cord seamlessly. Start by selecting a piece of wire, about 6 inches long, and shape it into a loop that fits your pendant’s size. Wrap the excess wire around the base, securing the loop tightly. To guarantee durability, make multiple wraps, keeping the tension firm but not too tight. Smooth out any sharp edges and fix the shape so the bail hangs evenly. Remember, a well-formed bail combines functionality with aesthetics.
- Choose the right wire gauge for strength and flexibility
- Use pliers for precise shaping
- Keep the loop proportional to your pendant
- Wrap tightly to prevent slipping
Finishing and Tucking the Wire Ends

Once you’ve finished wrapping your wire, it’s essential to neatly finish and tuck the ends to prevent snagging and guarantee a polished look. Use your chain nose pliers to gently bend the wire ends inward, tucking them beneath the wrapped coils. If the ends are sharp or sticking out, trim them slightly with wire cutters, leaving just enough to tuck securely. Press down gently to smooth any sharp points and ensure the ends are flush with the rest of the wirework. This step not only enhances safety but also gives your pendant a clean, professional appearance. Take your time to make sure all ends are tucked in tightly, so your wire wraps stay secure and your pendant looks flawless.
Polishing and Final Touches

Now that your pendant is shaped, it’s time to polish it for a professional finish. You’ll want to smooth any rough wire edges, enhance the shine, and consider adding a protective coating. These final touches will make your piece look polished and help it last longer.
Polishing Techniques
Are you ready to give your wire-wrapped pendant a professional shine? Polishing is key to enhancing its appearance and making your work stand out. Start by cleaning the piece with a soft cloth to remove fingerprints and dust. Use a polishing cloth or a jewelry-specific cloth for a smooth, bright finish. For stubborn tarnish, gently buff with fine steel wool or a polishing wheel. If you prefer a matte look, lightly sand the surface with fine grit sandpaper. Always handle your pendant carefully to avoid damaging delicate wire wraps. Remember, patience and attention to detail result in a polished, professional-looking piece.
- Choose the right polishing tools for your wire type
- Use gentle, circular motions for even polishing
- Avoid harsh chemicals that could damage the wire
- Inspect your work frequently during polishing
Finishing Wire Edges
Finishing wire edges is a crucial step to give your pendant a polished and professional look. Sharp or uneven wire ends can detract from your design’s overall appearance and may cause discomfort when worn. To smooth edges, gently file or sand any protruding wire points using a fine jeweler’s file or abrasive pad. Be careful not to damage your design while doing this. You can also tuck any sharp ends inward by carefully bending them with pliers, ensuring they won’t catch on clothing or skin. Once all edges are smooth and secure, inspect your pendant closely. Making these final adjustments enhances durability and creates a clean, refined finish that elevates your handmade jewelry.
Adding Protective Coating
Adding a protective coating to your wire-wrapped pendant helps preserve its shine and prevent tarnishing over time. This step guarantees your finished piece stays beautiful longer and maintains its luster. You can choose from clear sealants or specialized jewelry coatings to shield your wire. Apply a thin, even layer using a soft brush or cloth, and let it dry completely. This not only enhances durability but also gives your pendant a polished look. To get the best results, consider the type of metal and environment your jewelry will be exposed to. Proper sealing minimizes oxidation and keeps your craftsmanship looking fresh.
- Protects against tarnishing and corrosion
- Enhances the pendant’s shine
- Adds a layer of durability
- Maintains the polished appearance longer
Attaching a Chain or Cord to Complete Your Pendant
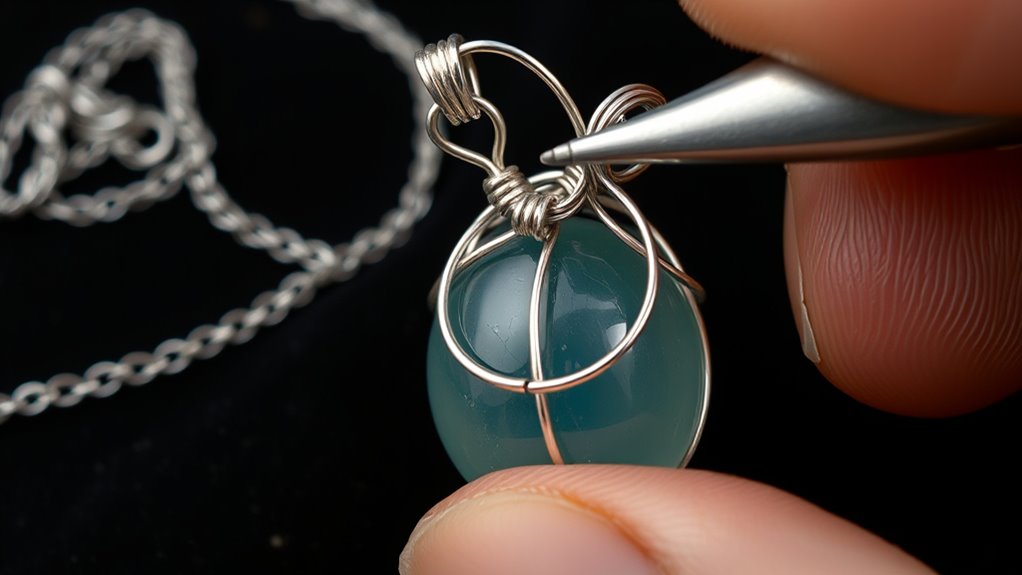
Once you’ve completed your wire-wrapped pendant, the next step is to attach a chain or cord so you can wear it effortlessly. If your pendant has a loop at the top, thread your chain or cord through it. For a more secure connection, open a jump ring with pliers, slide it through the loop and the chain, then close it tightly. If your pendant doesn’t have a loop, you can create one by wrapping a small piece of wire around the top of the pendant, forming a loop, and attaching your chain or cord to that. Choose a chain or cord that complements your pendant’s style and size. Once attached, verify everything is secure before wearing your beautiful, handmade necklace.
Frequently Asked Questions
How Do I Choose the Right Wire Gauge for My Pendant?
Choosing the right wire gauge depends on your pendant’s size and design. For delicate, intricate wraps, go with thinner wire like 24 or 26 gauge. If you want a sturdy, bold look, opt for thicker wire such as 18 or 20 gauge. Consider the gemstone or bead’s size too; larger stones need thicker wire for support. Always test a small piece first to verify it’s flexible yet strong enough for your project.
What Tools Are Essential for Wire Wrapping Jewelry?
Think of your tools as the brushes and palette for a painter—essential for bringing your jewelry vision to life. You’ll need a pair of chain nose pliers for precise bends, round nose pliers for loops, and wire cutters to trim excess wire. A jeweler’s file helps smooth rough edges, and a ruler guarantees accurate measurements. With these tools, you’re set to craft stunning wire-wrapped jewelry pieces with confidence.
How Can I Prevent the Wire From Breaking During Wrapping?
To prevent the wire from breaking during wrapping, you should choose the right gauge for your project, typically a softer, thinner wire for detailed work. Always handle the wire gently, avoid over-tightening, and use smooth tools to shape it. Properly supporting your work and maintaining even tension prevents stress points. Additionally, work slowly and carefully, and if the wire feels too stiff, warm it slightly to increase flexibility.
What Are Some Tips for Creating Symmetrical Wire Designs?
Creating symmetrical wire designs is like dancing with a partner—balance and coordination matter. Start by sketching your design or using a template to guide your work. Use consistent tension on the wire, and work slowly to make certain of even loops and shapes. Regularly check your progress against your pattern, and use pliers to make precise bends. With patience and practice, your designs will become more uniform and visually stunning.
How Do I Securely Attach a Chain or Cord to My Pendant?
To securely attach a chain or cord to your pendant, you should carefully create a loop or bail with your wire at the top of the pendant. Make sure to wrap the wire tightly around itself to prevent slipping. Then, thread your chain or cord through the loop, and give it a few extra wraps for added security. Finally, tuck in any sharp ends and trim excess wire for a clean finish.
Conclusion
Now that you’ve crafted your wire-wrapped pendant, think of it as planting a seed that blossoms into a unique piece of jewelry. With patience and practice, your skills will grow stronger, and each pendant will become more beautiful than the last. Keep experimenting with different stones and wire styles, and soon you’ll be creating your own garden of stunning, handcrafted jewelry. Celebrate your creativity—your masterpiece is ready to shine!