
To create a wooden block calendar, start by selecting durable hardwood like maple or cherry for a polished look, or choose more budget-friendly options like pine or plywood. Measure and cut four rectangular pieces carefully—two for the base and two for rotating blocks—ensuring they slide smoothly and fit well. Sand all edges thoroughly and consider adding numbers with engraving or paint. Finish by stacking and assembling the blocks, making sure they move freely. For a detailed step-by-step guide, keep exploring this craft.

Get business pricing on tools and workshop supplies
- Business-only prices and quantity discounts
- Tax-exempt purchasing
- Multiple users, one account, clear invoices
Key Takeaways
- Select durable hardwood and measure four rectangular pieces for the base and rotating blocks.
- Cut precise slots in the blocks to allow smooth rotation for changing dates.
- Sand all edges thoroughly and round corners for safety and a polished look.
- Mark or engrave numbers on the rotating blocks for easy date adjustments.
- Assemble the blocks with snug-fitting rotation, then finish with a protective coat for durability.
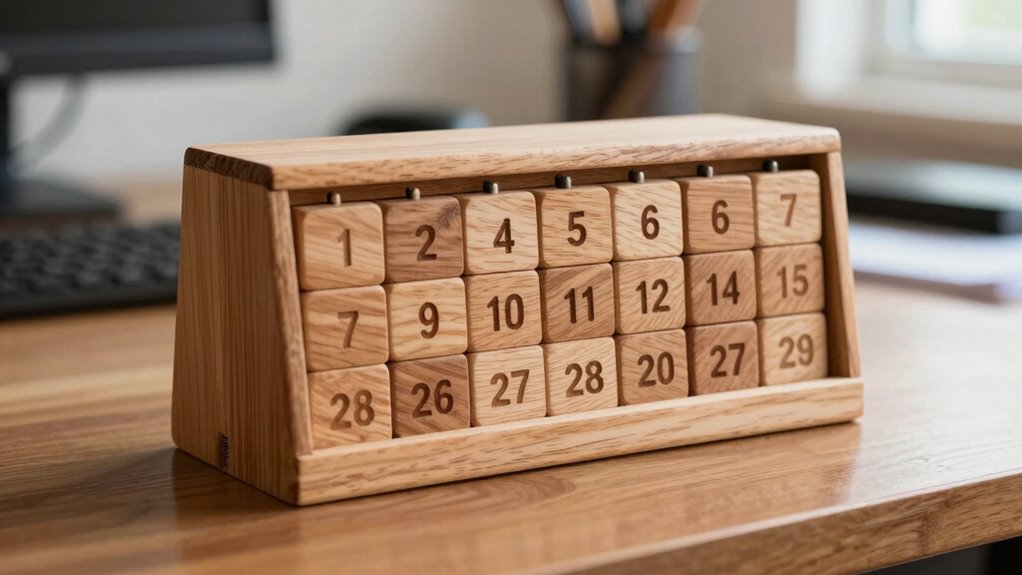
Ever wondered how to add a touch of craftsmanship to your workspace? Creating a wooden block calendar is a perfect way to do that, and it’s a project that combines practical design with creative woodworking. To start, you’ll want to focus on woodworking techniques that guarantee your blocks are both sturdy and visually appealing. Precision in cutting and sanding will make your calendar look professional and feel smooth to the touch. Using a saw suitable for detailed cuts, like a miter saw or a scroll saw, helps you achieve clean edges. Sanding is essential; it rounds off sharp corners and creates a polished finish, making your calendar pleasant to handle daily.
Craft a sturdy, polished wooden calendar with precise cuts and smooth sanding for a professional, charming workspace addition.
Material selection is key to a successful project. You should choose a durable, attractive wood that’s easy to work with, such as hardwoods like maple, cherry, or oak. These woods have a fine grain that lends sophistication to your calendar, and they hold up well over time. If you prefer something more budget-friendly or lightweight, pine or plywood can work, but keep in mind they may require extra care during finishing. Whichever material you pick, make sure it’s free of knots or cracks, so your cuts stay precise and your calendar remains stable.
Once you’ve selected your wood, measure and cut the blocks carefully. You’ll need at least four rectangular pieces: two longer ones for the base and two shorter ones for the rotating blocks. Precision here is vital because the blocks need to slide smoothly without wobbling. After cutting, sand all edges and surfaces thoroughly to remove splinters and rough spots. This step guarantees your calendar will be safe to handle and will look refined. If you’re comfortable with finishing techniques, applying a clear coat or oil helps protect the wood and enhances its natural beauty.
Design-wise, you can keep it simple or get creative with painted or engraved numbers. For a minimalistic look, just carve or paint the numbers directly onto the blocks. Make sure your markings are clear and easy to read. Assembling the calendar involves stacking the blocks in a way that allows you to change the date daily. The rotating blocks should fit snugly but move freely, so test your fits before final assembly.
Creating a wooden block calendar is more than just a functional desk accessory; it’s a small piece of craftsmanship you’re proud to display. With the right woodworking techniques and careful material selection, you’ll craft a timeless, personalized item that adds charm and organization to your workspace.
As an affiliate, we earn on qualifying purchases.
Frequently Asked Questions
What Types of Wood Are Best for This Project?
You should choose hardwoods like maple, oak, or cherry for your wooden block calendar, as they have attractive wood grain and are durable enough for daily use. These woods accept finish options well, allowing you to customize the look with stain or sealant. Softwoods like pine can work too, but they may dent more easily. Opt for a wood that matches your style and offers a smooth surface for easy carving or labeling.
How Long Does the Entire Process Typically Take?
Creating your wooden block calendar takes roughly 4 to 6 hours, like completing a satisfying puzzle. You’ll want to prioritize woodworking safety, wearing goggles and a dust mask. The process involves measuring, cutting, sanding, and assembling, so focus on precise crafting techniques. If you work steadily and carefully, you’ll have a beautiful, functional desk piece ready in a day or over a weekend, depending on your experience level.
Can I Customize the Design Beyond Basic Blocks?
Yes, you can customize your wooden block calendar beyond basic blocks by exploring various personalization options and decorative techniques. You might paint or stain the wood with colors that match your style, add engraved designs or labels, or incorporate decorative elements like decals or washi tape. These techniques allow you to create a unique, artistic piece that reflects your personality, making your desk calendar both functional and a personal expression.
What Tools Are Essential for Assembly?
You’ll need essential tools like a saw, drill, and sandpaper for assembly. Always prioritize woodworking safety—wear safety glasses and a dust mask, and keep your tools well-maintained to prevent accidents. Regular tool maintenance guarantees everything stays in good condition, making your project safer and easier. Use a ruler or square for precise assembly, and handle all tools carefully to avoid injuries. Proper safety and maintenance are key to a successful build.
How Do I Ensure the Calendar Is Stable on My Desk?
Imagine your calendar as a sturdy ship sailing smoothly on calm waters. To keep it stable, focus on weight distribution, ensuring the blocks are balanced and not top-heavy. Add non-slip pads underneath the base to anchor it firmly, preventing slips or slides. These small details act like anchors, keeping your wooden calendar steady and secure on your desk, so you can enjoy its charm without worry.
Conclusion
And just like that, you’ve crafted a timeless piece of desk decor—because what’s more inspiring than staring at a wooden block calendar that’ll surely outlast your phone’s fleeting battery life? Now, every glance at those sturdy blocks reminds you that, yes, you’re finally mastering the art of woodworking, or at least convincing yourself you are. So go ahead, impress your coworkers with your “craftsmanship,” and enjoy the sweet satisfaction of a calendar that’s as durable as your procrastination skills.
Columbus Day / Indigenous Peoples' Day Picks
long weekend sales
As an affiliate, we earn on qualifying purchases.