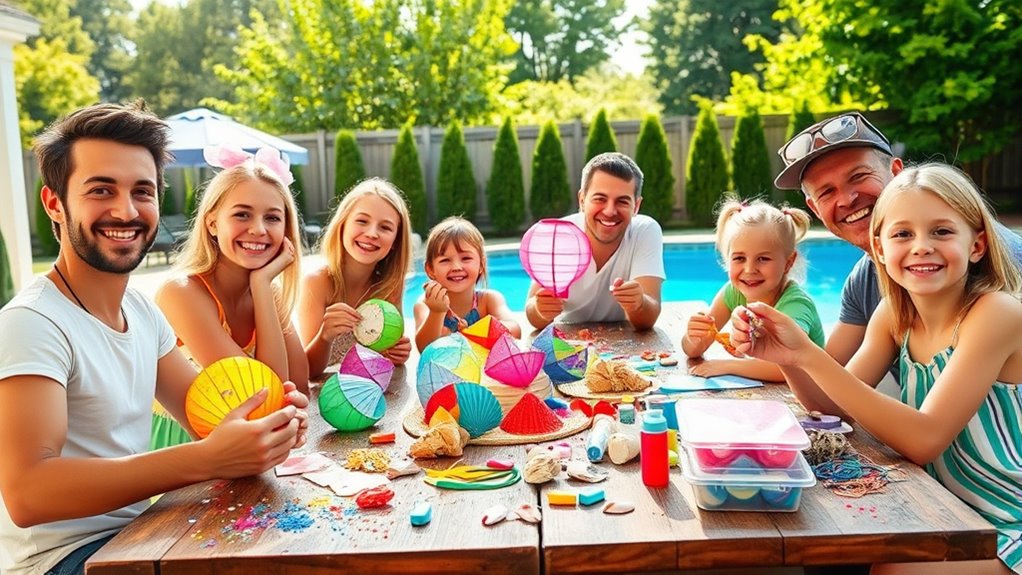

Looking for fun summer crafts to enjoy with your family? You can create vibrant tie-dye shirts, decorate sun hats with bright patterns, or personalize water bottles with vinyl stickers. Make a seashell wind chime, craft colorful suncatchers, or design your own picnic blanket. For lasting memories, build a family memory jar. If you’re interested in backyard fun, try making a mini-golf course. Keep exploring for more exciting summer craft ideas to try together.
Key Takeaways
- Offer a variety of easy, family-friendly projects like tie-dye shirts, painted rocks, and paper lanterns to inspire summer creativity.
- Include nature-inspired crafts such as seashell wind chimes and garden decor to engage outdoor exploration.
- Incorporate eco-friendly DIY ideas using recycled materials to promote sustainability and environmental awareness.
- Provide step-by-step instructions for simple, fun activities like making fruit magnets and decorating sun hats.
- Emphasize interactive projects that encourage family participation and create memorable summer keepsakes.
Colorful Tie-Dye T-Shirts and Accessories
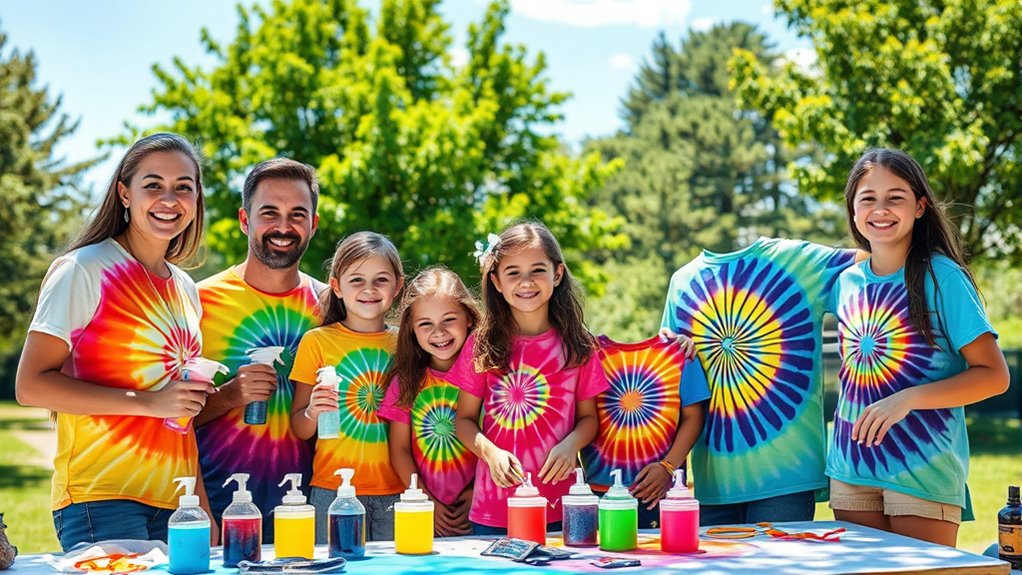
Creating colorful tie-dye T-shirts and accessories is a fun and easy way to add a vibrant touch to your summer wardrobe. You don’t need fancy skills—just some plain white items, rubber bands, and dye. Start by choosing your favorite colors and preparing your workspace with plastic or newspaper to catch spills. Wet your fabric slightly for better dye absorption. Then, twist, fold, or bunch your fabric, securing it with rubber bands to create unique patterns. Mix your dyes according to instructions and apply them to different sections of your fabric. Once you’re satisfied with the design, let the items sit for several hours to set the colors, which helps ensure vibrant color vibrancy and shine. Proper dye setting is essential for vibrant, long-lasting results. To further enhance the durability, consider pre-treating your fabric with a fixative solution before dyeing. Ensuring that your fabric is properly prepared for dyeing can significantly improve the final look and longevity of your designs. Additionally, exploring remote hackathons can inspire new creative projects and connect you with a global community of makers and innovators. Rinse, wash, and dry, and you’ll have one-of-a-kind, eye-catching pieces perfect for summer days.
Decorate Your Own Sun Hats With Bright Patterns
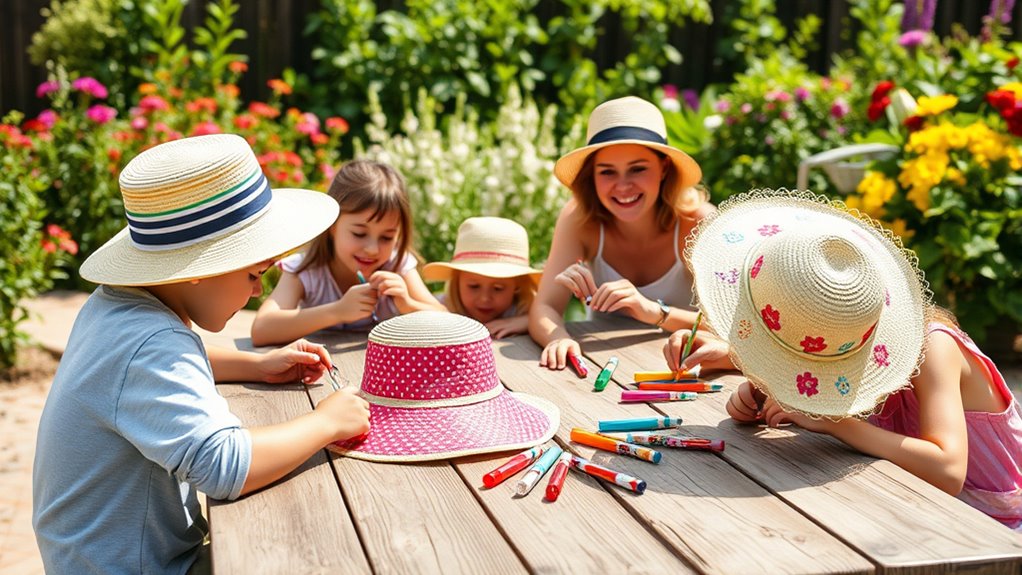
After customizing your T-shirts and accessories with bold tie-dye patterns, why not extend that creative flair to your summer wardrobe by decorating your own sun hats? Grab some plain straw or fabric hats and gather bright fabric paints, markers, or even iron-on patches. Start by sketching fun designs like flowers, sunbursts, or geometric shapes directly onto the hat. Use vivid colors to make your patterns pop and reflect your personality. You can also add rhinestones or glitter for extra sparkle. Remember, there’s no right or wrong—let your imagination run wild! Incorporating natural materials and engaging in hands-on craft activities can also foster holistic development, and understanding of sustainable materials, and strengthen family bonds. Exploring creative techniques like stenciling or fabric layering can further elevate your designs and inspire new ideas. Regularly updating your craft supplies with new artistic techniques can inspire even more creative ideas. For added inspiration, consider researching innovative decorating methods to expand your creative repertoire.
Make Personalized Water Bottles With Vinyl Stickers
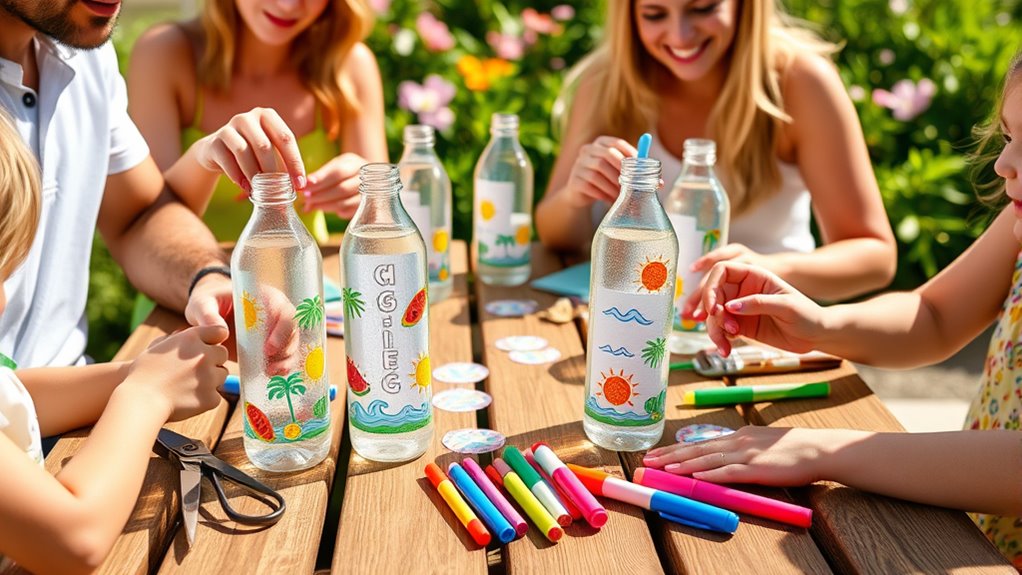
Ever thought about turning your plain water bottles into eye-catching accessories? It’s easy with vinyl stickers.
First, choose fun, colorful designs or create custom ones that reflect your family’s personality. Clean your bottles thoroughly to remove any dirt or oil, ensuring the stickers stick well.
Peel the backing off the vinyl sticker and carefully place it on your bottle, smoothing out any air bubbles with your fingers or a cloth. Feel free to layer different stickers for a unique look.
Once you’re satisfied, let the stickers set for a few minutes. These personalized bottles make summer outings fun and help everyone stay refreshed while easily identifying their own drinks. Additionally, using custom stickers can enhance the security and uniqueness of your bottles, reducing the chance of IRA withdrawals during busy summer activities. Proper placement of stickers can also prevent peeling and extend their lifespan, especially with adhesion on smooth surfaces.
Incorporating branding consistency with your stickers can also make your creations more memorable and cohesive. They’re a great way to add a creative, personal touch to everyday accessories.
Create a Seashell Wind Chime for Your Garden

Transform your garden into a soothing oasis by making a seashell wind chime that captures the relaxing sounds of the coast. Start by collecting various seashells, ensuring they’re clean and dry. Use a strong, clear fishing line or thin wire to string the shells, arranging them in different lengths for a gentle, melodic sound. Tie a loop at the top to hang your chime securely from a tree branch or hook. You can add small charms or beads between shells for extra visual appeal. When hung outdoors, the wind will cause the shells to gently clink and sway, creating calming ocean-inspired sounds. Incorporating eco-friendly recycled materials can make your decoration more sustainable and unique. Using cost-effective supplies allows you to create beautiful decor without overspending. This simple project not only beautifies your garden but also brings a piece of the beach into your outdoor space. Additionally, choosing eco-friendly supplies helps reduce environmental impact and promotes sustainability. Exploring the history of pinball machines can inspire creative ways to personalize your wind chime, such as adding small ornament pieces that reflect your interests.
Craft DIY Surfboard Wall Art With Painted Canvas
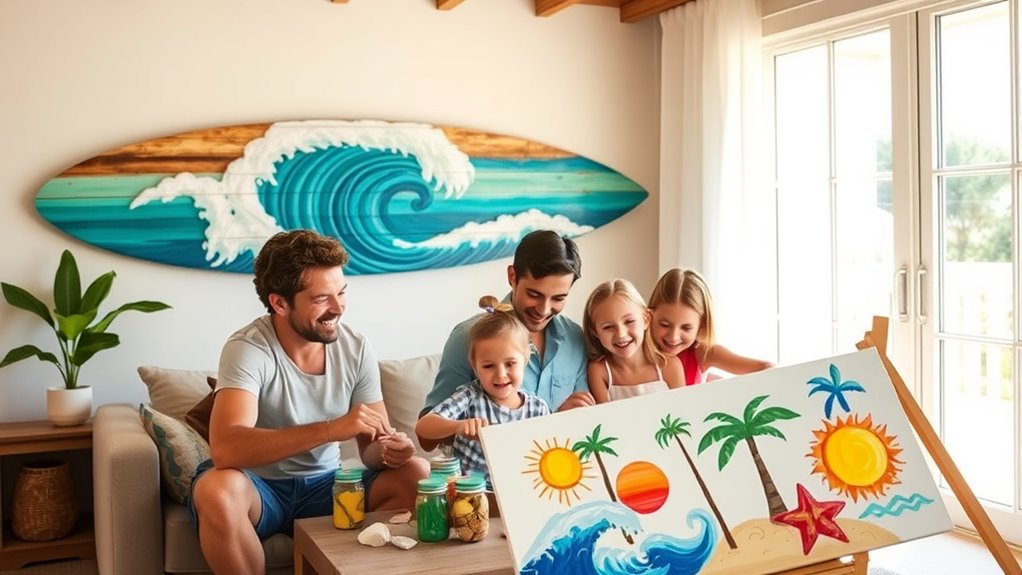
Looking to bring a coastal vibe to your home decor? Creating a DIY surfboard wall art with painted canvas is a fun project that instantly adds beachy charm. Start with a large canvas and paint it with ocean-inspired colors like turquoise, sandy beige, or deep blue. Use bold brushstrokes or stencils to add waves, palm trees, or surfboards. For a more authentic look, trace and cut out paper shapes and attach them to the canvas. Incorporating nautical motifs into your decor can also boost your mood and make your space feel more inviting. Hang your finished art on a prominent wall to evoke the seaside. This project is simple, inexpensive, and customizable to your style. With a few supplies and some creativity, you’ll have a vibrant piece that captures the essence of summer and surf.
Build a Birdhouse From Recycled Materials

Building a birdhouse from recycled materials is an eco-friendly and budget-conscious way to attract local wildlife to your yard.
Creating a recycled birdhouse is an eco-friendly and budget-friendly way to invite wildlife into your yard.
Start by gathering items like old wood, plastic bottles, or tin cans. Use a sturdy piece of wood for the main structure, cutting out a small entrance hole about 1.5 inches in diameter.
Create a roof that extends slightly to protect the birds from rain, using scrap metal or plastic. Secure all parts with nails or waterproof glue.
Make sure to drill small drainage holes at the bottom for water runoff.
Hang or mount your finished birdhouse in a shady, safe spot away from predators.
Not only will you help local birds, but you’ll also enjoy watching them visit your eco-friendly creation throughout the summer.
Design Custom Summer Bracelets With Beads and Charms

After assembling your eco-friendly birdhouse, you might want to create accessories that reflect your summer style. Designing custom bracelets with beads and charms is a fun way to do just that. Start by choosing colorful beads that match your summer vibe—think bright hues, seashells, or glow-in-the-dark options.
String the beads onto elastic cords or thin jewelry wire, adding charms like flip-flops, suns, or waves for extra flair. Mix and match different shapes and textures to make each bracelet unique. This project is simple enough for the whole family and allows everyone to express their personality.
Once finished, you’ll have wearable keepsakes that remind you of summer adventures and sunny days spent outdoors.
Make Fruit-Shaped Magnets for Your Refrigerator

Making fruit-shaped magnets is a fun way to add color to your fridge. You can create vibrant designs that brighten up your kitchen space.
Plus, these magnets are simple to craft and perfect for quick, eye-catching decor.
Colorful Fruit Designs
Have you ever wanted to add a splash of color and fun to your kitchen? Creating colorful fruit designs is a perfect way to do that.
Start by gathering foam sheets, paint, and small magnets. Cut out shapes resembling strawberries, pineapples, lemons, or watermelons.
Use bright paints or markers to add vibrant details, making each fruit unique.
To give your magnets a glossy finish, coat them with clear sealant or mod podge.
Attach the magnets to the back with glue, ensuring they’re firmly secured.
These lively, handcrafted magnets will brighten up your fridge and make grocery lists more enjoyable.
Plus, they’re easy to customize for each family member’s favorite fruit or color.
With a little creativity, you’ll have a colorful, fruity display that’s both functional and cheerful.
Easy Magnetic Crafting
Creating fruit-shaped magnets is a simple and fun way to bring your colorful fruit designs to life on your refrigerator. Start by gathering craft foam, felt, or even painted paper in your favorite fruit colors. Cut out shapes like strawberries, bananas, or watermelons.
Attach a small magnet strip or a round magnet to the back using hot glue or strong adhesive. For added detail, you can add tiny felt leaves or seeds.
Let the glue dry completely before placing your magnets on the fridge. These magnets are perfect for holding up notes, recipes, or artwork. Plus, they add a cheerful, personalized touch to your kitchen décor.
This quick craft offers a delightful way for the whole family to get creative and enjoy summertime fun.
Assemble a Nature-Inspired Shadow Box Display
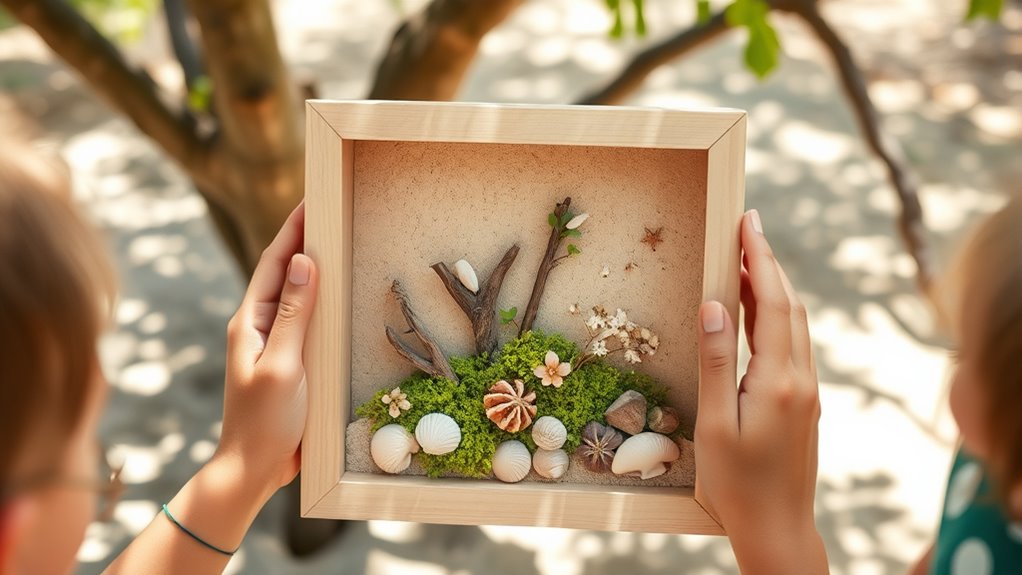
A nature-inspired shadow box display offers a charming way to showcase your favorite outdoor finds. Gather small objects like shells, stones, dried flowers, leaves, or tiny driftwood pieces you’ve collected.
Choose a sturdy shadow box with glass front to protect your treasures. Arrange your items inside, playing with layers and spacing to create visual interest. You might layer flat items like pressed flowers or place larger objects at the back.
Use hot glue or craft tape to secure everything in place. Add a personalized touch with a handwritten label or small decorative accents.
Once assembled, hang your shadow box in a sunny spot or display it on a shelf. It’s a simple, meaningful craft that celebrates nature and adds a touch of summer’s outdoor beauty to your home.
Create Summer-Themed Painted Rocks for Garden Decor
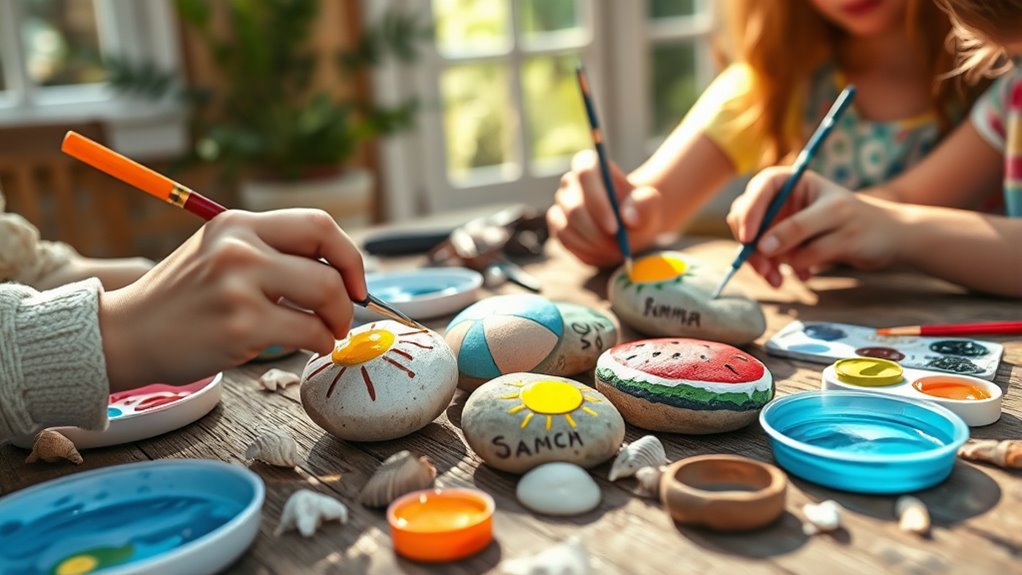
You can add charm to your garden by painting rocks with bright summer themes and lively colors. Focus on creating eye-catching designs that reflect the season’s fun spirit. Then seal them properly to protect your artwork.
When placing your painted rocks, consider strategic spots where they’ll brighten up your outdoor space.
Colorful Designs and Themes
Bright, cheerful colors breathe life into summer-themed painted rocks, making them perfect for garden decor. To create eye-catching designs, consider using vibrant hues like yellow, turquoise, coral, and lime green.
Incorporate playful motifs such as suns, waves, flowers, or beach balls to evoke a summery vibe. You can also experiment with patterns like polka dots, stripes, or zigzags for added visual interest.
Layer colors for a gradient effect or add glitter for sparkle. Using stencils or freehand painting helps personalize each rock.
Remember to keep designs simple yet bold, ensuring they stand out amidst your garden greenery. These colorful touches will bring a lively, festive atmosphere to your outdoor space and delight visitors of all ages.
Sealing and Placement Tips
To guarantee your summer-themed painted rocks withstand outdoor conditions and continue to brighten your garden, sealing them properly is essential. Use a clear, waterproof sealant like a spray or acrylic varnish to protect your artwork from moisture and UV rays. Apply two or three light coats, allowing each to dry completely before adding the next.
This creates a durable barrier that keeps your designs vibrant. When placing your rocks, choose shaded spots to prevent sun damage and avoid areas prone to heavy rain or flooding.
Position them where they can be easily seen and appreciated, like flower beds or along garden paths. Regularly check the sealant’s condition and reapply as needed to maintain their charm and longevity. Proper sealing and placement ensure your colorful creations last all summer long.
Craft Paper Lanterns for Evening Outdoor Fun
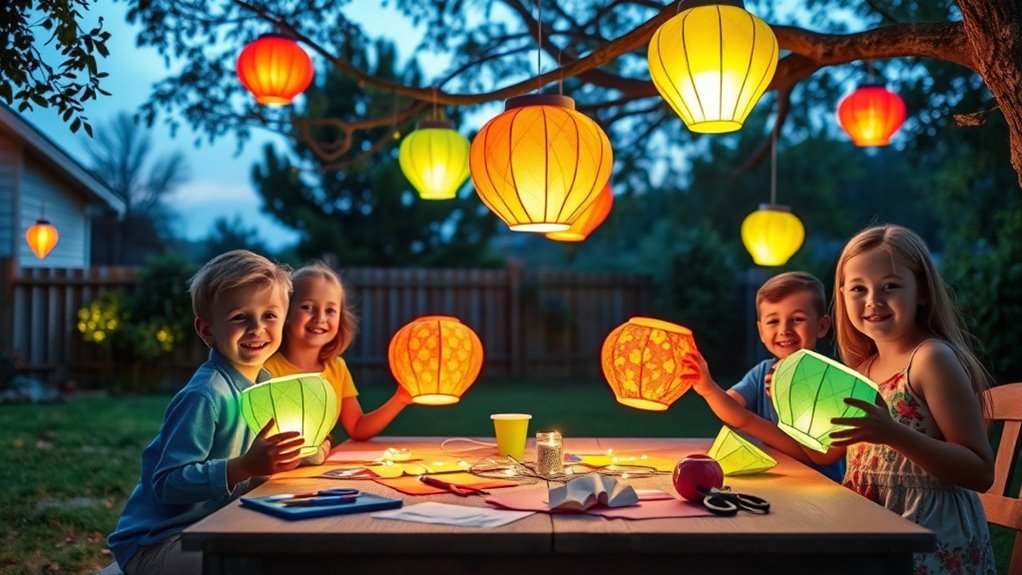
Looking to add a warm, inviting glow to your outdoor summer evenings? Craft paper lanterns are perfect for creating cozy ambiance. Start by choosing colorful, sturdy paper and cutting it into your desired shapes or patterns.
Use battery-operated LED candles or fairy lights inside for safe illumination. To make your lanterns stand out, consider adding decorative elements like tassels, ribbons, or cut-out designs.
Hang them from trees, porch ceilings, or shepherd hooks to create a charming display. Remember to keep safety in mind by using flameless lights rather than real candles.
- Select weather-resistant paper for durability
- Incorporate holes or cutouts for light patterns
- Use twine or string for hanging
- Add decorative embellishments for personalization
- Guarantee lights are battery-powered for safety
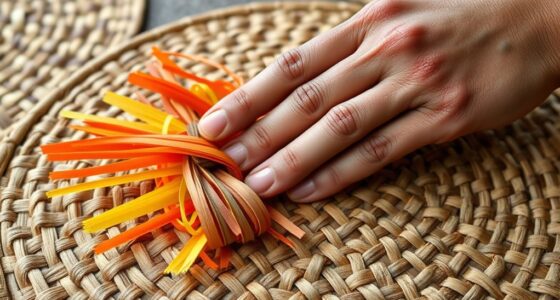
Make Your Own Suncatchers With Colored Glass and Wire
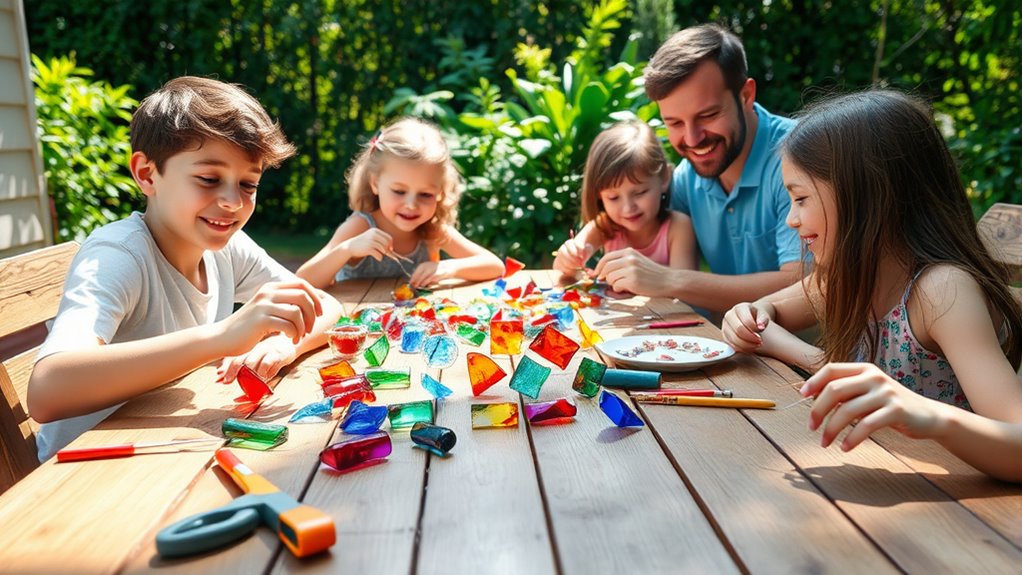
After assembling your cozy paper lanterns for outdoor evenings, it’s fun to add a touch of sparkle and color to your summer decor.
Making your own suncatchers with colored glass and wire is simple and rewarding. Start by cutting or shaping small pieces of colored glass into fun shapes or abstract designs.
Create colorful, unique suncatchers by shaping small pieces of glass and wrapping them with wire.
Wrap each piece with thin wire, twisting it securely around the edges. Use pliers to shape the wire and create loops for hanging.
Once your design is complete, attach a loop of wire at the top. Hang your suncatchers near windows, on tree branches, or from a porch.
When sunlight hits the glass, it creates beautiful, colorful reflections, adding a magical touch to your summer days.
This craft is perfect for involving the whole family.
Design and Paint Your Own Picnic Blanket
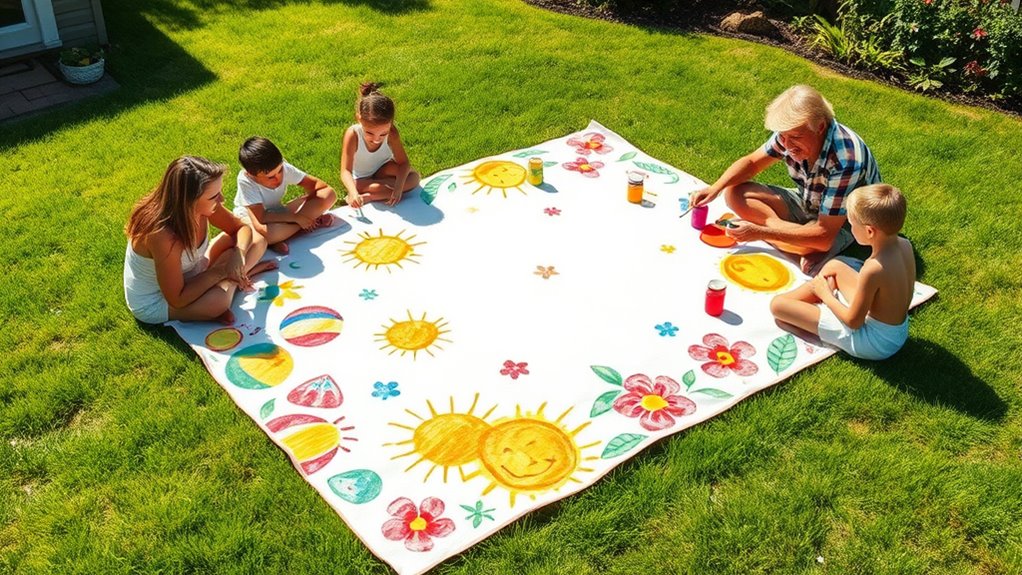
Designing and painting your own picnic blanket allows you to create a personalized outdoor accessory that reflects your style. Start with a plain fabric blanket as your canvas. Use fabric paints or markers to add vibrant patterns, fun designs, or meaningful symbols. Consider stenciling geometric shapes, watercolor effects, or even your family’s initials.
To guarantee your artwork lasts, set the paint with an iron or follow the manufacturer’s instructions.
Here are some ideas to get you inspired:
- Choose bright, summer-themed colors like yellows and blues
- Incorporate floral or beach motifs
- Add fun quotes or family jokes
- Use stencils for precise designs
- Finish with a waterproof sealant for durability
Create a Family Memory Jar With Summer Mementos
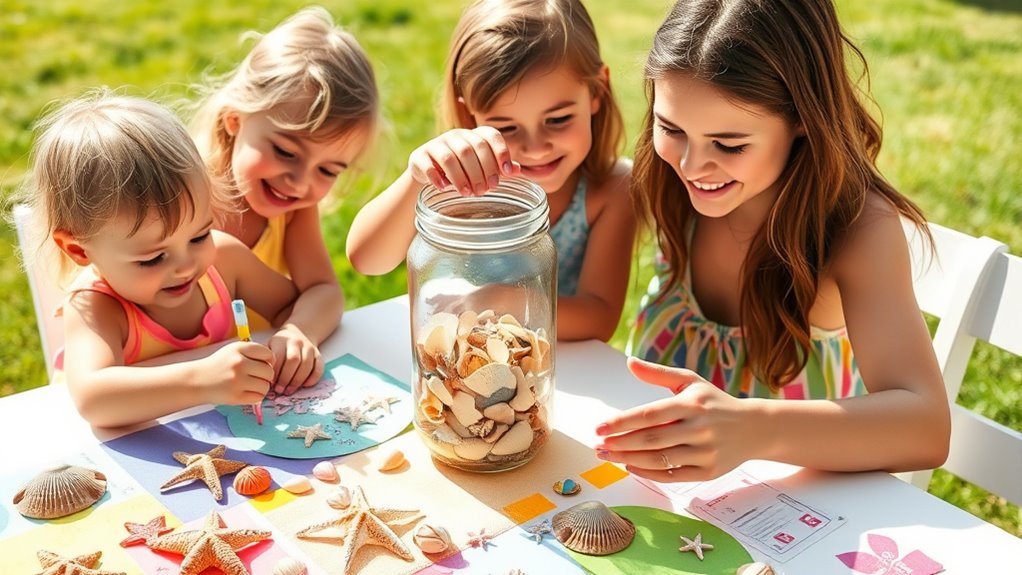
Creating a family memory jar with summer mementos is a meaningful way to preserve special moments from the season. Choose a clear jar or container that everyone can see through easily.
Throughout summer, collect small keepsakes like seashells, ticket stubs, flower petals, or photos taken during family outings. Write quick notes or stories about each item to add context and memories.
Encourage each family member to contribute their finds and reflections. When the jar fills up, set aside time to go through it together, reminiscing about the summer adventures.
This simple activity not only captures the essence of your summer but also creates a treasured keepsake that you can revisit for years to come. It’s an easy, heartfelt project to celebrate family moments.
Make a DIY Backyard Mini-Golf Course
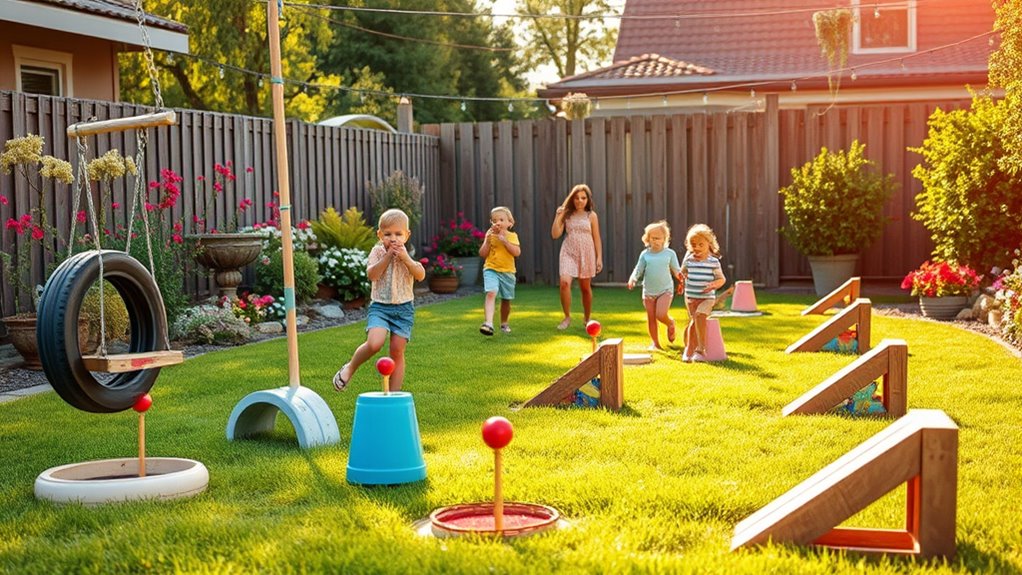
Looking for a fun and easy way to enjoy your backyard? Making a DIY mini-golf course is a perfect summer project. You can customize it with household items and get creative.
Start by choosing a designated area and sketching out your course layout.
Use everyday items for obstacles and hazards, like:
- Empty laundry baskets for tunnels
- Plastic cups as hole markers
- Cardboard boxes for ramps
- Garden hoses for winding paths
- Small rocks or toys as obstacles
Secure everything with stakes or tape to keep it stable.
Keep the course simple but challenging, and have fun designing different holes. Not only will you create a backyard game, but you’ll also enjoy a fun activity that everyone can participate in.
Frequently Asked Questions
What Safety Tips Should I Consider for Kids During Outdoor Crafting?
You should always supervise kids closely during outdoor crafting to prevent accidents. Make sure they wear protective gear like gloves and goggles when handling sharp tools or messy supplies. Keep small items out of reach to avoid choking hazards.
Choose non-toxic paints and glues, and work in a shaded area to prevent sunburn or heat exhaustion. Encourage breaks and hydration, and teach children to clean up carefully to stay safe and enjoy the experience.
How Can I Involve Children of Different Ages in Summer Crafts?
Imagine you’re in a time machine, bringing together kids of all ages for summer crafts. You can do this by assigning simple tasks to younger children, like choosing colors or helping with glue, while older kids handle more detailed work.
Encourage teamwork by pairing them up or creating stations. This way, everyone feels included and learns from each other, making crafting fun and memorable for the whole family.
What Eco-Friendly Materials Are Best for Sustainable Summer DIY Projects?
You can choose eco-friendly materials like recycled paper, natural fibers, and biodegradable glues for sustainable projects. Using items like old jars, fabric scraps, or fallen leaves helps reduce waste and minimizes environmental impact.
Opt for non-toxic, plant-based dyes to add color. By selecting these materials, you not only create beautiful crafts but also teach kids the importance of caring for the environment while enjoying summer activities.
How Do I Clean and Store Craft Supplies After Summer Activities?
Your craft supplies are practically begging for a spa day after summer fun! To clean, wipe off any dirt or glue residue with a damp cloth, and wash brushes with warm, soapy water.
Store your supplies in airtight containers or labeled bins to keep everything organized and dry. Make sure to keep items out of direct sunlight, so they don’t turn into a craft apocalypse.
This keeps your supplies ready for next adventure!
Are There Any Budget-Friendly Alternatives for Expensive Craft Materials?
When you’re looking for budget-friendly alternatives for expensive craft materials, you can get creative with everyday items around your home. Use old magazines, scrap fabric, buttons, or cardboard for your projects.
Visit dollar stores for inexpensive supplies, or swap materials with friends and family. Thrift stores often carry unique, affordable craft supplies as well.
These options help you save money while still making fun and creative crafts.
Conclusion
Summer is the perfect time to get creative and make memories together. With these fun DIY projects, you can turn ordinary days into unforgettable moments. Whether you’re crafting sun hats or designing a mini-golf course, remember that teamwork and creativity go hand in hand. As the saying goes, “The family that crafts together, stays together.” So grab your supplies and enjoy creating joyful, lasting bonds this summer.